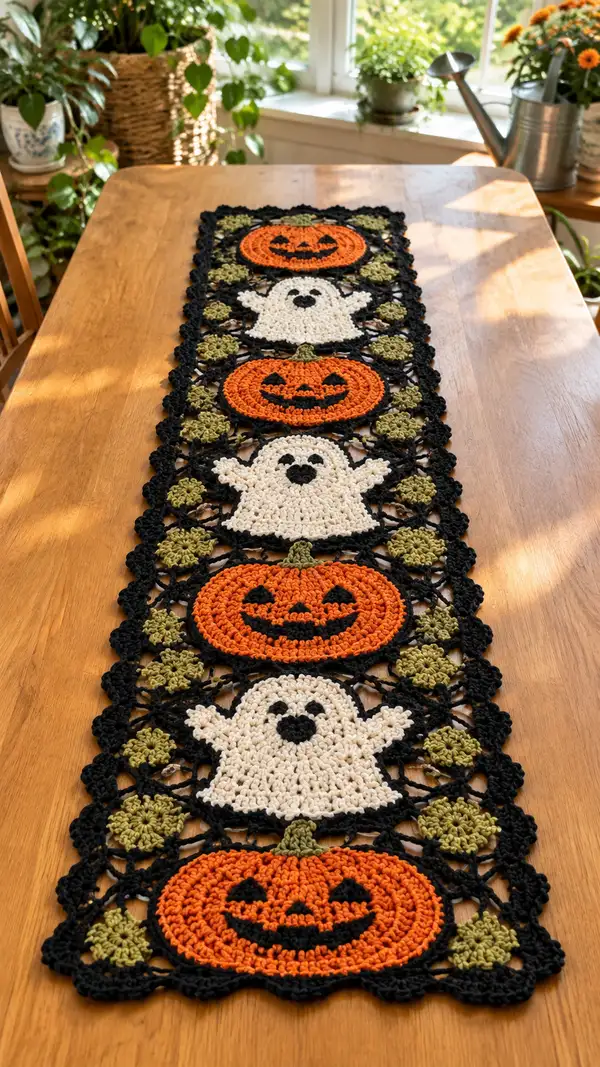
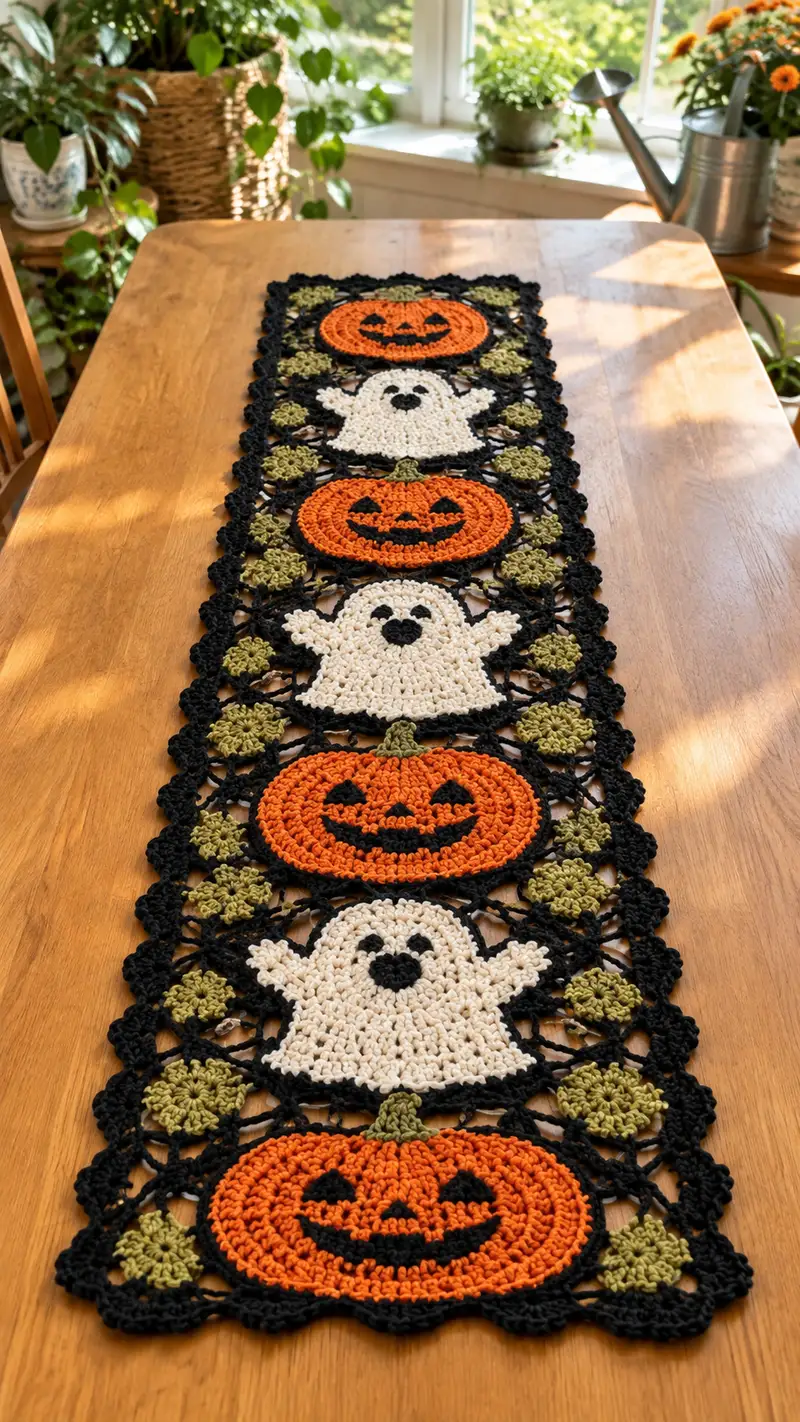
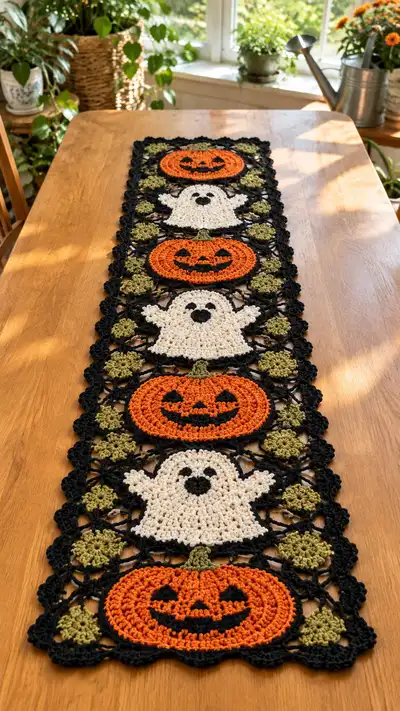
Create a charming Halloween table runner featuring alternating jack-o-lanterns and friendly ghosts set in a lacy black lattice with olive rosettes. This pattern uses simple motifs joined into a long runner, perfect for a dining table or seasonal display. Worked in worsted weight yarn with clear round-by-round instructions and helpful assembly tips. Finished runner shows textured pumpkin ridges, embroidered faces, and a decorative scalloped edge.
Progress Tracker
0% Complete
— Pumpkin Motif :
Round 1 :
With pumpkin orange, 6 sc in magic ring (6)
Round 2 :
Inc in each st around (12)
Round 3 :
(1 sc, inc) x 6 (18)
Round 4 :
(2 sc, inc) x 6 (24)
Round 5 :
(3 sc, inc) x 6 (30)
Round 6 :
(4 sc, inc) x 6 (36)
Round 7 :
(5 sc, inc) x 6 (42)
Round 8 :
(6 sc, inc) x 6 (48)
Round 9-12 :
1 sc in each st (48)
Info :
Rounds 9–12 let the pumpkin grow to a good width. Keep tension consistent. Place a stitch marker in the first stitch of Round 9 and move it each round to track the beginning. This will help later when positioning the carved face.
Round 13 :
(6 sc, inc) x 6 (54)
Round 14-16 :
1 sc in each st (54)
Info :
These rounds establish the pumpkin's maximum girth. If you prefer a flatter pumpkin, stop increases earlier; for a puffier pumpkin add another increase round.
Round 17 :
(6 sc, dec) x 6 (48)
Round 18 :
(5 sc, dec) x 6 (42)
Round 19 :
1 sc BLO in each st (42)
Info :
Working this round in the back loops only creates a subtle ridge where the pumpkin begins to show its "ribs." Keep stitches even and pull yarn snug but not tight.
Round 20 :
1 sc in each st (42)
Round 21 :
1 sc FLO in each st (42)
Info :
The BLO/FLO rounds create a tactile ridge pattern resembling pumpkin grooves. When viewed later these subtle ridges catch light and create the pumpkin look without needing extensive post stitches.
Round 22 :
(5 sc, dec) x 6 (36)
Round 23 :
(4 sc, dec) x 6 (30)
Round 24 :
(2 sc, dec) x 6 (24)
Info :
We decrease to create a slight flattening at the top where the stem will attach. Keep your decreases neat and perform invisible decreases if you prefer a smoother finish.
Round 25 :
Change to olive green for stem. 1 sc in each st (24)
Round 26 :
(2 sc, dec) x 6 (18)
Round 27 :
(1 sc, dec) x 6 (12)
Round 28 :
6 dec (6) — fasten off leaving 12" tail to sew to join and to stitch face if desired
Info :
Fasten off and leave a long tail for sewing the pumpkin onto the black join later. Do not weave in yet. Face is added later with surface embroidery in black yarn to create the jack-o-lantern expression.
— Pumpkin Face Embroidery :
Info :
Use black worsted weight held single or stranded embroidery technique. Position face centered on pumpkin: align the eyes approximately 6–8 stitches down from Round 12 (the widest point) and spaced about 10–12 stitches across depending on tension.
Step 1 :
Thread tapestry needle with black yarn. For each triangle eye, use satin stitch or surface crochet to fill a small triangular shape. Recommended size: about 4–6 short satin stitches forming a small triangle per eye.
Step 2 :
For the smile, embroider a curved line across the pumpkin center using backstitch or surface slip stitch; fill small sections to create a toothy grin if desired. Keep tension gentle so the pumpkin fabric does not pucker.
Info :
Alternatively, make the face by surface slip-stitching with black yarn left attached to a bobbin; this prevents bulky knots at the back. Secure ends by weaving through several stitches behind the motif.
— Ghost Motif :
Round 1 :
With cream/ivory, 6 sc in magic ring (6)
Round 2 :
Inc in each st around (12)
Round 3 :
(1 sc, inc) x 6 (18)
Round 4 :
(2 sc, inc) x 6 (24)
Round 5 :
(3 sc, inc) x 6 (30)
Round 6 :
(4 sc, inc) x 6 (36)
Round 7 :
1 sc in each st (36)
Info :
These first rounds create a circular body. The ghost will be worked with a slight flared base and small "arms" that wave out toward the sides. Place marker at start of round 7 for orientation of arms.
Round 8 :
Work in FLO: 1 sc in each st (36)
Round 9 :
1 sc in each st (36)
Round 10 :
Begin ghost shaping: ch1, sc in next 6 sts, ch3, skip 3 sts (arm space), sc in next 4 sts, ch3, skip 3 sts (second arm space), sc in remaining sts (36 total including chains and skipped)
Info :
Round 10 introduces chain spaces where the arms will form. Use markers in the two ch-3 spaces to identify arm starting points for the next rounds.
Round 11 :
Working into ch-3 space: 4 dc in first ch-3, sc in next 4 sts, 4 dc in next ch-3, sc around remainder to end (36)
Round 12 :
1 sc in each st and 1 sc in each dc stitch (36) — this smooths the arm curve
Round 13 :
(3 sc, inc) x 9 (45)
Info :
Round 13 gently widens the ghost body to give a waving base. If your tension is tight, use a 4.5mm hook for these rounds to keep fabric flexible; otherwise stay on 4.0mm.
Round 14-16 :
1 sc in each st (45)
Round 17 :
(3 sc, dec) x 9 (36)
Round 18 :
(2 sc, dec) x 9 (27)
Round 19 :
(1 sc, dec) x 9 (18)
Round 20 :
6 dec (6) — fasten off leaving long tail for sewing and possible stuffing of chest area if you like tiny loft
Info :
The ghost is intentionally slightly flatter than the pumpkin to create contrast. Leave a long tail for sewing into the black join. Face is embroidered afterwards using black yarn: two oval eyes and a small round mouth centered between them.
— Ghost Face Embroidery :
Using black yarn, embroider two small rounded eye shapes about 3–4 stitches wide and a small heart or round mouth centered 4–6 stitches below the eyes. Secure yarn tails behind the motif.
— Olive Rosette Motif :
Round 1 :
With olive, 6 sc in magic ring (6)
Round 2 :
Inc in each st (12)
Round 3 :
(1 sc, inc) x 6 (18)
Round 4 :
Ch3 (counts as first dc), *2 dc in next st, ch1; rep from * around to create 6 small petal clusters — join with sl st to top of ch3 (36 expected including ch1 spaces)
Info :
This rosette is intentionally compact and sits between the larger motifs in the black lattice. Work petals evenly; the ch1 spaces act as small decorative gaps that echo the runner's lacy geometry.
Round 5 :
Using sc, work 1 sc in each dc and ch1 space around to create a tidy ring (36)
Round 6 :
Slip stitch into every other st to slightly cinch the rosette for texture (18)
Round 7 :
Fasten off leaving tail for sewing into join
Info :
You will need multiple rosettes per runner. Make extras and keep them organized by placing with the connecting black motifs so assembly is efficient.
— Lacy Black Connector Motif (single connector tile) :
Round 1 :
With black, ch6, join with sl st to form small loop (or mr alternative) — ch3 (counts as dc)
Round 2 :
Work 12 dc into loop (12)
Round 3 :
*ch3, skip 1 dc, sl st in next dc; rep around creating 6 chain loops — join (12 sl st anchors and 6 chain loops)
Round 4 :
Into each ch3 loop: (sc, hdc, 3 dc, hdc, sc) to form a decorative petal — 6 petals total
Info :
This small connector tile becomes the geometric "open" unit that frames pumpkins/ghosts and holds rosettes in the corners. Keep tension consistent so tiles sit flat.
Round 5 :
Join petals with sl st to adjacent petals to create a hex-like openwork (work 1 sl st into the top of the next petal's sc, repeat) — fasten off leaving tail for joining
Info :
Make a number of these tiles equal to the count needed to fill the lattice between motifs — you will connect them row-by-row. Keep tails long when making them to make join sewing easier later.
— Assembling Motifs into a Repeat Row :
Info :
The runner is composed of a linear repeat: Pumpkin tile, connector(s) on each side, rosettes in the corners, then Ghost tile, connectors, rosette, Pumpkin tile, etc. Decide how many motif repeats fit your table first (photo shows 4 pumpkins and 3 ghosts alternating). Pin the layout on a blocking mat before joining.
Step 1 :
Block each motif lightly to flatten and align center points. Use a steam iron on low or wet blocking pins on a mat. Align centers of pumpkins and ghosts so their widest rounds match.
Step 2 :
Using black yarn and a yarn needle, whip stitch around the stem area of pumpkins to the adjacent connector tile at the top and bottom to create a strong anchor. Sew through the back loop edge where possible for a flat join.
Info :
Sewing with black yields invisible joins because connectors are black. When joining an orange or cream motif to black, sew through the black tile stitches and then through the motif's outer round, spacing stitches every 3–4 stitches for stability.
Step 3 :
Insert rosettes in the small corner spaces by sewing the rosette center to the connector tile corner with a whip stitch and then securing the outer petals to the adjacent motif edge stitches. Use small, neat stitches and weave ends back into the rosette center.
Info :
Work in stages: join each motif to its immediate neighbors, then step back and adjust alignment before sewing the next set. Blocking again after partial joining helps maintain alignment across a long runner.
— Lattice Join Method (detailed row-by-row join technique) :
Round 1 :
With black and using the 4.0mm hook, pick up any connector tile and sl st into an outer loop space on the connector (this is the start of the join sequence).
Round 2 :
Ch3, 2 dc into same loop, ch2, sl st into the adjacent motif's outer loop (where pumpkin or ghost will attach). Continue alternating (3 dc in tile loop, ch2, sl st into adjacent motif loop) around the connector.
Round 3 :
Repeat Round 2 but work into the back loops where possible to create a subtle ridge. After you complete one connector you will begin to make a continuous strip by joining the next connector tile into the same ch2 spaces — this creates the long lattice.
Info :
The ch2 spaces distributed across connectors form the openwork in the runner. Keep chains and dc tall enough that the lattice does not pull too tight between motifs; adjust by blocking if needed.
Round 4 :
As you progress making a continuous strip, periodically stop and line up pumpkin and ghost motifs. Sew them into the lattice by inserting hook into the motif outermost round and making a sl st into the ch2 connector space, or use a yarn needle to join firmly.
Info :
Using the slip stitch join yields a crochet-seam look and can be faster; whip-stitch provides a flatter, invisible join. For an antique look, leave joins looser; for a sturdy, everyday runner, make joins tighter with smaller stitches.
— Border and Scalloped Edging (applied after full runner assembly) :
Round 1 :
With black, join at any corner with sl st, ch1, work 1 sc evenly around the entire runner edge, placing 3 sc in each corner or into space to keep edge square (count will vary — aim for even spacing)
Info :
This first round creates a consistent base for scallops. Place 1 sc in each visible outer stitch and 3 sc in any corner spaces to maintain shape.
Round 2 :
1 sc in each st around (same count as Round 1). Keep marker at start of round and move as you work for consistency.
Round 3 :
*Skip 2 sc, (5 dc in next sc), skip 2 sc, sl st into next sc; rep from * around to form scallop clusters. Make small adjustments at corners to keep pattern rhythmic
Info :
The 5-dc scallop creates the wavy edge you see in the photo. If scallops pull, reduce to 4 dc per scallop; if they lie flat and you want more definition, use 6 dc.
Round 4 :
Ch1, sc in center of each scallop cluster and sc in sl st anchors between scallops — this defines scallops and tidies edge.
Round 5 :
Working in FLO, *1 sc in next 2 sts, 1 hdc in next st; rep around to add slight texture band (maintain counts from previous round)
Round 6 :
Optional decorative picot row: *sc, ch3, sl st into base of ch3 to form picot; rep between scallops for delicate points
Info :
You can add as many decorative rounds as you like to make the runner look more ornate. The photo shows a delicate scalloped edge; replicate by doing Rounds 3–4 only for a neat edge, or add rounds 5–6 for depth.
Round 7 :
Fasten off and weave in ends. Use blocking pins to shape scallops perfectly once edging is complete.
— Final Blocking and Finishing :
Info :
Lay the fully-assembled runner face down on a blocking mat or towel. Use pins to shape straight edges and scallops. Lightly steam (do not press directly if using acrylic yarn) or wet block per yarn manufacturer's instructions. Allow to dry completely before use.
Step 1 :
Weave in all remaining tails by threading them through several stitches and pulling tight to hide ends. Trim close but not flush to reduce chance of slipping out.
Step 2 :
Double-check embroidered faces for loose ends; tie or weave extra yarn on the reverse side and add a dab of fabric glue if you expect heavy use.
Info :
If your runner will be laundered, secure ends extra well and test a small sample of blocking method on a spare motif to be sure yarn tolerates the method.
This Halloween table runner brings together cozy texture and playful motifs to create a standout seasonal accent. Each pumpkin and ghost motif is carefully shaped, embroidered, and joined into a dramatic black lattice for a finished piece that feels handmade and professional. The modular design makes it easy to lengthen or shorten to suit your table. 🧶🎃 Add a scalloped black edge for polish and enjoy the warm, spooky vibe it brings to your home. Happy stitching and have fun making it your own! 👻✨