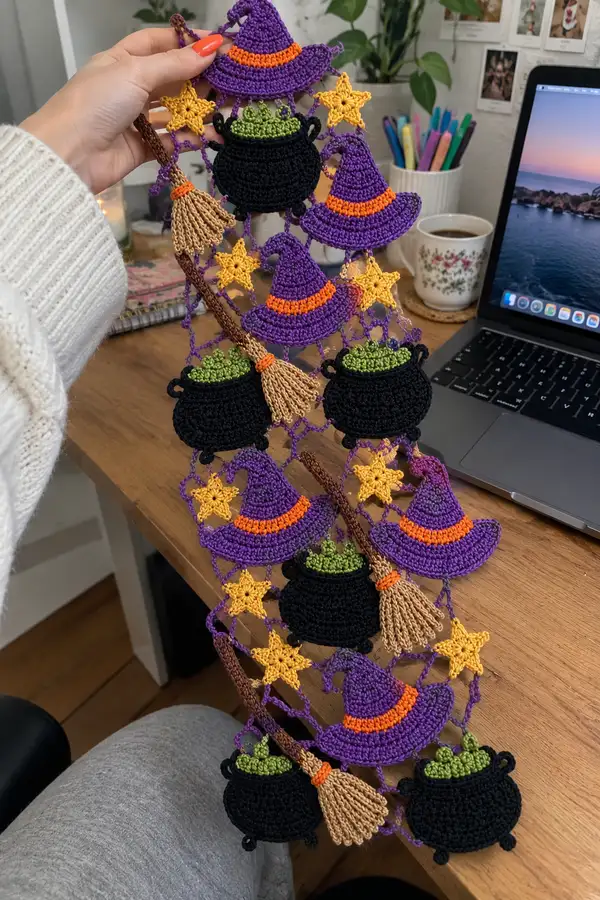
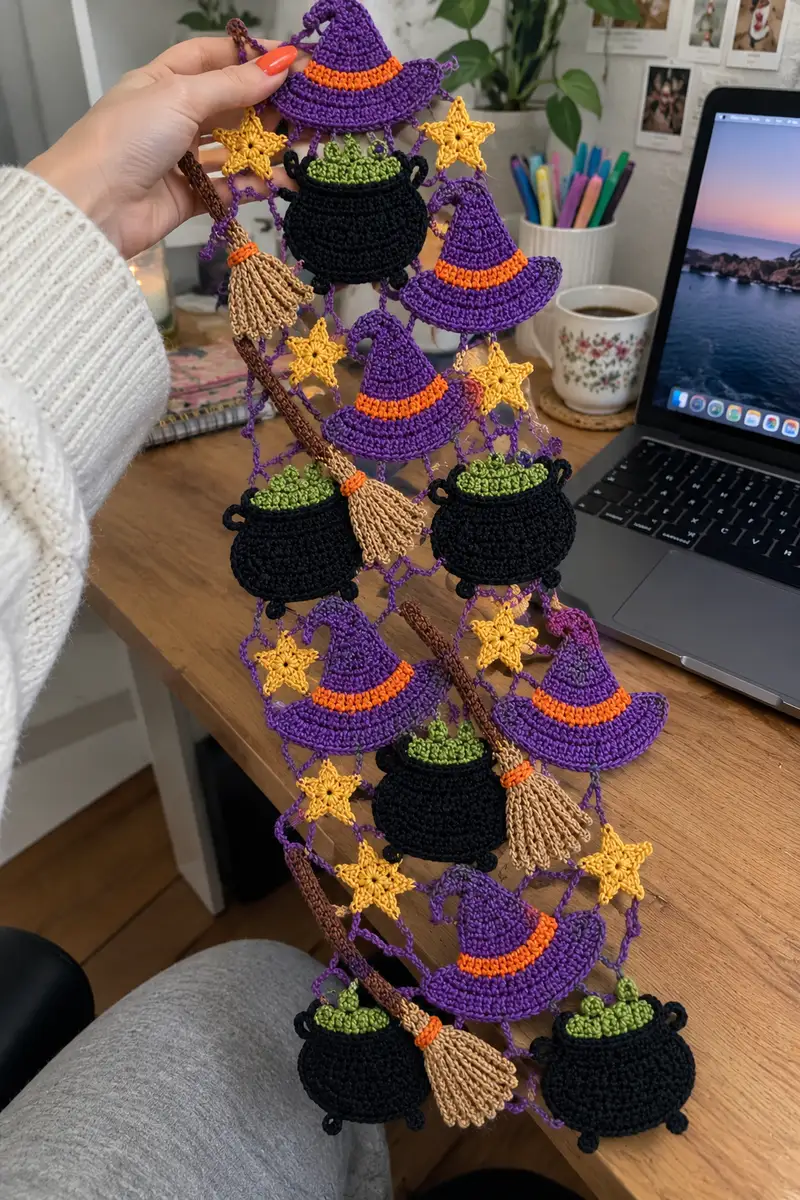
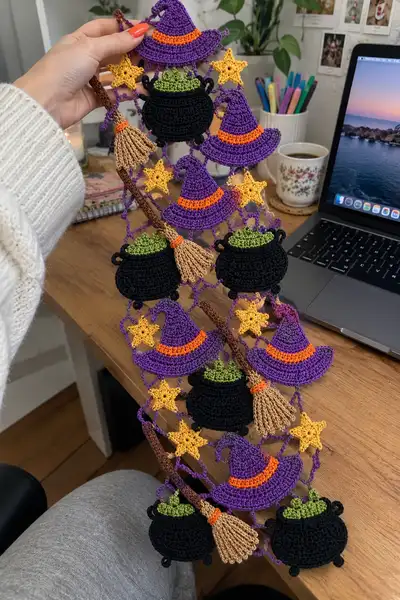
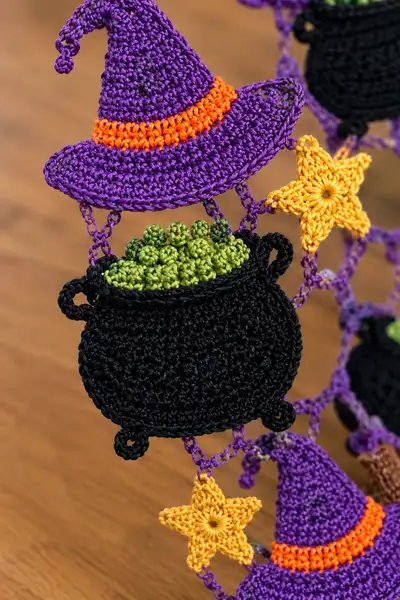
Create a spooky, whimsical Halloween table runner featuring tiny witch hats, bubbling cauldrons, broomsticks and golden stars. This delicate, lacy runner is worked in fine cotton thread with bold purple, black, orange and green accents. Perfect for seasonal decor, the motifs are linked together with a fun netting join-as-you-go technique to make a lightweight, drapey runner that accents any table or mantel. Detailed stitch counts and assembly notes make this approachable for an intermediate crocheter.
Progress Tracker
0% Complete
— Notes and Gauge :
Info :
This runner is made with size 10 crochet thread and a 1.75mm hook. Gauge is not critical for a decorative runner, but a motif hat brim should measure approximately 6.5cm (2.5 inches) across the brim when worked in the specified thread and tension. Keep tension consistent across motifs for even joins. Work in rounds or rows as indicated; slip stitch to join rounds unless otherwise noted.
Info :
When I describe 'work in same st' I mean insert hook under both loops unless specified BLO or FLO. Use stitch markers for the first stitch of each round. Info sections appear often to guide color changes, stuffing, blocking and attaching motifs.
— Witch Hat Motif (Make 6-12 depending on runner length) :
Round 3 :
(1 sc, inc) x 6 (18)
Round 4 :
(2 sc, inc) x 6 (24)
Round 5 :
(3 sc, inc) x 6 (30)
Round 6 :
(4 sc, inc) x 6 (36)
Round 7 :
(5 sc, inc) x 6 (42)
Round 8 :
(6 sc, inc) x 6 (48)
Info :
Rounds 1-8 build the cone body from the top outwards; keep stitches tight so the cone holds a curve. Place a marker at the first stitch of round 9 to maintain evenness during the body rounds.
Round 9-12 :
1 sc in each st around (48)
Info :
These even rounds build hat height. Try on a scrap to check the cone height; if you want a taller hat, add extra even rounds here before the band.
Info :
Change to orange yarn for hat band at the beginning of Round 13. Break purple, weave in later. Carrying fine thread is possible but for crisp band color we change yarn.
Round 13 (orange) :
1 sc in each st around (48)
Info :
This single round of orange forms the narrow hat band. For a chunkier band work R13-R14 in orange if desired. After R13 change back to purple and join with sl st to first purple st.
Round 14 (purple) :
1 sc in each st around (48)
Round 15 :
(6 sc, inc) x 6 (54)
Round 16 :
1 sc in each st around (54)
Info :
Rounds 15-16 begin to flare the brim. Increase evenly so the brim lays flat; if your brim curls up, block gently. For a wider brim repeat R15 (add another increase round) and check placement for mesh joins.
Round 17 :
(7 sc, inc) x 6 (60)
Round 18 :
1 sc in each st around (60)
Round 19 :
Work 1 hdc in next st, *ch2, skip 2 st, 1 hdc in next st* repeat around to create a scalloped openwork edge (approximately 20 hdc/20 ch2 spaces; adjust to keep even). Final count depends on spacing created but aim for 60 base stitches.
Info :
Use the ch2 spaces as connecting points to the net later. If you prefer a more solid brim, substitute 1 sc in each stitch for rounds 19-20 and create picot edge at final round. Block the brim flat before joining.
Round 20 :
Sl st to finish, fasten off and weave ends. If you want a curly tip, make a short tail from the tip before blocking: from the top center with purple, ch6, sl st back along the chain to form a small curl and attach to top of cone with sl st. Fasten off and weave ends.
Info :
For a tighter spiral curl at the tip: ch8, sc3 in 2nd ch from hook, sc2 in next, sc1 in each remaining ch, sl st back to cone and secure. Shape with your fingers then block lightly.
— Cauldron Motif (Make 6-12) :
Round 3 :
(1 sc, inc) x 6 (18)
Round 4 :
(2 sc, inc) x 6 (24)
Round 5 :
(3 sc, inc) x 6 (30)
Round 6 :
(4 sc, inc) x 6 (36)
Round 7 :
(5 sc, inc) x 6 (42)
Info :
Round 1-7 form the cauldron base and gather outward to a wide belly. Keep work tight; a cauldron should look slightly bulbous. To keep a smooth curve do not block heavily—block only to shape rim if needed.
Round 8-11 :
1 sc in each st around (42)
Info :
Rounds 8-11 create the body height. Place two small handle loop anchors on either side later—we will add tiny looped handles on Round 12.
Round 12 :
(5 sc, dec) x 6 (36)
Round 13 :
1 sc in each st around (36)
Info :
Round 12 shapes the upper narrowing below the rim. If you prefer a more squat cauldron skip a decrease and work even rounds instead.
Round 14 (rim formation) :
Ch1, sc in same st, *(hdc, dc, hdc) in next st (creates slight lip), sc in next 2 sts* repeat around. Aim for 36 rim stitches/structures. Fasten off black main color leaving tail for sewing if needed.
Round 15 (handles - make 2) :
Attach black at side st where handle should sit: ch5, sl st in 2nd ch from hook and back along chain to the cauldron (or create tiny loop of 6 ch secured with sl st into the rim). Fasten off, weave ends. Repeat opposite side.
Info :
Place handles symmetrically—count stitches from center to place handles about 7-9 sts from center on each side depending on your count. Handles are decorative loops attached with slip stitches; reinforce with an extra round of sl st underneath for durability.
Round 16 (feet loops) :
At the lower edge of the cauldron make four small feet loops evenly spaced: attach yarn, ch4, sl st in base to form loop, fasten off. Repeat 3 more times every 9 stitches. These create cute little feet that show in the photo.
Info :
If you prefer solid feet, make ch6 loops and tighten then sc around base to flatten and shape a small semicircle foot and sew onto lower edge for more stability.
— Cauldron Bubbling Potion (Make 6 sets) :
Round 1 :
With lime green thread, ch4, join to form a small ring, ch1, 8 sc in ring (8)
Round 2 :
*ch3, sl st into next st*, repeat 8 times to create 8 tiny chain loops above bubbles (visual filler) or work 8 bobble clusters: bob into same st: (yarn over, insert, pull up, yarn over, pull through 2 loops) x3, pull through to close bobble. Fasten off leaving long tail to sew into cauldron rim.
Info :
Sew the green cluster along the rim of the cauldron, tucking clusters into the rim to resemble bubbling potion. Use small, neat stitches to anchor the bobbles. You can add 4-6 small green bobbles depending on how full you want the cauldron to look.
— Broom Motif (Make 4-6) :
Round 1 (handle start) :
With tan thread make a tiny tube: 6 sc in mr (6)
Round 2-12 :
1 sc in each st around (6) for 11 rounds (handle length). Fasten off leaving long tail for sewing. This small tube will be flattened to look like a slim wooden handle. Optionally, place a thin wire inside before finishing and wrap wire end with glue to avoid poke.
Info :
For longer or shorter broom handles adjust rounds 2-12. Use a slightly smaller hook for the handle if you want a dense stiff tube. If not using stuffing or wire, flatten handle and secure with a few stitches for a flat stitched look.
Broom Tassel :
Attach tan yarn at one end of handle, ch20, cut several groups of 6-10 strands and loop them through the chain or work a gathered fan of sc rows: Row1: 10 sc across chain, Row2: ch1, turn, 10 sc across. Repeat for 3-4 rows then fold and secure to the handle base. Wrap the broom band with orange: ch1, sl st in 6 sts around to form the orange band. Fasten off and weave ends.
Info :
Trim the ends of the tassel to shape the broom head. For a frayed, soft look comb out the tassel gently. The orange band added with sl sts secures the tassel and creates the bright accent seen in the photo.
— Five-Point Star Motif (Make many) :
Round 1 :
Ch5, sl st to first ch to form ring; ch1, 10 sc in ring, sl st to join (10)
Round 2 :
*Ch3, sc in next st; ch3, sl st back to create point base* repeat for 5 points so that you form 5 small loops/spaces around the circle. You should have 5 ch3 spaces to build points.
Round 3 (points) :
*In 1 ch3 sp: (sc, hdc, dc, hdc, sc), sl st into next space* repeat for each point (creates 5 pointed petals). Fasten off and weave ends.
Info :
Alternatively use picots on point tips for a star with a tiny point. Work tighter tension for crisp points. Block lightly to open points if desired.
— Joining Mesh & Runner Construction :
Info :
Once your motifs are completed, you will link them into columns and then join columns with a netting mesh. The photo shows three descending columns with alternating hats and cauldrons, with stars and brooms placed as fillers. You can make more or fewer columns depending on runner length.
Foundation Chain Row :
With purple thread ch a long foundation row that will act as the central spine for motif joins (for pictured length ch 120 or measure to your desired length). Place markers every 12 ch to keep track of potential motif positions.
Mesh Row 1 :
Attach purple, ch6 (counts as chain loop and a little vertical drop), sc in 6th ch from hook to create small picot chain, *ch6, sc in 6th ch back along foundation every 6 ch* repeat to create repeating 6-ch loops along the foundation. This creates a ladder to connect motifs.
Info :
Use the ch6 loops made with the foundation to join hat brims via the ch2 spaces created in hat round 19. Slip stitch lightly to connect so motifs hang with a small gap between them; this produces the airy mesh look in the photo.
Mesh Row 2 :
Row2: On the opposite side of the foundation, work a mirror row of ch6 loops to create a net on both sides if you want double-sided hanging motifs. Otherwise work single-sided mesh and add decorative edges with picots.
Joining Motifs (General Info) :
Position each motif so its attachment point (hat ch2 scallops, cauldron rim ch spaces, star top ch loop or sl st) sits over a mesh ch-loop. Use sl st or ch4 loops to join motifs to the mesh; always pin first and place motifs so they alternate visually for a balanced runner.
Attach Hat to Mesh :
Place hat brim over a ch6 mesh loop, use the ch2 scallop points or selected sc stitches along the brim edge: sl st through brim space, sl st into mesh loop, *ch3, sl st back into next brim point and mesh loop* repeat to secure hat with three evenly spaced attachment points (left, center, right). This allows the hat to dangle and stay oriented.
Attach Cauldron to Mesh :
Seat cauldron rim so the cauldron hangs below a mesh junction. Use the cauldron's two small handle anchors and a center rim anchor: sl st handle loop to mesh loop left, sl st center rim to mesh node, sl st right handle to mesh node on the opposite side. Reinforce with a small backstitch through the rim if needed.
Attach Star and Broom :
Use single ch loops to attach stars and brooms between hats and cauldrons to visually fill gaps. Small stars attach with one sl st or ch3 loop; brooms attach via the handle top loop (use the handle tail to slip stitch through mesh and stitch in place). Space these at roughly every second motif for visual balance.
Info :
Leave small gaps between motifs to preserve the airy look; do not pull motifs tightly toward the mesh. If any motif droops too much, add an extra sl st at upper edge to pull it forward slightly. Block entire runner faintly after joining to let the mesh settle.
— Finishing & Edging :
Round 1 :
Work a final edging along the foundation chain top edge: in purple, sc evenly along top with ch3 picots every 6 sts to echo the mesh loops. Fasten off and weave ends.
Round 2 :
If you want a hanging loop, add ch20 at runner ends and sl st back to base to form a hanger; reinforce with extra backstitches and glue optional.
Block :
Lightly steam block or pin wet to shape brim curves, cauldron rims, and star points. Avoid heavy water when using mercerized cotton as it can alter sheen; spritz lightly and pin into shape on a foam board then allow to dry.
Info :
Weave in all ends on the wrong side of the runner. For visible floating tails on brims, bury ends in the brim rounds with a yarn needle and run them through several stitches to avoid lumps.
Optional Variation :
To make a denser runner, add additional mesh rows between motif columns or add a second row of motifs in staggered placement. To make a garland instead of a runner, shorten foundation chain and add hanging loops for wall display.
This witchy runner is a delightful mix of playful motifs and delicate lacework—perfect for Halloween tables or autumn displays! Each tiny cauldron, floppy hat and broom is a joy to make and assemble. The bright color pops add instant seasonal charm, and the modular motifs let you customize length and layout easily. 🧙♀️✨ Once finished and lightly blocked, it becomes a magical heirloom accent for your fall decorating. 🧶🎃