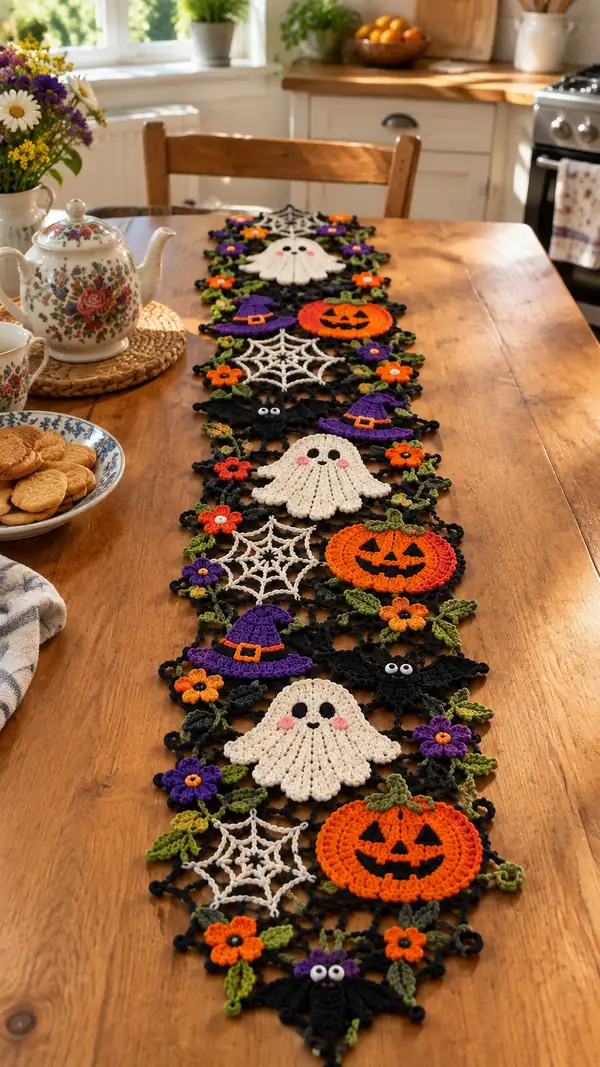
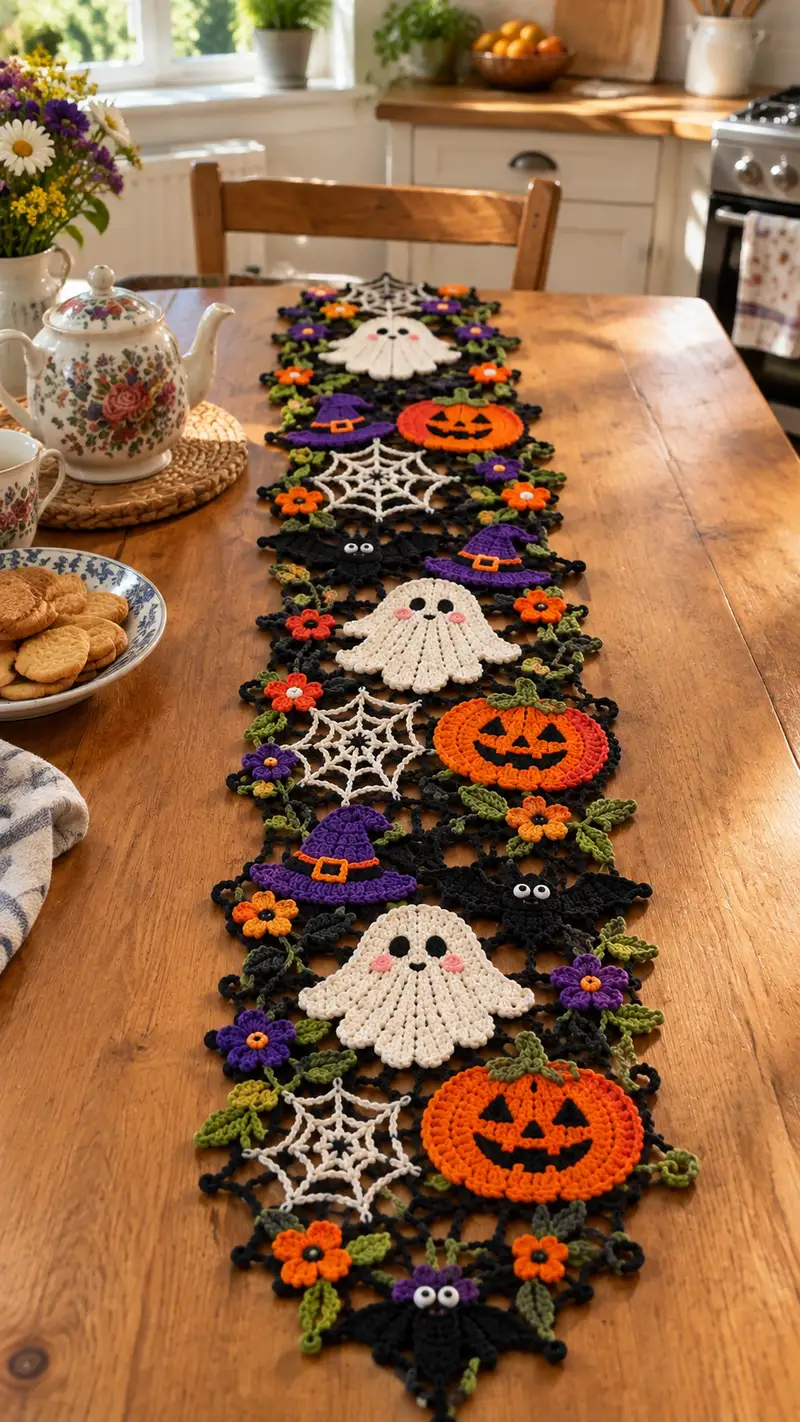
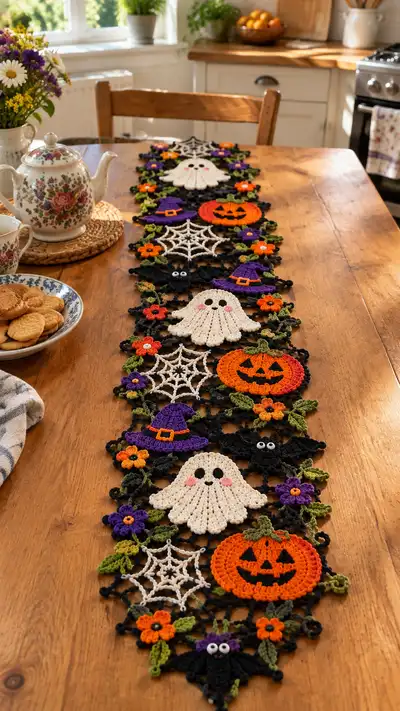
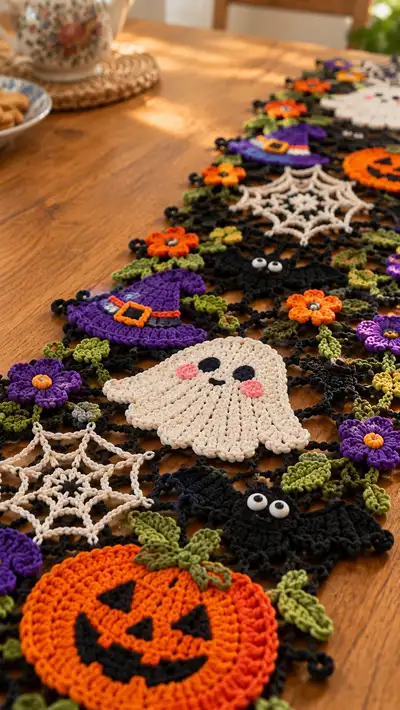
Bright, playful Halloween table runner featuring scalloped ghosts, jack-o-lantern pumpkins, cheeky bats, witch hats, spiderwebs, and colorful blossoms woven into a delicate black openwork lattice. Worked in worsted-weight cotton for a crisp stitch definition, this runner layers textured motifs and embroidered faces for a charming, festive display. The repeating motif strip is modular so you can shorten or lengthen to fit your table. Perfect for seasonal decorating or gifting to Halloween lovers.
Progress Tracker
0% Complete
— Ghost Motif :
Round 1 :
With cream/ivory yarn, make a magic ring. 6 sc in magic ring (6)
Round 2 :
Inc in each st around. 6 inc (12)
Round 3 :
(1 sc, inc) x 6 (18)
Round 4 :
(2 sc, inc) x 6 (24)
Round 5 :
(3 sc, inc) x 6 (30)
Info :
These early increase rounds build the ghost's rounded head. Keep your tension even; use a stitch marker to mark the first stitch of each round.
Round 6 :
(4 sc, inc) x 6 (36)
Round 7 :
(5 sc, inc) x 6 (42)
Round 8 :
1 sc in each st around (42)
Round 9 :
1 sc in each st around (42)
Info :
Place embroidered eyes or small felt circles now: eyes are centered approximately on Rounds 5-7 spaced about 6-8 sts apart depending on your preference. For large, expressive eyes, place them about 10 sts apart (measured at Round 6).
Round 10 :
1 sc in each st around (42)
Round 11 :
1 sc in each st around (42)
Round 12 :
(5 sc, dec) x 6 (36)
Info :
Begin shallow decreases to taper the ghost body slightly. Start to pad lightly if you want the motif flat with a small raised center; most motifs should remain flat—do not overstuff.
Round 13 :
(4 sc, dec) x 6 (30)
Round 14 :
(3 sc, dec) x 6 (24)
Round 15 :
(2 sc, dec) x 6 (18)
Round 16 :
1 sc in each st around (18)
Info :
We will now create the scalloped lower edge that gives the ghost its wavy sheet-like appearance. The scallops are made by working small shells in FLO to create vertical ridges.
Round 17 :
Change to BLO for vertical definition: *skip next st, 5 dc in next st (shell), skip next st, sc in next st*; rep from * to * around to create 6 shells and 6 sc anchors (6 shells + 6 sc = 18 sts worked as anchors) Finish with sl st to join.
Round 18 :
Working into the shells: *ch1, sc in top of shell, ch1, 3 dc across top of shell, ch1, sc in anchor sc*; rep around to shape the scallop flounce. This gives the lower edge gentle waves.
Round 19 :
Fasten off leaving long tail for sewing. Flatten motif and block gently to open scallops evenly. Surface-embroider eyes with black yarn or sew on small black circles. Embroider rosy cheeks with a few satin stitches in pink near the lower side of the face.
Info :
If you prefer a fringed ghost appearance, add additional small picot loops between scallops: ch3, sl st into the base between shells to create looped fringe. This is optional and adds playful texture.
— Pumpkin Motif :
Round 1 :
With orange yarn, make a magic ring. 6 sc in magic ring (6)
Round 2 :
Inc in each st (12)
Round 3 :
(1 sc, inc) x 6 (18)
Round 4 :
(2 sc, inc) x 6 (24)
Round 5 :
(3 sc, inc) x 6 (30)
Round 6 :
(4 sc, inc) x 6 (36)
Info :
These rounds give a slightly domed pumpkin; we'll flatten slightly and add vertical ridges to suggest pumpkin ribs and then add the pumpkin face using black yarn.
Round 7 :
1 sc in each st around (36)
Round 8 :
1 sc in each st around (36)
Round 9 :
(4 sc, dec) x 6 (30)
Round 10 :
(3 sc, dec) x 6 (24)
Round 11 :
Change to orange FLO and work 1 sc in each st FLO for one round to create a subtle ridge for the base of the ribs (24)
Round 12 :
Switch to black for the face: embroider or surface crochet triangular eyes and nose and a smiling mouth with 3 small V-shaped decreases; use a tapestry needle and mattress stitch-like embroidery for crisp shapes.
Round 13 :
Change back to orange, attach green yarn at top center and work stem: ch4, sl st into same st, sc around remaining top stitches to anchor stem; or make a small 4-round cone: (sc in magic ring 6; inc rounds to 9 stitches; work 2 rounds, fasten off and sew to top).
Info :
To accentuate ribs, you can use surface slip-stitching in a slightly darker orange along 6 evenly spaced vertical lines from top to bottom. Mark rib positions before stitching to keep spacing even.
Round 14 :
Block flat and press lightly. Fasten off leaving long tail for sewing to background mesh.
— Witch Hat Motif :
Round 1 :
With purple yarn, ch4, join to first ch to form small ring; work 8 sc into ring (8)
Round 2 :
(1 sc, inc) x 4 (12)
Round 3 :
(2 sc, inc) x 4 (16)
Round 4 :
1 sc in each st around (16)
Round 5 :
Change to cap brim: ch3 (counts as dc), *2 dc in next st, ch1, skip 1 st, 2 dc in next st*; rep around for textured brim shape; join (brim will flare). (16 dc groups)
Round 6 :
Work one round of sc around brim edge to neaten (count will match number of join points; approximately 24 sc depending on patterning). Fasten off purple.
Round 7 :
With orange or contrasting yarn, work a narrow band: attach yarn to brim base, ch1, work sc around base to form hat band; work two rounds of sc for band thickness. Fasten off and weave ends.
Info :
To create point height adjust by adding two rounds of dc in decreasing stitch counts so the hat has a tall cone appearance. Add small foam-backed buckle or crocheted buckle in yellow for a charming accent.
— Spiderweb Motif :
Round 1 :
With white yarn, ch6, sl st to first ch to form loop. Work 8 sc evenly around loop (8)
Round 2 :
Ch8, sl st into opposite sc to create a spoke; *ch8, sl st into next sc*; rep to create 8 spokes. Fasten off and reposition yarn for next step.
Round 3 :
Attach yarn to center of any spoke, ch4 (counts as first loop), work *sl st into spoke 2 ch from center, ch3, sl st into same spoke*; work around connecting spokes to form a small circle at center. Continue outward building rings by ch5 loops anchored to spokes: for each outer ring increase loop length (ch5,ch6) so web fans out. Make 3 concentric rings total for delicate web (3 rings + center).
Info :
Spiderwebs are delicate: keep loops even and block to square or circle before joining to mesh. If you want a tighter web, use smaller hook (3.0mm).
— Bat Motif :
Round 1 :
With black yarn, ch6, join to form ring; 10 sc in ring (10)
Round 3 :
(1 sc, inc) x 10 (30)
Round 4 :
1 sc in each st around (30)
Round 5 :
Shape wings by working into side stitches: *ch4, 3 dc in next st, ch4, sl st to wing base (this forms a wing scallop)*; work both wings symmetrically on opposite sides of body. The two wing scallops use about 6-7 sts each depending on tension.
Round 6 :
Work additional ruffled edge on wings: *sc around wing scallop edge working 1 sc per dc and 1 sc in each chain space* to neaten. Fasten off leaving tail for sewing. Add two small white beads or embroidered eyes with white and black center to give the bat a cheeky face.
Info :
Pin bats flat and steam-block slightly to open wing scallops and ease joining. For a more dimensional bat, make the center slightly stuffed but keep overall motif flat to sit on mesh.
— Flower Motif (make many) :
Round 1 :
With flower color yarn (orange or purple), magic ring, 6 sc in ring (6)
Round 3 :
*sc in next st, ch2, 3 dc in next st (petal), ch2, sc in next st*; rep around to form 6 petals. Fasten off, sew small yellow bead or French knot at center for seed.
Info :
Make flowers in two sizes: for medium petals use 3 dc; for smaller petals use 2 dc clusters. Block petals slightly for consistent shape.
— Leaf Motif (make many) :
Round 1 :
With green yarn, ch8; sc in 2nd ch from hook, hdc, dc, tr, dc, hdc, sc along chain, then work along opposite chain side: sc, hdc, dc to form symmetrical leaf (total around 14 sts). Sl st to first st; fasten off leaving tail for sewing.
Round 2 :
Optional: work a center vein in FLO with a contrasting green by surface crocheting a line of slip stitches down the center of the leaf to add texture.
Info :
Vary leaf sizes by starting with ch6 for small or ch10 for large leaves. Press flat and pin into shape while drying for neat curves.
— Joining Black Mesh (background lattice) :
Info :
The black mesh is worked in long strips of chain loops joined in a lattice; motifs are attached into the lattice at specific anchor points as you build. Work with black yarn and 3.5mm hook for crisp loops. The mesh is worked row-by-row producing chain loop rows connected by small clusters.
Round 1 :
With black yarn, ch10, sl st to form small ring; this ring will be the first anchor node. Make 6 sc into ring to bulk node (6)
Round 2 :
*ch8, sl st into the same node*; rep 6 times around to form 6 long loops radiating - you will have 6 loop spokes attached to node. This becomes a decorative open node that motifs will be attached to.
Round 3 :
From each loop make a small picot cluster: join black yarn in middle of ch8 loop, ch3, sl st into same spot for tiny picot; *ch12, sl st to picot of previous node to form connecting chain*; work connecting chains across to create diamond-shaped mesh—repeat to desired width. Essentially you will be forming a repeating pattern of nodes linked by ch12 chains forming hexagon-like holes. Continue working nodes and connecting chains until you have a strip wide enough to hold three motif rows across width (this runner shows one central chain of motifs with border loops). Count nodes carefully so spacing aligns with motif size.
Info :
When joining motifs, align motif centers above node junctions. Work the mesh to include a node directly under each motif center and additional nodes around motif edges where petals and leaves will anchor. Blocking the mesh flat helps keep motifs flush and makes join-as-you-go easier.
Round 4 :
Join motifs as you go: when reaching the node where a motif will sit, lay the flat motif over the mesh and attach with 1 sc in motif edge into each nearby node and chain join positions. Sew with black yarn to visually integrate the motif into the mesh. For example, the ghost motif bottom scallops attach to 6 surrounding nodes using sc to secure tips and sc anchors at scallop valleys. Use yarn needle and mattress-like joining for a tidy seam.
Round 5 :
Continue creating nodes and connecting chains in repeat: *make a node (6 sc in ring), ch8 loops x 6, join to neighboring node with ch12*; rep across the length. Each node will host part of a motif or leaf cluster—plan motif spacing before you work the full length by laying out motifs on the mesh and marking nodes with scrap yarn.
Round 6 :
To form a stronger mesh edge, work one round of sc along both long edges: sc in each node and in chain spaces across the outermost edge, creating a tidy border. This round neatening also stabilizes the runner for table placement.
Info :
Measure spacing: typical motif centers in the sample runner are spaced about 12-14 cm apart (approx. 4.5-5.5 inches) center-to-center. Adjust node-to-node distance by changing ch12 to ch10 or ch14 depending on desired density.
— Assembly & Motif Placement Rounds :
Round 1 :
Lay out your mesh strip flat. Arrange motifs in repeating sequence: pumpkin, web, ghost, bat, witch hat, small flower cluster, repeat. Place motifs so their anchor stitches meet nodes—generally a motif will be secured with 6-8 anchor points to surrounding nodes.
Round 2 :
Working with black yarn and 3.5mm hook, join each motif to the mesh using slip stitch and sc: insert hook through motif edge stitch and through corresponding node, sc to secure; use 1 sc per node or per scallop anchor. For small petals and leaves, use a few discreet sl st to avoid bulky joins that distort shapes.
Round 3 :
After securing main motifs, add flowers and leaves between motifs using small chains attached to nodes: ch6 loop as little tendril, join with sl st to node; attach small flowers by sewing their backside into node loops with a few whip stitches for permanence.
Info :
Work from center out: attach largest motifs first (pumpkin, ghost), then medium (hat, web), then small (flowers, leaves). Pin each motif before sewing and check that motifs lie flat and do not overlap excessively.
— Decorative Embroidery & Faces :
Round 1 :
Use black yarn and yarn needle to embroider pumpkin faces: satin stitch triangles for eyes and nose; for mouth use short satin stitches to make triangular teeth. Keep stitches neat and anchored on inside of motif so back remains tidy.
Round 2 :
For ghost cheeks use small satin stitch circles in pink—six short stitches in radial formation create a soft cheek. Eyes can be embroidered as solid ovals or sewn-on small black discs. Add tiny smile using a few black sc stitches in curved shape.
Info :
If you plan to launder the runner, use secure embroidered details rather than glued beads. Alternatively use sewn-on button beads for centers, but ensure thread is knotted and woven into several stitches for durability.
— Border & Final Finishing :
Round 1 :
With black yarn, work a decorative scalloped border along both long sides and both short ends. Start at one corner: sc around edge evenly, then *skip 2 sts, 5 dc in next st, skip 2 sts, sl st* to form scallop; repeat to the end. Count scallops to keep symmetry at both ends.
Round 2 :
Optional: with green yarn, create a vine accent by surface slip-stitching a meandering line along border between scallops; anchor small leaves along the vine by sewing leaf motifs into place with 2-3 stitches each.
Round 3 :
Fasten off and weave in all ends carefully on the backside of the runner. Use blocking pins to pin the runner flat and mist lightly; allow to dry completely to set shape and open any loops evenly.
Info :
For a crisp tabletop look, starch lightly and press with low heat (if cotton yarn used) or use a fabric-safe stiffener to keep runner flat under serving items.
— Alternate Decorative Options & Techniques :
Info :
To vary the design: make ghosts in a variegated cream or off-white, pumpkins in a deeper burnt orange for vintage vibe, or use metallic yarn accents on witch hat buckles. You can also omit bead eyes for baby-safe versions and rely solely on embroidery.
Info :
If you want a reversible runner, work motifs and mesh in mirrored pairs and join so both sides present finished edges; this doubles work but produces a reversible piece suitable for display both ways.
Info :
Troubleshooting: if mesh holes are uneven, steam-block each completed node to set shape. If motifs tug on mesh when joined, add extra anchor points or reduce chain length between nodes for a denser join.
This Halloween runner is a playful mix of classic motifs—ghosts, pumpkins, bats and spiderwebs—that bring instant seasonal charm to any table. Each motif is a small crochet scene, then joined into a delicate black lattice for a cohesive, whimsical look. The project is modular and endlessly customizable, making it a perfect gift or a special piece for your own home. I hope you enjoy every stitch and the cozy glow it brings to your Halloween gatherings! 🎃🕸️