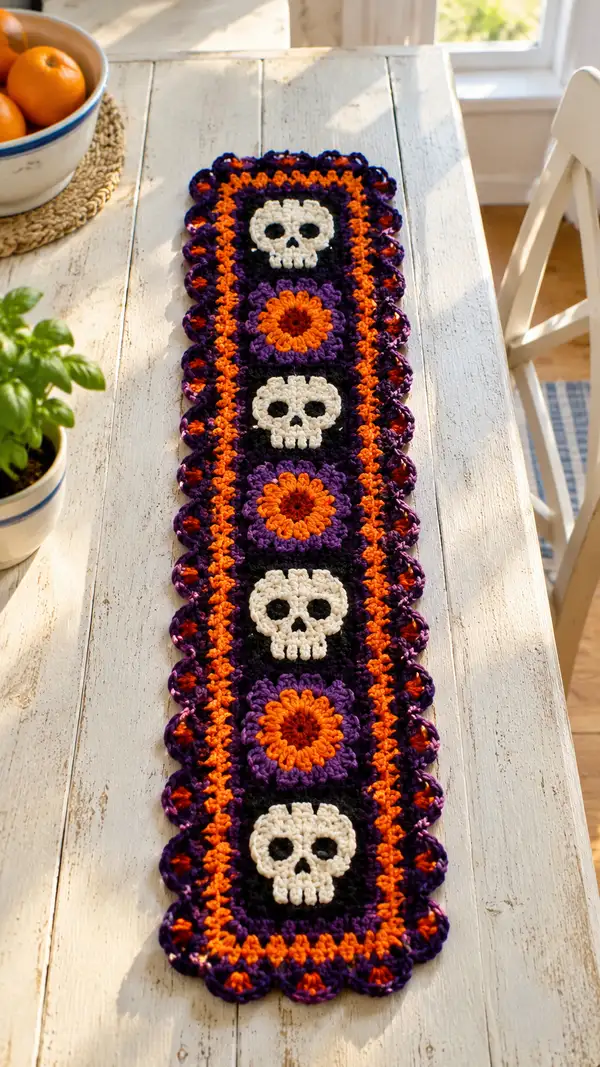
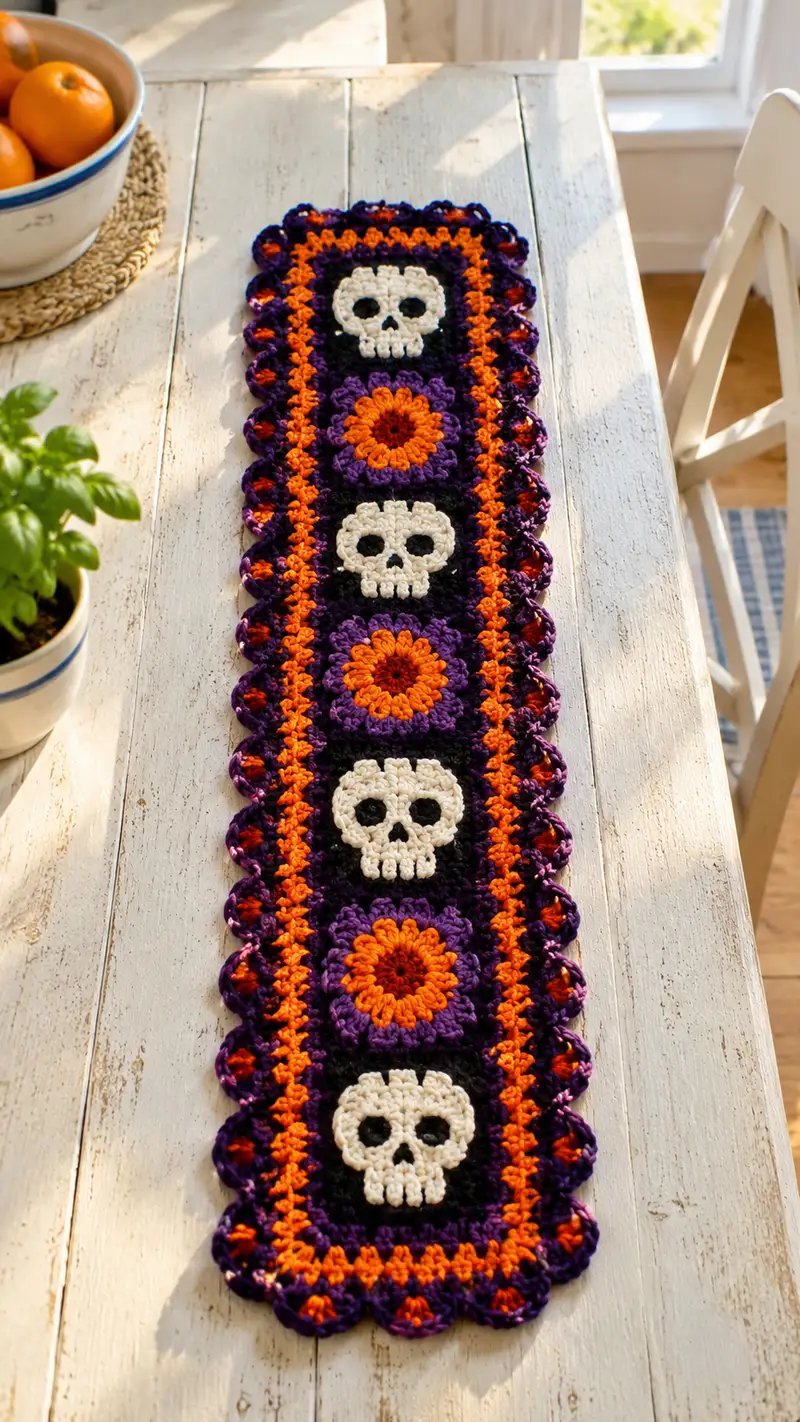
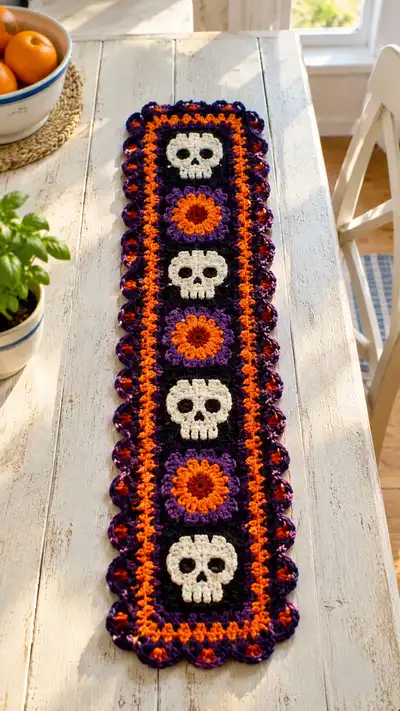
Create a festive Halloween table runner featuring alternating cream skull appliques and bright orange-and-purple floral medallions set on deep black and purple squares. This runner is richly textured with layered granny-style stitches and a scalloped edge in contrasting colors, perfect for seasonal décor or a special centerpiece. The pattern uses simple motifs joined into a long narrow runner and includes detailed color-change and edging instructions.
Progress Tracker
0% Complete
— Overview :
Info :
This pattern builds modular 6" square motifs (approx) alternately featuring a skull applique and a floral medallion. Motifs are framed into full squares, joined into a column, and given an orange inner border and scalloped purple outer edging. Adjust length by adding or removing motif repeats. Work with worsted weight yarn and a 5.0mm hook unless you prefer a tighter fabric; test gauge by making one motif first.
— Tools & Yarn Notes :
Info :
Use acrylic or cotton-blend worsted yarn for crisp stitches and easy blocking. Maintain consistent tension. For cleaner color changes, fasten off and rejoin or carry yarn across back when colors alternate every round. Block squares flat before joining for best alignment.
— Skull Applique (Make 3) :
Info :
Work the skull flat in cream yarn using rounds and shaping to create a stylized skull silhouette that will be sewn onto the square background. The skull is worked in continuous rounds (do not join) with a visible stitch count for shaping. Use stitch markers to mark round starts. This skull design is slightly oversized vertically to form the jaw teeth detail later.
Round 1 :
6 sc in magic ring (6)
Round 3 :
(1 sc, 1 inc) x 6 (18)
Round 4 :
(2 sc, 1 inc) x 6 (24)
Round 5 :
(3 sc, 1 inc) x 6 (30)
Round 6 :
1 sc in each st (30)
Info :
By now you have a circular disk; we begin shaping the top of the skull and later create eye sockets. Keep work fairly flat—do not over-tighten. Place stitch marker at start of each round.
Round 7 :
(4 sc, 1 inc) x 6 (36)
Round 8 :
1 sc in each st (36)
Round 9 :
(5 sc, 1 inc) x 6 (42)
Round 10 :
1 sc in each st (42)
Info :
We will now create slight shaping for the top curve of the skull and begin to define the brow ridge by working short rows (partial rounds) and then creating the eye sockets using slipped- or sc-bridges. Keep counts exact.
Round 11 :
FLO: 1 sc in each st around (42)
Round 12 :
(6 sc, 1 dec) x 6 (36)
Round 13 :
1 sc in each st (36)
Info :
Create eye sockets next by leaving two paired gaps, which will later be filled with black background fabric when applied, giving a hollow-eye effect. To do this, chain small bridges in the next round at the appropriate positions (see placement information below).
Round 14 :
Work 10 sc, ch 3 (counts as designed gap - do not fasten), sk next 3 sts, 2 sc in next 6 sts, ch 3, sk next 3 sts, sc to end (36 sts worked: actual count of solid sc remains 30 plus ch spaces)
Info :
Eye placement: Position these chain-3 gaps approximately 8-10 stitches apart across the face so eyes appear centered on the skull's upper third. When applying to the black square, the black background will show through for hollow eyes. Adjust gap spacing if you prefer different expression.
Round 15 :
Work sc evenly around including working 3 sc into the chain-3 gaps to reinforce them, smoothed (36)
Round 16 :
(4 sc, 1 dec) x 6 (30)
Round 17 :
(3 sc, 1 dec) x 6 (24)
Info :
Begin jaw shaping: we will work short rows and small clusters to form teeth. The next two rounds create a stubby jaw and teeth-like bumps using 2-sc clusters and small picots.
Round 18 :
1 sc in next 6, (2 sc in next, 1 sc in next) x 6 (30)
Round 19 :
(2 sc, 1 dec) x 6 (18)
Round 20 :
1 sc in first 3 sts, (picot: ch 3, sl st in 3rd ch back into same st) in next st for tooth effect, 1 sc in next 2 sts, repeat across to create 5 small picot teeth, sc to end (18)
Info :
Fasten off leaving a long tail for sewing. Block the skull applique flat on a blocking mat so the shape flattens and edges smooth. When sewing to background, position the skull so bottom teeth align near the square center-bottom for best visual balance.
— Floral Medallion Motif (Make 2) :
Info :
This floral medallion is worked in rounds beginning with a small orange center, expanding into puff/cluster petals in orange and purple. The motif finishes square-ready by squaring rounds into a framed square that matches skull square size.
Round 1 :
6 sc in magic ring with orange (6)
Round 3 :
(1 sc, 1 inc) x 6 (18)
Round 4 :
Change to dark orange/rust if desired. (2 sc, 1 inc) x 6 (24)
Info :
Next we make puff petals in bright orange to create a round blossom. Use yarn-over puff (yo, insert hook, yo pull up loop) 3-4 times per petal depending on plumpness; complete petal by pulling through all loops and sl st to anchor.
Round 5 :
*(yo,insert,yo,pull up) x3 in next st, yo pull through all loops, sl st in next st* repeat 12 petals around (24 stitches and 12 petals total anchored in alternating stitches)
Round 6 :
Change to purple. Ch 1, 1 sc in same st, *ch 2, skip next petal base, 1 sc in next st* repeat around to make petal-spaced chain arches (24)
Round 7 :
In each ch-2 arch, work (3 dc, ch 1, 3 dc) to create larger petals (12 shells). Join with sl st. (count shells visually)
Info :
After petals, we will square the round by working corner clusters. Maintain stitch marker at the start of the squaring round so you can be precise when joining to adjacent squares.
Round 8 :
Change to purple if not already. Work 1 sc in top of each shell, then begin squaring: *work 3 dc in next 2 sts, ch 2, 3 dc in same st to form corner*, continue across to create 8 mini-corner points forming a rough octagon (visual count)
Round 9 :
1 sc evenly around to tidy (approx 36 sc)
Round 10 :
Transition to black: 1 sc in each st BLO to create a ridge before square framing (36)
Round 11 :
Begin square frame: *1 sc, ch 2, 1 sc in next st, skip 2* across to create chain spaces; corner: (sc, ch 2, sc) in corner ch-2; repeat for four sides (approx 40 sts including ch spaces)
Info :
Fasten off and block medallions flat. The floral medallion will be centered in its black square so the orange and purple contrast with the black background.
— Square Background Frame for Motifs (Make 5 squares total; 3 for skulls, 2 for flowers) :
Info :
Each motif sits on a 5-6 round square frame built mostly in black and deep purple to match the image. The frame must be the same finished size for all motif squares. Use black for inner rounds then switch to purple for outer row to match the runner photo.
Round 1 :
With black, ch 4, join to form ring, ch 3 (counts as dc), work 11 dc into ring, join (12 dc)
Round 2 :
Ch 3, 1 dc in same st, 2 dc in each st around (24 dc)
Round 3 :
Ch 2, *hdc in next 2 sts, ch 1, skip 1* repeat to begin shaping blocky texture (24 hdc with ch-1 spaces)
Round 4 :
Change to purple. Work 1 sc around in each st and ch space to even out edges (24)
Round 5 :
Start squaring: *3 dc in same st, ch 2, 3 dc in same st (corner made), 1 dc in next 6 sts* repeat for 4 sides (approx 40 dc)
Round 6 :
With purple, 1 sc in each st BLO to create an inner ridge (40)
Round 7 :
Work a tidy sc round in black: 1 sc in each st (40)
Info :
At this point your square should be approximately 6" across (depending on yarn/hook). Fit your motif (skull or flower) to the center; the motif should sit evenly with about 4-6 stitches of background around edges. Sew motif onto square using whip stitch or mattress stitch with long tails for an invisible join.
— Positioning & Sewing Motifs :
Info :
Place skull or floral motif centered on square, pin with blocking pins. For skulls, align eye gaps to show black. Use long tail from the motif or new yarn to sew through the motif back and the square front using small whipstitches. Hide knots behind motif and weave tails thoroughly into the backing to prevent loosening for machine wash.
— Column Joining Strip (Make 1 long strip joining squares) :
Info :
Once five squares (skull, flower, skull, flower, skull) are completed, join them with a neat single crochet joining seam or slip stitch join; we recommend the join-as-you-go (JAYG) single crochet method for an invisible seam. This section covers joining and building a narrow band between squares to mimic the photograph which shows narrow black frames between motifs.
Round 1 :
Lay two squares right sides together, align edges. Join with black: join at corner with sl st, ch 1, 1 sc through both loops across to next corner (approx 40 sc along side). Fasten off. Repeat to join all squares into a single column. (Joining stitch counts depend on square size)
Round 2 :
Work 1 sc around the entire joined column in purple to even out joins: 1 sc in each sc and side seam (approx 220 sc - adjust to fit actual square dimensions)
Info :
Ensure seams are flat and not twisted. Use pins or safety pins to maintain alignment. For a neater result, weave a small secondary row of sc in orange to reflect the inner orange stripe visible in the photo.
Round 3 :
Change to bright orange. Ch 1, 1 sc evenly around the purple row to create the inner orange border (approx same stitch count as round 2). This creates the vivid inner stripe seen bordering the runner motifs.
Info :
If your column height differs because of yarn/hook you can add or remove an extra sc round in purple before switching to orange to maintain proportions.
— Outer Border: Scalloped Edge (Multiple Rounds) :
Info :
The outer scalloped edgings are worked in rounds to create a decorative border with alternating purple scallops and small orange pop details in the scallop centers. Work continuous rounds around the runner, placing shells at regular intervals and decreasing slightly along straight edges to keep scallops even. Measure the runner perimeter to count scallops; the pattern below gives a guideline using the running stitch count from the join round.
Round 1 :
With purple, 1 sc evenly around the entire runner edge (work 3 sc into each corner to round it) (approx 240 sc)
Round 2 :
Ch 3 (counts as dc), *skip 2 sts, (5 dc) in next st, skip 2 sts, dc in next st* repeat around to form initial shells; place 7 dc shells into corner clusters to maintain shape (shell count approx 40 shells)
Info :
Keep track of shells on each side so the scallops align visually. If your perimeter stitch count is different, adjust number of base stitches between shells to space them evenly.
Round 3 :
Slip stitch into center of each shell, ch 1, *sc in center, ch 3, sc in center* to create little loops between shells (this defines scallop separation)
Round 4 :
Change to orange. In each ch-3 loop, work (sc, dc, sc) to create small orange pop-ins between larger purple shells. Fasten off orange and rejoin purple.
Round 5 :
With purple, work a finishing round: in each shell work (sl st, ch 3, 3 dc, ch 3, sl st) into the shell center to make pronounced scallop picot edges (visual count matches shells from Round 2)
Round 6 :
Edge tidy: 1 sc around in purple to smooth and stabilize scallops. Fasten off and weave ends.
Info :
Blocking along scallops helps them open and lay flat. Pin out each scallop to the same depth during blocking for a professional finish. Weave ends into the back of the work and trim.
— Alternative Edging Variation (Optional) :
Info :
If you prefer a denser border, replace the scallop rounds with two rounds of crab stitch (reverse sc) in purple for a rope-like edge, then add orange bobbles in every 6th stitch for color pops.
— Finishing & Blocking :
Info :
Block the finished runner flat, pinning scallops to even depth and smoothing motifs. Steam-block carefully if acrylic yarn is in use—use a pressing cloth or spray lightly with water and pin to shape. Weave all tails under multiple stitches and trim close to fabric. If desired, tack the runner corners to a non-slip mat or use a tiny bit of fabric glue to prevent shifting on smooth table surfaces.
— Gauge & Size Adjustments :
Info :
One motif square should measure approximately 6" when blocked. With five squares joined and borders added, the sample runner measures roughly 10" x 36". To lengthen, add more motifs; to widen, make larger squares by adding extra rounds to background frames before joining.
— Care Instructions :
Info :
Hand wash or use gentle cycle in cold water; lay flat to dry. Avoid high heat to prevent softening of acrylic fibers and keep scallops shaped by reblocking after washing.
This festive table runner pairs bold Halloween charm with crochet-friendly construction to make a standout seasonal accent. Each motif comes together in bright orange, deep purple, cream, and black for high-contrast appeal, and the scalloped edge provides a polished finish. Make a set for your autumn table or tailor colors for year-round display—it’s a fun, creative way to celebrate handmade style. 🧶🎃😊