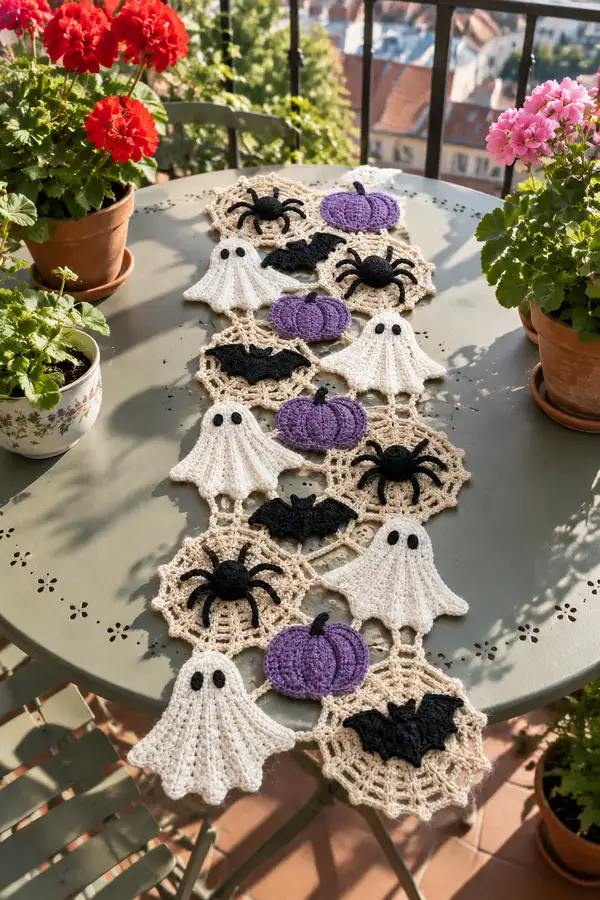
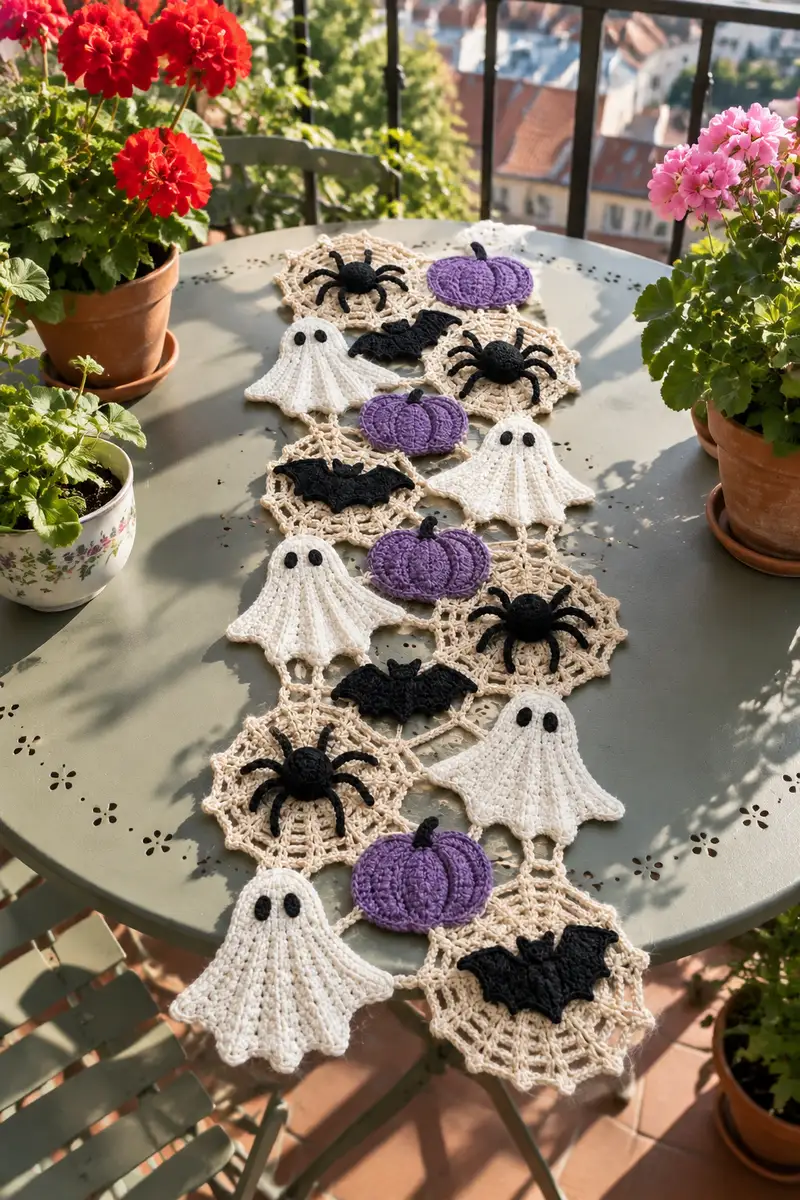
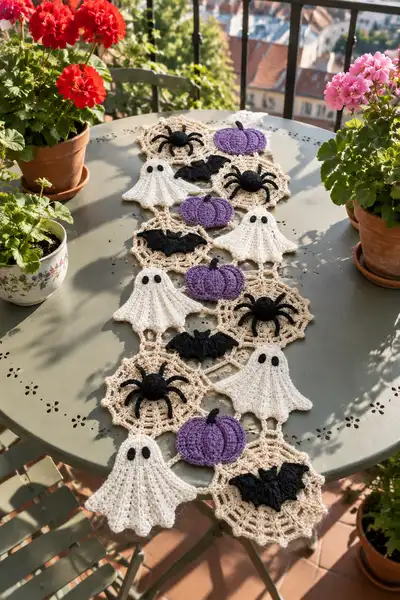
Create a charming Halloween table runner made of linked spiderweb hexagons, lacy ghosts, purple pumpkins, bats and 3D spiders. This cozy seasonal runner uses neutral beige web motifs as a base with cream ghosts, black spiders and bats, and rich purple pumpkins to create an elegant, spooky centerpiece. The pattern is modular — make as many motifs as you like and join them into a runner, placemats or garland.
Progress Tracker
0% Complete
— General Notes :
Info :
All motifs are worked in rounds except the ghost which is worked flat in rows joined into a motif. Use a 4.0 mm hook for the base web hexagon and a 3.5 mm hook for appliques if you prefer firmer shapes. Gauge is flexible — the project is modular and size will depend on yarn and tension. Block each motif lightly before assembly for best results.
Info :
When instructions show repeats like '(3 dc, ch 2) x 6' the number in parentheses is the stitch sequence repeated. Maintain consistent stitch counts; math has been checked for accuracy for each round.
— Spiderweb Hexagon Motif (make multiple) :
Round 1 :
6 sc in magic ring (6)
Round 3 :
(1 sc, 1 inc) x 6 (18)
Round 4 :
(2 sc, 1 inc) x 6 (24)
Round 5 :
(3 sc, 1 inc) x 6 (30)
Info :
Work these first rounds tightly to create a firm center. This establishes the hexagon base that will support lacy rounds.
Round 6 :
1 sc in each st (30)
Round 7 :
(4 sc, 1 inc) x 6 (36)
Round 8 :
1 sc in each st (36)
Round 9 :
Change to lacy round: *ch 5, skip 2 sts, sl st in next st* around to form 12 chain loops (36 adjusted to loops)
Info :
Round 9 creates 12 raised loop spaces around the center. These chain loops become the anchor points for spiderweb spokes. Keep tension even so loops remain uniform in size.
Round 10 :
Join yarn in first chain loop, *(sc, ch 3, 3 dc, ch 3, sc) into loop, sl st into next chain loop* repeat 12 times forming 12 petal spokes (approx. 12 petals)
Round 11 :
Working into gaps between petals: *(ch 4, sl st into center of next petal) x 12 creating a delicate connect (12)
Info :
At this point you will have an open lacy disc with 12 radiating spokes which reads like a basic web anchor. Keep it flat; block at this stage if you notice curling.
Round 12 :
*Into each petal: sl st, ch 4, (2 dc, ch 2, 2 dc) into chain-3 arch from previous round, ch 4, sl st in next petal center* repeat 12 times forming 12 scalloped bridge sections
Round 13 :
*(ch 6, sc into arch space two petals over) x 12 — create larger web arches to reach hexagon corners
Info :
Counting here is based on 12 repeating arch positions. The hexagon shape emerges as you build three larger arches for every two original petals. Keep loops even and block each completed hexagon flat with pins to set shape.
Round 14 :
*sl st into arch, ch 3, (dc, tr, dc) in arch, ch 3, sl st into next arch* repeat 12 times (creates tall peaks)
Round 15 :
*(ch 8, sl st into next arch forming a long connecting loop) x 12 — now you have 12 long loops forming the hexagon outer edge (work should approximate hexagon)
Round 16 :
Work a stabilizing round: in each long loop: sl st, ch 2, (2 dc, ch 2, 2 dc), sl st — this anchors outer edge and gives a scalloped hexagon border
Info :
Fasten off leaving a 15 cm tail for joining if you plan to sew motifs together rather than slip-stitch joining. Make as many hexagons as needed for runner length. Block hexagons to flatten and set measurements before attaching appliques.
— Ghost Motif (Flat scallop ghost) :
Info :
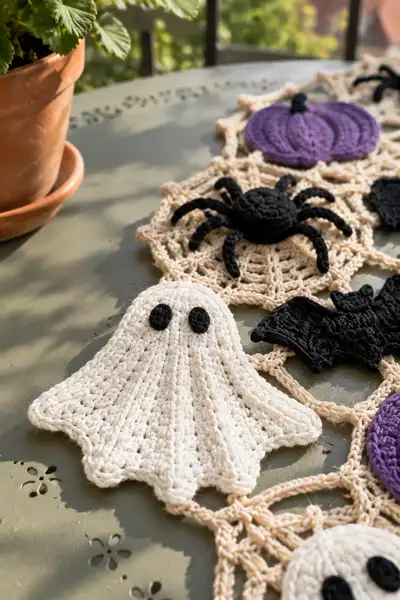
Ghost is worked flat using cream yarn. It is shaped as a semi-circle with scalloped bottom edge. Work with 3.5-4.0 mm hook depending on desired drape. Each ghost is worked in rows/short rounds then edged to create bottom scallops.
Round 1 :
Ch 6, sc in 2nd ch from hook and across — 5 sc (5)
Round 2 :
Ch 1, turn, inc in first st, 1 sc in next 3 sts, inc in last st (7)
Round 3 :
Ch 1, turn, inc, 1 sc in next 5, inc (9)
Round 4 :
Ch 1, turn, inc, 1 sc in next 7, inc (11)
Round 5 :
Ch 1, turn, inc, 1 sc in next 9, inc (13)
Info :
These early increases form the semi-circular cap of the ghost. Keep turning rows even. Place stitch markers at row ends to keep track of increases.
Round 6 :
Ch 1, turn, 1 sc in each st (13)
Round 7 :
Ch 1, turn, 1 sc in each st (13)
Round 8 :
Ch 1, turn, (sc in next 3, inc) x 3, sc in remaining (16)
Round 9 :
Ch 1, turn, 1 sc in each st (16)
Round 10 :
Ch 1, turn, (sc in next 4, inc) x 3 (19)
Round 11 :
Ch 1, turn, 1 sc in each st (19)
Info :
At this point you have a semi-circle roughly the width of the ghost body. We will create vertical ridges to mimic the flowing sheet using front loop work and simple ribbing.
Round 12 :
Ch 1, turn, *1 sc BLO in next 2 sts, 1 hdc FLO in next 2 sts* rep across (creates vertical rib texture) (19)
Round 13 :
Ch 1, turn, *1 sc BLO in next 2, 1 hdc FLO in next 2* rep across (19)
Round 14 :
Repeat Round 13 (19)
Info :
Work 4-6 rows of ribbing to create visible folds. Adjust number of rows to change ghost height. For sample, use 6 rows of ribbing total (Rounds 12-17).
Round 15 :
Repeat Round 13 (19)
Round 16 :
Repeat Round 13 (19)
Round 17 :
Repeat Round 13 (19)
Round 18 :
Ch 1, turn, sc in next 3, *(sc, ch 2, sc) in next st* repeat across to create 6 bottom scallops; finish sc (19 with 6 scallops)
Round 19 :
Work into each scallop: sl st, ch 1, (2 sc, ch 1, 2 sc) in each scallop to deepen scallop edge; sl st to end. Fasten off leaving long tail for sewing.
Info :
For eyes: embroider or crochet small oval appliques in black. Make two small ovals by ch 6, work back along chain with sc to produce a small plump oval — make 2 and sew centered near top of ghost semi-circle. Place eyes roughly 3-4 rows from top center and about 5-6 sts apart depending on ghost width.
— Pumpkin Motif (flat round with ridges) :
Info :
Pumpkin is worked in rounds to create a plump disc then surface ridges using front post stitches to create vertical segments. Use purple yarn for pumpkin body and a small amount of black for the stem.
Round 1 :
6 sc in magic ring (6)
Round 3 :
(1 sc, inc) x 6 (18)
Round 4 :
(2 sc, inc) x 6 (24)
Round 5 :
1 sc in each st (24)
Round 6 :
1 sc in each st (24)
Info :
For a slightly domed pumpkin, work two rounds even then create post stitches to define sections. Stuff lightly with fiberfill if you want a more sculpted shape — these sample pumpkins are slightly padded for dimension.
Round 7 :
(FLO) *fpdc around next 4 sts, (sc in next 2)* repeat around to create 6 segments approximate (24)
Round 8 :
Repeat Round 7 to deepen ridge definition (24)
Round 9 :
1 sc around to tidy (24)
Round 10 :
Change to black yarn — make stem: ch 4, sl st into top center, ch 1 and sl st back to base to create a short stem. Fasten off and leave tail for sewing.
Info :
Surface embroidery: you may embroider extra raised lines between post stitches with short lengths of yarn pulled through to enhance segment shape. Sew pumpkins to hexagon centers or slightly overlapping hexagon edges as shown in sample photos.
— Bat Motif (flat silhouette) :
Info :
Bat is a small flat silhouette worked in black yarn using a short series of increasing rounds and outward wing shaping. Use 3.5 mm hook for a firm shape and crisp wing edges.
Round 1 :
Ch 6, sc in 2nd ch from hook and next 3 ch, ch 2, turn to work along opposite side of chain: sc 4 into remaining chains (8) — forms small body base
Round 2 :
Ch 1, sc in first 3 sts, (inc) in next 2 sts at center, sc in last 3 sts (10)
Round 3 :
Ch 1, turn to wing shaping: sc in next 2 sts, hdc in next 2, dc in next 2, tr in next st, sl st to form wing tip; return to other side and mirror: tr, dc, dc, hdc, sc to form symmetrical wings. Fasten off (creates a flat bat with wing points)
Info :
Block flat and sew bats to hexagon edges or place them slightly overlapping a web opening. Place bat wings to create spacing between adjacent motifs.
— Spider (3D) Body and Legs :
Info :
Spider body is small and slightly domed; legs are formed from chained tubes or crocheted i-cords to create round legs. Use black yarn. Make 1-2 spiders per runner as focal points.
Round 1 :
6 sc in magic ring (6)
Round 3 :
(1 sc, inc) x 6 (18)
Round 4 :
1 sc around (18)
Info :
Begin stuffing lightly now to form a round body. The spider is small — only a few grams of polyester fiberfill are needed. Continue stuffing as you add the dome round.
Round 5 :
(2 sc, inc) x 6 (24)
Round 6 :
1 sc around (24)
Round 7 :
(2 sc, dec) x 6 (18)
Round 8 :
(1 sc, dec) x 6 (12)
Round 9 :
6 dec (6) — close leaving a small opening; finish stuffing and fasten off leaving long tail for sewing to hexagon
Info :
For legs: make 8 legs. Option A: crocheted tubes — ch 18, sl st back along chain working 2-3 rounds to create a tube, fasten off leaving tail for attaching. Option B: i-cord method — using 3.5 mm hook work 18 sc in a continuous round (use 3-4 rounds) to make a slightly thicker leg. Bend legs into an arched shape and sew deeply into sides of body so legs spread evenly around the body.
Round 10 :
Attach legs by spacing them evenly around the spider body — pin 2 legs per 'quadrant' then stitch firmly through body using the long tails. Sew a second pass through each leg base for strength.
Info :
Attach spider to hexagon center by sewing through back loops of hexagon center and spider underside. Add a couple of stitches into the web loops to secure. Use a small dab of fabric glue if you need extra hold for display use only (not for laundering).
— Joining Motifs (Join-As-You-Go and Sew Joining) :
Info :
The sample runner links hexagon motifs edge-to-edge with single chain link connectors (three chains forming small loops). You can join motifs by slip-stitching into outer loops on the previous piece or by sewing with matching yarn so joins are discreet. Join as you go for faster results: attach new hexagon outer round by working sl st into corresponding outer loop of adjacent hexagon at join points.
Round 1 :
When joining new hexagon: complete Round 16 and do not fasten off. Align the hexagon next to a previously made hexagon; at each intended join (three or four points per side) sl st into outer loop of existing motif then into your current motif loop, continue around joining at 3-4 evenly spaced points. Fasten off and weave tails.
Info :
If you prefer a visible decorative connector, chain 6 between hexagon edges and slip-stitch into next hexagon outer loop forming a bridge. Repeat across runner to create flexible linking chains. Keep chain lengths identical for uniform spacing (recommended ch 6 for sample).
Round 2 :
For X-shaped joining points where three motifs meet, use a small joining square: ch 5, sl st into intersection point on each motif and secure with several stitches to anchor the three motifs together. This distributes tension and prevents warping at intersections.
Info :
Lay out your motifs before joining. The sample runner alternates ghost, spider, pumpkin and bat appliques so plan motif placement first — pin pieces to hexagon faces to preview layout. This also helps maintain symmetry and even spacing along runner length.
— Attachment of Appliques to Hexagon Base :
Round 1 :
Position ghost: place ghost over hexagon center or overlapping two adjacent hexagon edges where desired. Use pins to hold in place.
Round 2 :
Sew around appliques with whip stitch using tail from applique: make small, even stitches through applique and the hexagon web loops. Aim for 2-3 stitches per scallop on ghost, and 4-6 discreet stitches around pumpkin base to hold padding.
Info :
For spiders: sew spider underside to web center by passing needle through lower rounds of web and underside of spider. For bats: sew along back to hide stitches. Reinforce each applique with a second pass to ensure durability for table use.
— Runner Edge Finishing Rounds :
Round 1 :
Once motifs are joined into desired runner length, work a unified edging round across exposed outer loops: join yarn at a corner, *ch 3, sl st into next exposed outer loop, ch 3, sl st* continue around entire runner to create scalloped chain loops.
Round 2 :
Work into each chain loop: (sc, hdc, 2 dc, hdc, sc) to form a decorative shell edging at each exposed loop around entire runner. Fasten off and weave ends.
Info :
Blocking: soak runner in lukewarm water, lightly press out excess water (do not wring), pin flat to blocking mat ensuring hexagon edges are aligned and shells/even loops are symmetrical. Allow to dry thoroughly before using on table.
— Optional Decorative Embellishments (Embroidery & Beads) :
Round 1 :
Embroider small veins on pumpkins with contrasting darker purple or black using backstitch — 6 short curved lines radiating from top stem down to base for extra definition.
Round 2 :
Sew tiny black seed beads near web centers to mimic dew drops or add reflective sparkle. Use small, flat seed beads and secure with double thread through bead and knot on reverse side.
Info :
Keep embellishments small to avoid scratching table surfaces. For table use, avoid heavy protruding beads; for decorative-only pieces you can be more adventurous.
This ghost and spider Halloween table runner brings handmade seasonal charm to your home in a playful, elegant way. Each hexagon web and appliqued ghost, pumpkin, bat and spider adds texture and personality to your table display. The modular design makes it easy to extend or shorten the runner to fit any table. Enjoy the process of building this runner motif by motif — it's a joyous, crafty way to celebrate the season. 🎃🕸️