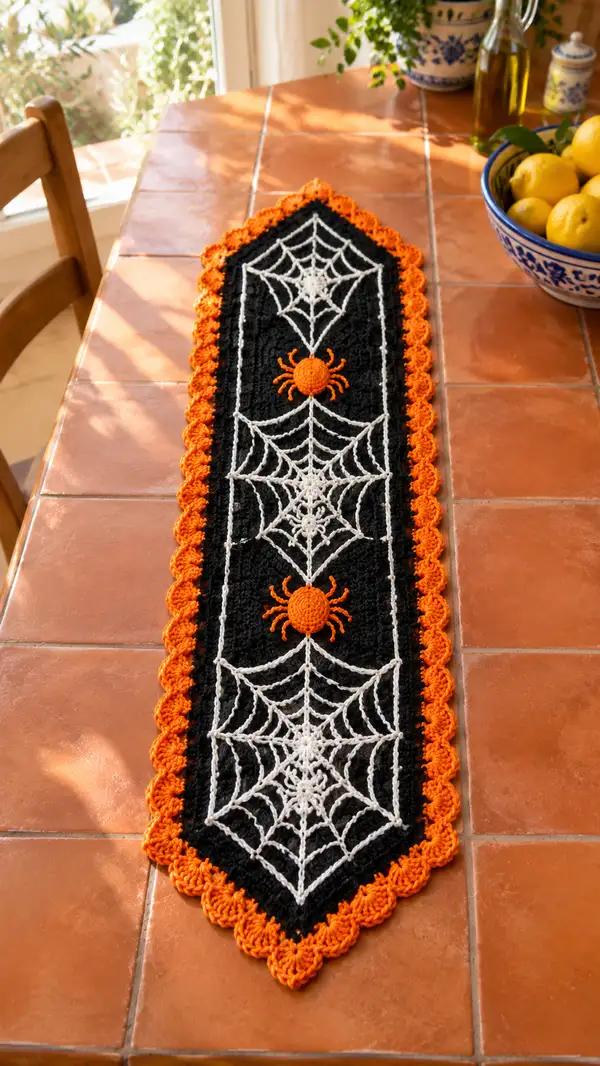
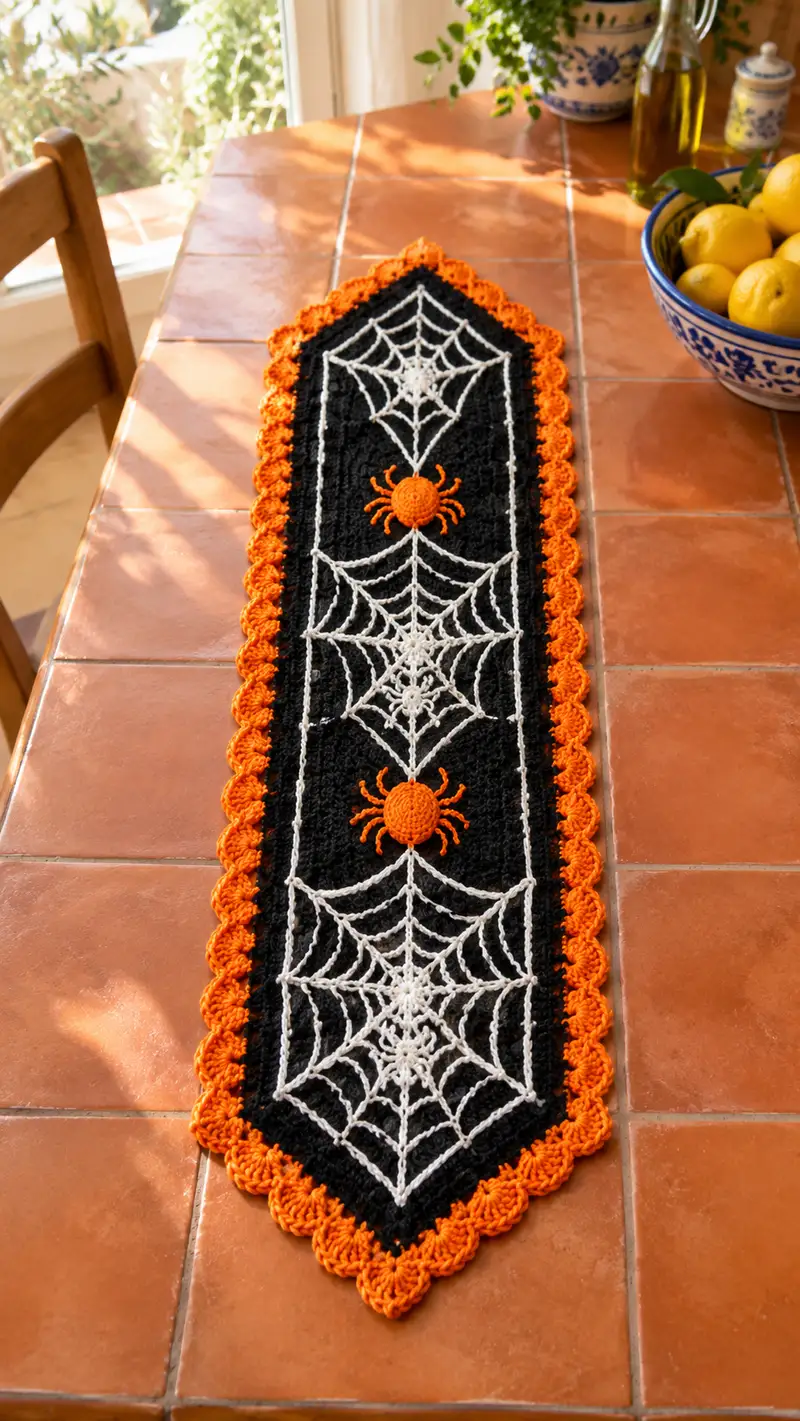
Make a dramatic Halloween table runner with bold black background, crisp white spiderweb overlay and bright orange scalloped edging. This long, narrow runner features three lacy spiderweb motifs and three raised orange spider appliques for a playful, seasonal centerpiece. The pattern uses simple stitches, modular motifs and a pretty shell border — perfect for mixing tapestry-style overlay with applique work.
Progress Tracker
0% Complete
— Materials & Gauge :
Info :
Gauge is not critical for this home decor piece; however using worsted weight yarn and a 3.5mm hook should give a dense fabric. Approximate finished runner shown measures about 36-40 inches long and 6-7 inches wide; adjust center panel row count to lengthen or shorten.
— Center Panel (Make 1) :
Round 1 :
Using black yarn, ch 41. (This foundation chain creates 40 base stitches across)
Round 2 :
Row 1: 1 sc in 2nd ch from hook and in each ch across. Turn. (40)
Round 3 :
Row 2: Ch1, 1 sc in each of the 40 sts across. Turn. (40)
Round 4-12 :
Rows 3-11: Repeat Row 3. Work 10 more even rows to create a dense central panel. (40)
Info :
Place a stitch marker at beginning of each row to keep your edge straight. Keep tension even. For a slightly textured fabric, you can work these rows in BLO for 2-4 rows in the center; use Info guidance before doing so.
Round 13 :
Row 12: Ch1, sc in each st across. Turn. (40)
Round 14-22 :
Rows 13-21: Continue 9 rows of 1 sc in each stitch (40)
Info :
If you prefer a slightly wider runner, increase your starting chain by 4 or 8 stitches and add corresponding rows for length. Keep all motif placement measurements relative to the final stitch count.
Round 23-42 :
Rows 22-41: Work 20 even rows of sc across to reach desired length for spacing three spiderweb motifs. (40)
Info :
Measure and mark the centerline and three equal spaced spots for the spiderweb centers now: top third, middle, bottom third. Use pins to mark 3 positions across the 40-st width, centered along the length of the panel. Typical spacing on pictured runner is about 10-12 rows between motif centers.
Round 43-52 :
Rows 42-51: Work 10 more even rows of sc to leave room at bottom end for the last motif. (40)
Round 53 :
Row 52: Ch1, sc in each st across. Fasten off and weave in ends for the central rectangle. Block the rectangle flat to square up edges before attaching motifs. (40)
Info :
Blocking is important. Wet block or steam carefully to flatten the rectangle; pin edges straight and allow to dry. This helps the spiderweb motifs sit flat and the final border to be even.
— Spiderweb Motif (Make 3 identical) :
Round 1 :
Using white yarn, MR, ch3 (counts as first dc), work 11 dc into MR. Join with sl st to top of ch3. (12)
Round 2 :
Ch4 (counts as tr + ch1), *tr in next st, ch1; rep from * around. Join with sl st to 3rd ch of starting ch4. You will have 12 tr with ch-1 sps. (12 tr, 12 ch-1)
Round 3 :
Slip to first ch-1 sp, ch3 (counts as dc), (2 dc) in same ch-1 sp, ch2, *(3 dc in next ch-1 sp, ch2) repeat around. Join to top of ch3. This forms 12 small 3-dc groups separated by ch-2 sps. (36 dc, 12 ch-2)
Round 4 :
Slip to center of first 3-dc group, ch1, sc in same st, ch6, sc in center of next 3-dc group, ch6; repeat around until you complete 12 long loop arms connecting centers. Join with sl st. (12 loops of ch6)
Round 5 :
Slip to first ch6, *(sc, ch5, sc) in ch6 loop, sl st into sc of adjacent 3-dc group to tack it slightly; rep around for each of the 12 loops. Join. This creates anchored loops ready for radial lines.
Info :
These loops form the outer points of the web. Keep tension quite loose for the chains so the web lays flat; if your chains are too tight, it will pucker.
Round 6 :
Using working yarn held, attach yarn at center with sl st. Ch1, sc in same center st, *ch4, sl st in next ch-1 sp worked between the tr arms out to where the radial line should meet the outer loop; rep to create 12 radial spokes. Join. (12 spokes)
Round 7 :
Change to a smaller hook if desired for crisper loops. Work surface crochet around: from center sc, ch1, sc into each radial spoke chain at two strategic points to create concentric ring lines: *sc into radial spoke 3 chains out from center, ch2, sc into same spoke 2 chains closer to center; rep across all spokes to form two inner ring lines. This is worked as surface slip-stitch / sc; count = 24 sc positions but these are surface tacks not full stitches into the motif body.
Round 8 :
Working into outer loops: sc around each loop working 5 sc into each anchored loop (the ch5 loops from Round 5) to create a scalloped outer ring. Join and fasten off. (12 shells of 5 sc = 60 sc around)
Info :
Block each web flat on blocking board and pin gently in a slightly diamond orientation to match the long narrow runner shape. The finished web diameter will be approximately 5-6 inches across with loose chain arms.
Round 9 :
Placement: Pin each finished spiderweb onto the blocked black rectangle at the marked positions (top third, center, bottom third). Use fine yarn and whip stitch to sew through the centers only in 6-8 evenly spaced tacking points to keep the motif flat and secure, taking care not to pull the web taut — keep it slightly relaxed for a natural web shape.
Info :
Sew only through rings at the center and two or three anchor points around the shell ring. Avoid sewing along chains; if you must secure a chain, take only a single tiny stitch to prevent puckering.
— Spider Applique (Make 3) :
Round 1 :
Using orange yarn, MR, ch1, 6 sc in MR. Pull tight. (6)
Round 2 :
Inc in each st around. (12)
Round 3 :
(1 sc, inc) x6. (18)
Round 4 :
(2 sc, inc) x6. (24)
Round 5 :
(3 sc, inc) x6. (30)
Info :
This creates a slightly raised round disc for the spider body. If you want a flatter spider body reduce to Round 4 and stop there.
Round 6 :
1 sc in each st around working in BLO for a slightly defined edge. (30)
Round 7 :
Fasten off leaving long tail for sewing. Weave tail through a yarn needle and use it to stitch the spider body onto the runner centered directly beneath each web center (approximately 3-4 rows below each web's center). Position per the photograph: one spider under each web.
Round 8 :
Legs (make 8 legs per spider): Using same orange yarn, join at the edge of the body with a sl st, ch10 for each leg, sl st back to join point on the body. Repeat for 8 legs spaced evenly around the lower half of the body (4 on each side) to imitate the spider silhouette. Fasten off and weave in ends.
Info :
To make legs curled, after ch10 sl st back into the chs using 1 sc every 2 chains to create a slight curve; secure to body edge with small whip stitches. Arrange legs to point outward slightly and press flat before final sewing.
— Small Decorative Line Border (White Outline Border) :
Round 1 :
Working from the backside of the rectangle, with white yarn and 3.0mm hook, attach yarn at lower left corner with sl st. Ch1 and sc in each visible edge stitch along the long side (40 sts), sc across short pointed end stitches as required (we will describe point assembly below), sc up the opposite long side back to the starting corner. Join with sl st. (Approx 2 x 40 + corner sts)
Info :
This thin outline visually frames the web panel. Work loosely if you prefer the outline to sit on top rather than pull the fabric.
— Pointed End Inserts (Make 2) :
Round 1 :
Each pointed end is worked separately in black to create the tapered coffined points. With black yarn, ch1, 1 sc in same st, sc across next 6 stitches to form a small triangle base that will be sewn to each end. Make a small flat diamond/triangle approximately 7 rows long: Row 1 sc6, Row 2 sc5, Row 3 sc4, decreasing one at each row end to achieve a point. (Row stitch counts reduce by 1 each row)
Round 2-7 :
Work decreases at both ends each row to shape the triangular point: ch1, dec at beginning, sc in middle sts, dec at end. Continue until 1-2 sts remain, fasten off leaving tail for sewing.
Info :
Sew each triangle to the short ends of the rectangle aligning the widest edge with the rectangle edge; stitch evenly to avoid puckers. After sewing, work the white outline (previous section) around the sewn seams to hide any join stitches.
— Scallop Shell Border (Orange) :
Info :
With orange yarn and 3.5mm hook, attach at any corner. The scallop shell will be worked as shells of 5 dc into every 3rd stitch along the long edges and into the points to create the decorative frame.
Round 1 :
Join orange yarn with sl st. Ch1, sc in first stitch to anchor. *Sk 1 st, 5 dc in next st (shell), sk 1 st, sc in next st; rep along entire edge including around the short pointed ends and the opposite long edge. Work shells into the corners by placing 3 shells around the corner seam. Fasten off. (Number of shells depends on edge stitch count; with 40 base stitches expect ~13-15 shells per long side)
Round 2 :
Optional second row: For a taller scallop, turn and work into the top of each shell: sl st into center dc of each shell, ch1, (sc, hdc, 3 dc, hdc, sc) in center of each shell. Join and fasten off. This creates a layered scallop similar to the photo.
Info :
Keep shell placement even by counting stitches and spacing shells evenly across the side. If your stitch count changes due to blocking, add or remove small sc spacers between shells to maintain symmetry.
— Detailed Assembly & Finishing :
Round 1 :
After all motifs are blocked and sewn, check overall symmetry. Weave in all ends from spiderwebs and spiders to the backside using a yarn needle. Make sure spider bodies are firmly tacked to the panel at the central 6-8 points to prevent lifting.
Round 2 :
Optional: To make the white web lines pop, use a surface slip-stitch in white following the radial spokes and concentric rings on each web; this creates defined lines between chains and makes the web appear embroidered rather than crocheted.
Round 3 :
Block the entire completed runner once more to ensure shells flatten and motifs lie flat. Steam lightly with a damp cloth between iron and fabric if necessary, but do not press directly.
Info :
Press gently only if your yarn is heat-safe and you do not mind slightly flattening the shells. Acrylic yarn may melt under high heat; always test a scrap first.
— Optional Variations & Scaling :
Info :
To make a wider runner, increase your starting chain by multiples of 4 to maintain shell spacing, and add extra spiderweb motifs or expand web sizes proportionally. To make the runner shorter or longer, add or remove center panel rows in groups of 10 for even spacing of the three webs.
Info :
For a monochrome look swap the orange for a metallic gold or silver, or make the webs subtle by using grey instead of white. The spider bodies can be made black for a more subtle silhouette.
I adore how the bold orange scallop and crisp white webs pop against the black center — it's a perfect seasonal accent for Halloween 🕸️. Each modular motif is surprisingly quick to make and the scalloped edge gives the whole runner a charming handmade finish. Display it under a spooky centerpiece or along a hallway table for instant festive style. Happy stitching and enjoy making this playful runner! 🎃🧶