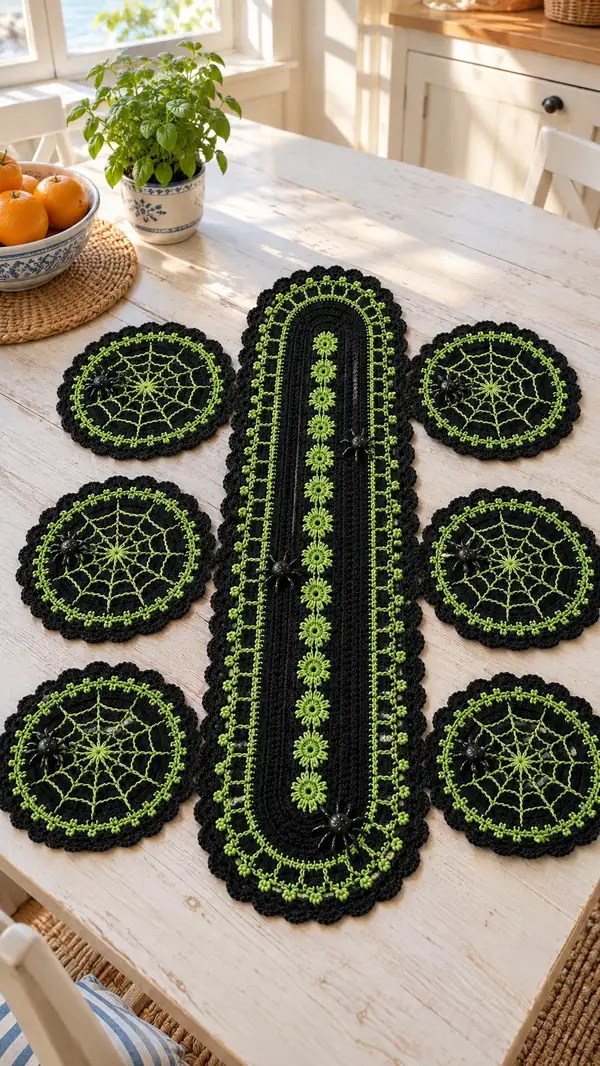
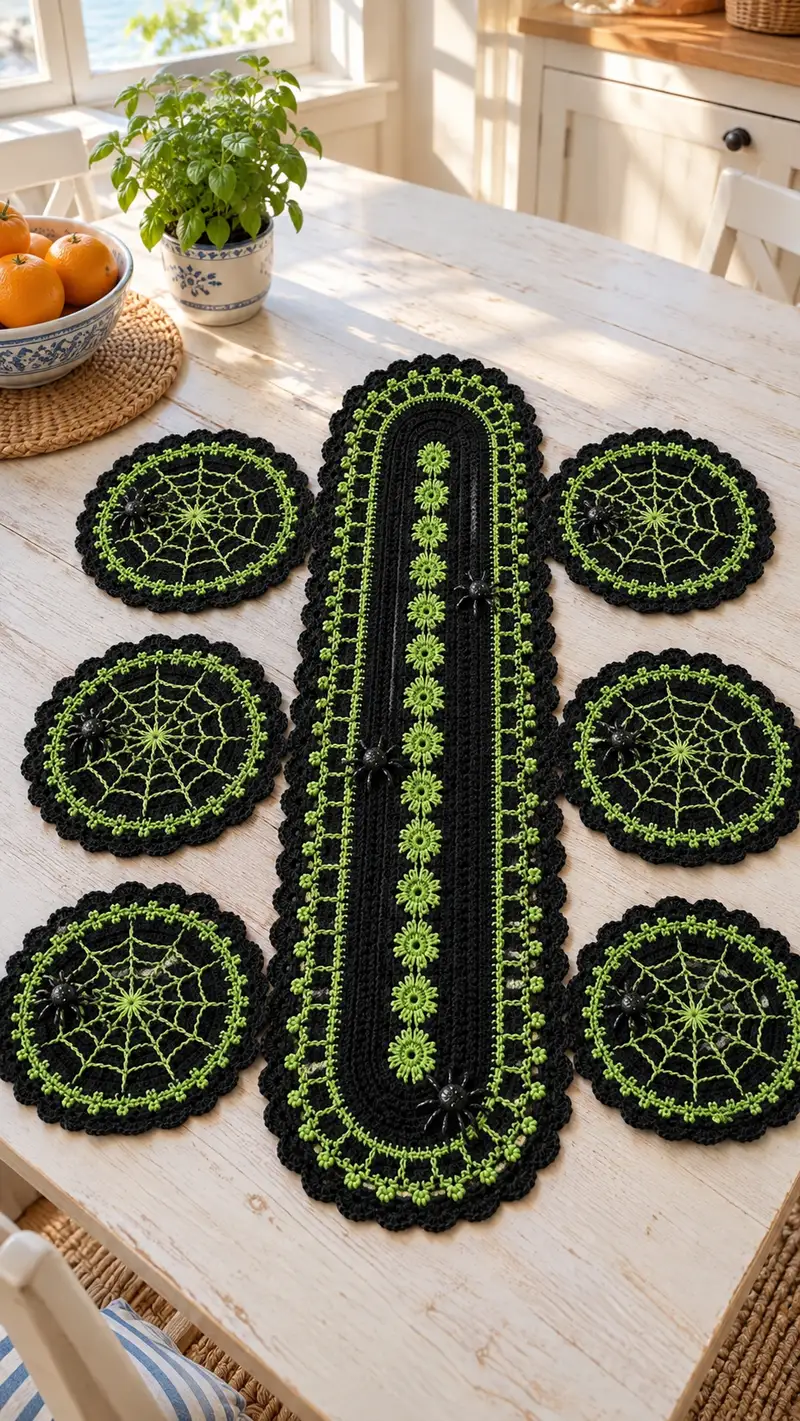
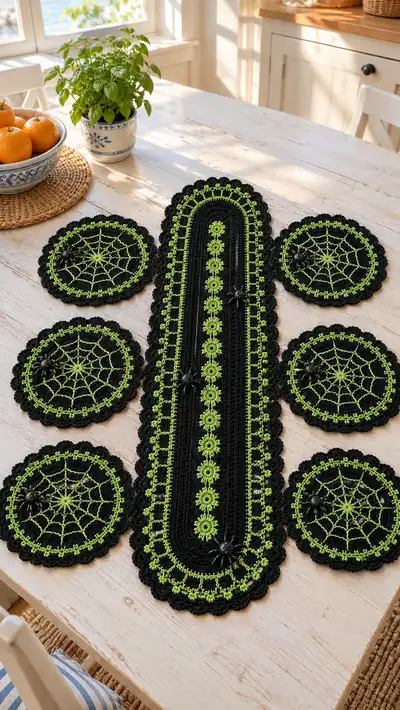
Create a dramatic Halloween-ready table runner and matching coasters in black with neon green lace accents. This set features a long oval runner with a center line of green floral rosettes, a scalloped black edge with green picot highlights, and six round spiderweb coasters with lacy spider accents. Perfect to dress a dining table or buffet with seasonal flair and handmade charm.
Progress Tracker
0% Complete
— Notes & Gauge :
Info :
This pattern is worked in DK weight cotton with a 3.5mm hook. Gauge for the solid runner body is approx 18 sc x 10 rows = 10cm (4in) in single crochet. Coasters finished measure approximately 12.5cm (5in) diameter; runner finished measures approximately 36cm (14in) wide by 120cm (47in) long depending on blocking and tension. Blocking will open and define lace work significantly.
Info :
Throughout this pattern we work rounds around an oval foundation for the runner and rounds for coasters. Use stitch markers to mark the first stitch of each round. When changing colors, join with slip stitch and carry tails neatly or weave in as you go. All stitch counts are given at the end of each round in parentheses.
— Runner Base (Long Oval) :
Foundation :
Using black, create a foundation chain of 48 chains. This creates the center starting chain for an elongated oval shape. Adjust chain multiple by +2 if you want a slightly wider base.
Round 1 :
Working into the 2nd chain from hook, 1 sc in each chain across until last chain, 5 sc into last chain, rotate and work across the opposite side of foundation chain, 1 sc in each chain until end; 5 sc in the final chain (corner) to close (48 + 8 corner sts = 56 total around) (56)
Round 2 :
1 sc in each st around, placing 2 sc at the 5-st corner groups to avoid gaps (56)
Info :
Place a stitch marker at the start of every round. Keep first 3 rounds worked tightly to create a firm runner center that will support lacework later.
Round 3 :
(Work in BLO) *1 sc in next 7 sts, inc (2 sc in next st)* rep around, making sure to place 2 sc into each corner cluster evenly (56 + 8 increases = 64)
Round 4 :
1 sc in each st around (64)
Round 5 :
(2 sc, inc) x around on straight sections, and for corner groups maintain additional increases so the oval expands smoothly. If working multiplication across oval sections this round yields (approx) 72 sts (72)
Info :
At this point your oval should begin to flatten into a smooth elongated shape. Don’t worry about exact stitch placement across the curve—keep increases even on both end semicircles.
Round 6-9 :
1 sc in each st around for 4 rounds to build a stable base (72)
Round 10 :
Change to FLO and switch to a slightly smaller hook (optional) for a neat ridge: 1 sc in each st FLO around (72)
Round 11-16 :
1 sc in each st around (72)
Info :
Begin planning rosette placements — we will attach 9 rosettes along the center. Mark the center line and measure spacing; the runner center has 9 green rosettes spaced evenly down the length. Reserve round counts and chain loops as you continue.
Round 17 :
Start decorative central channel: *1 sc in each of next 6 sts, ch2, sk 2 sts* rep across straight sections to create a subtle chain channel down the center; on ends work sc evenly to maintain circumference (72)
Round 18-22 :
1 sc in each st around maintaining the chain channel structure (72)
Info :
Stuffing is not used for flat runner; however if you prefer a slightly padded look you can insert a thin layer of batting beneath before finishing borders. For table use we keep it flat and flexible.
Round 23 :
Work a decorative band: *1 hdc in each of next 4 sts, 1 dc in next, ch2* rep across straight sections; ends remain sc to keep shape (72)
Round 24-30 :
1 sc in each st around (72)
Info :
At the end of Round 30 your runner base should be fully established and measured for rosette placement. Use pins to mark 9 equally spaced positions down the center channel for rosette attachments later.
Round 31 :
Change to green yarn. Join with sl st to first stitch of the central channel marker. *Ch5, sk 3 sts, sl st in next st* across the length of the channel to create small decorative picot arches where rosettes will sit (72)
Round 32 :
Switch back to black. 1 sc in each st around carefully working around the green picot arches (72)
Round 33-36 :
1 sc in each st around (72)
Info :
We will add the rosettes separately and sew them onto the green picot arches. Making the rosettes separately gives a crisp floral relief down the center and is easier than crocheting them in place.
— Rosette Motifs (Make 9) :
Round 1 :
Using green, MR, ch2 (counts as first hdc), 11 hdc in magic ring, tighten (12)
Round 2 :
(1 hdc, inc) x 6 around (18)
Round 3 :
(2 hdc, inc) x 6 around (24)
Round 4 :
(3 hdc, inc) x 6 around (30)
Round 5 :
Switch to dc for petal bases: *ch3, sk next st, dc in next st* rep around to create loops. Adjust so there are 12 loops for petals (30)
Round 6 :
In each loop make a cluster petal: *(sl st, ch2, 3 dc, ch2, sl st in same loop)* around to form 12 raised petals (12 petals)
Info :
Block rosettes flat but with the petals slightly cupped upward for visual interest. Leave a tail for sewing—about 30cm (12in) per rosette.
Round 7 :
Border the rosette: 1 sc around each petal base to create a tidy button-like motif and FO leaving long tail (approx 48 sts around including sc in spaces) (48)
Info :
Sew each rosette on top of the green picot arch on the runner center, spacing them evenly. Use mattress stitch or whip stitch through the rosette base and runner between rounds 31-33 to secure. Secure yarn tails and weave in ends on reverse side.
— Runner Decorative Side Panel (Green Lace Row) :
Round 37 :
Return to black with 1 sc in each st around to even back the work (72)
Round 38 :
Change to green: sl st to the edge stitch then *ch4, sk 2 sts, sl st in next st* around the straight sides to create a chain ladder around the perimeter that will be highlighted later (72)
Round 39 :
Switch to black, 1 sc in each st around, working over green chains so they are secured at the base (72)
Round 40-42 :
1 sc in each st around (72)
Info :
If you prefer, work these rounds in BLO to create a ridge for scallop attachment later. Make sure to count consistently and keep edges square.
— Runner Scalloped Border (First Layer) :
Round 43 :
Work scallop border around entire runner: *[skip 1 st, 5 dc in next st, skip 1 st, sl st in next]* repeat around. On the rounded ends work additional clusters to maintain oval shape. Count should be approx 12 scallops per long side and 6 on each round end (approx 72 scallops) (variable, approx 72 scallop clusters)
Round 44 :
1 sc around scallops to tidy (approx 72)
Round 45 :
Change to green: *ch3, picot (ch3, sl st in 3rd ch), sl st in next scallop center* repeat around to add green picot highlights between scallops (approx 72)
Info :
On this round the green creates a decorative outline that contrasts against black. Carry the green yarn carefully or join anew at intervals to minimize floats; weave in tails on the back for a clean finish.
Round 46 :
Switch to black. 1 sc in each st around to secure picots (approx 72)
Round 47 :
Work a final ornamental scallop row: *in each scallop center do (sl st, ch1, 3 dc, ch1, sl st)* to create a shallow shell around the edge, adjust on curved ends for smoothness (approx 72)
Info :
Weave in all ends on the reverse. Blocking: pin the runner into shape and lightly steam or wet-block to open the lace, allowing edges to settle into a uniform scallop. This is essential to achieve the look in the photo.
— Coaster: Spiderweb Center (Make 6) :
Round 1 :
Using black, MR, ch3 (counts as first dc), 11 dc in MR, sl st to top of ch3, tighten ring (12)
Round 2 :
Ch3, dc in same st, 2 dc in each st around to create a flat round (24)
Round 3 :
(Ch3, sk next st, dc in next) around to create a looser ring suitable for webs (24)
Info :
We are now preparing the foundation for the web spokes which will be worked in green. Use a contrasting hook (3.0mm) if you prefer a tighter spiderweb thread look.
Round 4 :
Change to green: join in a central sp. Create 8 radial spokes: *ch8, sl st to the ring at opposite point* repeat to create an 8-spoked star across the coaster. Adjust lengths so spokes meet evenly and trim loop distances if necessary (8 spokes)
Round 5 :
In green: starting at center, sl st into the first spoke, *ch4, sl st in next spoke, ch4, sl st in next spoke* continue to create 2 concentric chain arcs between spokes. This forms the inner and middle webs (do 2 rounds of arcs across spokes)
Round 6 :
Continue green: make a final outer lace ring by chaining 6 between spokes and sl st, creating a webbed network (this creates the radial rings that mimic a spiderweb)
Round 7 :
Switch to black and secure: 1 sc around the outer dc ring and across the spoke intersections to create a stable foundation for the outer scallop (approx 48)
Info :
The spiderweb effect is built by making consistent arc lengths between spokes and securing intersections with small sc or sl st to hold the web open. Tension in green should be slightly looser than black to keep the web airy.
Round 8 :
Work outward in black: (2 sc, ch2, skip 2) around outer edge to prepare for scallops (approx 48)
Round 9 :
Scallop round in black: *(sc in next st, 5 dc in next ch2 sp, sc in next st, sl st)* repeat around creating 8 scallops total (approx 48)
Round 10 :
Border tidy in green: join green and work *ch3, picot, sl st into center of scallop*, repeat around for a bright green outline (approx 48)
Round 11 :
Finish in black: 1 sc between scallops to reinforce, FO leaving tail to weave in (approx 48)
Info :
If you want a more dramatic web, add a second concentric arc row in green before switching back to black. You can also make the outer scallop larger by increasing dc counts to 7 per scallop if you desire a larger coaster diameter.
— Coaster Spider Accent (Optional) :
Spider Body (Make 6) :
Using black gloss yarn or a small plastic spider embellishment. For crocheted spider: MR, 6 sc in MR, pull tight and FO leaving long tail for sewing. For legs, cut six lengths of black yarn approx 6cm long each, fold and attach around the body with a lark's head knot or stitch and shape to look like legs. Secure with glue or sew in place.
Info :
If using plastic spiders, position them and sew on through the holes or use a dab of clear fabric glue to secure. Place them off-center on each coaster for a realistic look like in the photo.
— Alternate Coaster Web Technique (for tighter lace) :
Round 1 :
Use green: MR, ch1, 12 sc in MR, sl st to join (12)
Round 2 :
Change to black, *ch5, sl st in next st* around forming outer loops, then return to green and connect loops with sl sts to create a tight geometric web (12 loops)
Info :
This alternate method yields a denser center and allows you to create spiderwebs with smaller diameter suitable for cocktail coasters or even ornaments. Choose the technique that matches the look you want.
— Finishing Runner Details & Decorative Grid :
Round 48 :
Final surface detail in green: join green to the runner edge at the mid-point and *ch5, sl st into the scallop center every 6th scallop* all around; this creates an outer decorative grid that echoes the coaster webs (72)
Round 49 :
Switch to black and single crochet in each st around to secure the grid and form the final top row (72)
Round 50 :
Optional: Add small green cluster bobbles in the center of each rosette row on the runner by working (tr3tog) clusters at the rosette centers and securing with sl st behind to accentuate the vertical floral line (9 clusters)
Info :
Check the runner length and symmetry. If you want a slightly longer runner, you can add extra sc rounds between Round 30 and Round 43 before adding scallops to lengthen the body. Ensure rosette spacing is adjusted proportionally.
— Blocking & Care :
Info :
Wet block both runner and coasters. Pin to desired shape, gently steam or spray with water, and allow to dry thoroughly. This will open lace and flatten scallops. Care: hand wash in cool water and reshape while wet. Avoid machine washing to preserve appliques and scallops.
Info :
Weave in all ends on the back. Use small, neat stitches to sew rosettes to runner center: go through both rosette base and runner rounds 31-33, knot securely and weave ends across several stitches before trimming.
— Optional Customizations :
Info :
Use a metallic or glitter yarn for the spider accent to make it sparkle on candlelit tables. For an autumn palette swap, replace neon green with bright orange or deep purple. To make a longer runner, increase initial foundation chain by multiples of 4 and balance increases at ends accordingly.
This spooky-chic runner and coaster set is a wonderful seasonal project that combines solid crochet foundations with delicate lace accents. The neon green rosettes and spiderweb motifs create a dramatic, handcrafted focal point for your table. You’ll enjoy the rhythmic rounds of single crochet and the fun of assembling the lacy motifs—plus blocking makes everything pop. 🎃🕷️🧶