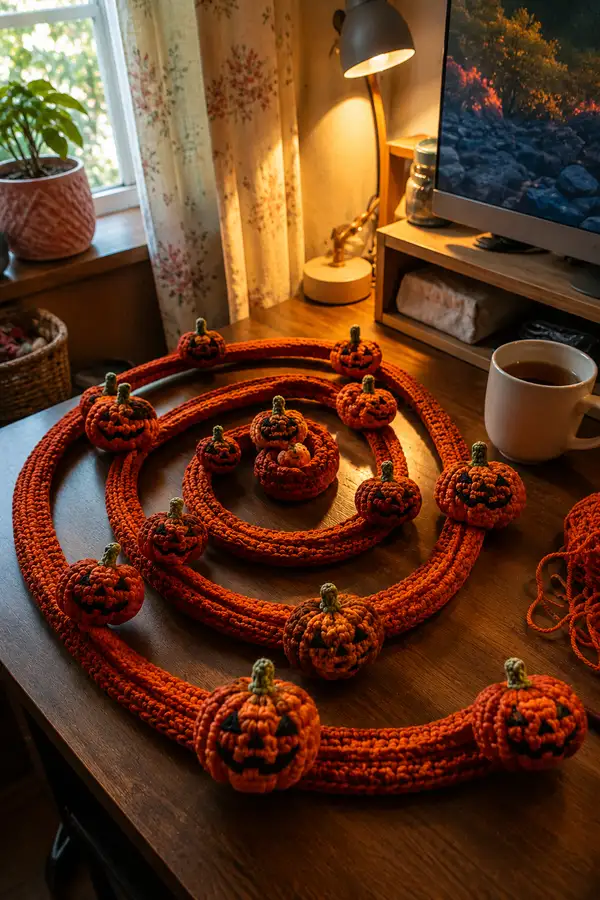
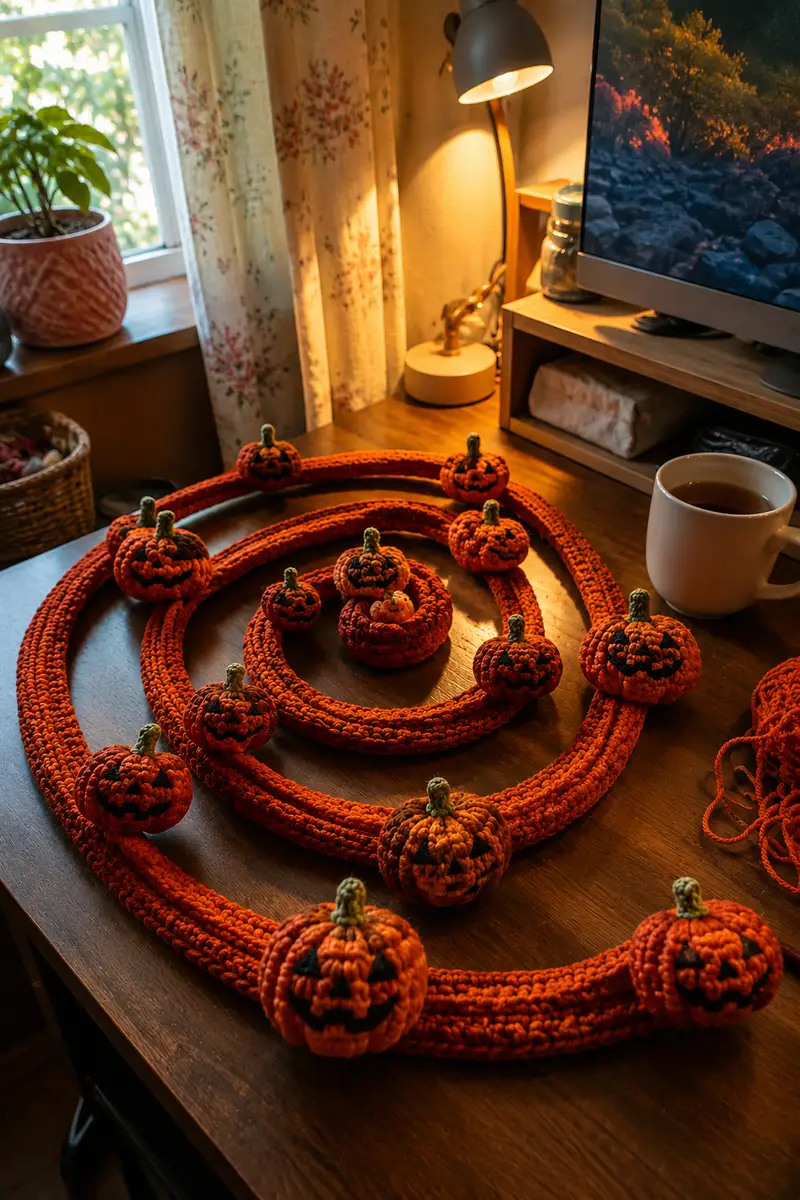
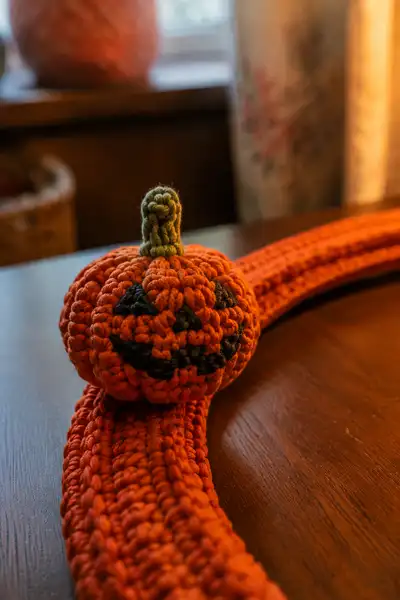
Create a cozy, spiral Halloween garland decorated with smiling crochet pumpkins. This pattern builds a thick crocheted rope in three spiral sizes and a set of pumpkins (large, medium, small and tiny) with carved jack-o-lantern faces and short stems. Designed to sit flat or drape around a table, mantel or wreath, the garland is textured with ribbed stitches and bold orange yarn with stitched black faces and green stems.
Progress Tracker
0% Complete
— Gauge & Notes :
Info :
Gauge is not critical, but for reference: 14 sc x 14 rows = 4 inches in worsted cotton using 3.5mm hook. Use a slightly smaller hook than recommended on the yarn label to create firm fabric that won't show stuffing. Work in continuous rounds for amigurumi-style pumpkins unless otherwise noted. This pattern uses single crochet and BLO ribbing to create pumpkin segments. Stitch counts provided are exact.
— Pumpkin (Large) :
Round 1 :
6 sc in magic ring (6)
Round 3 :
(1 sc, inc) x 6 (18)
Round 4 :
(2 sc, inc) x 6 (24)
Round 5 :
(3 sc, inc) x 6 (30)
Round 6 :
(4 sc, inc) x 6 (36)
Round 7 :
(5 sc, inc) x 6 (42)
Round 8 :
(6 sc, inc) x 6 (48)
Info :
By Round 8 your pumpkin should measure approximately 2.5-3 inches across when lightly blocked. From here you create height and ribbing. Place a stitch marker at the beginning of each round and another marker at the start of each rib segment if you plan to do vertical ribbing repeats.
Round 9-14 :
1 sc in each st (48) — 6 rounds to build height (48)
Info :
To create pumpkin ribs, on the next round we will work single crochet in BLO (back loops only). This compresses the front loops and forms visible vertical channels when worked in alternating rounds if desired. Mark the first stitch for the ribbing anchor.
Round 15 :
1 sc in each st BLO (48)
Round 16 :
1 sc in each st (48)
Info :
Alternate BLO rounds with even single crochet rounds for pronounced ribs. For larger ribs, you can work 2 rounds BLO then 2 rounds even; this pattern uses single BLO rounds for defined but soft ribs.
Round 17 :
1 sc in each st BLO (48)
Round 18 :
1 sc in each st (48)
Round 19 :
(6 sc, dec) x 6 (42)
Info :
Begin stuffing gradually. Use small amounts of fiberfill, pushing stuffing into each rib valley so the pumpkin holds the vertical segmentation. Stuff moderately firm but not rock-hard so the pumpkin will sit nicely on the rope.
Round 20 :
(5 sc, dec) x 6 (36)
Round 21 :
1 sc in each st BLO (36)
Round 22 :
(4 sc, dec) x 6 (30)
Round 23 :
(3 sc, dec) x 6 (24)
Round 24 :
(2 sc, dec) x 6 (18)
Info :
When you reach 18 sts begin to shape the top where the stem will attach. Reduce stuffing slightly so the top can be sewn closed around the stem base. Keep the pumpkin slightly flattened top-to-bottom for the classic jack-o-lantern shape.
Round 25 :
(1 sc, dec) x 6 (12)
Round 27 :
Fasten off leaving a long tail for sewing to rope. Use yarn needle to close the small opening by threading tail through front loops and pulling closed; weave tail inside and knot. Finish shaping with small amounts of stuffing pushed to desired shape.
— Pumpkin (Medium) :
Round 1 :
6 sc in magic ring (6)
Round 3 :
(1 sc, inc) x 6 (18)
Round 4 :
(2 sc, inc) x 6 (24)
Round 5 :
(3 sc, inc) x 6 (30)
Round 6-10 :
1 sc in each st (30)
Info :
For the medium pumpkin we will create slightly fewer ribs—work alternating BLO rounds at Rounds 11 and 13. Mark the start of each round to keep ribs aligned.
Round 11 :
1 sc in each st BLO (30)
Round 12 :
1 sc in each st (30)
Round 13 :
1 sc in each st BLO (30)
Round 14 :
(4 sc, dec) x 5 (25)
Round 15 :
(3 sc, dec) x 5 (20)
Info :
Start stuffing here; stuff a little firmer than for large pumpkins because of the smaller surface area. Shape ribs with your fingers to encourage vertical lines.
Round 16 :
(2 sc, dec) x 5 (15)
Round 17 :
(1 sc, dec) x 5 (10)
Round 19 :
Fasten off leaving long tail. Close opening with yarn needle and weave tail inside. Adjust stuffing before closing final hole.
— Pumpkin (Small) :
Round 1 :
6 sc in magic ring (6)
Round 3 :
(1 sc, inc) x 6 (18)
Round 4 :
(2 sc, inc) x 6 (24)
Round 5-8 :
1 sc in each st (24)
Round 9 :
1 sc in each st BLO (24)
Round 10 :
(3 sc, dec) x 6 (18)
Round 11 :
(2 sc, dec) x 6 (12)
Info :
Small pumpkins take very little stuffing; use small amounts to keep them rounded. If you prefer a flatter pumpkin, use slightly less stuffing and sew the base more snugly to the rope.
Round 12 :
(1 sc, dec) x 6 (6)
Round 13 :
Fasten off leaving tail; close and weave tail inside.
— Pumpkin (Tiny) :
Round 1 :
6 sc in magic ring (6)
Round 3 :
1 sc in each st (12)
Round 4 :
(1 sc, dec) x 4, sc (8)
Round 6 :
Fasten off leaving a tail; close and stuff barely—this is mostly a decorative bead-like pumpkin.
— Stem (Make one per pumpkin) :
Round 1 :
Magic ring, 6 sc in mr (6)
Round 3 :
1 sc in each st (12)
Round 4 :
1 sc in each st BLO (12)
Info :
For a thicker stem, use two rounds of BLO to compress the surface, then switch to FLO to round the edges. Stuff lightly and shape by twisting slightly as you sew to mimic a real stem.
Round 5 :
(2 sc, dec) x 3 (9)
Round 6 :
(1 sc, dec) x 3 (6)
Round 8 :
Fasten off leaving long tail for sewing. If you want a curled stem, before fastening off fold the stem and stitch a couple of times through the base to hold the curl.
— Embroidered Face :
Info :
Embroider faces before fully closing the top or bottom where you will attach the stem. Use black yarn and a tapestry needle. Eyes are typically triangles of 3 stitches wide and 2 rows tall; the mouth is worked as a curved chain of backstitches or surface slip-stitches. Refer to steps below for precise placement.
Step :
Large pumpkin: Eyes between rounds 10–12, centered on opposite sides, 6 stitches apart. With black yarn, insert needle in front loop where eye will start, bring yarn through and make 3 horizontal stitches forming a triangle. Repeat for the other eye. For mouth, create a smile between rounds 11–14 using small backstitches across 12–14 stitches depending on desired width.
Step :
Medium pumpkin: Eyes between rounds 8–10, 4–6 stitches apart. Mouth 8–10 stitches wide between rounds 9–12. Small and tiny pumpkins: use 2–3 stitch eyes and a 4–6 stitch smile; consider French knots for small round eye highlights if desired.
— Garland Rope (General Tube Construction) :
Info :
The visible garland is a thick tubular rope with pronounced ridges. I used a tubular oval method by starting with a foundation chain and working in rounds around it to create a continuous tube. You can also use Tunisian simple stitch for a dense rope or crochet a long i-cord. These instructions use a crocheted tube built on a foundation chain of 18 to 22 stitches to produce a rope approx. 1–2 in wide depending on yarn.
Rope Foundation :
Ch 20, sl st to join (do not twist). Place marker at join — this is the beginning of round 1.
Round 1 :
Working into the back bumps of the foundation chain: sc in each ch across (20), 3 sc in last ch to turn around, sc in remaining back bumps of foundation chain (20), 3 sc in first ch at starting end to finish the oval join — total approx (46)
Round 2 :
1 sc in each st around (46)
Round 3-6 :
1 sc in each st around (46)
Info :
At this point you have created a small oval tube. For pronounced ribs run alternating rounds of BLO single crochet (to create a ridge) every 3–4 rounds, or work 1 sc BLO every other round. The tube will grow in length by adding more rounds; keep even stitch count each round for consistent shape.
Round 7 :
1 sc in each st BLO (46)
Round 8-100 :
1 sc in each st (46) — continue until desired length. For sample spirals use lengths shown in assembly notes: small spiral 60 rounds, medium spiral 90 rounds, large spiral 120 rounds (these are guidelines; adjust based on your spacing)
Info :
If you prefer a thicker rope, increase the foundation chain to ch 26 and use 56–62 sts around. To create a flatter rope, work hdc in rounds instead of sc for a softer profile. For extra stability, thread flexible craft wire through the tube or use a narrow pipe insulation core inside the tube before closing the final rounds.
— Rope Variations (Short, Medium, Long Spirals) :
Short Spiral (Table Inner Ring) :
Make one rope to 60 rounds (including foundation rounds). After Round 60, fasten off and leave a 20" tail for sewing. This rope will coil into a small circle roughly 12–15" diameter depending on tightness of coil.
Medium Spiral (Middle Ring) :
Make one rope to 90 rounds (including foundation rounds). This rope will coil to a mid-size circle approx 20–24" diameter. Fasten off and leave long tail for attachment.
Large Spiral (Outer Ring) :
Make one rope to 120 rounds (including foundation rounds). This rope will form the outermost ring, approx 30–36" diameter. Fasten off and leave long tail for finishing.
Info :
Lengths above are approximate and depend on crochet tension and yarn. If you wish to hang the garland, make a single long rope rather than concentric rings and attach pumpkins spaced as desired.
— Attaching Pumpkins to Rope :
Info :
Decide spacing before you start attaching. For the layout shown, pumpkins are placed every 6–8 inches on the large rope, every 5–6 inches on the medium rope, and every 3–4 inches on the small rope. Use pins to mark placement and lightly press pumpkin into place to gauge spacing.
Step :
Thread long tail from pumpkin through center of rope (or around the rope if rope is too thick) and use a mattress or whip stitch to sew pumpkin base securely to rope. Sew through several rows of the rope and through the base of the pumpkin to create a stable attachment. For double security, sew a small X across the pumpkin base into the rope center.
Info :
Align ribs of the pumpkin perpendicular to the rope for a classic look. If pumpkins are tilted, adjust before finishing sewn stitches. Use extra back-and-forth stitching for heavy-use garlands.
— Finishing & Extra Details :
Info :
Weave in all ends, trim excess, and if desired steam-block the ropes gently with a cloth to relax any twist. Add small loops of yarn at both ends of the large rope to create hanging points. Optionally add a small bow or wooden bead between pumpkins for extra charm.
Step :
For a polished face, after embroidering the black facial features, you can add tiny highlights with a single French knot of white yarn or a small dab of fabric paint to mimic reflected light.
Info :
Keep stitches tight near attachment points. If you used wire inside your rope, protect the ends by folding them and wrapping with electrical or floral tape before inserting to avoid poking through yarn over time.
— Optional: Two-Tone Pumpkins :
Info :
To create a subtle two-tone effect, carry a second shade of orange inside the pumpkin while working the even rounds. Before Round 9 on larger pumpkins, change to Deep Rust and alternate one round Deep Rust and one round Pumpkin Orange for visual depth. Be sure to secure carried yarn at intervals so it cannot slip.
Step :
When changing colors, finish the stitch before the color change, pull new color through final yarn-over to begin next round, and weave the tails in inside the pumpkin to keep the exterior clean.
— Care Instructions :
Info :
Spot clean with a damp cloth and gentle soap. For fuller cleaning, hand wash in cool water and reshape while damp; lay flat to dry. Avoid machine washing if pumpkins are stitched onto a rope containing wire or rigid core.
This spiral pumpkin garland brings warm autumn vibes to any table or mantel and is a joy to make from start to finish. The chunky orange ropes paired with tiny carved smiles create a handmade centerpiece that sparks compliments and cozy feelings. Each pumpkin sewed in place adds personality and texture making this a perfect project for a relaxed fall afternoon. 🎃🧶 Happy crocheting—enjoy every stitch and the glow your garland brings to the season! 🍂✨