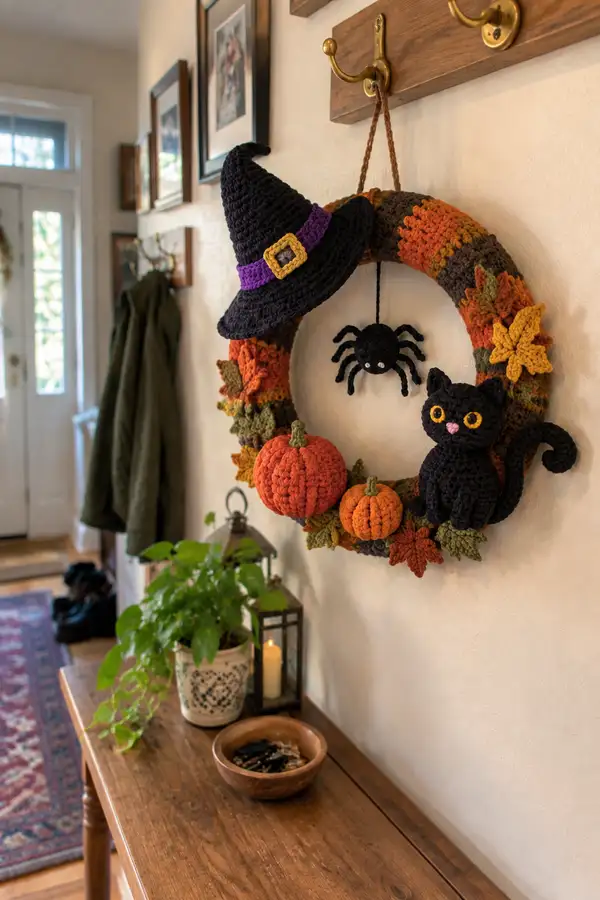
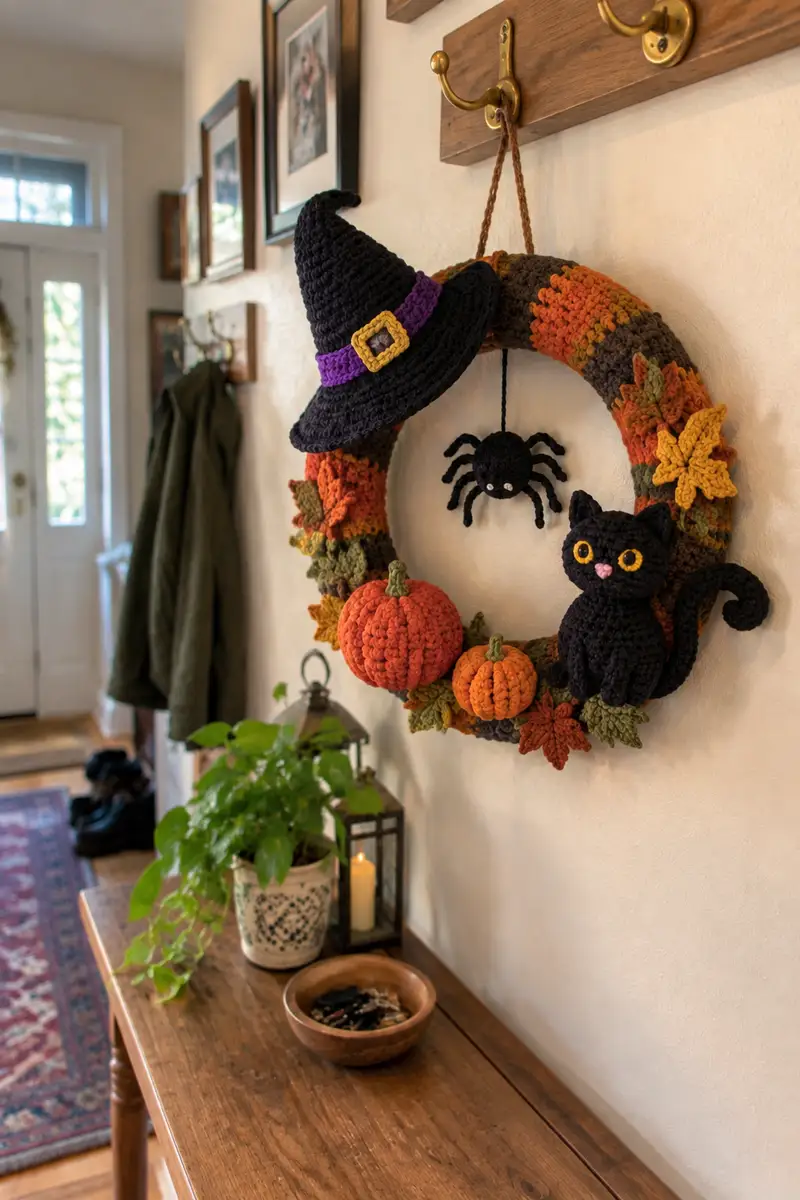
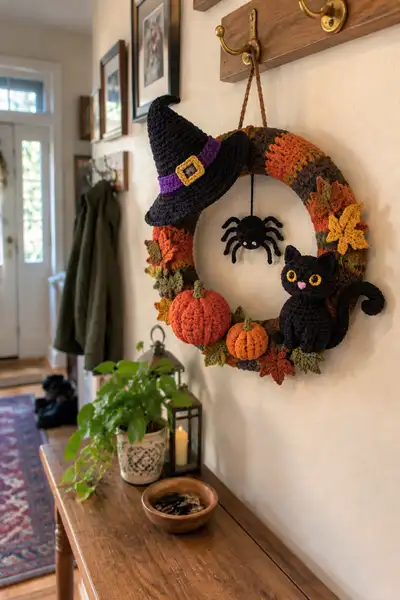
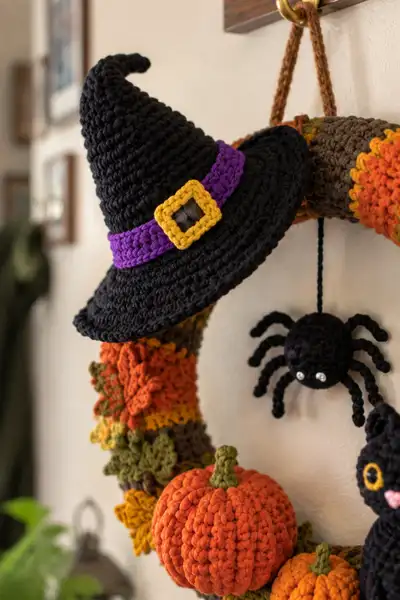
Create a charming Halloween wreath featuring a curled witch hat, a mischievous black cat, plump pumpkins, dangling spider and layered autumn leaves. This detailed pattern guides you step-by-step through each amigurumi element and the crocheted wreath cover so you can recreate the cozy, seasonal display seen in the photo.
Progress Tracker
0% Complete
— Wreath Cover (base tube to wrap foam) :
Info :
Work a long circular tube that will slip over a 12-14 inch foam wreath form. The tube is made in continuous rounds; join only when specified. Use bulky or two strands of worsted held together for the same chunky look as the photo. Target circumference 72 sts; adjust by adding or subtracting increases evenly.
Round 3 :
(1 sc, inc) x 6 (18)
Round 4 :
(2 sc, inc) x 6 (24)
Round 5 :
(3 sc, inc) x 6 (30)
Round 6 :
(4 sc, inc) x 6 (36)
Round 7 :
(5 sc, inc) x 6 (42)
Round 8 :
(6 sc, inc) x 6 (48)
Round 9 :
(7 sc, inc) x 6 (54)
Round 10 :
(8 sc, inc) x 6 (60)
Round 11 :
(9 sc, inc) x 6 (66)
Round 12 :
(10 sc, inc) x 6 (72)
Info :
Now you have the tube circumference. Work even rounds to build a wide tube long enough to slip over your wreath form. Change color every 4-6 rounds to create broad stripes of autumn tones; carry yarn inside if comfortable, or fasten off and join new color.
Round 13-16 :
1 sc in each st (72)
Info :
Change to variegated brown/olive color now for the next stripe. Work continuous rounds without joining to avoid visible seams. Place marker at round start.
Round 17-20 :
1 sc in each st (72)
Info :
Switch to rusty orange for a band. Make sure tube length will cover the foam circumference top to bottom; aim for 8-10 inches of height once folded around the form. If you need more length, continue even rounds until desired height.
Round 21-24 :
1 sc in each st (72)
Round 25-28 :
1 sc in each st (72)
Info :
To create subtle texture like the photo, alternate a BLO round every 8 rounds: 1 sc in each st BLO to create a ridge. Work one BLO round now if desired, then resume even rounds.
Round 29-36 :
1 sc in each st (72)
Round 37-40 :
1 sc in each st BLO (72)
Info :
When the tube is the right width to wrap your foam form, slip the tube over the ring. Where possible, slightly stretch and tuck ends together at the back. Seam edges with whip stitch or join with slip stitches and weave in ends so seam sits at back and will be covered by leaves.
— Leaves (Make 10-14 varied leaves) :
Info :
Leaves are worked flat in rounds or rows and sewn to the wreath. Use moss, olive, rust, and mustard colors. Make small, medium and large sizes. The following is a medium leaf; adjust size by adding length to chain and repeating increases.
Round 1 :
Ch 8. In 2nd ch from hook: 1 sc, 1 hdc, 2 dc, 1 hdc, 1 sc, sl st to last ch to mirror back into base (7 sts on top edge) Fasten off (mirror forms pointed leaf)
Info :
Alternatively work a 7-row leaf worked in rows: ch 8, sc across, then work decreases to create tip, then reverse for the other side. Block lightly while moist for crisp shape.
Variation Small Leaf :
Ch 6, 1 sc in 2nd ch, 1 hdc, 2 dc, 1 hdc, 1 sc, sl st to finish (smaller leaf)
Variation Large Leaf :
Ch 10, 1 sc in 2nd ch, 2 hdc, 4 dc, 2 hdc, 1 sc, sl st to finish (larger leaf)
Info :
Sew leaves randomly overlapping around wreath seam and base of pumpkins and cat to create layered foliage. Use a few leaves in each color to achieve the multicolored look.
— Pumpkin Small (Make 1 small and 1 medium) :
Info :
Pumpkins are worked in continuous rounds from bottom up, using front loop or surface slip stitch ribs later to create segments. The small pumpkin uses fewer rounds than the medium; both use same shaping but different final stuffing amounts.
Round 3 :
(1 sc, inc) x 6 (18)
Round 4 :
(2 sc, inc) x 6 (24)
Round 5 :
(3 sc, inc) x 6 (30)
Round 6-9 :
1 sc in each st (30)
Info :
Begin stuffing pumpkin moderately by round 8. Use extra stuffing for plump look; do not overstuff to avoid losing segment detailing later.
Round 10 :
(3 sc, dec) x 6 (24)
Round 11 :
(2 sc, dec) x 6 (18)
Round 12 :
(1 sc, dec) x 6 (12)
Info :
Fasten off leaving long tail for closing and for sewing onto wreath. Use yarn needle to close hole and create vertical segments: thread yarn through center and pull to make the top indent, then stitch from top to bottom across the pumpkin multiple times to create ribbing.
Stem :
Ch 5, sl st back along chain, stuff lightly and sew to top center of pumpkin. Alternatively, sc in mr for a tiny stem tube and sew in place.
Info :
For deeper ribs, use surface slip stitch or work FPdc around pumpkin in 8 evenly spaced rounds to create faux segments. Mark stitch positions evenly when sewing segments with yarn to maintain symmetry.
— Pumpkin Medium (Make 1 medium) :
Round 3 :
(1 sc, inc) x 6 (18)
Round 4 :
(2 sc, inc) x 6 (24)
Round 5 :
(3 sc, inc) x 6 (30)
Round 6 :
(4 sc, inc) x 6 (36)
Round 7-12 :
1 sc in each st (36)
Info :
Stuff pumpkin firmly by round 11 for rounded shape. When closing, leave long tail for sewing and creating vertical ribs as described for small pumpkin. Use slightly larger stem: sc in mr 4 and work 6 rounds to form thicker stem.
Round 13 :
(4 sc, dec) x 6 (30)
Round 14 :
(3 sc, dec) x 6 (24)
Round 15 :
(2 sc, dec) x 6 (18)
Round 16 :
(1 sc, dec) x 6 (12)
Info :
For the prominent vertical ridges: divide pumpkin into 8 equal sections. Using yarn and yarn needle, stitch from top to bottom across each section 2-3 times to deepen clefts. Block lightly if needed to set shape.
— Witch Hat :
Info :
Hat is worked in the round from tip down, then brim is increased, and a separate band and buckle are made. The hat pictured has a firm brim that holds shape; consider using a slightly thicker yarn for brim rounds or adding a hidden wire if you want a very stiff brim.
Round 3 :
(1 sc, inc) x 6 (18)
Round 4 :
(2 sc, inc) x 6 (24)
Round 5 :
(3 sc, inc) x 6 (30)
Round 6 :
(4 sc, inc) x 6 (36)
Round 7 :
(5 sc, inc) x 6 (42)
Round 8 :
(6 sc, inc) x 6 (48)
Round 9-16 :
1 sc in each st (48)
Info :
These rounds form the cone body. To make the tip curl, add a few extra increases on one side then skip a few stitches to bias the cone slightly. Alternatively, after the hat is finished, sew a few stitches on the tip and bend the stuffing to create curl.
Round 17 :
(6 sc, inc) x 6 (54)
Round 18 :
1 sc in each st (54)
Round 19 :
(7 sc, inc) x 6 (60)
Round 20-21 :
1 sc in each st (60)
Round 22 :
(7 sc, inc) x 6 (66)
Round 23-24 :
1 sc in each st (66)
Info :
Begin brim increases now. The brim is worked as a wide flat circle; increases will flatten outward. Work slowly and check flatness frequently to avoid ruffling or cupping.
Round 25 :
(8 sc, inc) x 6 (72)
Round 26 :
(9 sc, inc) x 6 (78)
Round 27 :
(10 sc, inc) x 6 (84)
Round 28 :
1 sc in each st (84)
Round 29 :
1 sc in each st BLO (84)
Info :
Work 2-3 more even rounds for brim thickness. If you want a rigid brim, slip a thin wire under the outermost rounds and stitch in place or make a separate stiffening circle with felt and glue inside the brim.
Round 30-32 :
1 sc in each st (84)
Band :
Ch enough to wrap around hat base (approx 20-24 ch depending on tension). Join with sl st and work 2-3 rounds of sc to create a thick band. Fasten off and sew to hat at base of cone.
Buckle :
With mustard yarn: ch 8, join to form loop. Round 1: 8 sc around loop (8). Round 2: (1 sc, inc) x4 (12). Fasten off, leave tail to sew buckle in place around band. Optionally, sew a small square of grey behind the buckle to simulate a metal hole.
Info :
To achieve the downward slant of the hat on the wreath, bend the brim slightly before sewing to the wreath, and lightly stuff the cone tip so it maintains the curled shape. Use a few stitches to anchor the hat to the wreath tube.
— Black Cat :
Info :
The cat is worked in separate parts: head, body, front legs (forming the sitting paws), back legs, tail and ears. Use black worsted yarn. Safety eyes are 10mm placed between rounds indicated. Stuff firmly but keep plush look.
— Head :
Round 3 :
(1 sc, inc) x 6 (18)
Round 4 :
(2 sc, inc) x 6 (24)
Round 5 :
(3 sc, inc) x 6 (30)
Round 6 :
(4 sc, inc) x 6 (36)
Round 7 :
(5 sc, inc) x 6 (42)
Round 8 :
(6 sc, inc) x 6 (48)
Round 9-12 :
1 sc in each st (48)
Info :
Place 10mm safety eyes between rounds 11-12 approximately 8-10 sts apart for the large expressive eyes seen in the photo. For embroidered eyes or smaller safety eyes, adjust placement accordingly.
Round 13-16 :
1 sc in each st (48)
Info :
Embed a small bit of stuffing behind each eye before fully stuffing the head for a rounded, ocular look. Mark nose and mouth placement now: center of face just below eyes by 4-5 rounds.
Round 17 :
(6 sc, dec) x 6 (42)
Round 18 :
(5 sc, dec) x 6 (36)
Round 19 :
(4 sc, dec) x 6 (30)
Info :
Begin stuffing head firmly, ensuring even distribution and smoothing lumps with your fingers. Add more stuffing as you approach the final rounds so the head keeps shape during decreases.
Round 20 :
(3 sc, dec) x 6 (24)
Round 21 :
(2 sc, dec) x 6 (18)
Round 22 :
(1 sc, dec) x 6 (12)
Info :
Fasten off leaving long tail for sewing head to body. Finish stuffing completely and close hole using yarn needle and invisible stitch.
— Ears (Make 2) :
Round 3 :
(1 sc, inc) x 6 (18)
Round 4 :
1 sc in each st (18)
Round 5 :
(1 sc, dec) x 6 (12)
Round 6 :
1 sc in each st (12)
Info :
Flatten ear and sew base to top of head at rounds 6-8, spacing ears about 14-16 sts apart depending on preference. Slightly curve ears forward when sewing for a natural look.
— Body :
Round 3 :
(1 sc, inc) x 6 (18)
Round 4 :
(2 sc, inc) x 6 (24)
Round 5 :
(3 sc, inc) x 6 (30)
Round 6 :
(4 sc, inc) x 6 (36)
Round 7-12 :
1 sc in each st (36)
Info :
Body will be slightly squat to allow a sitting posture. Stuff moderately starting at round 10, leaving neck area slightly less full for easier head attachment. Optionally switch to FLO or BLO for a subtle waist ridge.
Round 13 :
(4 sc, dec) x 6 (30)
Round 14 :
(3 sc, dec) x 6 (24)
Round 15-18 :
1 sc in each st (24)
Round 19 :
(2 sc, dec) x 6 (18)
Round 20 :
1 sc in each st (18)
Round 21 :
(1 sc, dec) x 6 (12)
Round 22 :
1 sc in each st (12)
Info :
Fasten off leaving long tail for sewing. Stuff body firmly but allow room for arm and leg attachments. Neck opening should be sized to match head base for neat join; sew with mattress stitch for invisible join.
— Front Legs / Paws (Make 2) :
Round 3-6 :
1 sc in each st (12)
Info :
These front legs form short rounded paws that sit on the wreath as the cat sits. Stuff paw tip firmly. Continue into lower arm with same yarn without stuffing too full so arms can be moved for positioning.
Round 7-12 :
1 sc in each st (12)
Round 13 :
(2 sc, dec) x 3 (9)
Round 14-18 :
1 sc in each st (9)
Info :
Make two matching front legs and sew them to the front of the body at rounds 8-10. Secure with several stitches through body and leg to prevent flopping. Position paws slightly forward as if resting on wreath rim.
— Back Legs (Make 2) :
Round 3 :
(1 sc, inc) x 6 (18)
Round 4-8 :
1 sc in each st (18)
Info :
The back legs are fuller and form part of the seated silhouette. Stuff foot portion firmly by round 6. Flatten slightly at ankle and sew to body sides so cat sits upright against wreath.
Round 9 :
(1 sc, dec) x 6 (12)
Round 10-14 :
1 sc in each st (12)
Info :
Fasten off leaving long tail. Sew both back legs to lower sides of body at rounds 2-4 on the body to create the tucked sitting position. Slightly angle the legs outward for stability on wreath edge.
— Tail :
Round 2-6 :
1 sc in each st (6)
Info :
To create the spiral curl seen in the photo, crochet a long narrow tube (approx 20-26 rounds) then lightly stuff. Sew thin wire or pipe cleaner inside if you want a poseable tail. Sew tail to back of body and shape curl around side of wreath.
Round 7-20 :
1 sc in each st (6)
Round 21 :
Fasten off leaving long tail to sew. Insert thin wire if desired and shape into curly loop before final stitching to secure placement.
— Cat Eyes & Nose :
Info :
Eyes in photo are bright yellow rings with black pupils. You can use 10mm safety eyes or make appliques: make small yellow circles (ch 4, join, 6 sc in ring) and sew black seed bead or embroidered pupil. Sew eyes into place covering the safety eye if used, or embroider around safety eye to mimic rings.
Nose :
With pink yarn: embroider a small inverted triangle under the eyes. Secure ends and weave inside head.
Info :
Use small stitches and short yarn tails to avoid lumps. For a child-safe version, embroider eyes fully and avoid use of small plastic safety eyes.
— Spider :
Info :
Spider body is small and suspended from hat brim. Create a small round body and 8 pipe-cleaner or crocheted legs. For the soft look, use 3.5mm hook and black worsted yarn. Use 6mm eyes or embroider white and black dots for safe version.
Round 3 :
(1 sc, inc) x 6 (18)
Round 4-6 :
1 sc in each st (18)
Round 7 :
(1 sc, dec) x 6 (12)
Info :
Fasten off leaving long tail for hanging cord top. Stuff lightly. For a hanging cord create a chain of desired length and attach securely at top of spider with hidden stitches under slit and glue if needed.
Legs :
Ch 8, sl st in 2nd ch from hook and each ch back to start to create a short curled leg. Make 8 legs and sew evenly spaced to body sides. Alternatively use pipe cleaners wrapped in yarn for poseable legs.
Info :
Sew a hanging cord (chain 30-40) to hat brim and slip the spider on so it dangles in the wreath center as shown.
— Hat Band and Buckle Detail :
Band :
Ch 20 (or measure around hat base), join with sl st and work 2 rounds of sc to make thick band. Sew in position at base of cone. Use purple yarn for band as in photo.
Buckle (small square) :
Ch 6, join to round, work 6 sc. Round 2: (1 sc, inc) x 3 (9). Fasten off leaving tail to attach over band. Use mustard yarn. Sew a small square of dark grey behind for the buckle hole if desired.
Info :
Place buckle on side of hat and sew securely; a few glue dots can help hold it while sewing to wreath.
— Additional Small Details :
Tip :
Make tiny curly vines or tendrils by chaining and slip-stitching back along chain for extra decoration near pumpkins. Create small acorn tops with brown yarn and 6 sc in mr then a few rounds with fewer stitches to shape cap.
— Assembly Instructions :
Info :
Pin pieces to the wreath to mirror the photo composition: hat perched on upper-left, cat sitting on lower-right edge, two pumpkins clustered at bottom-left, leaves layered around seam and clusters. Use sturdy thread to sew through wreath tube and each amigurumi base so pieces stay secure.
You've just completed a charming seasonal wreath full of personality — from the crooked witch hat to the playful black cat and ribbed pumpkins. Every stitched leaf and embroidered eye adds character and warmth to your home decor. Display it proudly and enjoy the compliments that follow — this piece is a true handmade treasure! 🧶🎃🖤