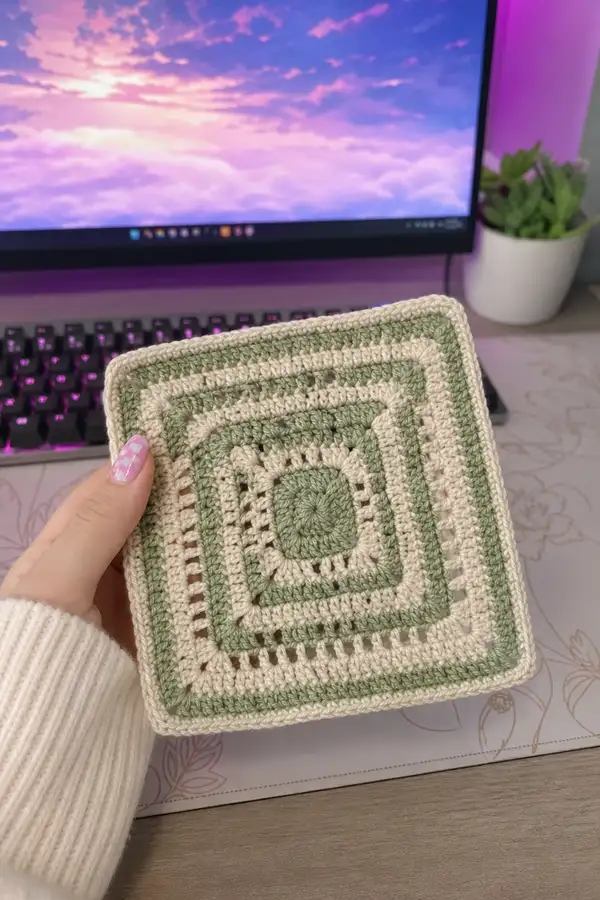
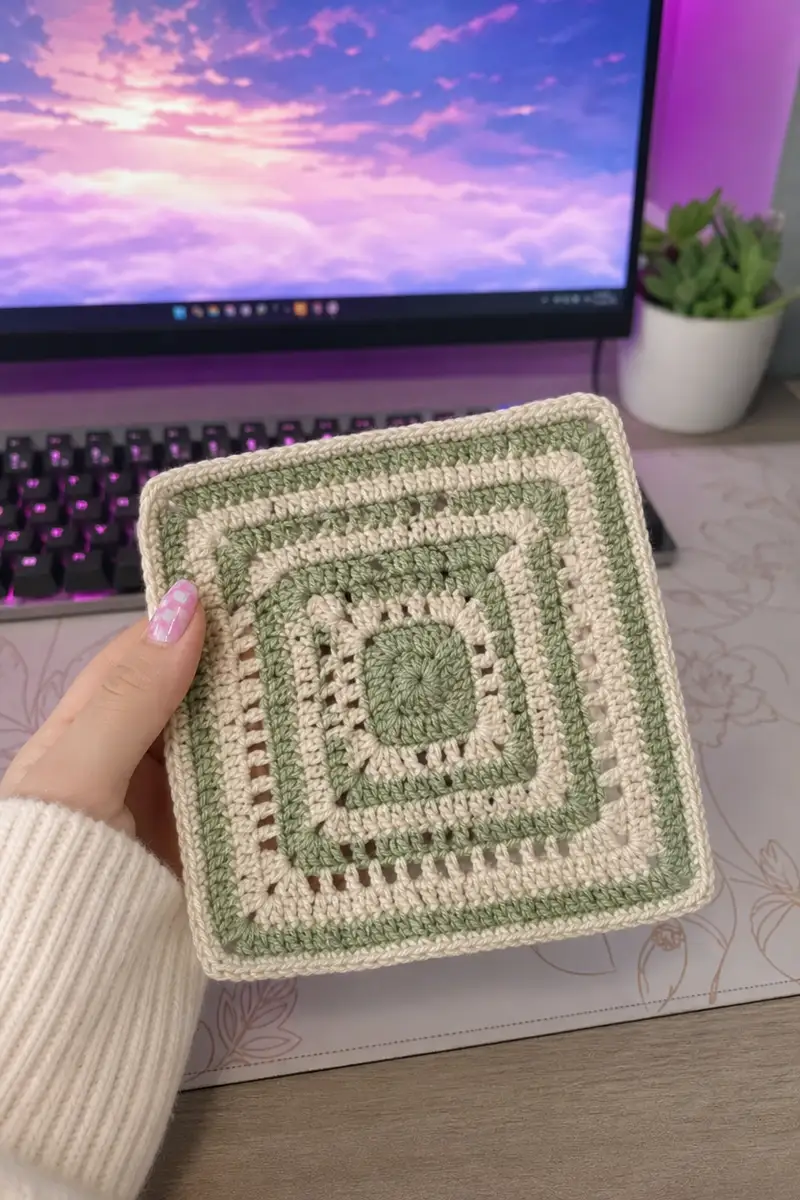
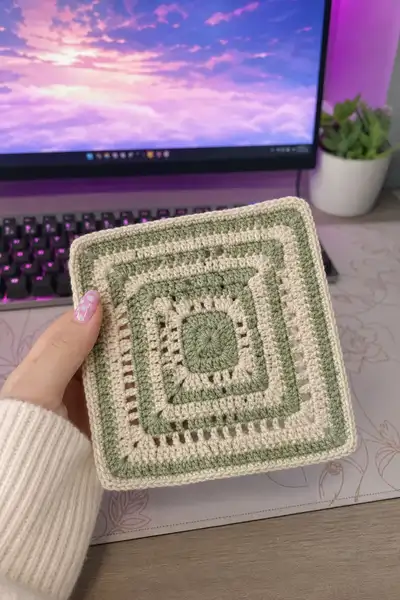
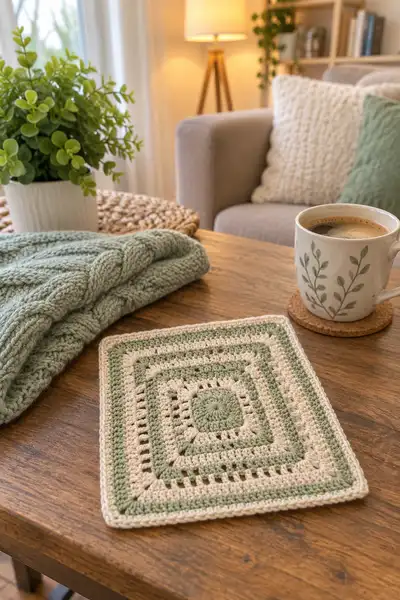
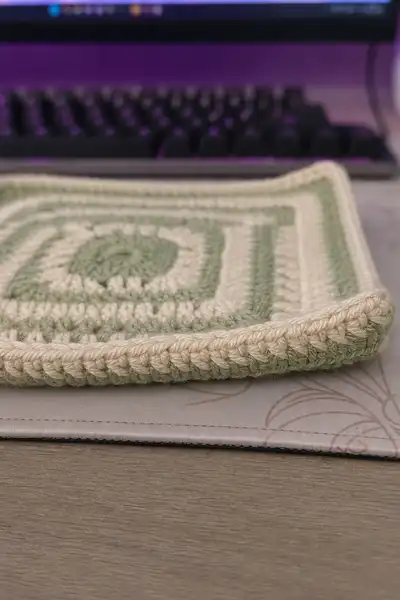
A calm, modern square granny motif featuring alternating sage green and soft cream stripes. The design starts with a small circular center that carefully squared-off into crisp concentric rounds with airy chain spaces and textured ridges. Finished with a neat tubular border that creates a slightly padded, quilt-like panel ideal for a bedspread or cushion set. Perfect for making coordinated squares to join into a full bedspread or using as single decorative panels.
Progress Tracker
0% Complete
— Square Granny Motif :
Round 1 :
With sage green and 4.0 mm hook, make a magic ring. Ch2 (counts as first dc), work 7 dc into ring; pull ring tight. Join with sl st to top of ch2. (8)
Round 2 :
Ch2, inc in same st (work 2 dc in same stitch), *1 dc in next st, 2 dc in next st* around. Join with sl st to top of ch2. (16)
Round 3 :
Ch2, (1 dc in next st, inc) x8 around. Join with sl st to top of ch2. (24)
Round 4 :
Ch2, (2 dc, inc) x8 around. Join with sl st to top of ch2. (32)
Round 5 :
Ch2, (3 dc, inc) x8 around. Join with sl st to top of ch2. (40)
Info :
Keep tension even and use a stitch marker in the joining sl st to mark round starts for these tight increase rounds. The center will still be round at this stage; later rounds will square it off.
Round 6 :
Ch2, (4 dc, inc) x8 around. Join. (48)
Round 7 :
Ch2, (5 dc, inc) x8 around. Join. (56)
Round 8 :
Ch2, (6 dc, inc) x8 around. Join. (64)
Info :
At the end of Round 8 we have 64 sts which divides evenly into four sides of 16 sts each. We will now begin converting the round into a square by creating corner clusters at four equidistant points. From now on we will work 3-dc corner clusters separated by side stitches.
Round 9 :
Change to cream. Ch3 (counts as dc here and throughout), *dc in next 14 sts, (3 dc, ch2, 3 dc) in next st (corner made into the same position to form a cluster)*. Repeat * to * 3 more times to make four corners. Join with sl st to top of ch3. (80 - corner clusters each add 6 dc replacing the side stitches)
Round 10 :
Ch3, dc in each dc across each side and work (3 dc, ch2, 3 dc) in each corner ch-2 sp. Join. (80)
Round 11 :
Change to sage. Ch3, dc in each dc across side sts, (3 dc, ch2, 3 dc) in corner ch-2 sps. Join. (80)
Info :
Rounds 10-11 form two tidy stripes - continue color changes every 2 rounds to mirror the squares in the photo. Keep joins tidy by matching your beginning ch to the stitch height (use ch2 if you prefer the less visible join).
Round 12 :
Change to cream. Ch3, dc in each dc across; corners remain (3 dc, ch2, 3 dc). Join. (80)
Round 13 :
Change to sage. Ch3, dc in each dc across sides, (3 dc, ch2, 3 dc) in corners. Join. (80)
Round 14 :
Change to cream. Ch3, work 2 dc in every 5th st along each side to begin slight side expansion: along each side (work 3 dc in next st, then dc in next 3 sts) so the side gain is subtle. Maintain (3 dc, ch2, 3 dc) in corners. Join. (96)
Info :
This round introduces subtle increases on the sides to allow a squarer shape to expand without distorting corners. The exact stitch placements across the side are flexible; target even spacing so each side length grows uniformly.
Round 15 :
Ch3, dc in each st around, working into corners as (3 dc, ch2, 3 dc). Join. (96)
Round 16 :
Change to sage. Ch3, dc in each st around, corners as usual. Join. (96)
Round 17 :
Change to cream. Ch3, along each side: *dc in next 6 sts, inc (2 dc) in next st* repeat to distribute 4 increases per side evenly; corners remain (3 dc, ch2, 3 dc). Join. (128)
Info :
When spreading increases across a side, count stitches on one side (between corners) to space increases evenly. Use stitch markers at side-start and side-end to help. After this round your square will be noticeably larger.
Round 18 :
Ch3, dc in each st around, corners (3 dc, ch2, 3 dc). Join. (128)
Round 19 :
Change to sage. Ch3, dc in each st around. Join. (128)
Round 20 :
Change to cream. Ch3, dc in each st around. Join. (128)
Round 21 :
Ch3, *dc in next 3 sts, sk next st, dc in next 3 sts* across each side to create a subtle openwork rhythm; corners remain (3 dc, ch2, 3 dc). Join. (128)
Info :
This openwork row is visible in the photographed panels as a narrow ladder/slot row. If you prefer solid fabric, substitute dc in every stitch instead of skipping to keep density.
Round 22 :
Change to sage. Ch3, dc in each st around; corners (3 dc, ch2, 3 dc). Join. (128)
Round 23 :
Change to cream. Ch3, dc in each st around. Join. (128)
Round 24 :
Ch3, dc in each st around. Join. (128)
Round 25 :
Change to sage. Ch3, work 1 dc in next 2 sts, inc (2 dc) in the next st across each side to gradually expand width; corners remain (3 dc, ch2, 3 dc). (Add 8 sts total.) Join. (136)
Info :
From rounds 14 onward you can repeat a two-round color stripe pattern (2 rounds per color) to replicate the look in the photos. Adjust increases so each side grows proportionally — aim to add the same number on each round to keep corners square.
Round 26 :
Ch3, dc in each st around. Join. (136)
Round 27 :
Change to cream. Ch3, dc in each st around. Join. (136)
Round 28 :
Change to sage. Ch3, dc in each st around. Join. (136)
Info :
At this point your panel should be square and measure approximately the size of the photographed sample (roughly 12-14 cm / 4.5-5.5 in across with the yarn and hook specified). If you are making many panels, keep a consistent round number per panel to ensure squares match when joining.
Round 29 :
Change to cream. Ch3, dc in each st around. Join. (136)
Round 30 :
Ch3, dc in each st around. Join. (136)
Round 31 :
Change to sage. Ch2, hdc in each st around for one round to slightly reduce the height and add texture. Join. (136)
Round 32 :
Change to cream. Ch1, sc in each st around working evenly; this starts the firm tubular edge visible in the photos. Join with sl st to first sc. (136)
Info :
The sc round forms a neat edge and visually defines the panel. If you prefer a thicker edge, work an additional sc round in same color or alternate for a two-color rim.
Round 33 :
Change to sage. Ch1, sc in BLO in each st around (work in back loop only) to create a raised ridge. Join with sl st. (136)
Round 34 :
Change to cream. Ch1, sc in each st around, slipping into first sc. Fasten off and weave ends neatly. (136)
Info :
If you want the slightly padded look in the photos, make two identical panels (front/back) and join them together using sc through both layers, leaving a small opening for light stuffing or a thin layer of batting before final closure.
— Optional: Second Layer (Make 1 matching back panel) :
Round 1 :
Repeat Rounds 1-34 exactly as for the front panel in the same color order to produce a matching back panel. Fasten off leaving a 40 cm/16 in tail for joining. (136)
Info :
Work the back panel identical to the front to ensure alignment when joining. Keep track of the color changes so stripes match across panels. If you prefer a reversible panel, change the final two rounds so the border mirrors the front rather than using BLO.
— Join Panels & Create Padded Panel (optional) :
Round 1 :
Place front and back panels with right sides out and align stitches. With cream yarn and 4.0 mm hook, join with sl st at any corner sc, ch1. Work sc evenly through both layers around the entire perimeter, working 2 sc in corner sts to turn corners smoothly. (Work total approx 136 sc + corners.)
Round 2 :
Continue sc through both layers for two rounds to create a firm seam. Stuff lightly through a small opening if you want a lightly padded effect (use a thin layer of polyester batting or a few grams of stuffing). For a completely flat joined panel, do not add stuffing. Close gap with sc and fasten off. Weave ends.
Info :
Stuff extremely lightly — the photographed panels appear gently padded, not fully stuffed. Use thin loft batting or a light sprinkling of fiberfill to avoid bulging. Keep edges neat and even by spacing sc evenly and using stitch markers at corners and mid-sides.
— Edging & Raised Rim Detail :
Round 1 :
With cream, pick up at any sc on the edge. Ch1, sc in each st around working 2 sc in corner spaces to maintain square shape. Join. (approx 136)
Round 2 :
Change to sage. Ch1, sc in BLO in each st around to create a defined ridge; join. (approx 136)
Round 3 :
Change to cream. Ch1, sc in each st around working 2 sc in corner sts for a rounded corner finish; join. Fasten off and weave ends. (approx 136)
Info :
The BLO round creates the neat raised ridge visible on the panel side. If you want a deeper ridge, repeat BLO round once more. Blocking after the final rounds will help flatten and square corners.
— Join-As-You-Go Method for Bedspread Assembly (joining multiple panels) :
Round 1 :
When making a grid of panels, work the final border on a new panel up to the sc round before joining. On the last sc round of a new panel, instead of completing the round with sl st, join to a finished adjacent panel by working sc into both the edge sts of the finished panel and the working panel simultaneously. Work corners with (sc, ch1, sc) into corner spaces to keep flexibility. Continue around adjacent sides to join each neighbor.
Round 2 :
For joining two rows, align panels with seams facing each other and use sc through both layers every 3-4 sts if you prefer less visible joins. Alternatively use a mattress stitch with a yarn needle for an invisible seam - whip stitch the edges together through the back loops only for a neat finish.
Info :
Joining-as-you-go keeps panels square and avoids a bulky join. Always block each panel before joining so edges match perfectly. Use a contrasting stitch marker to find the exact corresponding stitches between panels while joining.
— Full Bedspread Layout Guidance :
Round 1 :
Plan your layout. Measure finished panel size and calculate number of panels across width and length based on desired bedspread dimensions (e.g., 10 panels x 12 panels for a small double; adjust for mattress size). Remember borders and seam widths when calculating totals.
Round 2 :
Work panels in batches of 6-12 to maintain consistent tension and color change rhythm. Keep a tag or notepad marking the round count and color sequence for each batch so all panels match exactly.
Round 3 :
When most panels are joined into larger strips, join strips together using the join-as-you-go method or mattress stitch to create the full spread. Add final outer border rounds uniformly around the entire spread to create a cohesive edge.
Info :
A large spread will gain weight and stretch; add a generous border of at least 6 rounds to create a tidy frame. Consider an extra heavy border for beds to prevent fraying and keep edges straight after washing.
— Final Outer Border (worked on the whole joined bedspread) :
Round 1 :
With cream, work one round of dc evenly around the entire joined piece, working (2 dc, ch2, 2 dc) in each corner to anchor the border. This evens any small differences in edge length and creates a base for the final rounds.
Round 2 :
Change to sage. Ch1, sc in each st around working 2 sc in corner ch-2 sps. Join.
Round 3 :
Change to cream. Ch1, sc in BLO around for a raised inner ridge. Join and fasten off. Weave ends and block entire spread flat.
Info :
For a bedspread you will likely want at least 4-6 rounds of border after joining all panels — adapt the width to taste. A wider border looks finished and helps weight and drape on a bed.
— Blocking, Finishing & Care :
Round 1 :
Wet-block each panel to the exact square dimensions using pins on a blocking mat; allow to dry fully before joining. This ensures crisp corners and consistent sizing.
Round 2 :
Weave in all ends using a yarn needle and the matching color. Trim ends closely after weaving. If you carried color across many rounds, secure carried yarn ends every few inches to avoid slippage.
Info :
Machine wash gently only if yarn label permits; I recommend handwashing and laying flat to dry to preserve shape and color. Use a colorfast yarn to prevent bleed between the sage and cream stripes.
This square granny bedspread pattern combines classic granny construction with modern color blocking for a calming, cozy finish. Each panel builds from a small circular center and expands into a clean squared motif with alternating sage and cream stripes. The optional padded panel and raised rim add a quilt-like, handcrafted depth that's both tactile and elegant. Whether you make a single decorative cushion, a set of panels for a throw, or an entire bedspread, you'll enjoy the rhythmic stitching and the beautiful finished geometry. 🧶✨ Make a set to treasure or gift to someone special!