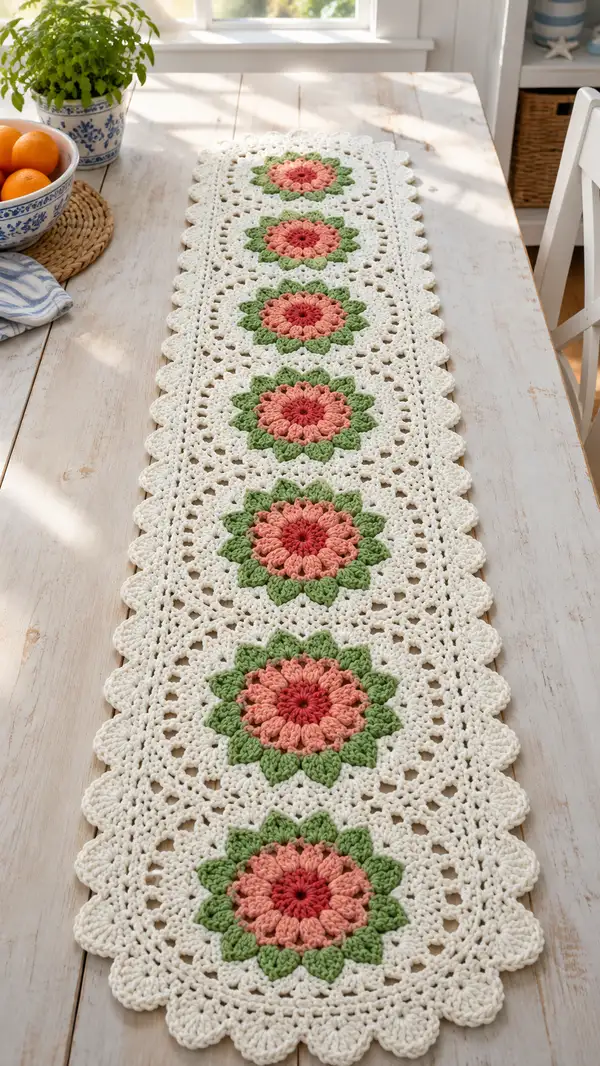
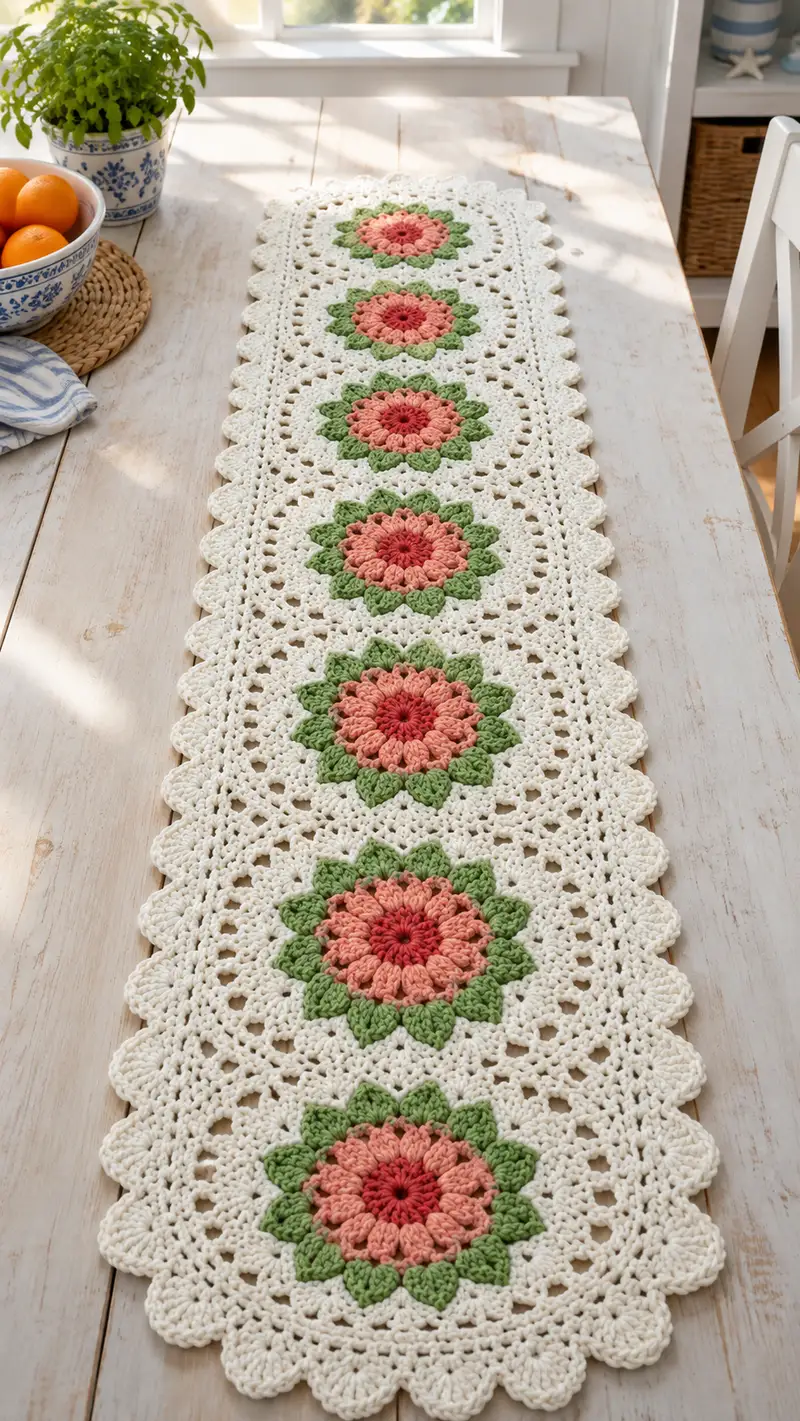
A charming Sunburst Floral Table Runner worked in soft cream with coral-pink flower centers and fresh green petals. This long, elegant runner features seven circular floral motifs joined by lacy crochet panels and finished with a scalloped edge. The textured puff petals and openwork background create a vintage-inspired statement perfect for brightening a dining table or sideboard. Detailed step-by-step instructions and tips make this pattern approachable for crocheters with intermediate skills.
Progress Tracker
0% Complete
— Stitch Notes & Gauge :
Info :
This table runner is worked using worsted weight yarn and a 4.0mm hook. Puff stitch used = yarn over, insert hook, yarn over, pull up a loop (repeat 3-4 times based on puff size), yarn over and draw through all loops on hook, ch1 to secure. Gauge is approximate: one completed floral motif (before joining) = roughly 12.5cm/5in across when worked with suggested yarn and hook. Adjust hook size if your motifs are noticeably larger or smaller. Block motifs to exact size before joining.
— Floral Motif (Make 7 identical motifs) :
Round 1 :
With Coral Center A, 8 dc in magic ring (8)
Round 2 :
(1 dc, inc) x 8 (16)
Round 3 :
(2 dc, inc) x 8 (24)
Round 4 :
(3 dc, inc) x 8 (32)
Info :
These initial rounds form a neat circular center. Keep tension even; place a stitch marker at the start of each round to help count. Do not join rounds; work in continuous rounds if you prefer, but for defined round separations working joined rounds keeps clusters tidy.
Round 5 :
Switch to Coral Mid (lighter coral). *Ch2, skip 1 st, puff in next st, ch1* around to create eight puff pockets, finishing with sl st into first puff top to join (8 puff clusters)
Round 6 :
In each puff cluster work: sl st into puff top, ch3 (counts as dc), 2 dc in same puff top, ch1, 3 dc in next puff top — creating 8 petal sectors separated by ch1 (repeat 8) (structure = 8 petal sectors)
Info :
Puff clusters are the textured petals. Make puffs with consistent loops (3-4 loops pulled up before completion) so petals sit evenly. If you prefer a fuller petal, use 4 loop puffs; for flatter petals, use 3 loops.
Round 7 :
Switch to Coral Edge (slightly darker accent). Work behind the petals: *ch1, (puff in the back ridge of the next petal), ch1, sl st into next ch1 space* around to add depth to each petal (8 back puffs)
Round 8 :
Change to Green. Around the petal row work leaf-shaped clusters: *ch2, (3 dc, ch2, 3 dc) all in next ch1 space to form a leaf/corner petal, sl st into next puff base* x8 (8 leaves)
Info :
When switching to green for the leaf round, join with a standing dc into a visible space behind a petal so leaves sit neatly. Keep leaf clusters consistent: 3 dc, ch2, 3 dc per leaf gives generous leaf shape that will later sit at each corner of a square conversion.
Round 9 :
Change to Cream (background). Work round to begin squaring off: sl st between each leaf, *ch3, (2 dc, ch2, 2 dc) in space between leaves to form rounded corner groups*, sl st to join — you will have 8 corner groups (this sets up for the square transitions)
Round 10 :
1 sc in each st and each ch-space around to smooth the round into a consistent base for square rounds. Work evenly so there are 64 counting positions across (approximate grid spacing for next round)
Info :
Round 10 evens out stitch spacing. If your count is not exactly 64, adjust by adding single crochet increases evenly across one or two sectors to reach a multiple that works well for the square conversion (multiple of 8 is ideal).
Round 11 :
Begin square shaping in Cream: *(sc in next 7 sts, ch3, skip 2 sts)* x 8 — this creates 8 chain-socket spaces which will form the corners and give a square impression (8 ch-3 corner sockets)
Round 12 :
In each corner socket work: (2 dc, ch2, 2 dc). In side sockets and between: work 1 dc in each sc across to create a rough 8-sided square (this round sets corner boosts)
Info :
Check your motif after round 12 and gently block to force a squarer edge; pin it out if needed. The ch-3 corners will become stronger corner ch-2 or ch-3 spaces in following rounds to allow easy joining.
Round 13 :
Work 1 sc in each dc and 3 sc in each corner ch-2/3 space (this will give solidity to the corners). Aim for a uniform edge that measures approximately 12.5cm across the center of motif when measured pinned flat.
Round 14 :
Work 1 dc in each sc around, and in each corner work (2 dc, ch2, 2 dc) to maintain corner expansion. This will bring the motif to a size comfortable for joining into the runner panel.
Info :
If you prefer a slightly larger motif, repeat round 14 once more, working 1 dc in each stitch and expanding corners with (2 dc, ch2, 2 dc). For the pictured runner the motif size after round 14 is ideal to line up with the lacy connector rounds.
Round 15 :
Work 1 sc in each st around in Cream. Finish with sl st to join and fasten off leaving a long tail for weaving (the tail is helpful if you choose to stitch motifs together rather than slip join).
Round 16 :
Block motif flat: dampen and pin to square/round shape on blocking mat, ensuring petals and leaf points are fanned evenly. Allow to dry before joining. Make 7 identical motifs following Rounds 1-15 exactly.
Info :
Work 7 motifs total. Blocking each motif is essential; it evens stitches and ensures uniform motif size which greatly simplifies joining into a straight long runner.
— Joining Motifs into Runner Panel :
Round 17 :
Lay out motifs in a single vertical line, oriented so leaves point outward along the long axis. With Cream and a 4.0mm hook, join motifs pairwise: place motif A and B right sides facing and use joining technique of your choice (whip stitch or slip-stitch join through back loops only) along the side where the two motifs touch through the outermost sc rounds. Join with 1 sl st between stitch positions creating a flat seam.
Info :
I recommend slip-stitch joining through the second-last round's back loops to make the seam neat and nearly invisible. Use a contrasting join for decorative look or matching Cream for invisible joins. Pin motifs together before joining to ensure even alignment.
Round 18 :
After joining base pairs, continue joining each motif in the same manner to make a long chain of 7 motifs. Work seam firmly but not overly tight; the panel should lie flat without puckering.
Round 19 :
With Cream, work a round of sc around the entire assembled motif chain, working 3 sc in each corner space where motifs meet left/right and 1 sc in each side stitch. In seams between motifs, work 1 sc into the seam space every 3 stitches to even out the join. This creates a unified fabric around the motif joins.
Round 20 :
Ch 3, *skip 2 sc, (3 dc cluster) in next sc, ch 2, skip 2 sc* along each side between motifs; at motif corners work (1 dc, ch2, 1 dc) into corner spaces. Repeat along entire long edges to create openwork columns between motifs.
Info :
This openwork columning between motifs reproduces the lacy strips visible in the photo. Keep clusters evenly spaced. If joining leaves small gaps, add an extra sc beneath clusters to stabilize the columns.
Round 21 :
Work 1 sc in each top stitch and in each ch-space around the panel to even out the texture (this readies the piece for extended border rounds). Place a stitch marker at the middle of each short end for later scallop alignment.
Round 22 :
Work one more decorative open round: *ch3, skip 2, sc in next, ch3, sc in next* across long sides between the floral sockets. On short ends create extra chain arches to create symmetry for scallop attachment (create 5 evenly spaced arches across each short end).
Info :
At this stage, block the assembled panel once more. Check alignment of motifs and arches at the ends — any irregularities are easiest corrected before working the heavier border rounds.
— Extended Panel Rounds (strengthen ground and prepare for scalloped border) :
Round 23 :
Switch to a firmer structure: work 1 hdc in each stitch and 1 hdc in each chain space around the entire panel. This provides a more solid fabric that supports the scalloped edge.
Round 24 :
Work 1 sc in each hdc around. Ensure corners at short ends have additional 3 sc clusters to form rounded short-end edges.
Round 25 :
Work a decorative filet-like row: *(ch5, sl st into 2nd ch from hook to create a little picot arch), sc in next 3 sts* across long sides. Repeat symmetrical arches across short ends, aligning with motif centers.
Info :
The filet/picot row gives a delicate openwork pattern that echoes the runner in the photo. Keep picot loops consistent in tension so stitches stack neatly for scallops later.
Round 26 :
Work 2 dc in each sc and (3 dc, ch2, 3 dc) in each corner to begin building scallop foundation (this increases width and creates raised sections for scallops).
Round 27 :
Work 1 sc in each dc across, and 5 sc in each corner ch-2 space. This evens the row and anchors the panel for the scalloped shaping.
Round 28 :
Work a decorative ridge row in BLO: 1 sc BLO in each st around (this slight ridge helps scallops sit proud and neat).
Info :
Using BLO on this round gives a subtle raised ridge that frames the scallops nicely. Keep stitch counts consistent; if you are off by one or two, adjust at the ends to maintain symmetry.
Round 29 :
Start scallop building: *ch1, 7 dc in next st, skip 3, sl st in next st* repeat across long edges aligning each scallop peak centrally above a motif seam or openwork arch. Work equivalent scallops evenly across short ends (approx 5 scallops per short end depending on motif spacing).
Round 30 :
Turn scallops into firm shells: in each scallop peak work sl st into base, ch2, (3 dc, ch2, 3 dc) into peak to give fuller shell; sl st to anchor between scallops.
Info :
Scallop counts and spacing are visual — adjust the number of dc in each scallop to match the size of your motif panel and preserve an even edge. Blocking after every two scallop rounds helps keep shells neat.
Round 31 :
Work 1 sc around each scallop base and 2 sc between scallops to stabilize. On short ends make sure scallops align with motif centers: if necessary add an extra sc between scallops to spread evenly.
Round 32 :
Working into each scallop top: *ch1, (puff x3) all into same space, ch1, sl st into next base* This decorative puff round gives the textured scallop shown in the picture.
Round 33 :
Secure scallops by working 1 sc in each stitch across and 3 sc in each peak ch-2 for reinforcement.
Info :
Use a smaller hook (3.5mm) for the final rounds if you want a tighter, neater edge. Many crocheters switch down a hook size for edging to give a crisp finish.
— Final Decorative Edge & Finishing Rounds :
Round 34 :
Work small shell picot edge: *sl st into top of shell, ch3, sl st into first ch to create tiny picot, sl st into next base* repeat around. This adds tiny decorative points between scallops.
Round 35 :
Work 1 sc in each st around to tidy the picots. Fasten off with a long tail for final blocking and weaving. Weave in all ends neatly on the back side of the runner.
Round 36 :
Final blocking: pin the runner flat on a large blocking surface, paying special attention to scallop peaks and motif centers. Mist with water and allow to dry completely. A light steam press or spray starch can be used to give crisp edges if desired.
Info :
Finishing is key: a gently blocked runner transforms the look. Place protective pads under centerpiece items to prevent crushing scalloped edges when in use.
— Alternate Width & Customization Notes :
Info :
To create a longer runner, add motifs in multiples of one. To make a wider runner (double-width), create two parallel rows of motifs and join them with a similar laced panel between rows, then work an extended scalloped border around the entire double panel. Use contrasting colors for the ground instead of Cream for a bolder look, or make the petals in a single tonal family for a softer, blended effect.
Info :
If you wish to make placemats or smaller table pieces, work the same motif then finish after round 14 with a simpler single-round edge of sc and small shells (3 dc in one stitch) for a neat placemat edge.
This Sunburst Floral Table Runner is a beautiful blend of texture and lace that brightens any table surface. Each motif stacks into a graceful long runner that feels both handmade and heirloom-ready. Blocking and a careful scalloped finish make this project truly special to gift or keep for your home. 🌸🧶 Enjoy the relaxing rhythm of petals and picots as you stitch — your table will thank you! ✨