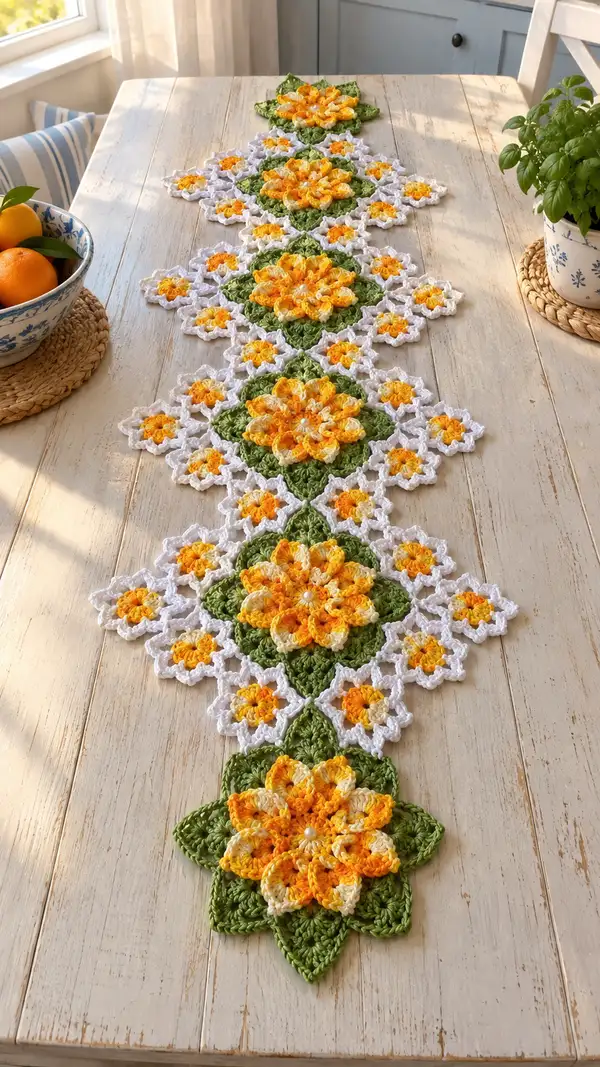
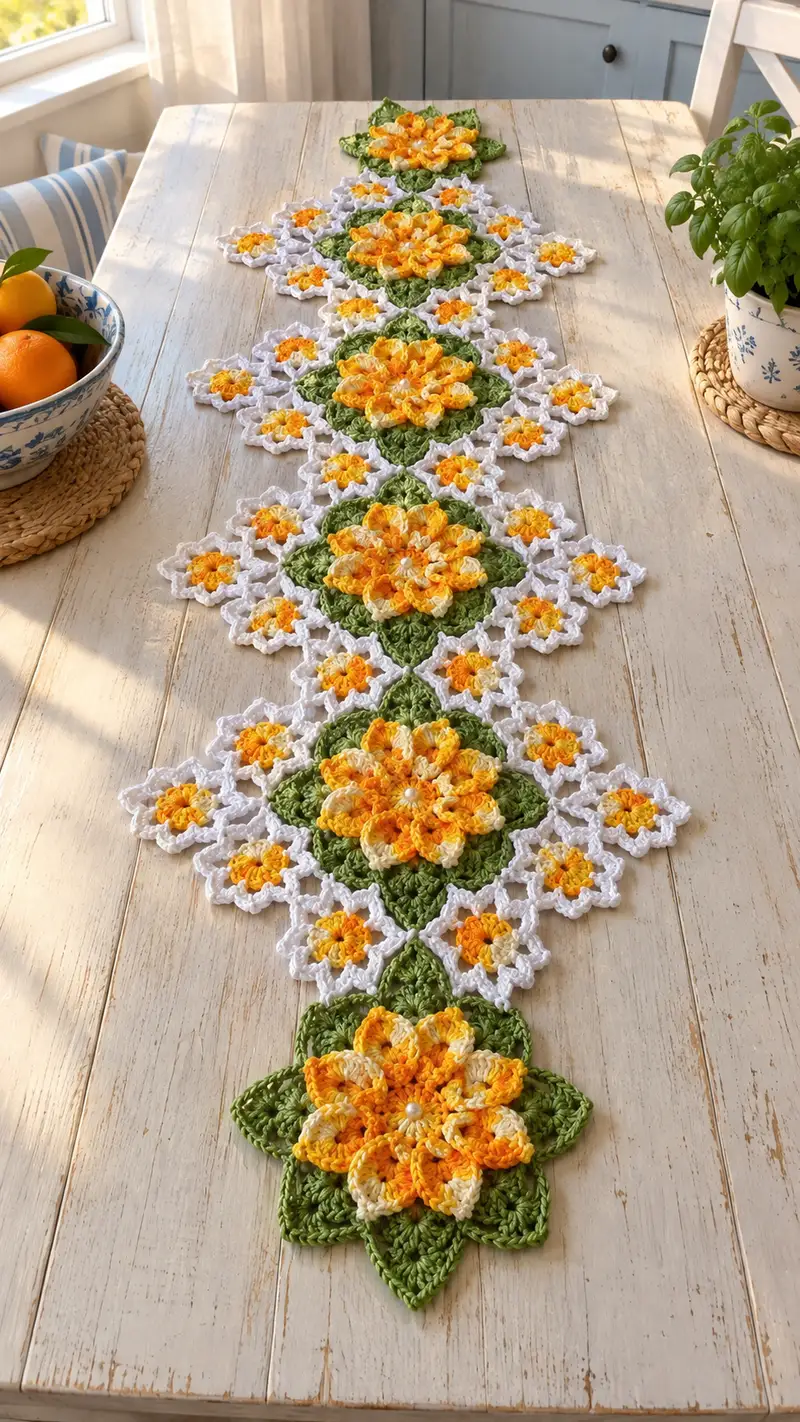
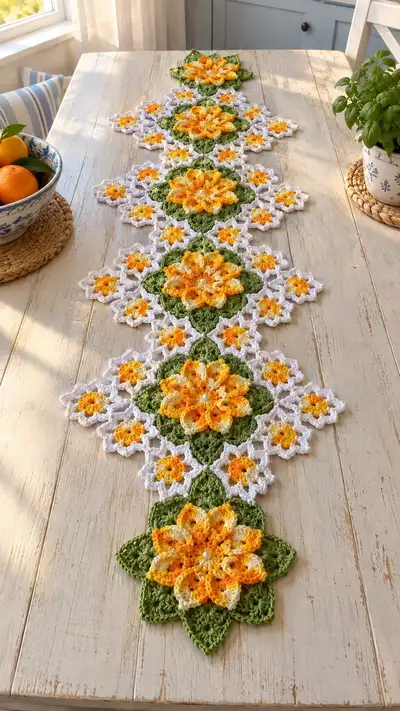
This cheerful table runner is built from layered sunflower-style motifs, leafy green diamonds and delicate white connecting blossoms. Vibrant variegated yellow-orange centers pop against a fresh green background and crisp white lace-like joins. The design creates a long, narrow runner that sits beautifully on a farmhouse or modern table, offering texture, color and a handmade centerpiece. Suitable for gifting or seasonal decorating, the motifs join to make a striking repeating pattern.
Progress Tracker
0% Complete
— Large Sunburst Flower Motif :
Round 1 :
With variegated yellow yarn, 6 sc in magic ring (6)
Round 3 :
(1 sc, 1 inc) x 6 (18)
Round 4 :
(2 sc, 1 inc) x 6 (24)
Round 5 :
(3 sc, 1 inc) x 6 (30)
Info :
These early increase rounds create a compact circular base for layered petals. Keep your tension even to allow later petal layers to lie flat. Place a stitch marker at the first stitch of every round to keep track easily.
Round 6 :
(4 sc, 1 inc) x 6 (36)
Round 7 :
(5 sc, 1 inc) x 6 (42)
Round 8 :
(6 sc, 1 inc) x 6 (48)
Round 9-11 :
1 sc in each st (48)
Info :
Rounds 9-11 form a slightly raised platform so the petals have a base to sit on. If your yarn is thicker or thinner, add or omit an even round here to maintain proportion.
Round 12 :
*1 sc in next 3 sts, ch 3, sk next 3 sts* rep to end (48 base sts with 8 ch-3 loops formed) — position petals at every 6 stitches (8 petals total)
Round 13 :
Switch to same variegated yarn held double for a fuller petal or continue single strand for lighter petals. Over each ch-3 sp: (sl st, ch1, 7 dc in ch-3 sp, sl st) — finish round with sl st to join to original round. Base stitch count remains 48.
Info :
If you prefer a puff petal, use puff stitches instead of 7 dc: make 7 puff stitches in the ch-3 space, separated by sl st to anchor. Puff gives a more three-dimensional petal; keep loops loose and consistent.
Round 14 :
1 sc in each base st across the top of petal anchors (48) — place 6 sc evenly between each petal cluster to stabilize petals.
Round 15 :
*Working behind petals: ch 3, (puff 3 times into the space between petal clusters), ch 3, sl st into base round between clusters* rep 8 times — this creates a secondary inner ring of short puffs.
Round 16 :
1 sc in each st around (48) — work through both loops where possible to anchor the inner puffs.
Info :
Lightly stuff center with a small fiberfill dab if you want a slightly domed center, or attach a small pearl/button later. The small stuffing is not structural — it only lifts the inner ring a touch.
Round 17 :
*Into each petal cluster: sl st to base, ch1, (puff stitch x5 in front of cluster to form outer petal) ch1, sl st into next base position* rep 8 times — petals now have a layered look.
Round 18 :
1 sc in each base st (48). Ensure petals are evenly seated and not twisted; adjust with fingers as you work.
Round 19 :
To create the scalloped petal tip: *in the top of each outer petal make: sc, hdc, dc, hdc, sc* rep 8 times around (these stitches sit on top of petals and do not alter base 48 count).
Round 20 :
Switch to a single strand of a lighter cream or pale yellow if you want petal highlights. Slip stitch through petal tips to pick up the new color, then *ch2, 3 dc cluster in front of petal tip, ch2, sl st into next petal tip* rep 8 times (this creates a decorative raised rim).
Info :
Color change: carry the lighter yarn behind petals and catch it with slip stitches so you have neat color transitions. If you plan to wash, weave tails securely and consider securing color joins with a small knot and woven tail on the back.
Round 21 :
1 sc around base round (48), work through both loops to secure color transition. Fasten off color if desired, leaving tail for weaving.
Round 22 :
Optional bead wrap: with a short length of pearl/cream yarn, sew a small decorative knot or single pearl in the center and weave secure threads to the back. This is purely decorative.
Round 23 :
Block motif gently to flatten petals and set the shape: pin petals into a circle with slight lift, steam or spritz lightly and allow to dry.
Info :
Make as many large motifs as needed. In the pictured runner, large motifs repeat in a linear sequence; count and plan layout before joining so the runner length matches your table.
— Leaf/Diamond Base Motif :
Round 1 :
With green yarn, 6 sc in magic ring (6)
Round 3 :
(1 sc, 1 inc) x 6 (18)
Round 4 :
(2 sc, 1 inc) x 6 (24)
Round 5 :
(3 sc, 1 inc) x 6 (30)
Info :
These increases form the small diamond center that sits behind and between large flowers. Count stitches carefully — this base will be used as a 4-point diamond/leaf anchor.
Round 6 :
Work in BLO: 1 sc in each st BLO (30) — this gives a slight ridge on the face that helps leaf texture sit forward.
Round 7 :
*Ch 4, sl st in 4th st ahead to form a small loop, sc in next 6 sts; rep across to form 4 corner loops* (30 base sts remain)
Round 8 :
Working into each of the 4 corner ch loops: (sc, hdc, 3 dc, hdc, sc) to shape a pointed leaf corner — repeat at all four corners; these stitches are worked over and around the ch loops and do not change base count.
Round 9 :
1 sc around base and around corner petals to tidy (30)
Info :
At this stage the diamond shape is forming; pinch the four corners to accentuate points before the next shaping round. Use stitch markers to mark corner peaks.
Round 10 :
*In each corner point: (ch2, 5 dc cluster in the top of point, ch2, sl st to base to anchor)* rep 4 times to create a raised petalled point.
Round 11 :
Work 1 sc around overall motif to even out edges (30). Fasten off and weave in ends. Make required number of diamond leaf motifs to alternate with large flowers.
Info :
If you want larger diamond motifs, repeat rounds 5-11 once more adding increases: (4 sc, 1 inc) x 6 etc., but maintain symmetry so joining points remain comparable to others.
— Small White Connector Flower Motif :
Round 1 :
With white yarn, 6 sc in magic ring (6)
Round 3 :
(1 sc, 1 inc) x 6 (18)
Round 4 :
*Ch3, sk 2 sts, sl st in next st* rep around forming 6 ch-3 picot loops (18 base stitches counted)
Info :
These small flowers act as lacy connectors between the large motifs and the diamonds. Keep them lightweight and open so the runner reads airy and delicate.
Round 5 :
Into each ch-3 loop: (sl st, ch1, 5 dc, ch1, sl st) — creates a tiny petal. Work sl st into the base between petals to stabilize (18 base st count still used for spacing).
Round 6 :
1 sc in each st around (18) — tidy round, fasten off. Make lots of small connector flowers; these will be joined with white join-stitches to the diamonds and big flowers.
Info :
To create the small clusters in the photo, some connectors use a tiny bright yellow center: after round 1 of white, quickly switch back to yellow for a mini puff in the center before completing round 5; this gives small orange centers peeking through.
— Joining Mesh / Star Connector (White) :
Round 1 :
With white yarn, ch 6, sl st to form a small ring (or mr, 6 sc) — this creates the center of the star connector (6)
Round 2 :
*Ch 4, sc into ring* rep 6 times to form 6 loops (6 anchoring stitches)
Round 3 :
Into each loop: (sl st, ch 1, 7 dc cluster, ch1, sl st) — finish around to make six open petals. These units are used as join points between diamonds and large flowers.
Info :
Work several of these connector stars; when joining you will crochet through matching loops of adjacent motifs with sl st or sc to create a flat, strong join. Plan the number of connectors per side before joining.
Round 4 :
1 sc in each anchoring stitch across (6) — tidy and fasten off.
— Decorative Border & Scallop Edging :
Round 1 :
With white yarn, join at any exposed outer petal tip: ch3, *5 dc in tip, sl st in space between petals* rep around the outermost petals to make scallops. Count petals and make same number of scallops as petal tips.
Round 2 :
1 sc in each st around the overall outer row (this will hit many spaces; aim for even coverage). If counts vary between motifs, adjust with extra scs between scallops to keep the edge flat.
Info :
Edge rounds are forgiving; the goal is consistent tension and neat scallops. Use smaller hook (3.5mm) if scallops look too loose. Work around entire runner after joining to unify motifs.
Round 3 :
*In each scallop, ch2, dc, tr, dc, ch2, sl st in top of scallop* rep to add decorative arms and lift. Fasten off and weave ends.
— Assembly & Joining Instructions (Motifs As You Go) :
Info :
Lay out your motifs in the desired order before joining. The pictured runner alternates: small flower connectors link the large sunburst motifs and diamond leaves in a repeating linear pattern—plan a center line of large motifs with diamonds between, then attach small flowers in the spaces to create triangular points.
Round 1 :
Join motifs by slip-stitching through matching loops: hold two motifs with right sides facing; working in white (or chosen join color), sl st through the back loop of the connector loop on motif A and through the corresponding loop on motif B, fasten off and weave. Do this at every designated tie point—typically 3-4 ties per adjacent motif depending on shape.
Info :
For a strong join, use 2-3 sl sts per connection point and then secure with a small whip stitch on the back for extra strength. Keep joins flat by pinning motifs before committing to the final stitch.
Round 2 :
When joining diamonds to large motifs: align diamond corner peaks to the cardinal petals of the large flower; slip stitch through the small ch loops on both motifs. Aim for symmetry: each diamond attaches by its four points to neighboring shapes.
Round 3 :
For the small white connectors, attach three points to the adjacent large flower petals and one point to the diamond tip to create the small triangular gap-filler seen in the photo. This gives the airy star-field effect.
Info :
Work slowly and pin motif edges flat to avoid skewed joins. Use washable fabric glue only if you need temporary hold while sewing joins, but do not rely on glue for permanent bonds—stitching is strongest.
— Extra Texture & Finishing Rounds :
Round 1 :
If you want extra raised veins on leaves: with green yarn, work 1 sl st up the center of each leaf point from the center to tip, then 2 hdc on either side to suggest veins. Repeat for every leaf motif.
Round 2 :
Add tiny surface crochet: with yellow contrast, embroider short straight stitches on inner petals to mimic highlights. Use a yarn needle and duplicate-stitch method and keep stitches short to avoid puckering.
Round 3 :
Final blocking: pin the entire runner flat on a blocking mat, shape scallops and points, spray with water and let air dry fully before removing pins. This sets the shape and evens joins.
Info :
Finishing is as important as construction — weaving tails neatly on the back ensures the runner lays flat and looks professional. Consider pressing lightly (covering with a cloth) if needed for stubborn curves.
Finishing this runner feels so satisfying — each layered sunflower and lace connector comes together to form a long, joyful centerpiece 🌻. The variegated yellows catch light while the green diamonds ground the design, and the white lacework adds a vintage charm. Whether you keep it for everyday beauty or make one for a special table, every stitch tells a little story of time and care. Enjoy blocking, joining and watching the pattern bloom across your table! 🧶✨