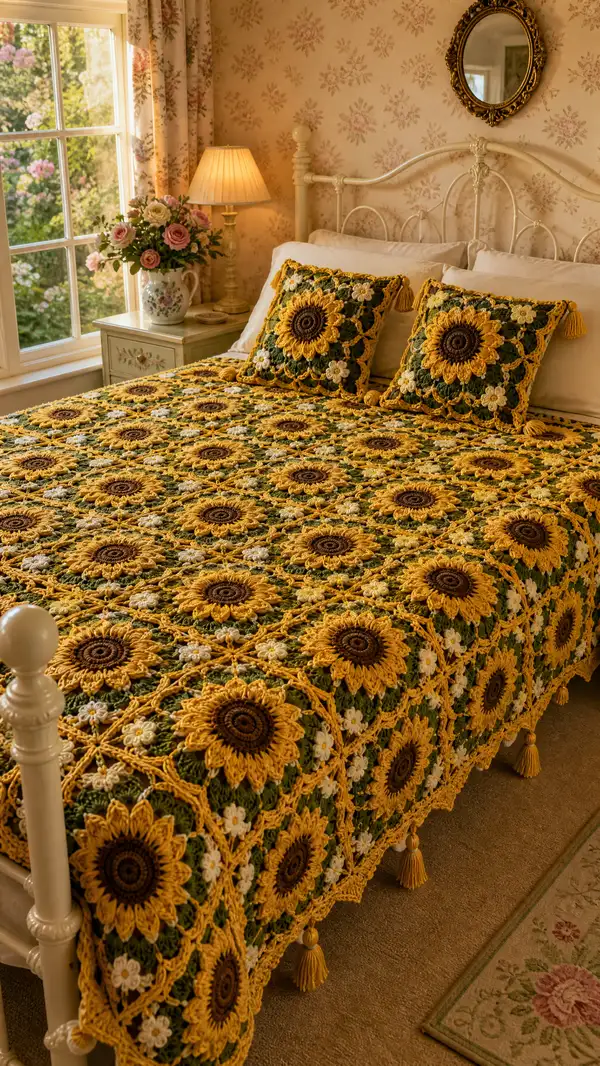
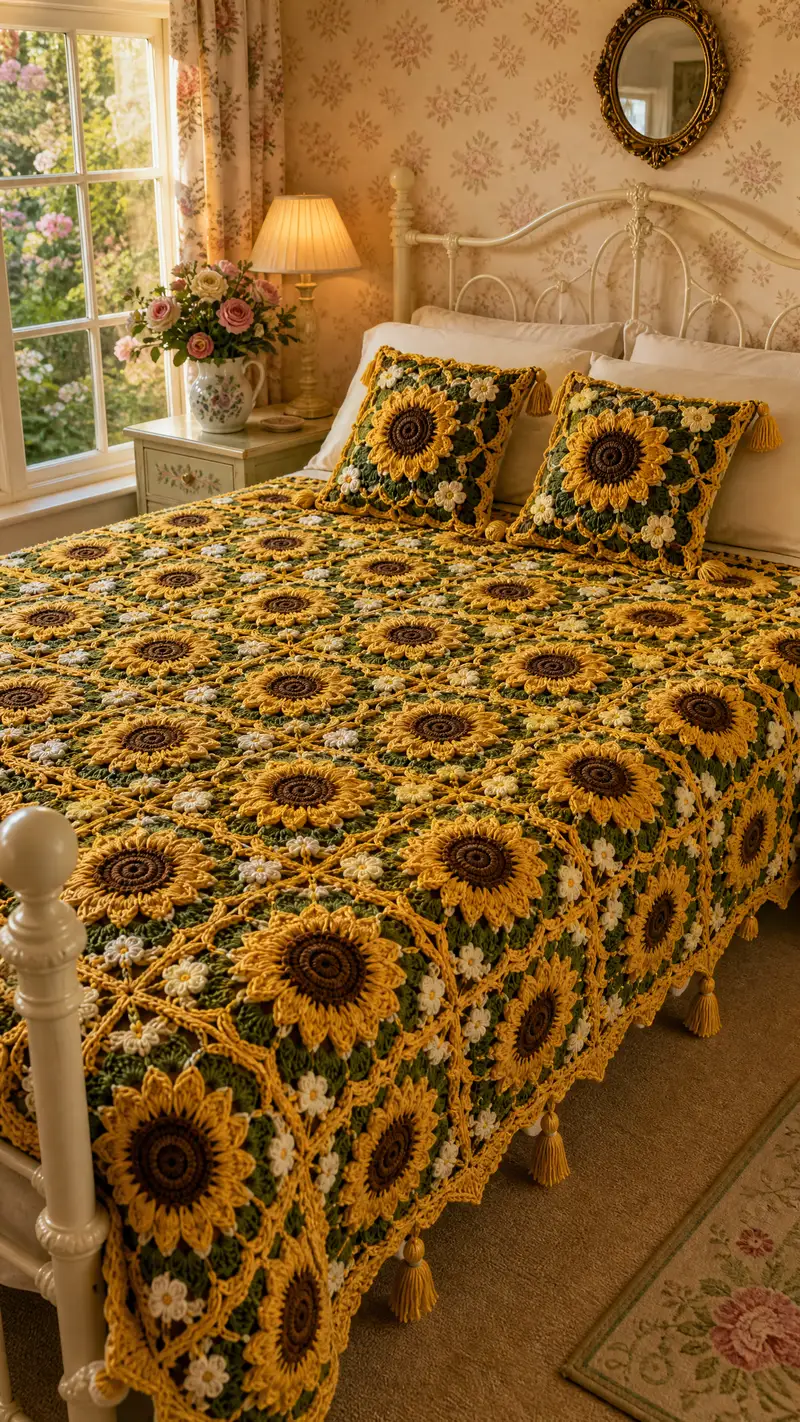
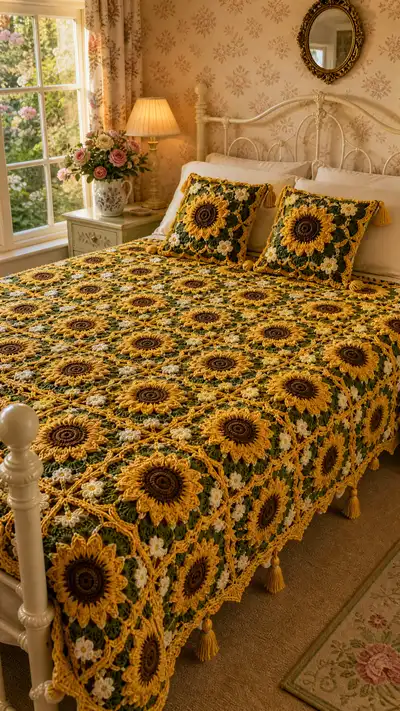
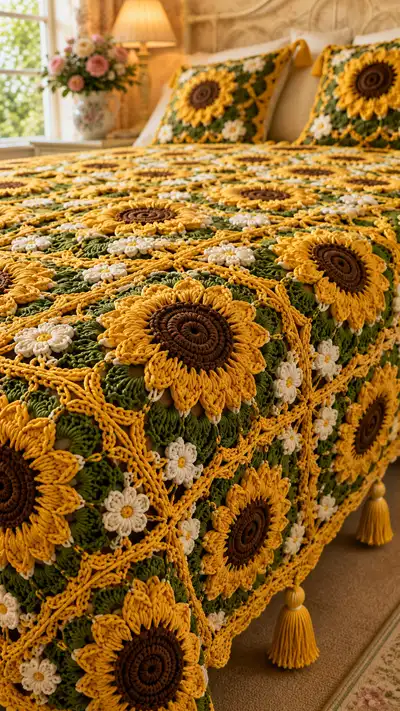
A warm, vintage-inspired sunflower granny bedspread worked in rich golden yellows, deep chocolate centers, leafy olive backgrounds and cream daisy accents. This detailed pattern walks you through making the sunflower motif, small daisies, join-as-you-go squares, an elegant lacy border and matching pillow shams. Finished with tassels at the corners, the bedspread brings a sunny cottage feel to any bedroom.
Progress Tracker
0% Complete
— Sunflower Motif (Make as many as needed) :
Round 1 :
With Dark Brown, mr, ch 1, 6 sc in magic ring. Pull tight (6)
Round 2 :
Inc in each st around (2 sc in each) (12)
Round 3 :
(1 sc, inc) x 6 (18)
Round 4 :
(2 sc, inc) x 6 (24)
Round 5 :
(3 sc, inc) x 6 (30)
Info :
Keep center rounds worked fairly tight to maintain a firm sunflower center. Use a slightly smaller hook for rounds 1-5 if your stitches look loose
Round 6 :
(4 sc, inc) x 6 (36)
Round 7 :
1 sc in each st around (36)
Round 8 :
1 sc in each st around in BLO to create a shallow ridge for petal anchor (36)
Info :
Switch to Sunflower Yellow. Fasten off Dark Brown leaving a 6-8" tail to weave in or to use for sewing the center if desired
Round 9 :
Attach Sunflower Yellow in any st, ch 2 (counts as first dc), *dc in next 2 sts, ch 2, skip 1 st* repeat around to create 12 ch-2 corners/spaces for petals. Sl st to top of beginning ch-2 to join (36 dc and 12 ch-2 sps)
Info :
This round establishes 12 petal positions. Mark the start of each ch-2 space with a removable marker to make the petal rounds foolproof
Round 10 :
Petal round: In each ch-2 space work: (ch 1, 5-loop puff*, ch 1, sl st into same ch-2). Move to next ch-2. Repeat around (12 puff petals). Sl st to join.
Info :
*5-loop puff: yarn over, insert hook, pull up loop; repeat 5 times in same space; yarn over and pull through all loops on hook; ch 1 to close puff. Keep each loop roughly same size for even petals
Round 11 :
1 sc in each st and across each puff base (work into ch-1 between puffs and sl st spots) around to tidy the base of petals (approx 48 sc depending on spacing)
Round 12 :
Petal increase and shaping: *Ch 3, (dc, tr, dc) all worked around the top of each puff to make a pointed petal top, sl st into next base stitch*, rep around (12 decorative petal tops)
Info :
Adjust tension of the top cluster to keep petals fanned and not pulled into the center. Use stitch marker at every 3rd petal to maintain count
Round 13 :
Switch to Olive Green. Ch 1, 1 sc evenly around the circle of petals, working between petal tops to create a continuous edge (approx 72 sc). Join with sl st
Round 14 :
Form square foundations: *Ch 5, skip 5 sc, sc in next 6*, repeating to mark four corner points. Adjust spacing to achieve 4 evenly spaced corner chain spaces. Join with sl st.
Info :
Round 14 creates anchor points for later square rounds. If your motif is pulling round, increase the number of ch in corner loops (ch 6) to relax tension
Round 15 :
Round to begin turning sunflower into a square: In each corner ch-5 space work: (sc, ch 3, sc) to form corner. Between corners work 3 dc clusters separated by ch-2 spaces across the side. Repeat for all 4 sides and join (this produces a soft square outline around the flower)
Round 16 :
In Olive Green continue with a granny-style round: *3 dc in ch-2 or side space, ch 2; in corner (3 dc, ch 3, 3 dc)*. Repeat around, laying out 4 corners and 4 side clusters. Join with sl st.
Info :
Work Round 16 firmly but not tight; this round establishes the square shape. Block motif lightly after finishing to square it precisely before joining
Round 17 :
In Olive Green work another round of granny clusters: *3 dc in each side space, ch 2 between clusters; 3 dc, ch 3, 3 dc in corner spaces*. Join (square grows; expect approx 12 side clusters total)
Round 18 :
Info :
Change to a slightly lighter Olive or Moss green if you want subtle variegation; alternatively continue same green for uniform look
Round 18 :
With same green, 1 sc in each stitch around working into tops of clusters to tidy corners and edges (count will vary by tension; square should measure approximately 6.5–7.0" across unstretched)
Round 19 :
Attach Cream to create small daisy spaces between sunflowers. In the midpoint between each sunflower petal cluster, ch 1 and sc to secure, ch 6 loop for daisy petal placement at the join stage. Make a small loop motif placement marker at four side midpoints.
Info :
We will work small daisies separately and sew them into the ch-6 loops or attach at join time; leave markers now so you know where to place daisy clusters later
Round 20 :
Edging round: Switch to Sunflower Yellow. Work 1 sc evenly around the square edge, placing 3 sc in corner ch-3 to keep corners square. Fasten off and weave ends. Square complete.
Info :
Make a full set of motifs to match your bed size; for a double/queen shown in the photo, plan roughly 6x8 to 7x9 layout depending on motif size. Count and block squares before joining
— Small Daisy Motif (Make many for between motifs) :
Round 1 :
With Cream, mr, ch 1, 6 sc in ring (6)
Round 2 :
Inc in each st around (12)
Round 3 :
(1 sc, inc) x 6 (18)
Round 4 :
Petal round: *Ch 2, in next st make 4-loop puff, ch 2, sl st in next st* repeat around to form 6 puff petals. Fasten off leaving tail to sew (6 petals)
Info :
Emphasize small daisies by slipping a tiny Yellow knot in the center: using a 6–8 mm yellow seed bead or a small embroidered French knot using Sunflower Yellow, sew into the center of the cream daisy
Round 5 :
Optional: For a more ragged daisy, sc around the back loop of each puff and add 1 dc per puff for light texture. Fasten off and leave a long tail for sewing into square spaces
Info :
Make at least one daisy per side gap of each square — the bedspread photo shows two small daisies where squares meet in the lattice spaces; plan accordingly
— Square Finalizing Round (after petal & background) :
Round 1 :
With Sunflower Yellow, join in a side stitch. Ch 1, sc evenly around all edges of square including working around petals to keep square flat. Place 3 sc in each corner ch-3. Join with sl st and fasten off (this completes motif edge)
Info :
Block each square flat to make joining easier. Use steam or wet blocking, pinning each square to a perfect square and allowing to dry completely
— Join-As-You-Go (JAYG) Method for Motifs :
Info :
We recommend JAYG to create the lacy lattice seen in the photos. Join motifs on their final edging round (the Sunflower Yellow edge). Work 3 sides of the join-first-square as usual; when reaching a side that touches an existing square, join into the matching stitch on the already-placed square instead of chaining or working a separate sc.
Round 1 :
Lay the first square flat and when working the second square on the joining round, align the edges and at every 3rd sc or ch-2 space, sl st through both loops of corresponding stitch on the adjacent square to join. Continue across the side, making joined sl sts at corresponding positions (this yields a neat, flat join)
Info :
When joining at corners, join both squares using (sc, ch 3, sc) into the corner of the already-joined piece then continue. Use pins to hold motifs perfectly aligned while joining
Round 2 :
Join subsequent rows: Start at an outer corner and work round-by-round, joining new squares into both the row above and the row beside as needed. Maintain yarn color for join (Sunflower Yellow) for continuous lattice effect
Info :
If you prefer seams, you can also whipstitch squares together from the wrong side after blocking; JAYG creates the airy decorative join seen in the image
— Lacy Centre Connector (for lattice look between 4 squares) :
Round 1 :
Work a small connector: ch 8, join with sl st to center of 4 adjoining squares at the meeting point, ch 8 and anchor to the opposing joining point with sl st to form a delicate X shape between squares. Repeat as needed while joining
Info :
These lacy connectors are worked on the final join round and create the airy diamond shapes seen between the sunflowers in the photo
— Border: Wide Lacy Border (Multiple rounds) :
Round 1 :
After all squares are joined and the bedspread is blocked, with Sunflower Yellow, join anywhere on outer edge. Ch 3 (counts as dc), dc evenly along the edge placing 3 dc in each corner. Work dc until you reach the next corner. Join with sl st to top of ch-3.
Round 2 :
Work 1 round even of dc in each st (this provides base for lacy rounds). Count stitches to ensure even distribution across each side; if necessary add or omit a few dc to make corners lie flat (st count varies by size)
Info :
Measure your bedspread into four sides; you want symmetric border stitch counts at each corner. If you added or removed dc, make sure to distribute changes evenly and keep corners at ch-3 clusters
Round 3 :
With Sunflower Yellow work lacy shell round: *Skip 2 sts, (5 dc) shell in next st, skip 2 sts, sl st in next st* repeat around. At corner adjust to place shell centered near corner cluster. Join.
Round 4 :
Ch 4, *1 tr in center of each shell, ch 3, sk next shell top, sl st in next valley* repeat around. This produces tall arches for next decorative round
Info :
Work evenly. Add markers at every 4th shell to keep track. The lacy arches will hold the decorative sunflower-edge rounds
Round 5 :
Switch to Olive Green. Working into each arch, form leafy picot clusters: (sc, ch 3, sc) in arch top to create a leaf-point. Repeat around, sl st to join.
Round 6 :
Switch to Sunflower Yellow. Create petal swags: *In each leaf-point work (ch 1, 5-loop puff, ch 1, sl st)* to form decorative stitches that echo the sunflower petals along the border. Repeat around
Info :
Border rounds are decorative and forgiving; keep motifs symmetrical by counting and marking every 8–12 repeats to avoid drift
Round 7 :
Edge finishing round: In Sunflower Yellow work 1 sc evenly around the edge, placing 3 sc in each corner. Add final picot points every 6 sc: *sc, ch 3, sl st into last ch to form small picot* to give a delicate scalloped finish
Round 8 :
Optional decorative fringe: With long strands of Sunflower Yellow (approx 8–10" each), group and attach tassels every 6–8 sc using a lark's head knot. Trim tassels to even length and comb lightly for fullness.
Info :
The bedspread in the photo has tassels at corners and every other motif on the border; add as you prefer. Secure tassel tops with extra thread and knot inside border for durability
— Alternative Border: Wide Lace Fan (Heavy Decorative Option) :
Round 1 :
With Sunflower Yellow, attach to edge and ch 5 (counts as tr + ch2), *skip 2, (7 dc) in next, ch 2, skip 2, sl st in next* repeat across creating big fans. At corners center a fan over corner cluster. Join.
Round 2 :
In each fan top work a picot round: *ch 1, 1 sc, ch 3, sl st into sc to make picot, 1 sc* across the fan to form small scallops. Fasten off and weave ends
Info :
This border is for an ornate, dramatic finish; allow for extra yarn consumption and test one side before committing to the entire bedspread
— Pillow Shams (Make 2) :
Round 1 :
Make 4 motif squares for each sham (matching the motif pattern above). Block and join them to form a 2x2 large square. Join using JAYG with Sunflower Yellow.
Round 2 :
After joining, work a border identical to the bedspread border but on a smaller scale: 1 round dc base, 1 round shells then decorative petal round so the pillow edges echo full bedspread
Round 3 :
Backing: Make a simple 2-row solid square in Olive Green slightly larger than front, leaving one side open for insertion of a pillow form. Seam the three sides with slip stitch or whip stitch and insert pillow.
Info :
For neat corners fold backing edges and pin before stitching. Add a zipper or overlapping envelope flap if you prefer removable covers for washing
Round 4 :
Tassels: Make 4 tassels per pillow (one at each corner) using Sunflower Yellow. Wrap yarn around a 3.5" cardboard 40–45 times, tie top, cut bottom to create full tassel, wrap neck with extra yarn and sew securely to sham corners
Info :
Pillows in the photo have large tassels. If you prefer a subtler look, make shorter, denser tassels or pom-poms
— Tassels (Corner Embellishments) :
Round 1 :
Create tassels to match photo: Wrap Sunflower Yellow approx 45–60 times around a 3.5" template. Slide off and tie close to top with a secure knot using a short yarn tail. Fold in half, tie again about 1/3 of the length from top and trim ends evenly.
Round 2 :
Sew tassels to outside of border corners and at any motif join points you want highlighted. Use a small piece of cardboard as a form to keep tassels even when tying them on
Info :
For long-lasting tassels, wrap the neck with a few tight stitches and apply a dab of fabric glue if desired. Tuck the top ends into the border and stitch through several layers to anchor
— Finishing & Blocking :
Round 1 :
Weave in all ends as you go or at completion: use a yarn needle to run tails through 4–6 stitches on the wrong side and trim close for tidy finish
Round 2 :
Light blocking: Mist squares lightly with water or use steam from an iron held a few inches away. Pin to blocking mats ensuring edges are straight and petals are shaped. Allow to dry completely before joining or applying border
Info :
Blocking is essential for a professional finish; it evens out stitch tension, flattens petals and makes joins lie flat under the lacy border
Round 3 :
Final inspection: Check each seam and tassel; reinforce any weak points with extra stitches. Trim stray fibers and lightly brush tassels to shape
— Measurement & Layout Guidance :
Info :
Estimate motif size after blocking. For example: if each motif measures 7.25" square and you want a bedspread approximately 84" x 90", you will need about 12 x 12 motifs = 144 motifs. Adjust counts for desired overhang and bed size (double/queen shown uses approx 6x8 to 7x9 in the photo depending on motif size)
Info :
Keep a tally chart and divide motifs into groups by color lots to keep color consistency across the spread. Work in batches of 8–12 motifs to maintain rhythm and tension
— Tips & Techniques Throughout :
Info :
Use stitch markers at every corner and at every 3rd petal to count easily. Maintain consistent stitch height by choosing a single hook size for the body and optionally a slightly smaller one for tight petal stitches
Info :
For puff and bobble stitches, practice on a sample square to achieve a consistent look; keep loops loose and use a large enough hook to gather all loops comfortably
Info :
When switching colors, carry unused yarn along the inside of the motif if you prefer fewer ends, or fasten off and weave in ends for clearer color changes and less bulk
Info :
Keep a journal of the number of motifs made, join order, and yarn lots to reproduce or repair the spread later if needed
Info :
If you want a lighter or heavier drape, swap to a DK or aran weight and adjust hook accordingly; this will change motif counts needed for the same bed size
Completing this sunflower daisy bedspread is such a rewarding project — every motif comes together to form a joyful, textural surface full of warmth and vintage charm. The petals add lovely depth while the lacy joins keep the bedspread airy and elegant. Make it to match your décor or gift it to someone who appreciates handmade comfort. 🧶🌻 Happy stitching — your sunny masterpiece awaits! ✨