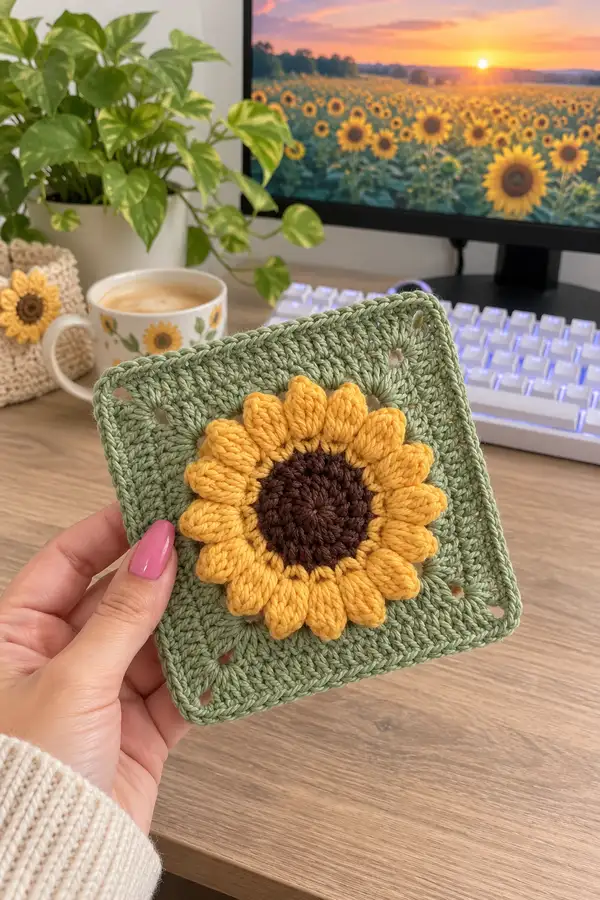
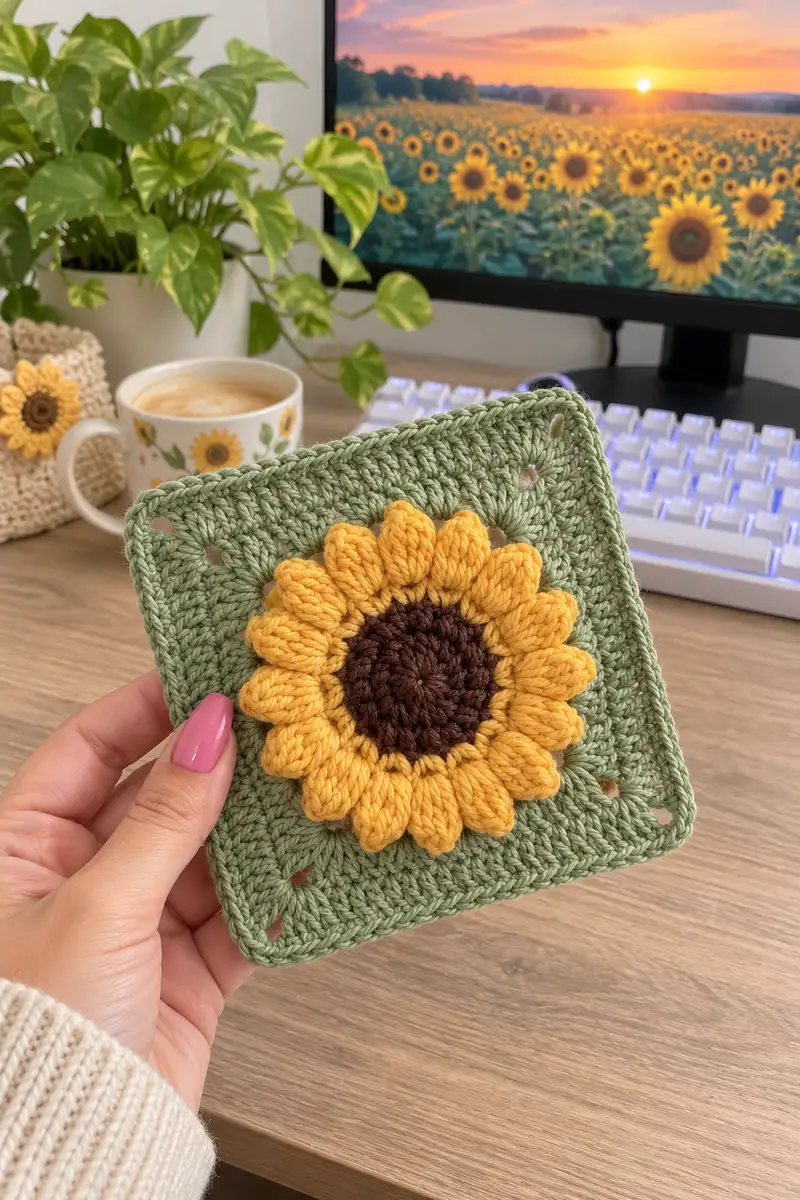
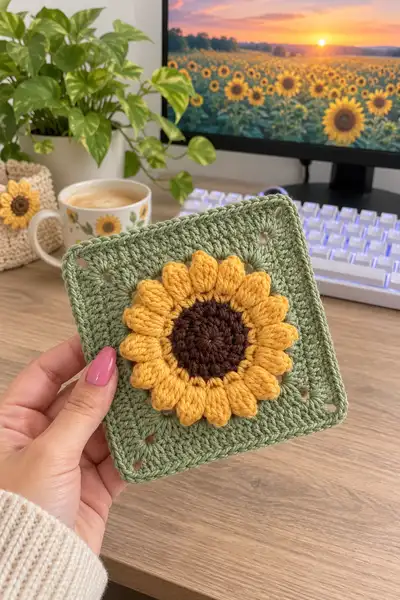
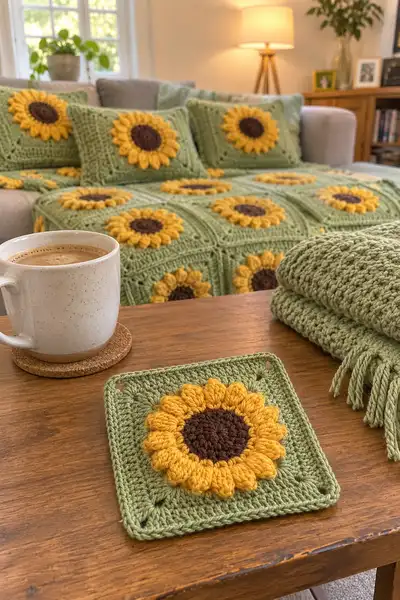
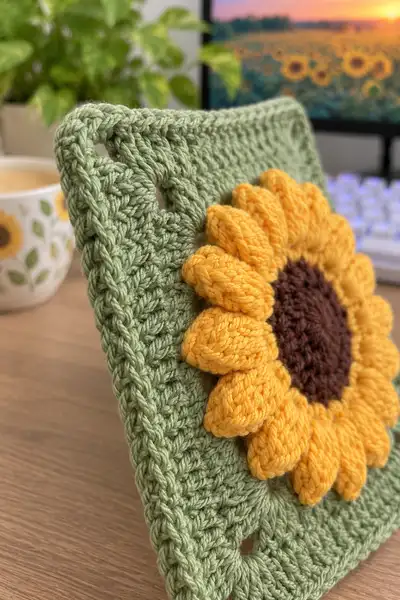
A warm, textured bedspread made from 3D sunflower granny squares set on a soft sage green background. Each square features a deep brown center, raised golden petals worked in puff stitches, and tidy square rounds that join to make a cozy, eye-catching coverlet. Includes pillow variations and a ruffled scallop border to finish the bedspread for a beautiful farmhouse or cottage look.
Progress Tracker
0% Complete
— Sunflower Center (brown) :
Round 1 :
Make a magic ring, 6 sc into ring (6)
Round 2 :
Inc in each st around (6 inc) (12)
Round 3 :
(1 sc, inc) x 6 (18)
Round 4 :
(2 sc, inc) x 6 (24)
Info :
Pull center tight and fasten off brown. We will use the 24-st round as the base for the petals. Weave in or leave a tail to weave under center if preferred.
— Petal foundation & Puff Petals (golden) :
Info :
Join golden yellow yarn in any stitch of Round 4 to begin petal work. This pattern places 12 petals around the 24-st base: each petal will be anchored every other stitch so we get 12 evenly spaced petals.
Round 5 :
*Sl st into next st, sc into next st* repeat around to tidy the join base (24)
Info :
We will build puff petals by working them into every second stitch around (so there will be 12 petals). The puff stitch used here is a 7-loop puff (large and sculptural). Keep tension slightly tighter on puff loops to keep petal shape.
Round 6 (Petal round) :
*Skip 1 stitch, (yo and insert hook into next stitch, pull up loop) 7 times, yo and draw through all 7 loops on hook, ch1 to close petal, sl st into same stitch to secure* repeat from * to * 12 times (12 petals; you will have used 12 of the 24 stitches for petals; skipping the alternate 12 stitches keeps spacing even)
Info :
After making each petal, gently pat the puff stitch into shape with your fingers. The ch1 after drawing through holds the petal secure and leaves a small chain space at the tip for definition.
Round 7 :
Working behind petals: join yarn at any base stitch, sc in each base stitch around, making 2 sc in each stitch that held a petal to secure it (24 sc if you sc once in each base st and add one extra sc into each petal base) (36)
Info :
The count above assumes you add 1 extra sc to each petal base to anchor the petal securely. If your counting differs, stop and recount to ensure 12 petals are evenly anchored and secured.
— Transition round & flattening :
Round 8 :
Join sage green yarn behind the petals: ch1, sc in same st and sc in each st around to create a tidy foundation for square rounds (36)
Info :
Work Round 8 tightly to flatten the petal bases and create a stable surface for the square rounds. Use BLO if you want the petals to sit even more pronounced on top of the square.
— Square rounds (sage green) — circle-to-square conversion and size building :
Round 9 :
dc in each of the 36 sts around (36)
Info :
This DC round thickens the background and prepares for corner placement. Keep stitches even and measure the diameter to track how many square rounds you will need for your desired finished square size.
Round 10 (first corner round) :
*dc in next 7 sts, (dc, ch2, dc) in next st* repeat 4 times (per quarter: 7 + 2 dc in corner = 9; total dc = 4 x 9 = 36, ch2 x 4)
Info :
Round numbering here intentionally starts corner shaping when the circle is large enough to accept corner ch-2 spaces. The pattern uses a formula to increase one side stitch each round while keeping corner units consistent so the motif grows into a square.
Round 11 :
*dc in next 8 sts, (dc, ch2, dc) in next st* repeat 4 times (per quarter: 8+2=10 dc; total dc = 40, ch2 x 4)
Round 12 :
*dc in next 9 sts, (dc, ch2, dc) in next st* repeat 4 times (per quarter: 9+2=11 dc; total dc = 44, ch2 x 4)
Round 13 :
*dc in next 10 sts, (dc, ch2, dc) in next st* repeat 4 times (per quarter: 10+2=12 dc; total dc = 48, ch2 x 4)
Info :
For each of these rounds the 'next sts' number increases by 1 to gradually expand the sides while keeping the corners at ch2. Continue to count your dc carefully — the total number of dc for Round R (where R starts at 10 for the first corner round) follows the formula Total DC = 4*(R - 2 + 2) = 4R + constant depending on round base; follow the explicit numbers given above for accuracy.
Round 14 :
*dc in next 11 sts, (dc, ch2, dc) in next st* repeat 4 times (total dc = 52, ch2 x 4)
Round 15 :
*dc in next 12 sts, (dc, ch2, dc) in next st* repeat 4 times (total dc = 56, ch2 x 4)
Round 16 :
*dc in next 13 sts, (dc, ch2, dc) in next st* repeat 4 times (total dc = 60, ch2 x 4)
Round 17 :
*dc in next 14 sts, (dc, ch2, dc) in next st* repeat 4 times (total dc = 64, ch2 x 4)
Round 18 :
*dc in next 15 sts, (dc, ch2, dc) in next st* repeat 4 times (total dc = 68, ch2 x 4)
Round 19 :
*dc in next 16 sts, (dc, ch2, dc) in next st* repeat 4 times (total dc = 72, ch2 x 4)
Round 20 :
*dc in next 17 sts, (dc, ch2, dc) in next st* repeat 4 times (total dc = 76, ch2 x 4)
Round 21 :
*dc in next 18 sts, (dc, ch2, dc) in next st* repeat 4 times (total dc = 80, ch2 x 4)
Info :
Rounds 10 through 21 create an even square shape by increasing side stitch counts by 1 each round. Continue further rounds in this pattern until your square measures the desired finished size. The example shown in the photos uses squares approximately 6 x 6 inches — this is achieved at around Round 18-21 depending on yarn and hook choice. Measure frequently.
Round 22 :
*dc in next 19 sts, (dc, ch2, dc) in next st* repeat 4 times (total dc = 84, ch2 x 4)
Round 23 :
*dc in next 20 sts, (dc, ch2, dc) in next st* repeat 4 times (total dc = 88, ch2 x 4)
Round 24 :
*dc in next 21 sts, (dc, ch2, dc) in next st* repeat 4 times (total dc = 92, ch2 x 4)
Round 25 :
*dc in next 22 sts, (dc, ch2, dc) in next st* repeat 4 times (total dc = 96, ch2 x 4)
Info :
If you prefer a smaller square (coaster or pillow insert), stop at Round 16-18. For the bedspread squares shown, most makers stop between Round 20-24 to get a roughly 6" square with worsted yarn and a 4.0mm hook. Yarn thickness and tension will alter size—block each square to standardize measurements before joining.
Round 26 :
To tidy the square edge: sc evenly around, placing 3 sc in each ch2 corner space (work 3 sc in corner ch2 spaces), and sc in each dc across the sides (total sc approx = previous dc count + 8 from corners)
Round 27 :
Optional neat edge: *hdc in next 2 sts, sc in next st* repeat around; place (hdc, sc, hdc) in each corner space to keep corners square. Fasten off and weave in ends.
Info :
At this stage you have one full sunflower square (center + petals + square rounds + tidy edge). Make a consistent number of squares to achieve your bedspread layout: for example a 4 x 5 grid (20 squares) for a narrow bedspread, or 5 x 6 (30 squares) for a larger profile. Count and block squares before joining; matching round counts ensures even joins.
— Joining method A: Join-as-you-go (JAYG) — add one side at a time :
Info :
Join-as-you-go is efficient for many squares. Work final round of new square until last corner, then join to adjacent finished squares by slip stitching through the stitch of the finished square while working the final round. This creates invisible join seams and stabilizes motifs immediately.
Round 28 (JAYG join round) :
Work sc/hdc round as in Round 26 but when you reach a side that touches an already-made square, slip stitch into the corresponding sc of the adjoining square instead of working a standalone sc; continue around making 3 sc in corner spaces and sl st joins on sides where squares meet. Fasten off and weave ends.
Info :
When joining, align squares carefully and use pins to maintain consistent spacing. The JAYG method yields a seamless mosaic look. Alternatively, you can whipstitch or mattress stitch squares together with a yarn needle for a slightly raised seam.
— Joining method B: Whipstitch or Mattress stitch :
Info :
For a robust join (especially for a bedspread that will be used often), backing-join your squares by whipstitching with matching sage green yarn. Use a ladder/mattress stitch to create a flat seam. Pin squares, align centers, and sew through corresponding stitches along the edge making sure to match corner points.
Round 29 :
Sew squares in rows first, then join rows together. Reinforce corner intersections with a couple of extra stitches for stability. Block the assembled rows flat as you complete each set.
Info :
Join the squares with the flower motif facing you so the petals align visually across the bedspread. Use a contrasting join (e.g., narrow cream join) if you want a framed look; otherwise match sage green for a cohesive background.
— Decorative Border & Scallop Ruffle (multiple rounds) :
Info :
Two-layer border: a tidy base of dc or hdc rounds for stability, followed by a scallop ruffle formed with shells and a triple-shell ruffle row. The bedspread in the photos shows a pronounced ruffle; the instructions below create similar drama.
Round 30 (Base border round) :
With sage green joined at any outer edge stitch, work 1 rnd sc evenly around the entire joined bedspread, working 3 sc in each outer corner to keep it square. Work a sl st to join at the end. This evens out any small irregularities from joins.
Round 31 (Stability round) :
*hdc in next 2 sts, sc in next st* repeat around; (hdc, sc, hdc) in each corner space (this gives a firm base for the ruffle)
Round 32 (Scallop setup) :
ch3 (counts as dc), *skip 2 sts, (5 dc) in next st (shell), skip 2 sts, dc in next st* repeat around; place (5 dc) shell in corners too to allow ruffle continuity. Adjust 'skip' counts depending on outer stitch count to keep scallops evenly spaced.
Round 33 (Ruffle deepening) :
In each shell from previous round work a triple shell: (dc, ch1, dc) into the middle st of each 5-dc shell to puff it further, then sl st between shells to stabilize. Fasten off and weave in ends.
Round 34 (Optional deeper ruffle) :
For an even fuller ruffle, add one more row: in each shell edge work (7 dc) creating a bigger scallop. This will make the border stand away from the bed for that skirted look.
Info :
If you want tassels or long fringe, attach them between scallops after Round 34 by knotting 6-8 strands of yarn through the shell edges and trimming to desired length. The pictured bedspread uses a subtle ruffle without long fringe; decide your preference before committing to many tassels.
— Throw cushion / Pillow variation (rectangular) :
Info :
Two sunflower squares make a small decorative pillow front. The pillow shown uses a centered sunflower square with additional rounds to make a rectangular shape; you can also make two identical squares for a square cushion.
Round 35 :
Create center sunflower motif as Rounds 1-8 above. After Round 26 (tidy edge), continue to add rectangular rounds: *dc in each st around for 2 rounds* to bulk the fabric (counts depend on current dc count; maintain corners with 3 dc in ch2 spaces)
Round 36 :
Work even dc rounds until the rectangle measures the width of your cushion insert. Fasten off leaving long tail for joining. Make the back panel in sage green with even dc rounds until it matches the front panel size.
Round 37 (Assembly) :
Place panels wrong sides together and whipstitch three sides leaving one side open. Insert cushion and finish closing with a final whipstitch or invisible seam. Optionally add a zipper strip by sewing a fabric zipper to the open side for removable covers.
Info :
For a more professional pillow finish, create a flange by adding one round of sc in a contrasting color around the front panel before assembling. This frames the sunflower nicely.
— Making multiple squares & bedspread planning :
Info :
Decide on how many squares you need by measuring the finished size of one blocked square. Example layout ideas: twin narrow bed: 4 columns x 6 rows = 24 squares; full/queen: 5 columns x 7 rows = 35 squares (customize to fit). Allow extra squares for drape at edges if you want a full bedskirt look.
Round 38 :
Make squares in batches: produce centers and petals in colorwork assembly-line fashion (all brown centers first, then all petals, then all green square rounds). This is faster and keeps color transitions tidy.
Info :
Label batches as you go (A, B, C) so you can join squares in a pleasing dispersed pattern ensuring petals don't cluster visually in one area of the bedspread.
— Finishing & Blocking :
Round 39 :
After joining and adding the border, block the entire bedspread lightly using steam or wet blocking to even stitches and encourage the ruffle to sit attractively. Pin scallops to shape while drying.
Info :
Blocking is especially important for heirloom bedcovers to smooth join seams and ensure consistent drape. Use a low-heat steam or wet-blocking method suitable for your chosen yarn fiber.
— Alternative edging: braided rope border (optional) :
Round 40 :
For a simpler finish, add 2 rounds of sc around the entire bedspread followed by a round of crab stitch (reverse sc) to create a neat twisted edge instead of the scallop ruffle.
Info :
Crab stitch uses sc worked left-to-right. Keep it tight for a polished look that helps the bedspread keep shape without heavy ruffling.
— Troubleshooting & small details :
Info :
If your petals appear lopsided, press them gently with a warm iron (with cloth barrier) or spritz lightly and shape with fingers while drying. Re-anchor any loose petals by sewing extra securing stitches under the petal base.
Round 41 :
Check corners: if corners pucker, add one more sc or hdc into corner ch2 spaces to ease tension and re-block corners outward to square the bedspread.
Round 42 :
Finishing: weave in all yarn ends on the wrong side and secure with a few back-and-forth stitches using a yarn needle. Trim close but not too short — leaving 1/4" tail inside is safest.
Info :
Store unused yarn in labeled small bags with color, dye lot, and batch information so repairs or future matching are easy.
— Optional embellishments and scaling tips :
Round 43 :
To scale the sunflower up or down, change the number of petals (work petals every other stitch for 12 petals, every third stitch for 8 petals, etc.) and alter the number of square rounds you build out before finishing the edge.
Info :
For a denser bedspread reduce your hook size by one increment; for a looser drape increase hook size. Always make a gauge swatch of one complete square (center + petals + 4 rounds of square) to verify final measurements.
Round 44 :
Special technique: puff stitch refresher — to create the puff used in petals, yarn over, insert hook into the indicated stitch, pull up a loop; repeat this step 7 times (7 loops on hook), yarn over and pull through all loops, ch1 to close. Tighten gently. This instruction is for a 7-loop puff; adjust loop counts for smaller/larger petals.
Info :
Be careful to count loops when making puff stitches to keep petals consistent. Pull each puff to the same height by measuring visually or with a small ruler if you want absolutely identical petals.
— Care instructions :
Round 45 :
Machine wash on gentle cycle in cool water using mild detergent for most acrylic/wool-blend worsted yarns, then reshape and dry flat. For delicate fibers, hand wash and dry flat. Avoid tumble drying on high heat to preserve shape of petals and ruffle.
Info :
If uncertain about yarn care, test a small blocked square in the washing method you plan to use before laundering the full bedspread.
This sunflower granny square bedspread is a joyful combination of texture and color that will brighten any bedroom! Each square builds from a rich brown center to puffed golden petals and a soft sage green frame. As you join the squares and add the scallop border the bedspread begins to come alive with movement and warmth. I hope this pattern brings you many peaceful stitching hours and a finished piece you'll treasure for years. 🌻🧶