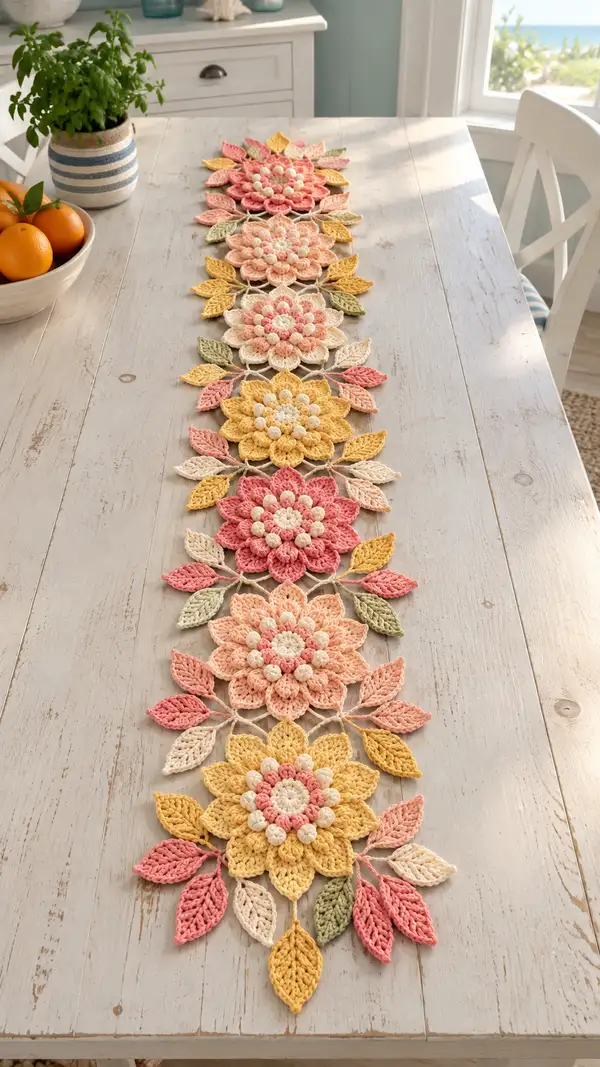
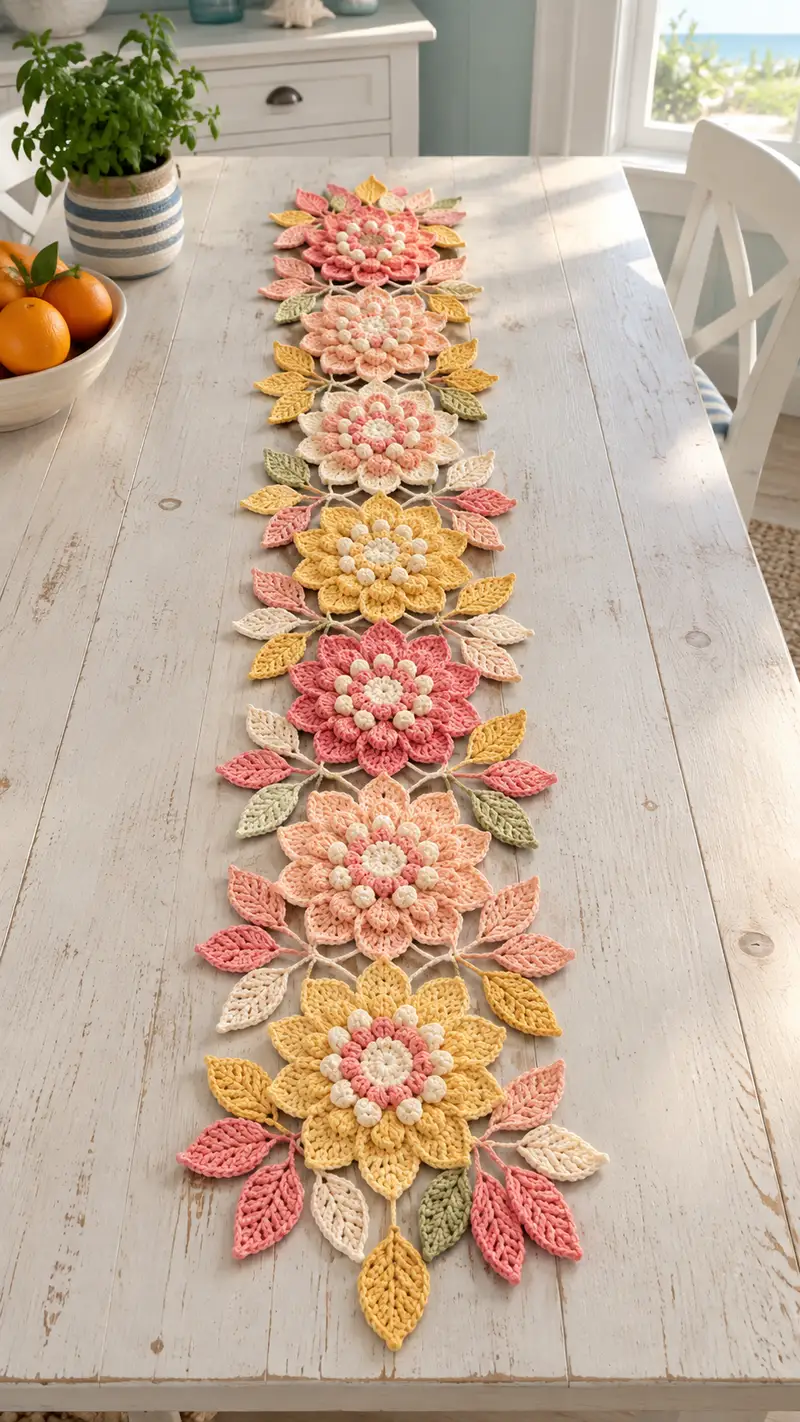
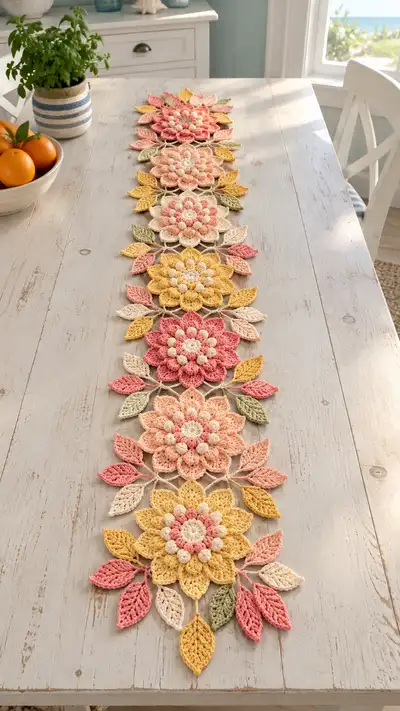
Bring a bright, garden-fresh look to your dining table with this Sunlit Floral Table Runner. Composed of linked layered flower motifs with textured petals, bobble centers and delicate leaves, this runner features soft pastel colors and airy lace connectors. The pattern includes step-by-step instructions for each flower, leaf and joining element so you can assemble a long, elegant runner to suit your table. Perfect for spring and summer decor or as a cheerful handmade gift.
Progress Tracker
0% Complete
— Overview :
Info :
This pattern describes one complete layered floral motif with connecting lace and leaf motifs. Make 6 motifs as shown for a long runner approximately 48" (122 cm) long; adjust quantity for desired length. Each motif measures about 7.5"–8.5" (19–22 cm) across once blocked and assembled. Work in worsted cotton with a 3.5mm hook for crisp petals and good stitch definition. Read through the entire pattern before beginning; modules include Center Bobble Medallion, Petal Layer A, Petal Layer B, Outer Petal Sculpting, Bobble Ring, Lace Join Bridges, Leaf Motif (make multiple), and final Assembly and Edging. Use stitch markers to mark round beginnings. Blocking is strongly recommended for even motif size.
— Central Bobble Medallion :
Round 1 :
Using cream yarn. Make a magic ring. Ch1, 8 sc into ring. Pull ring closed (8)
Round 2 :
Inc in each st around (16)
Round 3 :
(1 sc, inc) x 8 (24)
Round 4 :
(2 sc, inc) x 8 (32)
Info :
This small medallion creates a firm base for the bobble ring. Keep tension slightly firm for good texture. If you prefer a slightly smaller center, omit round 4 and begin bobble rounds at 24 sts.
Round 5 :
1 sc in each st (32)
Round 6 :
(3 sc, inc) x 8 (40)
Info :
If using a small amount of fiberfill to slightly pad the medallion for rounded bobbles, insert a tiny bit now; do not overstuff—centers should be gently domed, not firm balls.
Round 7 :
1 sc in each st (40)
Round 8 :
Prepare for bobble round: ch1, *bp in next st, ch1, sk1* repeat around to make spacing markers (40 markers including ch spaces)
Round 9 :
Bobble ring: Work a pattern of 10 double bobbles evenly spaced. To make one bobble (US): (yarn over, insert hook, pull up loop) 4 times in same st leaving last loop on hook each time, yarn over and draw through all loops, ch1 to secure. Space bobbles by 2 sc between them—adjust so total bobbles = 10. After finishing bobbles, sl st to first bobble base. (40)
Info :
Maintain even spacing for bobbles. If your yarn makes larger bobbles, reduce total bobbles to 8 and re-space. Carry bobble color or change to contrasting accent—fasten off and weave tail if switching colors.
Round 10 :
Sc round to secure bobbles: Ch1, 1 sc in each st and in each ch1 space around to create an even ring (40)
Round 11 :
(4 sc, inc) x 8 (48)
Info :
Round 11 expands the medallion slightly to provide a foundation for the inner petal bases. If you prefer more pronounced centers, you may add an extra even round before proceeding.
— Petal Layer A (Inner Petals) :
Round 12 :
Change to main petal color (for example blush or yellow). Ch1, 1 sc in next 3 sts, ch3, sk2, *1 sc in next 6 sts, ch3, sk2* repeat around to create 6 ch-3 loops evenly spaced (48)
Info :
These ch-3 loops become the foundation for the inner petals. Use stitch marker to mark the first loop to ensure you have six equal loops; adjust spacing by adding or removing sc between loops if necessary.
Round 13 :
Work petals into each ch-3 loop: *(sc, hdc, 3 dc, hdc, sc) into loop* x 6 (each petal uses 7 sts when worked; total st count across round will remain uneven—focus on petal shaping not on sc count)
Round 14 :
Sl st to base between first and second petal to tidy. Ch1 and work 1 sc in each st and in spaces around the petal bases to create a neat round of 48 sc equivalent—adjust by placing 2 sc in wider spacing to keep stitches even (approx 48)
Info :
Petals are intentionally sculpted and dimensional. After completing Round 13, gently lift petals outward and block later to preserve shape. If petals flop, consider working them in BLO on the foundation round for extra lift.
Round 15 :
1 sc in each st around to secure petal bases (48)
Round 16 :
(5 sc, inc) x 8 (56)
Info :
This round prepares the surface for the second petal layer by expanding the base evenly. Use stitch markers every 8 sts to avoid miscounts and to align next layer petals with underlying structure.
— Petal Layer B (Outer Petals Base) :
Round 17 :
Ch2, skip 1, *tr, ch2, tr* into next st to create small V spaces for outer petal anchors, 8 V-spaces evenly spaced around (56)
Round 18 :
Into each V-space work outer petal foundation: sl st into V-space, ch1 then (sc, hdc, 5 dc, hdc, sc) into V-space—create 8 larger petals (structured petals)
Info :
Outer petals are larger and sculpted to overlap inner petals slightly for depth. If using a second petal color, change yarn before Round 18 and carry or fasten off as desired.
Round 19 :
Work 1 sc around bases to secure petals; place extra sc at wider gaps to keep round roughly even (approx 56)
Round 20 :
(6 sc, inc) x 8 (64)
Info :
At this stage the motif has two layers of petals. Use blocking to coax petals into shape. Pin petals slightly upward when blocking to achieve the raised floral look.
Round 21 :
1 sc in each st (64)
Round 22 :
Optional texture: 1 sc in each st BLO around to create a small ridge that separates petal region from lace connectors (64)
Info :
Working BLO here creates a subtle ridge and makes petal layers read visually as a separate tier. If you prefer a flatter look, skip BLO and work standard sc.
— Outer Petal Sculpting and Detailing :
Round 23 :
Change yarn to highlight color (optional). Into every other sc along round, ch4 and sl st into same st to create elongated loop spaces for leaf connectors; alternate with 1 sc to stabilize. Aim for 16 loop spaces around total (64)
Round 24 :
Work decorative picot edging on each outer petal tip: *Ch3, sl st into third ch from hook (picot), sl st back to petal base* repeat across petal tips, sl st to join (no change in main st count)
Info :
Picots add a delicate scalloped look to petal edges and catch light when blocked. Keep picots small (ch2 or ch3) to avoid bulky edges.
Round 25 :
Secure and tidy: 1 sc in each st around to even out the round (64)
Round 26 :
(7 sc, inc) x 8 (72)
Info :
This expansion readies the outer region for leaf stems and lace connectors. If you're making a larger motif, repeat an increase round to enlarge footprint proportionally.
— Bobble Accent Cluster (Optional Additional Dimension) :
Round 27 :
Change to contrasting cream. Ch1, 1 sc in next 2 sts, *bp, sk2, 2 sc in next 3 sts* repeat around to place 12 small bobble accents just outside petal base (72)
Round 28 :
1 sc in each st and in each ch or space around to secure bobbles (72)
Info :
These small bobbles give the flower center a chunky, beaded look that appears in the photo. Keep bobbles uniform. If using fiberfill for slightly puffier bobbles, add minimal stuffing before closing bobble stitch.
Round 29 :
Ch1, *sc in next 4 sts, ch5, sk3* repeat around to create 12 ch-5 loop spaces which will become lace connectors to neighboring motif (72)
Info :
These ch-5 loops are where you will join motifs later using chains and slip stitches. Count your loops and mark the first; consistent placement ensures motifs line up evenly.
— Lace Join Bridge (Connector) :
Round 30 :
With cream yarn, into each ch-5 loop work: sl st, ch8, sl st into same ch-5 loop to make an 8-chain loop standing from motif edge. Repeat for each ch-5 loop (72)
Round 31 :
Work 1 sc evenly around the base and in between the chain loops to tidy and anchor (72)
Info :
These chain arches create airy bridges between motifs. When joining two motifs, you will connect these arches to the arches of the adjacent motif by slip-stitching or using a single crochet join for stability. Keep tension even so arches are uniform.
Round 32 :
Fasten off and weave ends. Block motif flat, pinning petals up slightly for dimension. Repeat to make 6 motifs (or desired number). Each motif uses the same rounds 1–32 structure with color swaps as desired.
— Leaf Motif (Make 4–8 per flower) :
Round 1 :
With sage green yarn. Ch8, sc in 2nd ch from hook, hdc in next, (dc, tr) in next two chs to create gradual rise, (dc, hdc) in next, sc in next, sl st to join to create a flat teardrop foundation (8)
Round 2 :
Turn leaf and work along opposite side of foundation chain: sc in next, hdc in next, 2 dc in next two sts, hdc in next, sc in next, sl st to first sc to close. Fasten off (approx 12 sts)
Info :
This simple leaf can be worked in two rounds for a flat leaf. For a more sculpted leaf, work additional rounds increasing at tip to create a fuller shape.
Round 3 :
Optional vein detail: Join cream with slip stitch in center base and work chain veins: ch6, sl st back down chain into leaf center to create 1-2 veins per leaf. Fasten off and weave ends.
Round 4 :
For a sculpted leaf (optional): Rejoin yarn at base, (sc, inc, hdc, 2 dc, inc, hdc, sc) working into back loops only on one side to create a slightly cupped shape. Fasten off (approx 18 sts)
Info :
Make varying leaf sizes by changing starting chain length (ch6-ch12). Mix colors—cream, pastel peach, sage—for the clustered leaves shown in the photo.
— Leaf Alternative: Hollow Lace Leaf (Delicate Spoke) :
Round 1 :
Ch10, sl st to form ring, ch1, 12 sc into ring (12)
Round 2 :
(1 sc, ch4, sk1) repeat around to create 6 ch-4 loops (12)
Round 3 :
Into each ch-4 loop work (sc, hdc, 3 dc, hdc, sc) to make small leaf shapes radiating like spokes; fasten off when finished (approx 42)
Info :
These hollow leaves read as delicate lace between motifs and are ideal for the airy connectors seen in the photo. Use neutral or pale colors for these spokes.
— Assembly: Joining Motifs with Lace Bridges :
Info :
Block all motifs first so shapes are even. Arrange motifs on a flat surface in desired order (the sample alternates colors). Each motif has 12 chain-8 arches from Round 30—these align with the adjacent motif's arches. Join motifs with single crochets or slip stitches across paired arches: align two arches, sl st through base of arch on motif A then through base on motif B, ch4 and sl st to the counterpart loop to create a balanced bridge. Repeat across 6 connection points per side. Work slowly and pin as you go to keep symmetry.
Round 1 :
Place two motifs RS together where arches meet. Starting at the first arch, insert hook through base of arch on motif A, then base of corresponding arch on motif B, sl st to join. Ch4, sl st into next arch pair, repeat across arch pairs to make 6 joins per motif intersection (no global stitch count)
Info :
For a sturdier join use sc instead of sl st: work 1 sc through both motif bases and work a ch-3 loop between joins for spacing. Keep tension even so the motifs sit flat and do not pucker.
Round 2 :
After completing joins along the row of motifs, flip runner and work a tidy sc round along joining seams on both sides: 1 sc in each connecting stitch and chain space to reinforce joins (work continuously along length)
Info :
If you plan to make a reversible runner, make identical joins on RS and WS with mirrored placement and use matching yarn color to hide seams.
— Attaching Leaves and Fillers :
Round 1 :
Position leaves around motifs as pictured: cluster small leaves near petal junctions and alternate hollow lace leaves between motifs. Use yarn needle and matching thread to whip stitch leaves through the petal base or chain arch. Sew only through the base of leaf so tips remain free and dimensional.
Round 2 :
Sew 3–4 leaves at each motif seam: one large leaf centered on the seam and smaller leaves radiating left and right. Use 2–3 passes with needle to secure—work from WS to RS for hidden knots.
Info :
Pin leaves before sewing, checking that leaves lie flat and don't flip the motif unevenly to one side. Slight curves at leaf tips add a natural look—tweak placement while sewing.
— Border Edging (Top and Bottom of Runner) :
Round 1 :
To create a finished look at each end, work 1 row of sc around the outermost edge of the first and last motif: begin at outer petal edge, work 1 sc in each visible st and 2 sc in corners to keep edge flat (work across joined seams and leaf bases carefully) (work to match length of edge)
Round 2 :
Work decorative scallop: *skip 2 sc, (5 dc in next sc), skip 2 sc, sl st in next sc* repeat across ends to create shell scallops. Adjust frequency to make ends symmetrical. Fasten off and weave ends.
Info :
Scallop shells echo petal shapes and give a polished finish. If you prefer a simpler edge, work a picot round (ch3 picot every 4 sts) instead.
— Finishing Touches and Blocking :
Round 1 :
Weave in all ends, hiding tail within petals and along seams by threading yarn needle through several nearby stitches. For reversible work, run ends through to WS carefully so RS stays clean.
Round 2 :
Lightly mist each motif and block to measurements: pin outer petal points to a flat surface so motif measures 8" across (adjust according to preference), let dry completely. Unpin and press lightly if needed.
Info :
Blocking is essential to flatten arches and set petal curves. Use rust-proof pins and a foam board. For cotton yarn, steam blocking works well—hold iron at a distance and press steam through a damp cloth over the motif; do not iron directly on yarn.
— Additional Notes on Color and Length Customization :
Info :
To change runner length, add or subtract motif units. Each motif requires roughly 8–12 leaves; plan yardage accordingly. Alternate colors to create ombre or repeat a sequence for symmetry. When changing colors in a motif, finish rounds cleanly and weave tails inside the petal layers to avoid bulk.
— Troubleshooting and Tips :
Info :
If edges ripple after joining, block motifs again with slight tension on join seams. If petals sit too flat, re-block with pins placed under petal tips and shape upward while damp. For gaps in join arches, shorten chain length by 1–2 stitches on subsequent motifs for tighter spacing.
This cheerful Sunlit Floral Table Runner brings a garden-inspired charm to any table setting. The layered petals, textured bobble centers and delicate leaves create a handcrafted statement piece full of warmth and detail. Make a single motif for a trivet or a row of motifs for a generous runner — either way this pattern invites creativity and color. Enjoy the meditative rhythm of petals and bobbles as you stitch, block and assemble your floral parade. 🌼🧶