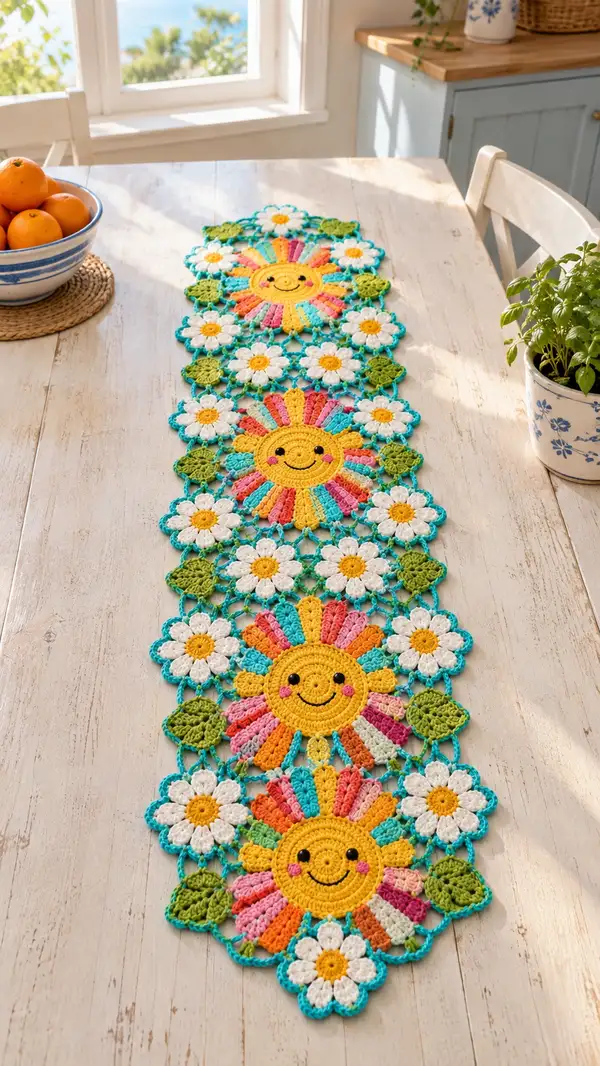
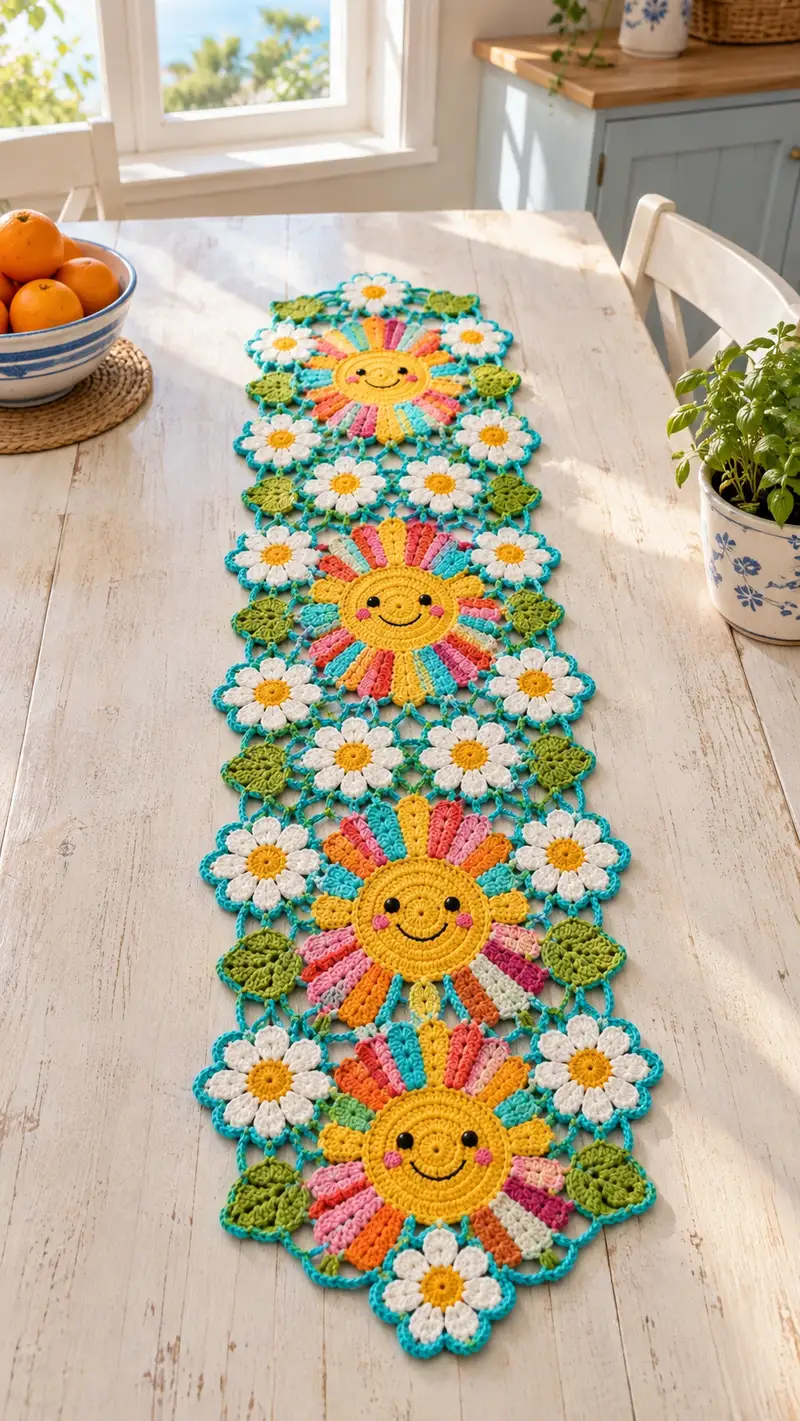
Bright, cheerful table runner made from joined floral motifs: smiling sun centers, white daisies and small green leaves, all linked with turquoise mesh. This decorative runner features layered petals in rainbow shades, embroidered faces on suns, and a scalloped turquoise edging. Perfect for adding a sunny, handmade accent to a kitchen or dining table.
Progress Tracker
0% Complete
— Sun Motif :
Round 1 :
6 sc in magic ring (6)
Round 3 :
(1 sc, 1 inc) x 6 (18)
Round 4 :
(2 sc, 1 inc) x 6 (24)
Round 5 :
(3 sc, 1 inc) x 6 (30)
Round 6 :
(4 sc, 1 inc) x 6 (36)
Round 7 :
(5 sc, 1 inc) x 6 (42)
Round 8 :
(6 sc, 1 inc) x 6 (48)
Round 9-12 :
1 sc in each st (48)
Info :
These rounds form a firm, flat disc for the sun center. Keep tension even and slightly firm so the face area sits flat. If substituting yarn, check that the center is approximately 4.5-5.5 cm across before adding petals.
Round 13 :
1 sc in each st (48)
Round 14 :
1 sc in each st (48)
Info :
Position safety eyes or prepare for embroidered eyes between rounds 10-13, spacing them approximately 8-10 sts apart depending on expression desired. If using safety eyes, secure washers now but do not over-stuff behind them.
Round 15 :
Change to yellow if not already. 1 sc in each st BLO (48)
Round 16 :
1 sc in each st (48)
Round 17 :
(3 sc, ch5) x 12 around (48 sc worked; 12 ch5 loops created)
Info :
Each ch5 loop will become a petal base (12 petals). Place a stitch marker at the start of round 17 to mark the first loop cluster. Carry accent yarns for petals if you plan to make stripes on each petal.
Round 18 :
Join first petal color in first ch5 loop: (sl st, ch3, 3 tr, ch1, 3 tr, ch3, sl st) in each ch5 loop around to create a full puff-style petal. Repeat in all 12 loops (petal count 12)
Round 19 :
Change to contrasting petal stripe color. Working behind the first petal row, in each petal make 5 dc clusters: (ch1, 5 dc in center of petal, ch1) to create petal height. Work same in each petal (12 petals)
Round 20 :
Change to another stripe color. In each petal space, work 3 puff stitches separated by ch1 to add a ridge: (puff, ch1, puff, ch1, puff) in each petal. Fasten off color and weave ends behind petals.
Info :
For rainbow striped petals use 2-4 colors per petal. Work stripes consistently for visual rhythm. Carry unused yarn along the back of the petal layers and catch in with occasional stitches to hide ends.
Round 21 :
Switch to petal base outline color (same turquoise used for mesh). Work 1 sc around the outer edge of each petal to even out shape: (sc evenly around petal edge, sl st to next petal base) — do this for all 12 petals to form a consistent outer edge.
Round 22 :
In turquoise, (sc 2, ch3, sc 2) into the outer edge between petals to create small arches that will ease joining later. Repeat 12 times.
Round 23 :
Work an outer decorative round: in each ch3 arch, work (sc, hdc, 3 dc, hdc, sc) to create a subtle scallop between petals (12 scallops)
Round 24 :
1 sc in each st around the scallops and along the back of petals where needed to tidy edges. Count will vary slightly but aim for approximately 96 sc around (sc is used as finishing tidy point; do not over-increase) — if you have 96 sc, maintain even tension.
Info :
Lightly stuff the sun center with a small amount of fiberfill before the petal base becomes too tight (after round 14-16). Sun centers should be only lightly stuffed to keep them flat but with slight body so embroidered faces sit nicely.
Round 25 :
Embroider the face now: using black embroidery thread or thin black yarn, stitch 2 small vertical ovals for eyes between rounds 10-13 separated by 8 sts. Embroider a curved smile with backstitch under the eyes. Add two small French knots or worked tiny circles with pink yarn for cheeks on either side of the smile. Info below shows exact placement.
Info :
Face details: Eyes centered approximately 7-9 mm from the center depending on tension. If using safety eyes (6-8mm), attach them through round 12 with washers. If embroidering, use a removable marking stitch to test placement before locking stitches.
Round 26 :
Optional small petal ruffle: in turquoise, (sc in each sc across scallop edge, ch2) repeating to create small connecting rings between petals – this creates additional texture and makes joining to daisies easier.
Round 27 :
Finish tidy round: sl st to next st and fasten off leaving a 20-25 cm tail for assembly. Weave tail on wrong side and trim.
Info :
Make 4 sun motifs for the full runner as shown, or reduce to 2 or increase to lengthen/shorten runner. Block sun motifs flat, pinning petals to an even round before final joining to avoid waves.
— Daisy Motif :
Round 1 :
6 sc in magic ring with golden yellow for center (6)
Round 3 :
(1 sc, 1 inc) x 6 (18)
Round 4 :
Change to white. (1 sc, 1 inc) x 6 (24) — this provides a slightly larger base under petals
Round 5 :
In each stitch, ch2, (dc, tr, dc) all in same stitch to form petal base, skip 1 st between petals; repeat around to create 8 petals (work into 8 evenly spaced positions) — result = 8 petals
Round 6 :
In each petal base, with white, work (sl st, ch3, 4 dc, ch3, sl st) to shape round full petal 8 petals
Info :
For daisy petals, keep tension slightly looser than the sun petal stripes so petals sit puffed and round. Place daisies between sun motifs as seen; you will need many daisies (about 16-20 depending on runner length).
Round 7 :
Work a tidy base: sc evenly around the petal bases into the foundation round to tidy edges. Aim for approximately 64 sc around (adjust evenly across petals)
Round 8 :
In golden yellow center, embroider small raised french knots or work 6-8 small sc clusters to accent the daisy center if desired.
Round 9 :
Change to turquoise for joining: around outer edge, (sc, ch3) between petals to create small openings for mesh joins. Repeat 8 times in total.
Round 10 :
Sl st and fasten off leaving long tail for joining (approx 20 cm). Make 12-16 daisies to mirror the image layout (exact count depends on runner length and how many daisies you place between suns).
Info :
To create the look in the photo, make 3 daisies between each sun motif vertically and 1 daisy at each end. Blocking daisies heavily will allow a flat, neat join to mesh.
— Leaf Motif :
Round 1 :
ch 6, sc into 2nd ch from hook, hdc, 2 dc, hdc, sc in next, sl st to finish leaf (creates small leaf shape)
Round 2 :
Turn leaf over; in bright green, work sc around the leaf edge to tidy (approximately 12 sc) and add a central raised ridge: using a contrasting green, work two front post sl st along center to create vein.
Round 3 :
Optional small picot edge: (sc, ch3, sl st) at tip to give a quaint point. Fasten off leaving tail for joining.
Info :
Leaves are small connectors between sun and daisy motifs. Make 12-16 leaves to distribute evenly in the mesh as seen in the photo. Keep them small and slightly cupped for visual texture.
— Joining Mesh and Layout (Central Construction) :
Info :
Lay out motifs in desired order before joining: in the pictured runner the order top-to-bottom is: sun, cluster of 3 daisies + leaves, sun, cluster of 3 daisies + leaves, sun, cluster of 3 daisies + leaves, sun. You can adjust the number of daisies between sun motifs to alter runner length.
Round 1 :
With turquoise yarn, join to a petal edge point on a sun motif where you created small ch3 arches. ch8, sl st into a daisy outer ch3 loop to join, ch8, sl st back to corresponding point on sun. Repeat to create an even 8-chain bridge between motifs across the seam — do this for each corresponding petal join to connect motifs in a grid.
Round 2 :
In each ch8 bridge between two motifs, work (sc in 2nd ch from hook, hdc, 4 dc, hdc, sc) in the center of the bridge to create a decorative fan that gives structural support (one fan per bridge). This does not alter counts on motifs but creates stable connection points along the mesh.
Round 3 :
Between adjacent daisy and sun connections, create triangular chain spaces: ch6, sl st to next join point to form a series of triangle mesh spaces across the runner. Keep chain lengths equal so motifs stay aligned.
Info :
Work flat on a blocking mat; pin each motif so that chain bridges pull motifs into consistent spacing. Use pins to ensure the mesh has an even diamond pattern before you make permanent joining stitches.
Round 4 :
Along each chain arch and between fan connectors, work 1 sc in each ch across to firm up the bridge: 1 sc in each ch across the ch6 and ch8 spaces. This creates small ladder-like bridges between motifs and reduces sagging.
Round 5 :
Work a decorative open round over the mesh: (ch3, sl st into fan top, ch5, sl st into next fan top) to create lacy chain loops across the runner. Adjust ch lengths to maintain flatness—count will vary depending on layout.
Info :
When joining long pieces, work in sections across the width of the runner and tack each section with a few temporary stitches first. This will prevent distortion as you progress down the runner length.
Round 6 :
To integrate leaves, work ch4 loops off the mesh at points between daisies and suns and attach leaves by sewing leaf tails into these ch4 loops. Use an extra sc around leaf base to prevent rotation.
Round 7 :
Continue working across entire runner connecting all motifs in the same manner. Once all motifs are joined with basic chain-bridge scaffolding, move to mesh reinforcement below.
Round 8 :
With turquoise, in each diamond mesh center (space formed by two ch-loops and fan connector), work (sc, ch3, sc) to form small ring connectors. Repeat across entire runner for stability.
Info :
Count your bridge points across each row so the runner remains symmetrical. If you have 12 bridge points in the topmost row, maintain same in each subsequent row so motifs line up vertically.
Round 9 :
Work a reinforcing round in BLO where possible on the mesh to create visual ridges that echo petal ridges. In sections over mesh work 1 sc in each st BLO (count varies), keeping stitches even and tension consistent.
Round 10 :
Chain lace decorative round: (ch5, sl st to next sc ring) repeat across runner to create scalloped turquoise connectors between daisies and suns. This is primarily aesthetic – adjust chain length to maintain flat runner.
Info :
Before finalizing joining, double-check motif orientation so that all suns face upward and daisies are consistently oriented. Pin, then sew a secondary pass of sl st through the main join bridges for added stability if runner will be used often.
Round 11 :
Optional reinforcement: in all main connective ch-loops, work (sc, hdc, sc) to reinforce the open spaces and reduce strain when laid on a table.
Round 12 :
Fasten off and weave in all long tails from joining rounds. Trim close to the fabric on the wrong side and tuck ends into mesh where possible.
— Outer Scalloped Edging :
Round 1 :
With turquoise, join at a visible outermost petal point. Work (sc in next 3 sts, 5 dc in next st, sc in next 3 sts, sl st) repeating along entire outer perimeter to form scallops. Count scallops to ensure they match motif repetition, aim for even spacing (approx 48 scallops along full length depending on runner size).
Round 2 :
Work a tidy finish: in each 5 dc shell work (sl st, ch2, sl st) to lift shell center slightly and define scallop. This creates the defined rounded edge seen in the photo.
Info :
If your edges ripple, adjust shell density (reduce or increase dc count in shells) and re-block. The scalloped edge is forgiving: minor variations are visually pleasing and natural for handmade lace.
Round 3 :
Optional picot finish: in white, weave small picots at the peak of every second scallop to add contrast. (sc, ch3, sl st) at every second shell. Fasten off and weave in ends.
Round 4 :
Final blocking: wet block or steam block the entire runner on a flat surface, pinning every petal, daisy and scallop to even roundness. Allow to dry completely.
Info :
Blocking flattens petals and evens motif spacing. Using a humidifier or gentle steam from an iron kept at a safe distance prevents yarn damage. Use rust-proof pins and check placement frequently while drying.
— Face Embroidery & Final Detailing :
Round 1 :
Using black embroidery thread or thin yarn and a yarn needle, embroider small oval eyes centered between rounds 10-13 of sun center. Use satin stitch or small vertical ovals about 4-6 mm high. Space eyes approximately 8 stitches apart depending on motif tension.
Round 2 :
Stitch a curved smile below the eyes using a backstitch. Start one side and make a smooth curve across the center (approx 10 mm wide). Emphasize ends of smile with small upward flicks for a cheerful look.
Round 3 :
Use pink yarn to create two small blush circles on the cheeks using a satin stitch or small French knots, one on each side of the smile, approximately 4-6 sts from the center line.
Info :
If you prefer safety eyes, insert them into round 12 of the sun center before light stuffing and final petal joins. Add a small felt circle behind the eye on the wrong side for reinforcement if desired.
Round 4 :
Inspect the runner for loose threads and weave in ends with a yarn needle. Tidy any stray loops with small stitches on the wrong side. Trim any excess ends after weaving thoroughly.
Info :
For extra protection, you can lightly spray with a fabric sealant on the wrong side to secure embroidery and small yarn ends. Test on a scrap first.
Bringing all the little sun faces, daisies, and leaves together creates a joyful, handcrafted centerpiece that's full of personality. Each motif is an opportunity to add a pop of color and a small custom touch—try different stripe orders or flower placements to make it yours. Blocking and careful joining really make the design sing, and seeing the runner laid out on the table is such a satisfying finish. 🧶🌼✨