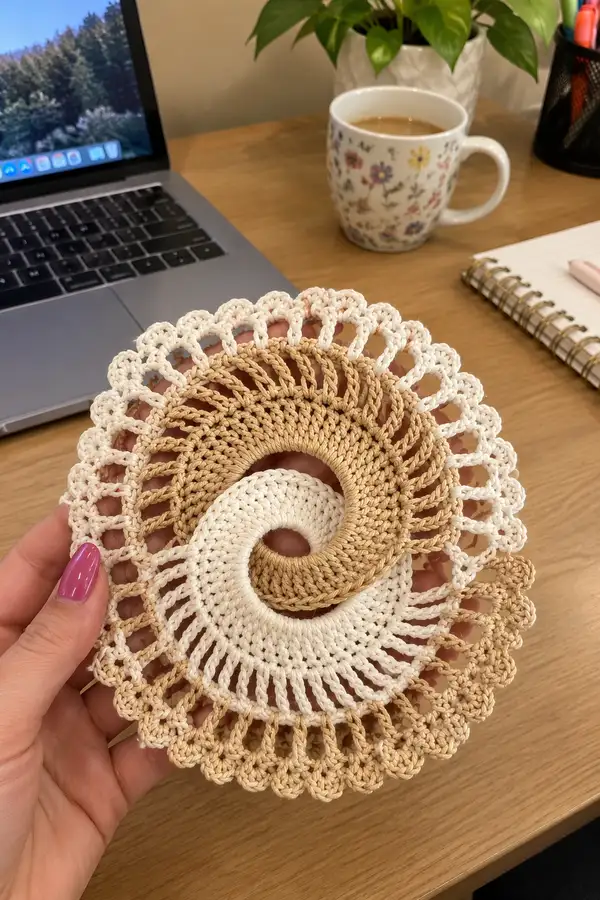
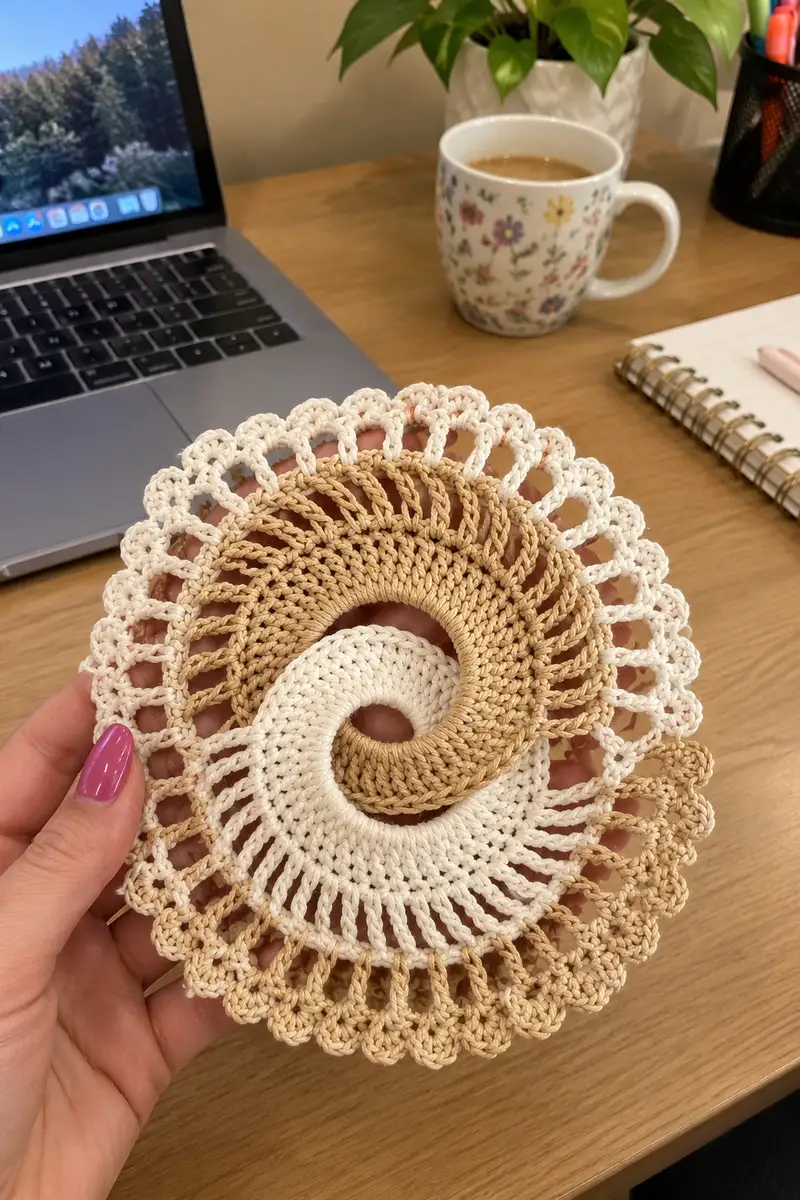
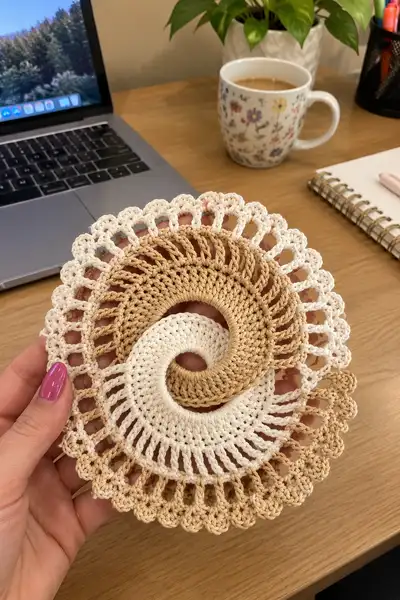
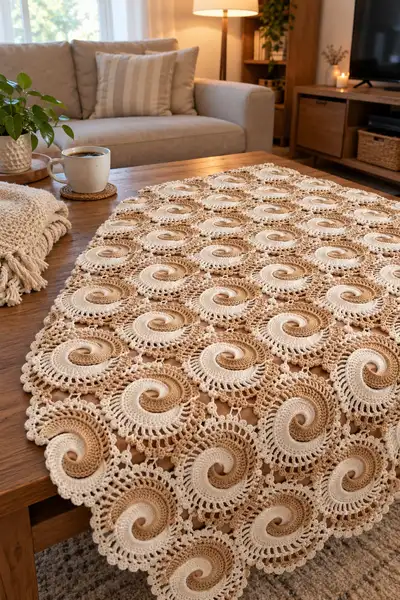
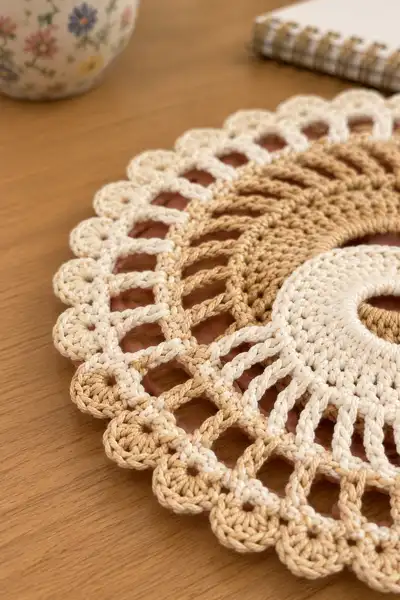
Create a stunning textured bedspread made from interlocking spiral lace motifs in warm cream and tan. This pattern breaks the blanket into repeatable spiral discs with a delicate lacy scalloped edge, assembled with a join-as-you-go technique for a seamless finish. The motifs are lightweight and breathable—perfect for layering on a bed or folding as a decorative throw. Clear step-by-step rounds and assembly instructions help you recreate this cozy, vintage-inspired bedspread.
Progress Tracker
0% Complete
— Notes & Gauge :
Info :
This pattern is modular: make as many spiral motifs as you need and join-as-you-go using the chain-loop join described in the Joining section. Gauge for motif centre (measured flat): 10 cm/4 in across after Round 18 using 3.5mm hook and DK cotton. Tension will affect motif diameter—if your motif is too small, switch to 4.0mm; if it is too loose, go down to 3.0mm.
Info :
All motifs are worked in joined rounds unless stated. At the end of rounds where you fasten off, leave a 20-25 cm tail for weaving or joining. Use stitch markers for the first stitch of each round. The pattern uses alternating color placement to create mirrored spirals; two motif versions are provided (A and B).
— Spiral Motif A (Make as many as needed) :
Round 1 :
6 sc in magic ring (6)
Round 3 :
(1 sc, inc) x 6 (18)
Round 4 :
(2 sc, inc) x 6 (24)
Round 5 :
(3 sc, inc) x 6 (30)
Round 6 :
(4 sc, inc) x 6 (36)
Round 7 :
(5 sc, inc) x 6 (42)
Round 8 :
(6 sc, inc) x 6 (48)
Info :
Work rounds 1-8 in Color 1 (cream). These rounds create a compact smooth center. Keep stitches tight but not cramped so motif lies flat.
Round 9 :
1 sc in each st (48)
Round 10 :
1 sc in each st (48)
Round 11 :
1 sc in each st (48)
Info :
Change to Color 2 (tan) with the final pull-through of Round 11 to begin the spiral contrast. Carry Color 1 inside the work if you prefer to hide ends for weaving later.
Round 12 :
1 sc in each st (48)
Round 13 :
(7 sc, inc) x 6 (54)
Round 14 :
1 sc in each st (54)
Round 15 :
(8 sc, inc) x 6 (60)
Round 16 :
1 sc in each st (60)
Info :
The increases in rounds 13 and 15 are placed to build more fabric on one side of the motif. This bias in increases combined with the later lacy rounds produces a subtle spiral curve when viewed in groups. Keep stitch counts accurate; place stitch marker on the first stitch of each round to track starts.
Round 17 :
(9 sc, inc) x 6 (66)
Round 18 :
1 sc in each st (66)
Info :
At the end of Round 18, the motif centre has reached approximately the size of a small coaster. If you prefer a larger or smaller motif, adjust the number of even sc rounds before the lacy surface begins.
Round 19 :
Change to Color 1. *Sc in next st, ch 3, skip next st* around. Repeat 33 times (33 sc, 33 ch-3 spaces). Join with sl st to first sc.
Round 20 :
*Into each ch-3 space: sc, hdc, 3 dc, hdc, sc (fan)* Repeat around (33 fans). Join with sl st to first sc.
Info :
Fans create the tall lace rays seen in the photos. Keep your tension even when making the 3-dc center of each fan so all fans finish at a consistent height. If your fans pull inward, increase the ch-loop size in Round 19 (try ch4) and adjust Round 20 accordingly (3 dc -> 4 dc).
Round 21 :
Ch 1, sc in first st; *sl st into center dc of next fan, ch 5, sl st into same center dc*; repeat around placing one ch-5 loop over each fan center (33 ch-5 loops). Join with sl st to first sc.
Round 22 :
Change to Color 2. Into each ch-5 loop: (sc, ch2, 4 dc, ch2, sc) — a taller decorative shell. Repeat into each loop around. Join with sl st to first sc.
Info :
Round 22 builds a taller airy frill which will be trimmed into scallops in the next rounds. If you prefer a denser outer lace, substitute (sc, 6 dc, sc) for each loop.
Round 23 :
Ch 1, sc in first st; *ch 3, skip 3 dc of shell, sc in next st* repeat around to create open arches over shells. You will create 33 arch spaces. Join with sl st to first sc.
Round 24 :
Into each arch: (5 dc, sl st to base) to create a rounded scallop. Repeat around (33 scallops). Join and fasten off. Leave 20 cm tail for weaving/assembly.
Info :
Fasten off leaving a long tail for joining. Block the motif to a flat circle matching the others: pin to blocking mat and mist lightly, stretching the scallops evenly. Allow to dry completely before joining.
— Spiral Motif B (Mirror version - Make alternating motifs) :
Info :
Motif B is worked exactly as Motif A but with the color order reversed (start with Color 2 in rounds 1-8 then change to Color 1 at round 12). This mirror placement causes adjacent motifs to read as opposing spirals in the layout for visual movement across the bedspread.
Round 1 :
6 sc in magic ring (6) — Color 2 start (tan)
Round 3 :
(1 sc, inc) x 6 (18)
Round 4 :
(2 sc, inc) x 6 (24)
Round 5 :
(3 sc, inc) x 6 (30)
Round 6 :
(4 sc, inc) x 6 (36)
Round 7 :
(5 sc, inc) x 6 (42)
Round 8 :
(6 sc, inc) x 6 (48)
Round 9-11 :
1 sc in each st (48)
Round 12 :
Change to Color 1 (cream). 1 sc in each st (48)
Round 13 :
(7 sc, inc) x 6 (54)
Round 14 :
1 sc in each st (54)
Round 15 :
(8 sc, inc) x 6 (60)
Round 16 :
1 sc in each st (60)
Round 17 :
(9 sc, inc) x 6 (66)
Round 18 :
1 sc in each st (66)
Round 19 :
Change to Color 2. *Sc in next st, ch 3, skip next st* around. Repeat 33 times. Join.
Round 20 :
Into each ch-3 space: sc, hdc, 3 dc, hdc, sc. Repeat 33 times. Join.
Round 21 :
Ch 1, sc; *sl st to center dc of fan, ch 5, sl st to center dc* repeat around creating 33 ch-5 loops. Join.
Round 22 :
Change to Color 1. Into each ch-5: sc, ch2, 4 dc, ch2, sc. Repeat around. Join.
Round 23 :
Ch 1, sc; *ch 3, sc* into spacing, repeat to create 33 arch spaces. Join.
Round 24 :
Into each arch: 5 dc to form scallops. Join and fasten off leaving a 20 cm tail for joining. Block flat to same measurements as Motif A.
Info :
Make half the number of motifs in version A and half in B for a checkerboard spiral layout or arrange as you prefer. For plaza or runner sizes you can use more of one version for directional flow.
— Joining Motifs (Join-As-You-Go Method) :
Info :
Motifs are joined at the scalloped edge points. Join-as-you-go (JAYG) is recommended: when working Round 24 (scallops) on a new motif, use sl sts to connect to adjacent blocked motifs through the arch-chains of already positioned motifs. Join motifs in rows left-to-right, then join rows top-to-bottom.
Round 1 (Joining step when working scallops on a new motif) :
Begin Round 24 scallop round as instructed for Motif. When you reach a scallop that lines up with a scallop of an adjacent motif: work 2 dc of the scallop, ch 1, sl st through the corresponding arch-ch3 space of the adjacent motif (pulling the stitches snug but not tight), ch 1, complete the remaining 3 dc of the scallop in the new motif. Continue around joining each time you meet a neighboring scallop. This creates paired sl-st joins that are subtle and flexible.
Round 2 :
For corner joins where up to four motifs meet, use ch1 sl st to join each connecting point twice (one for each neighbor) so the join sits flat. Be mindful of tension so the seam does not pull the scallops inward.
Info :
When joining across a previously completed motif, insert your hook into the ch-3 space (or picot center) of the neighbor motif to sl st. The join should be performed while the new motif's scallop round is still active—do not weave in ends until joins are complete for that motif.
Round 3 :
Repeat the scallop join process across the entire motif edge. After joining to all neighbors, finish the scallop round and fasten off leaving a tail to weave in; weave behind the newly joined seam to lock it into place.
Info :
For a neat grid, pin motif positions on the blocked motif layout board before joining. This ensures consistent spacing and a true rectangular final shape. If your motifs are slightly different sizes, ease the difference with slightly looser or tighter sl-st joins to compensate.
— Layout & Quantity Guide :
Info :
Estimate motif diameter after blocking. In the pictured layout each motif is approximately 12–13 cm (4.5–5 in) across. For a bedspread the number of motifs will vary by bed size. Example approximate motif counts: Lap/Throw (~60 x 60 cm): 12–16 motifs; Twin size (~160 x 220 cm): 180–220 motifs; Queen (~200 x 220 cm): 220–260 motifs depending on motif diameter and joining tension. Adjust motif count to your desired finished dimension.
Info :
Plan an arrangement on a flat surface or design wall; alternate Motif A and B as desired. For the gallery look, alternate A and B in a checkerboard arrangement so spirals oppose one another for a woven movement.
— Full Border & Finishing Rounds (After all motifs joined) :
Border Round 1 :
Along the outermost scallops, with Color 1, work 1 sc in each scallop top (the top dc of each five-dc scallop). Where two scallop peaks meet at a corner, work 2 sc to maintain straight edge.
Border Round 2 :
Ch 3 (counts as dc), *skip 1 sc, (3 dc, ch 1, 3 dc) into next sc (large shell)*; repeat along entire perimeter creating shell clusters at regular intervals for visual weight. At corners, work (3 dc, ch 3, 3 dc) to keep border square. Join and fasten off.
Info :
Optional additional rounds: Add one or two rounds of reverse single crochet (crab stitch) along the very edge for a sturdy finished edge, worked in opposite direction to normal sc.
Border Round 3 :
If you want a more dramatic scallop: With Color 2, work into each shell cluster from Round 2: (sl st to center, ch 4, 7 dc, ch 4, sl st) producing large raised scallops. Fasten off and weave in ends.
Info :
When adding the outer border, step back often and check for ruffling or scallops pulling in. If the border pulls in, add more shells or use a larger hook for the border rounds to relax tension.
— Final Blocking & Care :
Info :
After joining and finishing the border, soak the bedspread gently in lukewarm water with a small amount of mild detergent, rinse, then lay flat to block. Pin scallops and outer shells to even shape. Allow to dry completely. Cotton will relax and the open lace will look crisper after blocking.
Care :
Machine wash on gentle cold cycle in a laundry bag or hand wash, reshape and dry flat. Avoid tumble drying which can distort the lace and shrink cotton yarn. Store folded flat if possible to reduce stretching.
Info :
If you plan to machine wash frequently, consider using a cotton-blend yarn with a little poly content to increase durability and reduce shrinkage risk while keeping a similar visual effect.
— Tips & Troubleshooting :
Info :
Count often during increase rounds; a simple miscount in the center rounds will propagate and make fan spacing uneven. If you find a mistake several rounds later, unravel back to the last correct round rather than trying to fudge stitches; the join-as-you-go process demands matched fans and scallops.
Info :
If one motif edge sags compared to neighbors after joining, remove the joining sl sts along that seam, adjust tension and rejoin slightly tighter. Conversely, if seam is too tight and puckers, rejoin with looser sl sts or use a larger hook for the joining pass.
You made it to the finish line — bravo! This textured spiral bedspread is a rewarding blend of precise stitchwork and flowing design that rewards patient crocheters. Watching the spirals come together into a large surface is magical; each motif is like a small piece of art. Enjoy your cozy, handmade creation — it's perfect for gifting or keeping as a signature piece in your home. 🧶✨