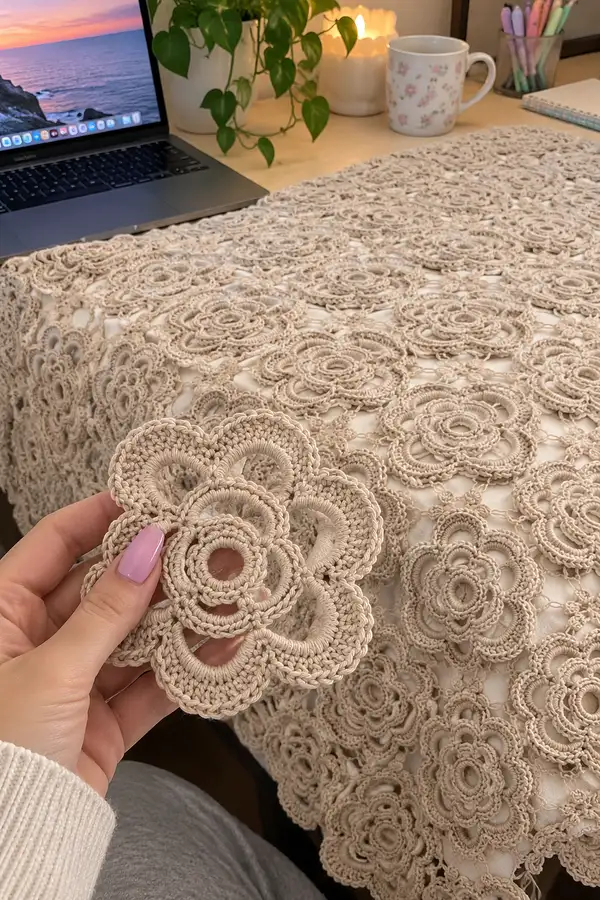
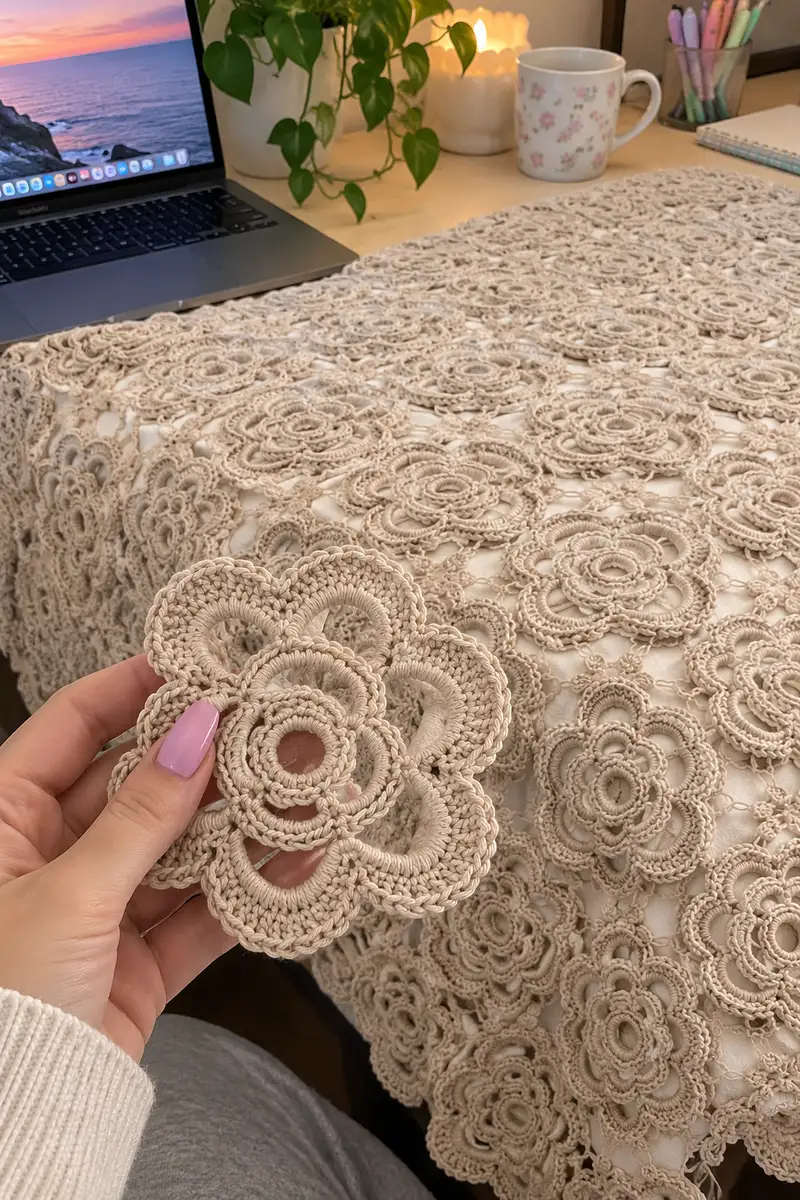
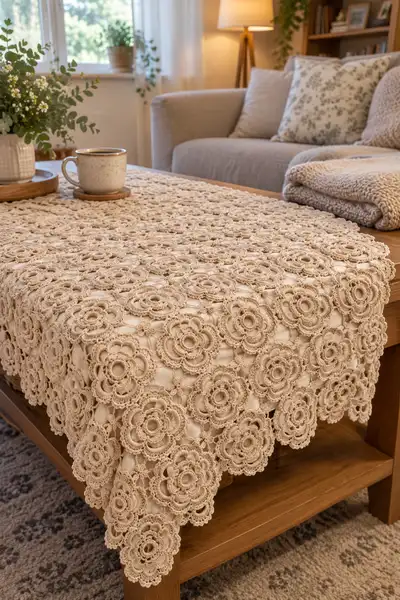
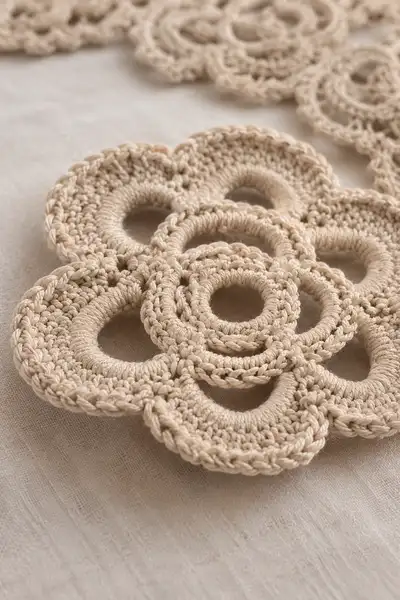
Create a calming, neutral-toned floral blanket made from joined granny-style flower motifs. This pattern features airy openwork rings, layered petals and a scalloped edge to form a lightweight throw or table runner. The finished fabric is delicate, breathable and beautifully textured — perfect for cozy corners, tabletops or layered on a bed. Detailed rounds and join-as-you-go instructions make assembly tidy and repeatable.
Progress Tracker
0% Complete
— Notes & Gauge :
Info :
Gauge is not critical for motif join patterns but affects final size. With 3.5mm hook and DK cotton, a finished motif measures approximately 11.5-12.5 cm (4.5-5 inches) across after blocking. Make one motif to check size before committing to full blanket.
Info :
Work motifs with tight, even tension so stuffing or padding underneath won’t show through. Block lightly after finishing each motif to round the petals and make joining cleaner. Use stitch markers at the first stitch of rounds and when marking join points.
— Main Flower Motif (Make many) :
Round 1 :
mr, 6 sc into ring; pull ring tight and join with sl st to first sc (6)
Round 2 :
inc in each st around (12)
Round 3 :
(1 sc, inc) x 6 (18)
Round 4 :
(2 sc, inc) x 6 (24)
Info :
This builds a smooth, slightly domed center. Keep stitches tight to form a defined ring. Place a stitch marker in the first st of Round 4 and move it each round.
Round 5 :
Ch 3 (counts as dc), *skip next sc, dc in next sc; repeat from * around to create 12 dc clusters separated by skipped stitches; join with sl st to top of ch-3 (12 dc clusters, 12 skipped spaces)
Round 6 :
In each skipped sp from previous round: (ch 6, sl st into same skipped sp) x12 — create 12 ch-6 loops evenly spaced around center (12 loops)
Info :
These ch-6 loops will form the base for the first layer of petals. Maintain even loops by keeping chain tension consistent — do not stretch chains while working the next round.
Round 7 :
*In ch-6 loop: sl st, ch 3 (counts as dc), 2 dc, tr in same loop, 2 dc, ch 1, sl st into loop; repeat from * around into each ch-6 loop (each petal worked entirely into its loop) (6 petals if you join pairs of loops — but we have 12 loops; we will pair loops in this round to create 6 full petals)
Info :
Round 7 pairs the ch-6 loops into six broader petals. To pair loops: work across two adjacent loops to create one petal by placing the cluster across the chain bridge that separates them. Ensure symmetry by counting petals as you go.
Round 8 :
Slip to first petal base; *(ch 4, sc in base between petals, ch 4, sl st into middle of petal) x6 — creates small picot arches between petals for decorative spacing
Round 9 :
Work 2nd layer foundation: sl st to top of any petal, ch 1, sc in same st, *(ch 6, skip to next petal top, sc at petal top) x6 — creates 6 ch-6 arcs joining petal tops (6 arcs)
Info :
These arcs will become the base for the larger outer petals. Keep ch-6 arcs identical in length to keep outer petals even. If your yarn shrinks, you can ch 7 for a slightly larger arc.
Round 10 :
In each ch-6 arc: (sl st, ch 3, 6 dc, ch 3, sl st) into arc — creates raised outer petal arches (6 outer petals)
Round 11 :
*Working across outer petal: ch 1, sc around bottom 3 dc of petal, (hdc, dc, hdc) at petal tip, sc down other side, sl st into base between petals; repeat around (maintain 6 petals) (use stitch counts so each sc row equals 12 sc around each petal base)
Info :
Round 11 shapes the outer petal into a defined, layered arc with subtle ridges. Use BLO on the next round to make a crisp edge if you want a more sculpted petal.
Round 12 :
1 sc in each st BLO around entire motif to create a firm ridge and even edge. Count total: If previous worked ~72 stitches across petals, this round will be 72 sc (72)
Round 13 :
Decorative scallop base: *(ch 3, 5 dc in next 3 stitches to form a fan, ch 3, sl st into next base st) x6 — creates 6 large fans evenly spaced (6 fans)
Info :
Fans give texture when motifs are joined to each other. If your motif feels too loose, work this round with a smaller hook or with tighter tension.
Round 14 :
Refine fan edges: sl st into center of each fan, ch 2, (hdc, dc, tr, dc, hdc) across fan center, sl st to fan base — repeat for 6 fans (6 shaped fans)
Round 15 :
Edge chain connectors: *ch 5, sl st into small sl st space between fans; repeat around to create decorative connecting chain loops (approx 6–12 chain loops depending on spacing)
Round 16 :
Finish outer edge: working into every chain loop from previous round: sc, hdc, dc, hdc, sc (creates scallop edging on every loop). If you have 12 loops, repeat pattern 12 times (60 sts if each scallop equals 5 stitches) (12 scallops)
Round 17 :
Picot finish: *sl st to top of next scallop, ch 3, sl st into same stitch (picot), sl st to next scallop top; repeat around (makes small picot points at scallop tops)
Info :
Weave in your ends now or leave long tails for a join-as-you-go method. Blocking the motif at this stage helps set scallops flat and even before joining.
Round 18 :
Optional reinforcement: 1 sc in each st around working through both loops and the back of last picot row for firm edge. Count will equal previous total scallop stitches (approx 60) (60)
Round 19 :
Optional decorative rope: ch 8, sl st into top of every 2nd picot around to create rope loop decoration; join at end with sl st (approx 6 rope loops)
Round 20 :
Fasten off and leave tail for joining if not joining-as-you-go. Block motif gently to shape petals and scallops.
Info :
One completed main motif includes an inner ring, inner petals and outer scalloped petals. After blocking, each motif should be roughly circular and measure about 11.5–12.5 cm. Make a sample block of 6 motifs to practice joins before mass-producing for the full blanket.
— Small Connector Motif (Make many) :
Round 1 :
mr, 6 sc into ring; join with sl st (6)
Round 2 :
inc in each st (12)
Round 3 :
(1 sc, inc) x6 (18)
Round 4 :
*(ch 3, sl st into same st), sl st into next st; repeat around to create 6 little ch-3 loops alternating with sl sts (6 loops)
Round 5 :
In each ch-3 loop: sc, hdc, sc — finish loop; repeat around (6 small petals) (approx 18 stitches total)
Round 6 :
Fasten off leaving a long tail for joining. These small connector motifs sit at intersections of main motifs to stabilize joins and create pretty 4-point star connectors.
Info :
Use small connector motifs between every 4 main motifs (at grid intersections). They are delicate and should be slightly smaller than main motifs; blocking helps keep them flat so joins are invisible.
— Join-As-You-Go Instructions (for connecting motifs into rows and blocks) :
Info :
We recommend joining the blanket using a modified join-as-you-go method: join main motifs to previously completed motifs by slip-stitching into the scallop or chain loops and by connecting into the small connector motifs at intersections. Join while working the final edging round (Round 16–18 from the main motif) so joins are hidden in scallops.
Round 1 :
Lay out first motif A and second motif B adjacent, right sides up. With motif B on hook, work until you reach the scallop that aligns with a scallop on motif A. When at the scallop top: sc as instructed, then instead of finishing the scallop stitch, sl st into corresponding stitch or chain space on motif A to join, then continue scallop on motif B. Repeat for each alignment point across that edge (join points dependent on motif size; typically 3–4 joins per adjacent edge).
Info :
Always join at the equivalently placed scallop or chain loop to ensure the motifs sit flat together. Use pins to align motifs before joining multiple edges.
Round 2 :
Join at corner intersections: When a corner sits adjacent to two motifs, work the fan/scallop on motif B until the corner stitch; sl st into the top of the small connector motif (if already in place) or into the adjacent motif's picot space for a neat corner. This locks three motifs together at a clean point.
Round 3 :
When a space between four main motifs is reached, position a small connector motif into the gap and join into its ch loops while completing scallops of surrounding motifs. Secure connector by sl st into each surrounding motif's connecting loop (4 joins). Fasten off connector tail and weave in.
Info :
Work in panels: build one row of motifs, then join subsequent rows to the first. This keeps the weight manageable and prevents distortion. Stitch counts for joins vary depending on how many scallops align — aim for even joins along each side with equal numbers of sl st connections.
— Joining Protocol: Row-by-row (Repeatable Steps) :
Round 1 :
Make first motif and 3 more to create 2x2 block, joining as you go following join steps. Keep the right side facing and join motifs B and C to A using sl st into the scallop tops for 3 points per side. When 2x2 block is secured, weave ends and block block gently.
Round 2 :
Add next motif to edge of block: align with motif A's exposed scallops and join using sl st across 3 points per side. Continue to add motifs across the row until desired width is reached.
Info :
For the bedspread in the photos, the maker used a grid of roughly 12 motifs by 12 motifs (approx 144 motifs) — adjust the grid to your requested finished size. For a table runner, 3 by 10 motifs is a practical starting dimension.
Round 3 :
When joining rows vertically, attach each motif at 3–4 symmetrical join points along the edge so tension distributes evenly across the fabric. If one side feels tighter, add one extra slip stitch at an outer scallop to balance.
Round 4 :
Connector motif placement: for every junction where four main motifs meet, insert a small connector motif and join into its loops with sl sts from each of the four surrounding motifs. This will form the little floral star seen in photos between large flowers.
Info :
Take your time on joins; pin all pieces in position before making permanent joins. Work across a flat surface to keep pattern alignment consistent.
— Decorative Edge / Wide Border (Work after full motif field is assembled) :
Info :
If your blanket is already an even rectangle, work the border all the way around. If not, you can fill with partial motifs or slender edge motifs to square off edges before adding the border rounds below.
Round 1 :
With right side facing, join yarn at any outer motif scallop. Ch 1, 1 sc in same st, *work 2 sc in each outer scallop top and 1 sc in each chain bridge between scallops; repeat around continuously; join with sl st to first sc (count will vary with number of outer scallops; approx 8–12 sc per motif edge)
Round 2 :
(BLO) 1 sc in each st around to create a ridge — same count as Round 1
Info :
BLO gives a neat ridge where the border meets the motif field. If some edges are scalloped unevenly, adjust by adding or skipping sc in chain bridges so the ridge lays flat.
Round 3 :
Ch 3, *skip next sc, (5 dc in next sc) skip next sc, ch 2, sl st into next sc; repeat around to create fans spaced with small ch-2 gaps (approx 1 fan per motif scallop)
Round 4 :
Work fan shaping: in each 5-dc fan: sl st, ch 2, hdc, dc, tr, dc, hdc, sl st to fan base — repeat around (fan count equals Round 3 fans)
Round 5 :
Between fans: ch 6, sl st into next ch-2 space to form decorative arches. (arches equal number of fans)
Round 6 :
Into each ch-6 arch: sc, hdc, 3 dc, hdc, sc — creates a scallop between each fan. Repeat for all arches (scallop count equal number of arches)
Round 7 :
Edge picot: *sl st to tip of scallop, ch 3, sl st into same stitch (picot), sl st to next base — repeat around
Info :
Adjust the number of chains in arcs (ch-6 vs ch-7) to control the depth of the border scallops. Smaller arcs make a denser border, larger arcs create a lacier finish.
Round 8 :
Optional reinforcing round: 1 sc in each st around working through both loops and under the picot tops if desired for a firm edge (count equals prior total scallop stitches — typically 5–7 sts per scallop)
Round 9 :
Decorative chain loops: ch 8, sl st into every 2nd picot around to add an open loop detail; join and fasten off.
Info :
Block the whole blanket after finishing the border. For large projects, wet block in sections on a blocking mat using rust-proof pins or blocking wires to keep scallops perfectly curved.
— Alternate Edge: Continuous Scallop Refinement (if you prefer rounded petal edge) :
Round 1 :
Join yarn to any outer motif petal base, ch 1, sc into base, *skip 2 sts, (7 dc in next st) skip 2 sts, sc in next st — repeat around to create deep scallops (scallop count depends on total outer petal bases)
Round 2 :
In each deep scallop: sl st to center, ch 2, (hdc, dc, tr, dc, hdc) across; sl st to base — repeat around
Round 3 :
Finish with small stitch ridge: 1 sc in each st around, join and fasten off. Weave ends and block.
Info :
Use this edge if you want a more pronounced petal silhouette similar to the images where outer petals form a continuous floral border.
— Finishing Touches & Assembly Rounds :
Round 1 :
Weave in remaining ends with a yarn needle, passing each tail through 6–8 stitches inside petals or under border ridges. Trim close to work.
Round 2 :
Final steaming: use a steam iron held 2–3 cm above motif surface and lightly steam each motif while shaping scallops with fingers or blocking pins. Allow to dry flat for 24 hours.
Round 3 :
If you want extra stability, stitch a lightweight cotton backing to the assembled motif fabric using slip stitch around each outer motif, being careful to match scallop points. This creates a reversible blanket with muted lace on one side.
Info :
Check joins after blocking and add small finishing stitches to any gaping points using matching yarn to keep the join invisible. For large blankets, topstitch the inner seam allowances on the wrong side to prevent stretching during use.
Round 4 :
Optional surface embroidery: use matching linen needle and single strand of yarn to add small french knots in centers or to outline petals for a subtle highlight. Work embroidery before final blocking for best stability.
Info :
Store the finished blanket flat or rolled to avoid creasing. If washing is necessary, handwash gently in cool water with mild detergent; reshape and block while damp.
This tranquil floral motif blanket is a labor of love — each motif is a little meditative moment that builds into an elegant whole. The neutral, layered petals add texture without overpowering a room, and the join-as-you-go method keeps assembly rewarding. Whether you make a runner or a full spread, every petal brings charm and calm to your space. 🧶🌸 Enjoy the mindful process and share your finished piece with pride! ✨