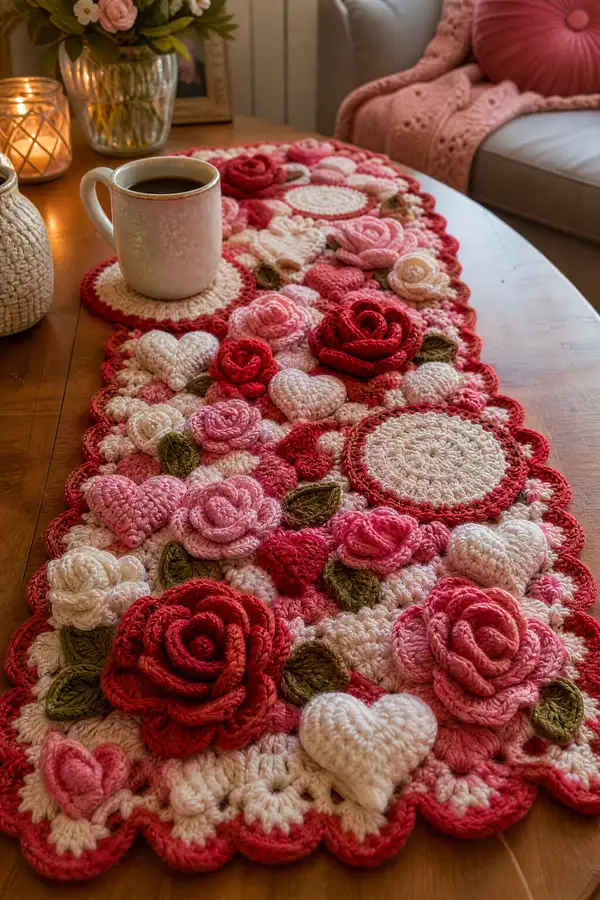
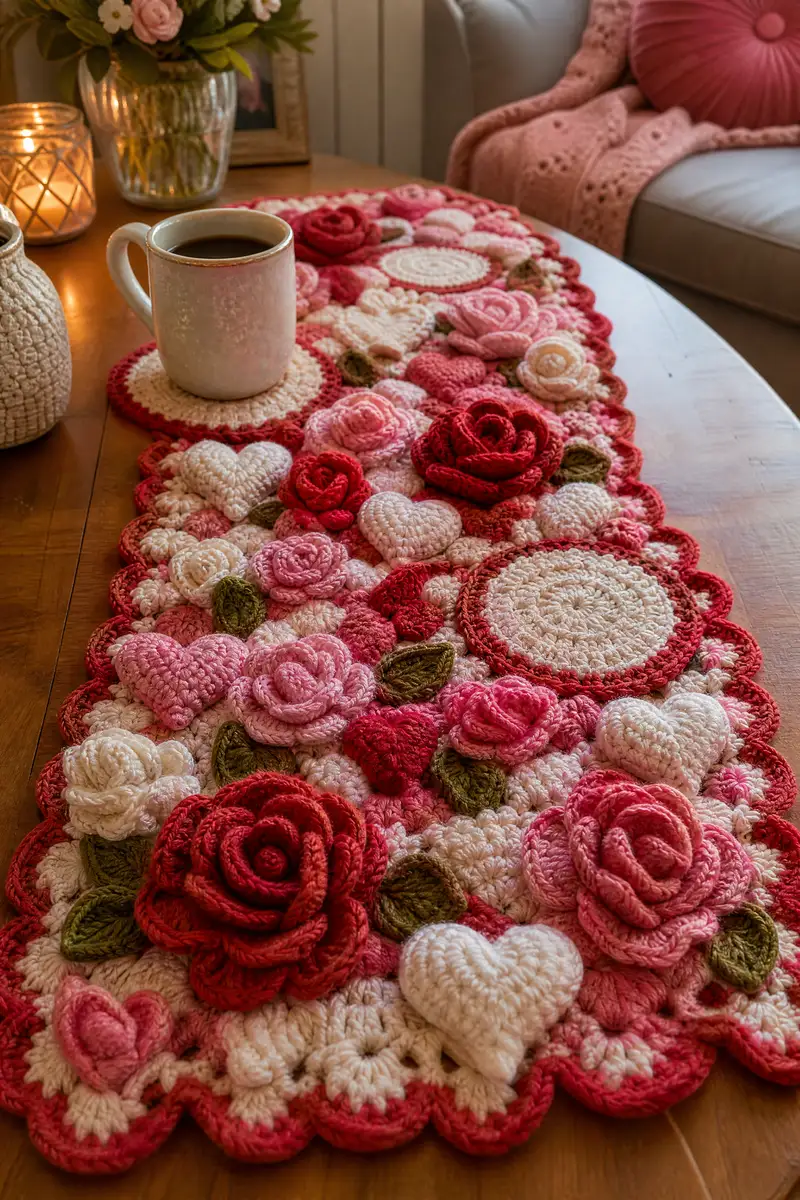
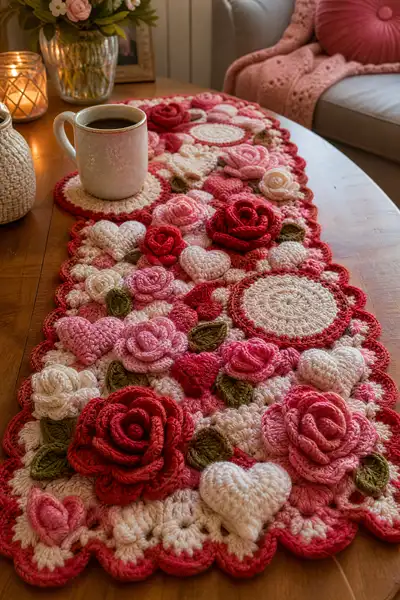
A romantic, textured table runner full of sculpted roses, puffy hearts and delicate leaves in shades of cream, blush, pink and deep rose. This layered piece uses small medallions, raised rosettes and bobble clusters to create a lush, dimensional surface that looks like a garden runway for your table. Perfect for seasonal displays, centerpieces or a cozy romantic touch to your dining area.
Progress Tracker
0% Complete
— Large Medallion (make multiple for runner centres) :
Round 1 :
6 sc in magic ring (6)
Round 3 :
(1 sc, inc) x 6 (18)
Round 4 :
(2 sc, inc) x 6 (24)
Round 5 :
(3 sc, inc) x 6 (30)
Info :
Change to cream color if making a light center. Keep tension even — medallion should lay flat and not ruffle.
Round 6 :
(4 sc, inc) x 6 (36)
Round 7 :
(5 sc, inc) x 6 (42)
Round 8 :
1 sc in each st (42)
Round 9 :
1 sc in each st BLO to create a subtle ridge (42)
Round 10 :
Switch to mid-pink. *sc 5, inc* x 6 (48)
Round 11-12 :
1 sc in each st (48)
Info :
These rounds create the medallion platform for a scalloped edge. Use a darker color for contrast if desired.
Round 13 :
(5 sc, inc) x 6 (54)
Round 14 :
1 sc in each st (54)
Round 15 :
For scalloped edge: *sk 1, (dc, tr, dc) in next st, sk 1, sl st* repeat around to create 18 scallops; join with sl st (54)
Info :
Fasten off and weave in ends. Make as many medallions as you want; spacing will determine runner length. Block flat before assembly.
— Small Round Coaster / Mini Medallion (make many) :
Round 1 :
6 sc in magic ring (6)
Round 3 :
(1 sc, inc) x 6 (18)
Round 4 :
1 sc in each st (18)
Round 5 :
Switch to accent color. Create small scallops: *sk 1, (dc, tr, dc) in next st, sk 1, sl st* x 6; join (18)
Info :
These small medallions act as bases for roses and hearts. Make 20-30 in mixed colors for a dense runner.
— Layered Rose (Large) (make several for focal points) :
Round 1 :
ch 40, sl st to form loop (or ch 35-45 depending on desired diameter)
Round 2 :
Round of sc around loop: sc in each ch (40)
Round 3 :
*sc 3, hdc 1, dc 2, tr 2, dc 2, hdc 1, sc 3* repeat across to form 10 wide petal bases (40)
Info :
This is a flat spiral method. Tension here is important: keep base row snug so petals sit upright when rolled.
Round 4 :
Work petals by forming shell over each petal base: in next 4 sts work (sc, hdc, dc, tr, dc, hdc, sc) to create a tall petal. Repeat 10x (70 sts total roughly)
Round 5 :
FLO only: 1 sc in each st to create a ridge under petals (70)
Round 6 :
Begin spiral roll: Attach yarn at one petal base, sc across first 7 sts, fold and sew the edge to the next 7 sts with slip stitches to start rolling; continue rolling the strip and slip stitching as you go. Result becomes a spiral rosette approx 9-10cm diameter depending on ch count.
Info :
When rolling, tuck inner turns tight for a compact center and let outer petals relax for a natural rose bloom. Sew with color-matched yarn for invisible joins.
Round 7 :
When roll is complete, secure with 6-8 stitches through base and weave tail. Optional: add a few small stitches through petal tips to keep outer petals in desired position.
Round 8 :
Finish: hide ends and block lightly by steaming to shape petals into a soft bloom.
— Medium Rosette (make multiple) :
Round 1 :
ch 28, sl st to join (or ch 24-30 for desired size)
Round 2 :
sc in each ch (28)
Round 3 :
*sc 2, hdc, dc, hdc* repeat across to form 7 petals (28)
Round 4 :
Turn strip and roll as with large rose. Slip stitch through base every 3-4 stitches to anchor. Secure with several back stitches (approx 6-10) and fasten off.
Info :
Make a spread of medium rosettes in contrasting colors to create layered depth around larger roses.
— Small Rosette / Rosebud (make many) :
Round 1 :
ch 18, join into ring with sl st
Round 2 :
sc in each ch (18)
Round 3 :
*sc, hdc, dc, hdc* repeat 4 times to create 4 small petals (18)
Round 4 :
Roll and sew center with 4-6 securing stitches. Fasten off (rosebud ≈ 2.5-3cm).
Info :
Small buds are the easiest way to add texture; make many to fill the runner's negative space.
— Puffy Heart Motif (make many) :
Round 1 :
Make two identical halves then join: For one half work 6 sc in magic ring (6)
Round 3 :
(1 sc, inc) x 6 (18)
Round 4 :
1 sc in each st (18)
Round 5 :
Form the round top: *ch 3, (dc, dc, dc) in next st, ch 3, sl st into adjacent st*, repeat for two bumps. Fasten off half. Make second half mirrored.
Round 6 :
Join halves by placing right sides together and sc through both layers around the outside leaving a 2cm opening; lightly stuff with fiberfill about 50% full to create a soft puff, then finish sc to close (total stitches around approx 36)
Info :
Stuff lightly so the heart is puffy but not overfilled which will distort seams. These hearts are excellent for mid-height texture.
Round 7 :
Edging: sc in each st around heart for a neat edge, adding 1-2 extra sc in curved points to avoid puckering (approx 36-38)
Round 8 :
Optional: Working in BLO, 1 sc around for a ridge to show an outline (36)
— Leaf Motif (make many) :
Round 2 :
sc in 2nd ch from hook, hdc, dc, tr, dc, hdc, sc across (11)
Round 3 :
Turn and mirror on the other side of chain: sc, hdc, dc, tr, dc, hdc, sc (22 total when counting both sides)
Round 4 :
Working around edge: *sl st, sc 2, sl st* to produce pointed leaf ribbing; fasten off and weave ends
Info :
Make leaves in olive green with a slightly smaller hook (3.5mm) for a crisp edge. Add a central ridge by working a line of hdc down the center in a contrasting green if desired.
— Raised Bubble / Bobble Fillers (background texture) :
Round 1 :
6 sc in magic ring (6)
Round 3 :
1 sc in each st (12)
Round 4 :
Work 1 row of puff stitches: *ch 1, make 3-loop puff in next st, ch 1, sl st next* repeat around to build a bobbly texture over the top; fasten off (approx 12 puffs)
Info :
These small clusters fill gaps between motifs and create a cohesive textured background. Make dozens in various colors to scatter across the runner.
— Base Joining Panel (foundation grid to attach motifs) :
Round 1 :
Make a wide background strip in cream to which motifs will be sewn. ch 120, sc in 2nd ch from hook and across (119)
Round 2 :
Turn, ch 1, sc in each st across (119)
Round 3-8 :
Repeat sc rows to build a strip about 8-10cm wide (119)
Info :
This strip is optional: you may also join motifs directly to each other for a fully sculpted runner. A background strip gives a stable base if you plan to place heavy items on the runner.
— Joining & Assembly Techniques :
Info :
Decide your layout before sewing: place large medallions first as anchors, then arrange large roses, hearts, and leaves around them. Work from the center outward and pin each motif before sewing to test spacing.
Step 1 :
Pin placement: Lay out runner base or directly on table, pin medallions at even intervals (e.g., every 25cm along centerline), then cluster roses and hearts in pairs or trios around each medallion.
Step 2 :
Sewing motifs: Use a mattress stitch or whip stitch to sew flat bases to background. For 3D roses and hearts, sew through the base of the motif into the background with 6-8 secure stitches and knot on the back.
Info :
Use matching yarn to sew for invisible joins. For extra strength at high-traffic points, sew with doubled yarn or add a small backing fabric square and sew through both backing and motif base.
Step 3 :
Inter-motif joins: Where motifs touch, join them using slip stitch through both motifs at the edge or single crochet small loops to tether them together. This reduces shifting and creates a unified surface.
Step 4 :
Filling gaps: Use small bobbles and rosebuds to fill any negative space. Sew these in place with a few secure stitches. Leaves can be slightly overlapped and sewn near petals to look natural.
Info :
When sewing a heavy rose onto smaller medallions, anchor the center with extra stitches and weave ends under petals to conceal tails.
— Border and Scalloped Edge :
Round 1 :
With deep rose, sc evenly around entire runner edge (approx stitch counts depend on runner perimeter; estimate 3 sc per cm). Work 1 sc in each available edge stitch to maintain neatness.
Round 2 :
*sk 2, (5 dc in next st), sk 2, sl st* repeat to form scallops. Aim for about 1 scallop per 2-3cm depending on size.
Round 3 :
Optional picot ridge: in each scallop work (sl st, ch 3, sl st) along the top of scallop to create a defined edge. Fasten off and weave ends.
Info :
Match scallop size to medallions; larger scallops create a more pronounced frame. Block entire runner flat after assembling to even out gaps and set border.
— Alternative Border Variation (puff scallop) :
Round 1 :
sc around edge in contrast color
Round 2 :
*ch 2, 5-puff cluster in next st, ch 2, sl st next* repeat for a textured scalloped border. Fasten off
Info :
Puff clusters catch light and coordinate well with the bubbles used in the background, giving the runner an overall cohesive texture.
— Detailed Round-by-round for a Single Repeat Unit (sample layout cluster) :
Round 1 :
Create one large medallion as described earlier (Rounds 1-15) and place it centered on your layout; this acts as an anchor.
Round 2 :
Make 2 large roses (Layered Rose) and sew one on each side of the medallion at about 4-6 stitches offset from center; secure with 8-10 stitches each.
Round 3 :
Make 4 medium rosettes and place them alternately near the scallops of the medallion; sew through base with 6 stitches each (approx 20-30 stitches total used for securing small motifs).
Round 4 :
Place 6-8 hearts in the negative spaces between roses and medallion; sew each heart with 4-6 stitches and add a small bobble under the heart to raise it slightly if desired.
Round 5 :
Add leaves around each rose cluster: 2-3 leaves per rose sewn with 3-4 stitches at the leaf base. Use olive green for natural contrast.
Info :
This single repeat is a modular approach; create several repeats along the runner centerline and then fill gaps with small rosettes and bobbles to make the runner dense.
— Finishing Touches & Blocking :
Info :
After sewing all motifs, gently block the runner flat. Pin edges and petals into desired shape and steam lightly or wet-block depending on yarn label. Allow to dry completely under pins to set shape.
Step 1 :
Weave all tails securely into the back of the runner and trim. For extra robustness, weave tails through several layers or apply a small dab of fabric glue to hidden ends.
Step 2 :
Inspect the runner for any loose motifs and retighten by adding additional stitches if necessary.
Info :
Lightly steam or press the petals into place for a natural look. Avoid pressing too hard on puffed hearts to preserve dimension.
— Variations & Color Notes :
Info :
Try using monochrome shades of pink for a subtler effect, or add metallic yarn for small accent medallions for a festive table. The layout and motif count can be adjusted to any table length.
Completing this Valentine Rose Heart table runner is so rewarding — the layered roses, soft hearts and delicate leaves come together into a romantic, tactile centerpiece that brings warmth to any table. Each stitch adds texture and personality, and the finished runner makes an unforgettable gift or seasonal accent. Enjoy the slow, meditative process of arranging and sewing the motifs, and celebrate the moment when your project is finally blocked and ready to decorate. 🧶💕🌹