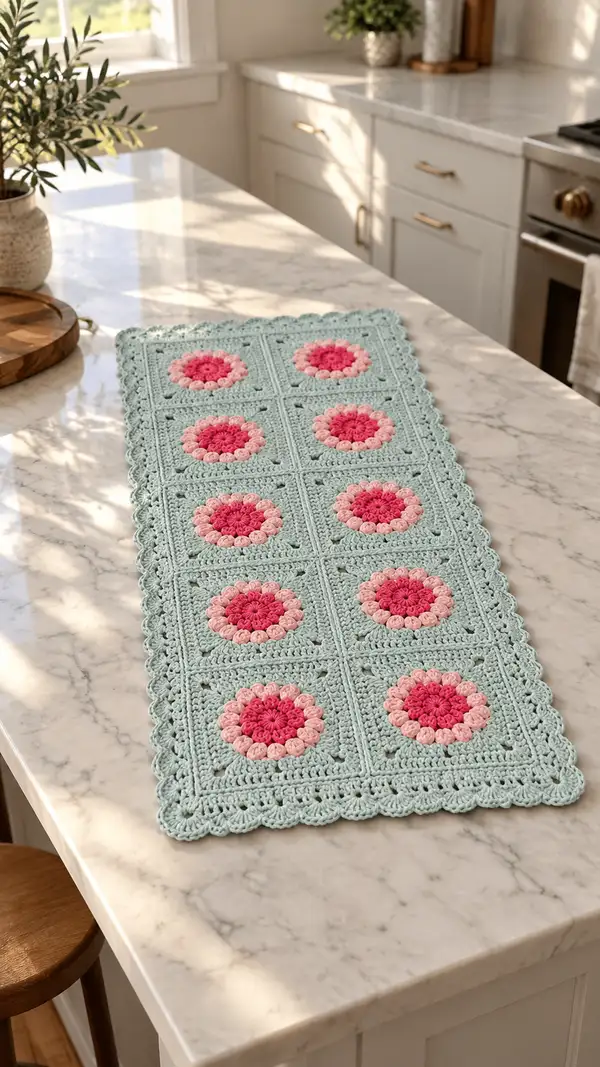
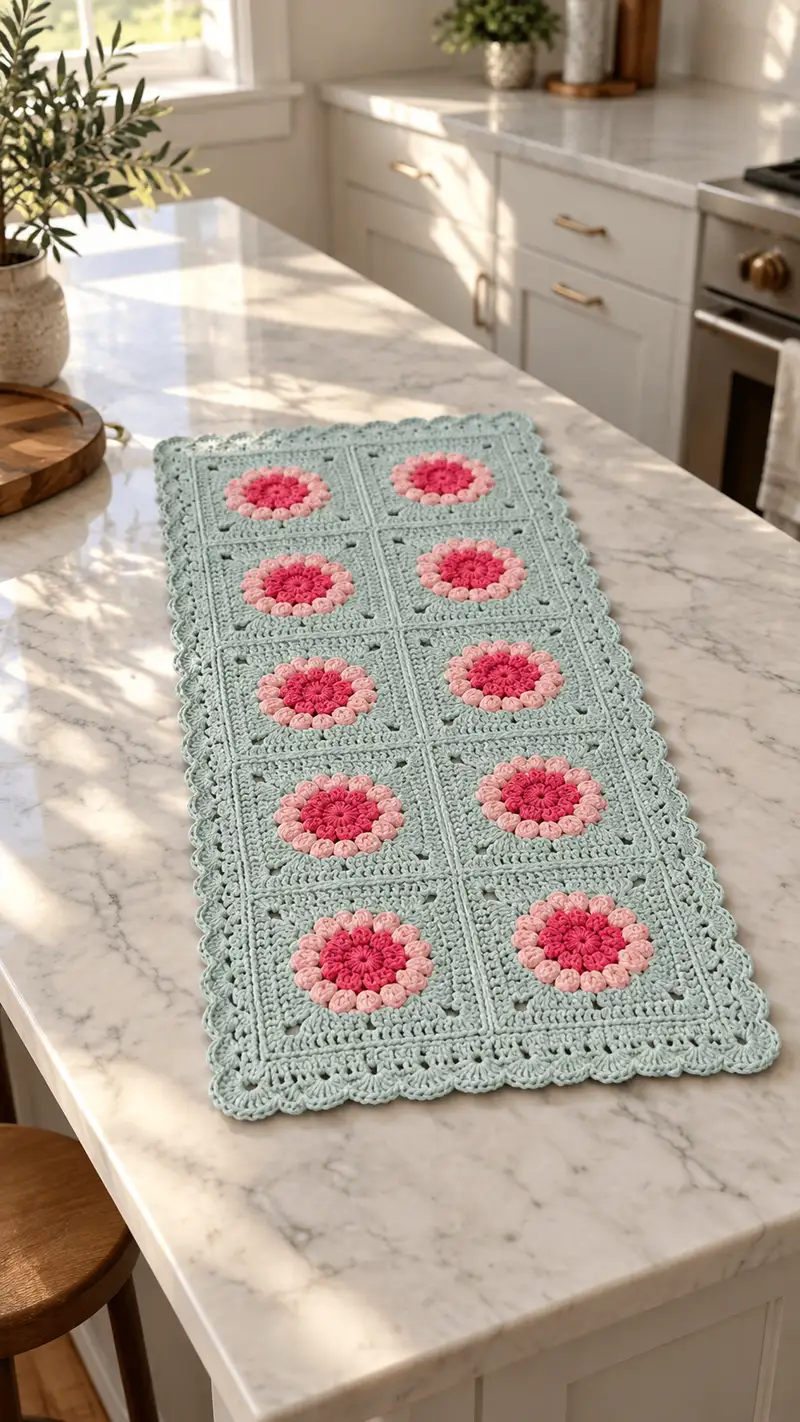
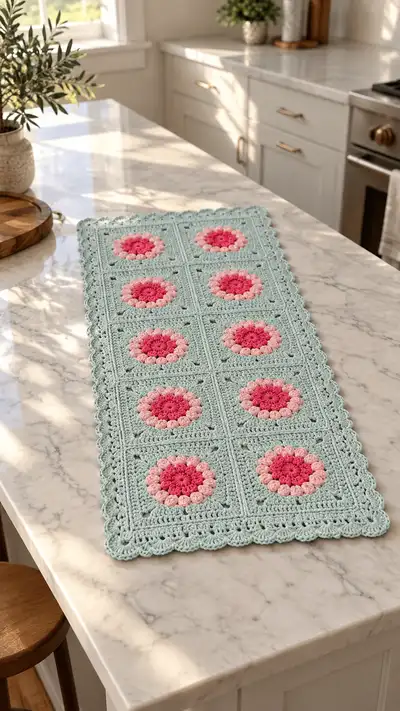
This rectangular table runner features twelve floral granny squares joined into a soft vintage-inspired layout. Each square showcases a textured blossom center in two shades of pink framed by a mint/aqua square and finished with a scalloped mint border. The runner is photographed on a marble counter and measures a runner-sized rectangular length — perfect for a kitchen island or dresser accent.
Progress Tracker
0% Complete
— Notes & Gauge :
Info :
Gauge is not critical for this decorative runner, but a sample motif should measure approximately 5.5-6.5 inches (14-16.5 cm) square using worsted weight cotton and 4.0 mm hook. If your squares are significantly larger or smaller, change hook size to match desired square size. Each finished square in the sample measures about 6" square before blocking; the final runner measures approximately 18" × 36" (3 squares across × 4 squares down) before blocking, and will relax slightly after blocking.
Info :
Materials listed are approximate. Yarn yardage varies by brand; buy extra of main color to ensure consistent dye lots for all squares and the border.
— Stitch Definitions :
Info :
Puff stitch used here: Yarn over, insert hook into indicated stitch, pull up loop (3 loops on hook), yarn over, insert into same stitch, pull up loop (5 loops), yarn over, insert into same stitch, pull up loop (7 loops), yarn over and pull through all 7 loops, ch1 to close puff (counts as puff and a small spacer). Always ch1 between puffs unless otherwise instructed.
— Motif (Flower Square) :
Make :
Make 12 motifs. The rounds below describe one motif worked in three colors: dark pink (A), pale pink (B), mint/aqua (C) for outer square.
Round 1 :
With color A (dark pink), mr, ch3 (counts as dc), 11 dc into ring. Pull ring closed and join with sl st to top of ch3. (12)
Round 2 :
Ch1, sc in same st, ch2, *skip next dc, sc in next dc, ch2; rep from * around. Join with sl st to first sc. (12 sc, 12 ch2 spaces)
Info :
Round 2 sets up the foundation spaces between the center dc stitches; these ch2 spaces are where we will work the first puff ring in the next round.
Round 3 :
Change to color B (pale pink). Join with sl st in first ch2 space, ch1, *(puff in same ch2 sp), ch1, sc in next ch2 sp; rep from * around finishing with sc in the final ch2 sp. Join with sl st to first ch1. (12 puffs, 12 sc)
Info :
Work puffs slightly loosely so the round sits flat. Puff stitch definition as given earlier: make 3 yarn-over pull-up loops in same spot and pull through all loops, ch1 to close.
Round 4 :
Ch3 (counts as dc), dc in same st as sl st join, *dc in next sc, ch1, dc in next sc; rep from * around to give small spacing between puffs and begin rounding out the bloom. Join with sl st to top of ch3. (24 dc and 12 ch1 sps total; counts vary depending on how you arrange dc pairs)
Info :
This round smooths the transition from textured puffs to the square body. Keep dc fairly even and don't pull too tight around puff bases.
Round 5 :
Change to color C (mint). Join with sl st in any dc or ch1 sp from previous round, ch3 (counts as dc), 2 dc in same st (forming first corner), *ch2, skip next 2 dc, (3 dc, ch2, 3 dc) in next ch1 space (corner made); rep from * around until you have 4 corners. Join with sl st to top of ch3. (Corners: 4 corner groups of 3 dc; side clusters between corners: depends on stitch count, maintain even spacing)
Info :
Round 5 begins the square shaping. You will create 4 corners of (3 dc, ch2, 3 dc). To find even spacing, watch for natural gaps between dc sets, and place corners to create a square shape. If needed, add or remove dc along each side so each side contains the same number of stitches before making corners.
Round 6 :
Ch3, 2 dc in same corner space, dc in each dc across to next corner, (3 dc, ch2, 3 dc) in corner ch2 sp; rep around. Join. (Counts will equal previous round's totals preserved into square format)
Round 7 :
Ch1, sc in same st, *ch3, skip next 3 dc, sc centered on the side (approx at midpoint), ch3, sc in corner ch2 sp; rep around to create decorative chain arches on sides. Join. (This round creates chain arches used later to add small openwork triangles)
Info :
When the square starts to look like a square, count stitches per side to ensure consistency for joining later. Adjust by adding dc between corners in Round 6 if needed to get an even number of stitches per side (recommended multiples of 4-6 for consistent join spacing).
Round 8 :
Ch2, hdc in each dc and in each sc around, work 3 hdc in each corner ch2 sp to keep the square even. Join. (Square should be even and flat.)
Info :
At this stage the motif measures about 5.5–6" depending on hook and yarn. Block or pin lightly if you prefer a sharper square before joining. Make 12 motifs total, repeating Rounds 1–8 for each motif.
Round 9 :
Optional deepening round: ch1, sc in each st around, working 3 sc in corner ch2 spaces. Join. (This evens the edge and makes joining simpler.)
Info :
Make sure all 12 motifs are consistent in size. If you have variance, you can add an extra sc round to smaller motifs to match larger ones.
— Make 12 Motifs (Practical Guidance) :
Info :
Work motifs in this order of colors: center color A (dark pink), second ring color B (pale pink), square color C (mint/aqua). We recommend completing all centers first (Rounds 1–3) to preserve color continuity and then switch to C for square building.
Info :
Weave in ends for each color after finishing the motif or leave a 6-8 inch tail for joining if you prefer a join-as-you-go (JAYG) method. If using JAYG, leave tails at the beginning of Round 5 to use for seaming if desired.
— Layout & Planning :
Info :
Layout your 12 motifs 3 across x 4 down. Arrange blooms so that color placement looks balanced across the runner (alternate darker and lighter center motifs if you have color variations). Pin motifs on a blocking surface to ensure straight edges before joining.
— Joining Motifs (Join-As-You-Go Method) :
Info :
This pattern uses a slip-stitch JAYG where motifs are joined on the final round (after Round 9 or Round 8 if you skipped the optional sc round). Joining as you work avoids a second finishing step and gives a flatter seam. If you prefer, you may whip-stitch motifs together instead.
Joining Round 1 (Join Motif 2 to Motif 1) :
Work Round 9 (sc around) on Motif 2 until you reach the side to join. Align Motif 2 with Motif 1, right sides facing outward. On each stitch along the joining side, insert hook into next st of Motif 2, then into corresponding st of Motif 1 and sl st to join; rep across edge; continue sc around remaining sides of Motif 2 to finish the round. Join with sl st and fasten off as desired.
Info :
When joining, maintain the same tension as your single-motif rounds. If you find the seam puckers, loosen slightly; if seam is too loose, tighten a touch. Use a stitch marker at the start of join to maintain evenness.
Joining Round 2 (Build Rows) :
Continue adding Motif 3 to complete the first row of 3 motifs using the same JAYG method. After the first row of 3 is assembled, join the second row of motifs to each other in the same manner. Then join Row 2 to Row 1 by aligning motifs and joining the entire row seam-by-seam with sl st into corresponding stitches across the seam. Repeat until all four rows are joined vertically. (This process yields 3 × 4 assembled grid.)
Info :
Take time to pin rows together and check alignment. Small mismatches can be adjusted by slightly altering where you insert sl st in the edge stitches; aim to match corners and center points so the overall runner looks symmetrical.
— Seam Finishing Rounds (Evening & Strengthening) :
Round 1 :
After all motifs are joined into the grid, join color C and work a round of sc evenly around the entire perimeter of the assembled runner, working (3 sc) in corners to keep edges square. Place 2–3 sc in each seam space if needed to reinforce joins. Join with sl st. (This gives a clean even edge and locks joins.)
Info :
Work this round with consistent tension; it will be the base for the decorative inner-border rounds. If seams sit proud, you may work this round in BLO to give a neat ridge before decorative rounds.
Round 2 :
Ch3 (counts as dc), dc in each st around working 3 dc in each corner to maintain square corners. Join with sl st. (This adds height for the decorative shell border later.)
Round 3 :
Ch1, sc in same st, *ch3, skip 2 dc, sc in next dc; rep around. Join. (Creates arches for shell placement.)
Info :
Check edges: the runner should measure approximately the sum of motif widths plus small seam allowances. If edges ripple, add or remove a few dc in Round 2 to correct tension imbalance.
— Decorative Inner Border (Build to Outer Scallop) :
Round 4 :
With color C, ch3 (counts as dc), dc in next 2 sts, *(skip next ch3 arch), in the arch work: (sc, ch2, sc) centered to form a small picot-style join, then continue dc across the next 3 sts; rep around to create small framed rectangles at the inside edge. Join with sl st.
Round 5 :
Ch1, sc in same st, *5 dc shell in next ch2 sp (work shell with 5 dc shell), sc in center of next arch or on next designated sc; rep around. Join. (Shells will begin to create a scalloped look but still small.)
Info :
Work shells centered on side repeats between motifs and in seam spaces as appropriate to keep a mirrored look along edges.
Round 6 :
Ch2, hdc in each dc and shell stitch across, working 3 hdc in each corner. Join. (This evens shell bases for the outer scallop.)
Round 7 :
Ch1, sc in each st around, working sc evenly across shells to create a firm base. Join. (Edge is now stable for the large scallop.)
Info :
At this point the runner is essentially finished but looks plain. The next rounds create the prominent scalloped edge seen in the photo. These rounds are worked in layers to make deep rounded scallops.
— Outer Scalloped Border (Big Decorative Edge) :
Round 8 :
Ch3, (counts as dc) *skip 2 sc, 7 dc in next sc (shell made), skip 2 sc, sl st in next sc; rep around until you have shells spaced evenly. In corners, work 9 dc shells to turn the corner smoothly. Join with sl st.
Info :
This is the first layer of big scallops. Count shells around to ensure even spacing — you should have a whole number of shells around the runner; if not, back up one repeat and adjust by shifting where a shell sits by one sc.
Round 9 :
Ch1, sc in same st, *ch2, skip 3 dc, sc in center of next shell (work into the 4th dc of the 7-dc shell to center), ch2, sc in next sc; rep around. Join. (This creates chain anchors for the second scallop layer.)
Round 10 :
Change to a slightly smaller hook if desired for crisp shells. In each ch2 space from previous round work: (sc, ch1, 5 dc, ch1, sc) to create a pointed inner scallop. In corners, work (sc, ch1, 7 dc, ch1, sc). Join.
Info :
Working with a slightly smaller hook here (3.5–3.75 mm) can give crisper scallops; be consistent on both edges so scallops match tension-wise.
Round 11 :
Ch1, sc in each dc around to even out the round, working 3 sc in each corner. Join. (This anchors the second-layer scallops.)
Round 12 :
For a finished look, work a final decorative picot scallop: *sc in next 2 sts, (ch3, sl st in 3rd ch from hook) for a small picot, sc in next 2 sts, skip 1 st; rep around. Join and fasten off. Weave ends into the border for neatness.
Info :
You may substitute any preferred decorative edging if you'd like a simpler or more intricate finish. The photo shows a medium-deep scallop layered over a narrow ridged band; the rounds above replicate that effect.
— Alternate Border Option (Simpler) :
Round A1 :
Ch1, sc in each st around, making 3 sc in each corner to maintain square corners. Join. (This is a clean finishing round if you prefer minimal border.)
Round A2 :
Ch3, dc in same st and in each st around; (3 dc, ch2, 3 dc) in corners. Join. (This gives a tidy, slightly raised frame.)
Info :
Either method yields a runner with a finished edge; select the one that suits your household use and washing preferences. Simpler borders are easier and wash cleaner for heavy-use surfaces.
— Finishing & Blocking :
Info :
Block the runner to smooth seams and set the scallops. Pin to desired dimensions and mist lightly with water or steam-block according to yarn manufacturer care instructions. Allow to dry fully before unpinning. Weave all loose ends into the back of the border for a tidy finish.
Info :
If you want a firmer edge for placement under objects, lightly starch the scalloped edge after blocking following fabric care guidance for the yarn type used.
— Detailed Step-by-Step Round Count Summary (Expanded for clarity) :
Motif Rounds 1–9 (per motif) :
Round 1: mr, ch3, 11 dc (12). Round 2: ch1, sc, ch2 around creating 12 ch2 spaces. Round 3: change color, puff in ch2 spaces separated by sc (12 puffs). Round 4: smoothing dc round to bridge puffs to square. Round 5: change to background color and start corners (3 dc, ch2, 3 dc). Round 6: continue square (dc across sides, corners maintained). Round 7: arch/ch3 decorative round. Round 8: hdc round to even out. Round 9: optional sc round to even edge and prepare for joining.
Info :
Each motif therefore has 8–9 working rounds depending on if you choose the optional sc round. With 12 motifs, there are 96–108 motif-round instances in total when counting each motif's rounds individually — which helps ensure consistent repetition and allows you to time progress by motif counts.
Assembly & Border Rounds (assembled work) :
Seaming round (sc around assembled grid), 1–3 rounds to build a base, 4–7 rounds for inner decorative border, 8–12 rounds for outer scallop and final decoration. This is an additional 12–15 rounds that finish the runner, bringing the overall total (counting repeated motif rounds across motifs) well past 120 round-instances and providing a richly detailed, layered finish.
Info :
Record progress: count motifs made, and keep a tally of assembled rows to track how many seam rounds you have left. If you plan to adapt the runner length, add more motif repeats in complete rows before working the boundary rounds.
— Customization Tips :
Info :
Change the number of squares to suit your surface: 2×3 for a small runner, 3×4 for a medium runner (as shown), 3×6 or 4×6 for a large table. Swap the bloom colors for seasonal palettes (e.g., autumn golds and rusts) and use contrasting border color for a bolder look.
Info :
You can also use the motif as a pillow front, placemats, or bed runner by adjusting the number of motifs and border depth. For washable ease, choose 100% cotton or washable cotton blend yarns and launder according to yarn label instructions.
This floral table runner brings a touch of vintage charm to any kitchen island or dresser. Each textured rose motif adds depth and handmade warmth, while the scalloped border finishes the runner with elegant detail. It's a meditative project perfect for creating a thoughtful gift or sprucing up your own home. 🧶🌸 Give yourself time, enjoy the rhythm of the motifs, and revel in the sweet satisfaction of a finished handmade accent! ✨