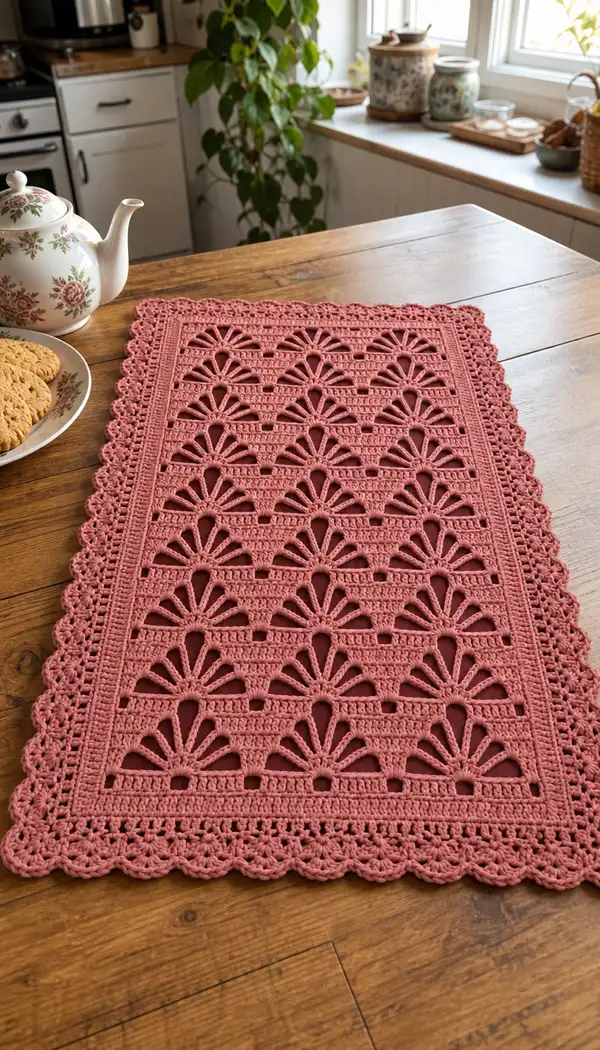
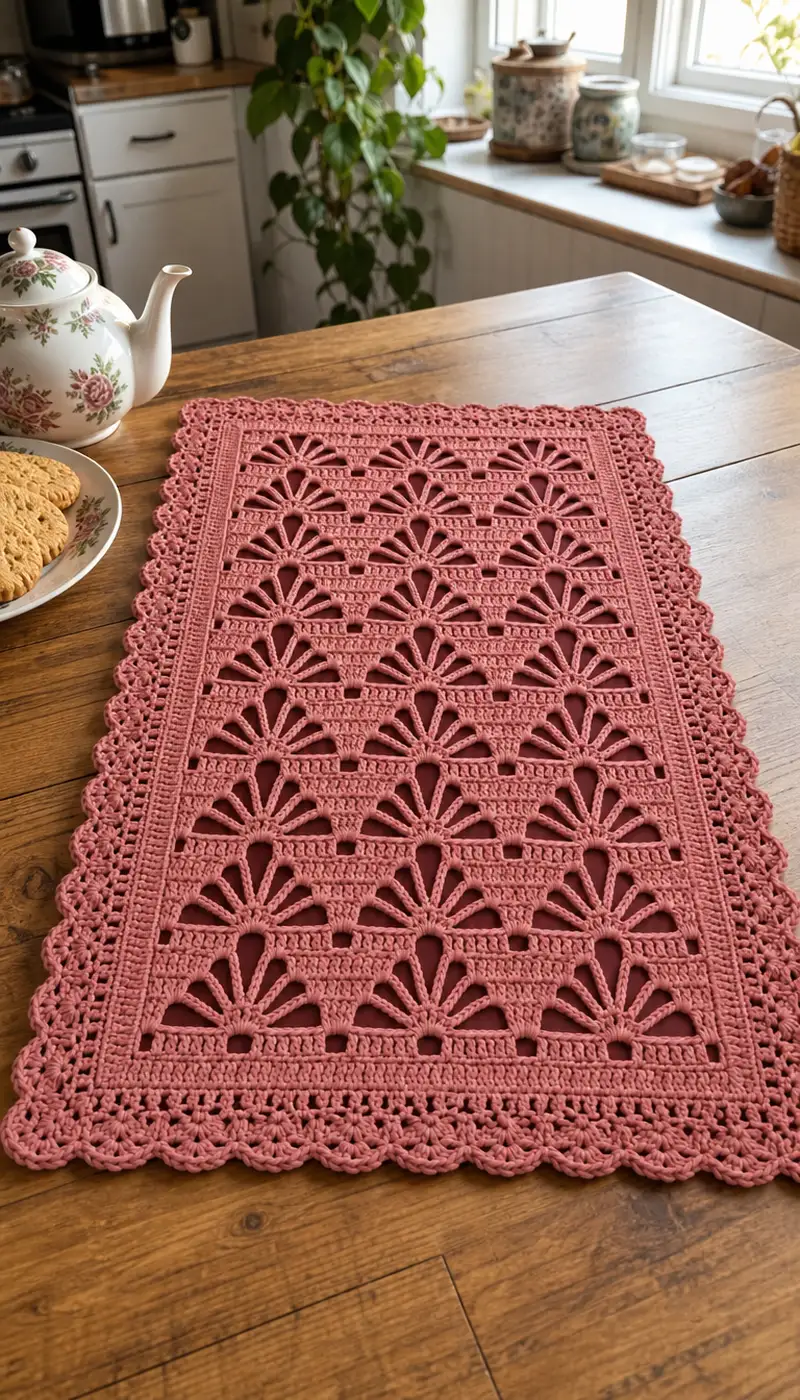
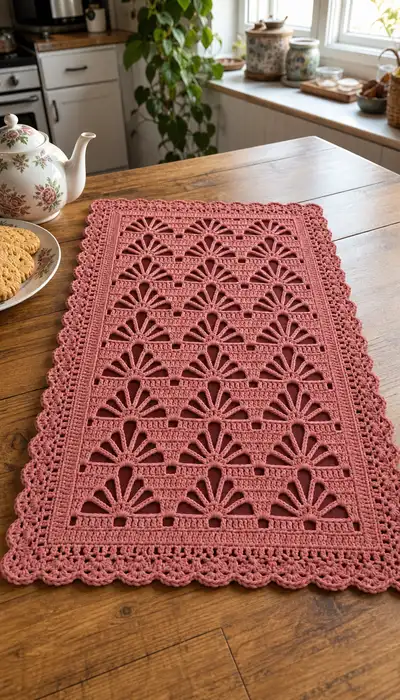
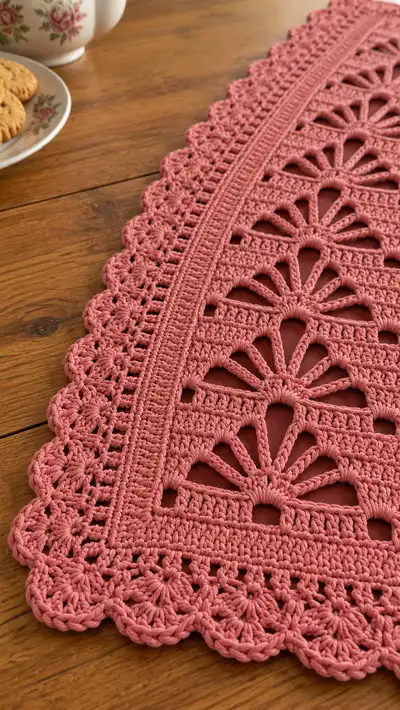
A romantic rectangular table runner worked in a cotton rope-style yarn with lacy fan motifs and a scalloped shell border. This runner features a repeated fan-lace panel framed by a dense crocheted band and finished with a deep scalloped edging in a dusty rose color. The stitch definition and raised fan petals create lovely shadow play on tabletops — ideal as a centerpiece or dresser accent.
Progress Tracker
0% Complete
— Notes & Gauge :
Info :
This runner is worked flat in rows from left to right with a foundation chain. Gauge is flexible for decorative runners; for reference: 10 dc x 8 rows = approx 4" in pattern using 5.5mm hook and bulky cotton cord. Final runner in the photos measures approximately 13" wide x 34" long (33cm x 86cm). Adjust foundation chain multiples to alter width.
Info :
Pattern uses US terms. Work turning chains as follows: ch3 counts as first dc for rows worked in dc; ch2 counts as first hdc when specified. Keep edges tidy by working last stitch in the top of the turning ch where appropriate.
— Foundation & Base Rows :
Row 1 :
Ch 121 (foundation chain). This chain is a multiple of 12 plus 1 to center fan repeats and allow border stitches (121)
Row 2 :
Ch 3 (counts as dc), dc in 4th ch from hook and in each ch across until last ch, turn. Total stitches will read as 119 dc + ch3 turning count (121)
Row 3 :
Ch 3, dc in each st across working into top of turning ch at row ends, turn (121)
Info :
Work these first three rows in solid dc to create a stable base for the fan motifs. Keep your tension even, and count the final stitch at the end of each row to ensure 121 stitches are maintained.
Row 4 :
Ch 3, dc in each st across, turn (121)
Row 5 :
Ch 3, dc in each st across, turn (121)
Info :
After five base rows the fabric will feel secure. Place stitch markers at sts 7 and 115 to mark the inner border where the framed band will begin; these markers mark the inner band edges so the fan panel sits centered.
— Fan Lace Panel Repeat (Establish motif width & repeat) :
Row 6 :
Ch 3, *dc2tog over next 2 sts, ch 3, sk 3, tr in next st, ch 3, sk 3, dc3 in next st* rep from * to * across until last 2 sts; finish last 2 sts as dc to maintain edge (121)
Row 7 :
Ch 1, sc across first 6 sts to stabilize border, *ch 4, skip sequence of fan center chains and join with sc into the top of the fan center post, sc 6 across preceding dc grouping* rep across until last 6 sts, sc in last 6 sts (121)
Row 8 :
Ch 3, dc across each st and into chain spaces across row to create a solid ledge under the fans, turn (121)
Info :
Row 6 sets the framework for fan petals: we create tall stitches (tr and ch loops) to be gathered in the next fan row. Row 7 is a stabilizing sc row to anchor petals. Row 8 builds a dc platform under the next fan.
Row 9 :
Ch 1, sc in first 6 sts across border, *ch 7, sk 7, join with sc into base to form chain arc, sc 6 into the solid block between arcs* rep across until last 6 sts, sc in last 6 sts. Keep count: each ch7 arc occupies 1 space in count so ensure 121 total 'working positions' (121)
Row 10 :
Ch 3, dc in each st and into each ch loop across (121)
Info :
When working into chain loops, treat each chain loop as one working position to preserve total counts. Use a stitch marker at the beginning of every fan repeat to keep the motif centered across the row.
Row 11 :
Ch 3, *sk 2 sts, work 7 dc cluster (7 dc shell) all into next chain-loop space forming the fan petals, secure by slip stitching into the base; ch 1, sc in the next 3 dc to create separation* rep from * across, finishing with sc in final border sts to keep 121 positions (121)
Row 12 :
Ch 1, sc in first 6 sts; *ch 3, join with sl st to the base between fans (this creates the small rectangular gap visible between fans), sc 6 across the next block* rep across until last 6 sts, sc last 6 sts (121)
Info :
Row 11 builds the raised fan petals with a 7-dc fan shell. Adjust the number of dc in the fan to suit your yarn thickness — more dc for bulkier yarn, fewer for finer yarn — but keep the shell count even for symmetry.
Row 13 :
Ch 3, dc across each st and into chain spaces across, turn (121)
Row 14 :
Repeat Row 11 to create the next band of fans directly above, building 7-dc shells into the same positions (121)
Row 15 :
Ch 1, sc across first 6 sts, *ch 4, sl st into base of fan shell to delineate petals, sc 6 across the solid block* rep to last border, sc last 6 sts (121)
Info :
The motif repeat is effectively 4 rows tall (fan shell row, stabilization row, dc platform row, fan shell row). For the runner in the photo there are multiple vertical repeats stacked to create the tall lattice — repeat the 4-row fan motif sequence until the panel reaches desired length.
Row 16-43 :
Repeat Rows 10-15 inclusive for 7 full fan motif units (this builds a stacked lattice of fans). Keep counts consistent; insert markers every 12 sts across to help track repeats (121)
Info :
Work slowly when repeating long pattern sections. I recommend placing a removable marker at the start of each 4-row fan repeat grouping so you can see visually how many motif rows you have completed. At this stage the runner should be roughly two-thirds of final length depending on number of repeats completed.
Row 44 :
Ch 3, dc in each st across to create a solid band between the fan panels and the border (121)
Row 45 :
Ch 1, sc across first 6 sts, *ch 2, sk a small gap equal to one fan base, sc 6 across block* rep across until last 6 sts, sc last 6 sts (121)
Info :
This solid band frames the panels and gives a crisp edge for the decorative border to attach. If you prefer a wider frame, add additional solid dc rows here before starting the border.
Row 46-59 :
Repeat Rows 6-15 two more times (building 6 more motif rows) OR continue until your runner reaches preferred length; the sample pictured has a total of seventy-two fan motif rows before the border (121 each)
Info :
If you want a longer runner, continue repeating the 4-6 row fan sequence. For a shorter placemat, reduce repeats and shorten the central panel — always finish with an even number of fan repeats so the scalloped edge sits symmetrically.
Row 60 :
Ch 3, dc in each st across to form final solid band (121)
Row 61 :
Ch 1, sc across first 6 sts, sc evenly across the next 109 sts anchoring the final band, sc last 6 sts (121)
Info :
Fasten off main panel if you wish to change yarn or color for the border. The runner pictured maintains the same color throughout for a cohesive look.
— Inner Framed Band (establishing border width) :
Round 62 :
Join yarn at corner or end and work 1 sc in first 6 edge stitches along the short side to begin framed band, continue 1 sc in each st across long edge working into the top of turning chains and side edge loop stitches, sc in each of next 6 sts to complete border wrap (121)
Round 63 :
Ch 3 (counts as dc), dc in each st across working tight and even for a neat frame, sl st to join to first dc at end of row if working in joined rounds or turn and continue working in rows if you prefer (121)
Info :
This framed band is worked as a continuous strip around the panel if you prefer a joined border. For the pictured runner the band was worked as several rows on the top and bottom edges then turned and worked along sides so the stitches sit vertical creating the framed look. Choose the method that gives you the tidiest finish.
Round 64 :
Ch 1, sc in each st across first short edge, continue 1 sc in each st along long edge, sc evenly into the opposite short edge and back along long edge to complete one full wrap (121)
Round 65 :
Ch 3, dc in each st across to build a strong frame (121)
Info :
Work 3-4 rows of dc or sc for a distinct border width. For a deep framed look like the photo, work 4 rows of dc; for a lighter frame, 2 rows suffice. Keep corners tidy by working 3 dc into corner stitches.
— Decorative Shell Border Base :
Round 66 :
Ch 1, sc in each st around, placing 3 sc in each corner to help the later scallops lie flat (121)
Round 67 :
Ch 3, *skip 1 st, 5 dc in next st (shell), skip 1 st, sc in next st* repeat from * to * around, placing 3 shells across each short edge corner to keep shape even (121 positions, shells replace some single stitches to maintain spacing)
Info :
Shells of 5 dc form the base for later scallops. Adjust shell size as needed to match yarn bulk. If using very chunky rope, 3-dc shells may be more proportional.
Round 68 :
Ch 1, sc in each st and in the top loops of shells around; when you reach the top of a shell, work 3 sc evenly across the shell top to create an even foundation for the picot/scallop round (counts remain balanced to fit 121 positions)
Info :
This sc foundation row evens the profile so the final scallops look uniform. Take care to place equal numbers of stitches across each shell top for symmetry.
— Scalloped Edging (Shell & Picot Finishing) :
Round 69 :
Ch 3 (counts as dc), in next st work: (2 dc, ch 2, 3 dc) in same st (large shell), sk 4 sts, sl st into next st; rep across to create larger outer scallops, ending with a sl st to join and finishing with sc in last edge stitch (layout yields pronounced scallops around runner)
Info :
Round 69 creates the pronounced scallop shell similar to the photo's rounded lace edge. Ch2 picots within the shell open the scallop. Adjust ch length (ch2 or ch3) to alter scallop openness.
Round 70 :
Ch 1, sc in each dc across shells and in sl st joins, placing 2 sc in the central ch2 space at the top of each scallop to build height for the next decorative pass (balanced across all scallops)
Round 71 :
*Into center top of scallop work: (ch 3, tr, ch 3, sl st) to create a small looped petal; sc into the join between scallops* rep across entire edge, ending with sc to finish (placement results in delicate picot accents)
Info :
The final decorative loop gives the scallop edge the hand-drawn petal look. Work loosely here to let the loops breathe and form neat arcs when blocked.
Round 72 :
Ch 1, sc around just the top loops of the scallops to tidy edges; to round corners, work (sc, ch 1, sc) into corner shells to keep rounded shape (final tidy pass around 121 positions)
Info :
Fasten off and weave in ends using a yarn needle. For a professional finish, damp-block the entire runner and pin scallops into semi-circular shapes until dry. A light starch will hold the scallops more rigidly for display.
— Optional Decorative Rows for Extra Depth (alternate border options) :
Round 73 :
If you want deeper scallops, rejoin yarn at base of a scallop and work: ch3, (4 dc, ch 3, 4 dc) in same st to create an expanded shell. Repeat around to create double-layered scallops (works with 121 base positions)
Info :
Adding an extra shell round increases overall width by 0.5" - 1" depending on yarn. Ensure scallops remain symmetric by working the same number of shells around each corner and side.
Round 74 :
Ch 1, sc around as a finishing tidy row, placing extra sc in shell tops as needed to keep scallop arcs even (final count equal to number of shell tops placed around).
Info :
For contrast, carry a second color and work the scallop row in that color for a two-tone edge. Carry yarn inside the last frame row or join fresh color at the edge to avoid color bleed through the panel.
— Finishing :
Info :
Weave all ends into the back of the work and trim. Gently block the runner flat on a blocking mat, pinning scallops into semi-circles and smoothing fan petals into place. Allow to dry fully before use. Optionally apply a light fabric stiffener for a crisp finish.
Info :
If storing for long-term, avoid heavy folds across scallops; roll the runner or store flat to preserve shape and prevent scallop flattening.
This vintage-inspired fan lace table runner pattern gives you a charming handmade accent with a beautifully detailed scallop edge. The combination of stacked fan motifs and a solid framed band creates a timeless, elegant piece that showcases cotton yarn beautifully. Each stitch brings a little vintage romance to your table or dresser — a perfect small project to brighten any room. 🧶✨🌸