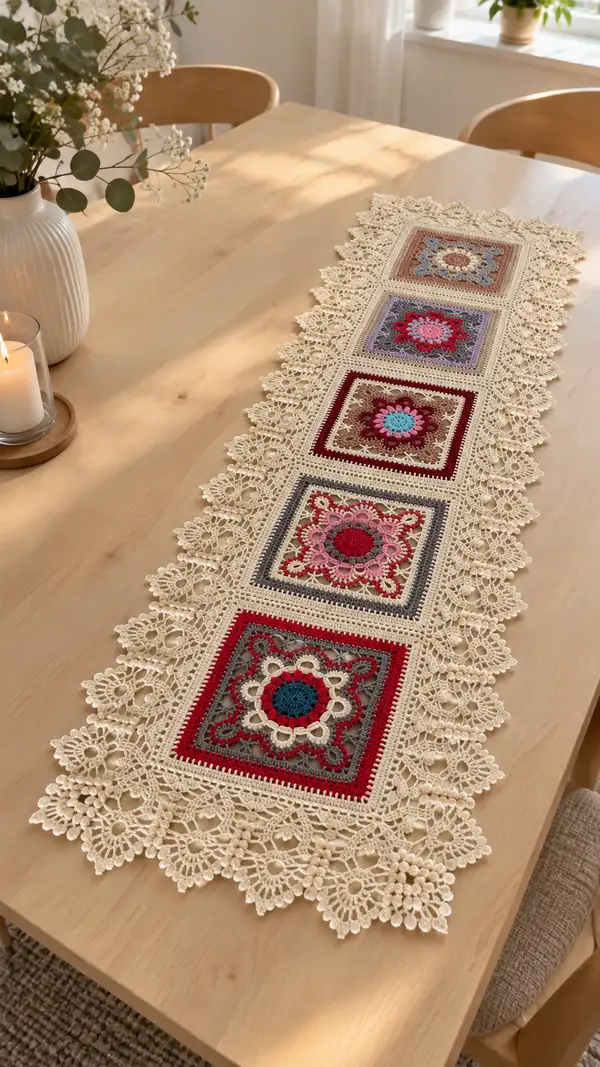
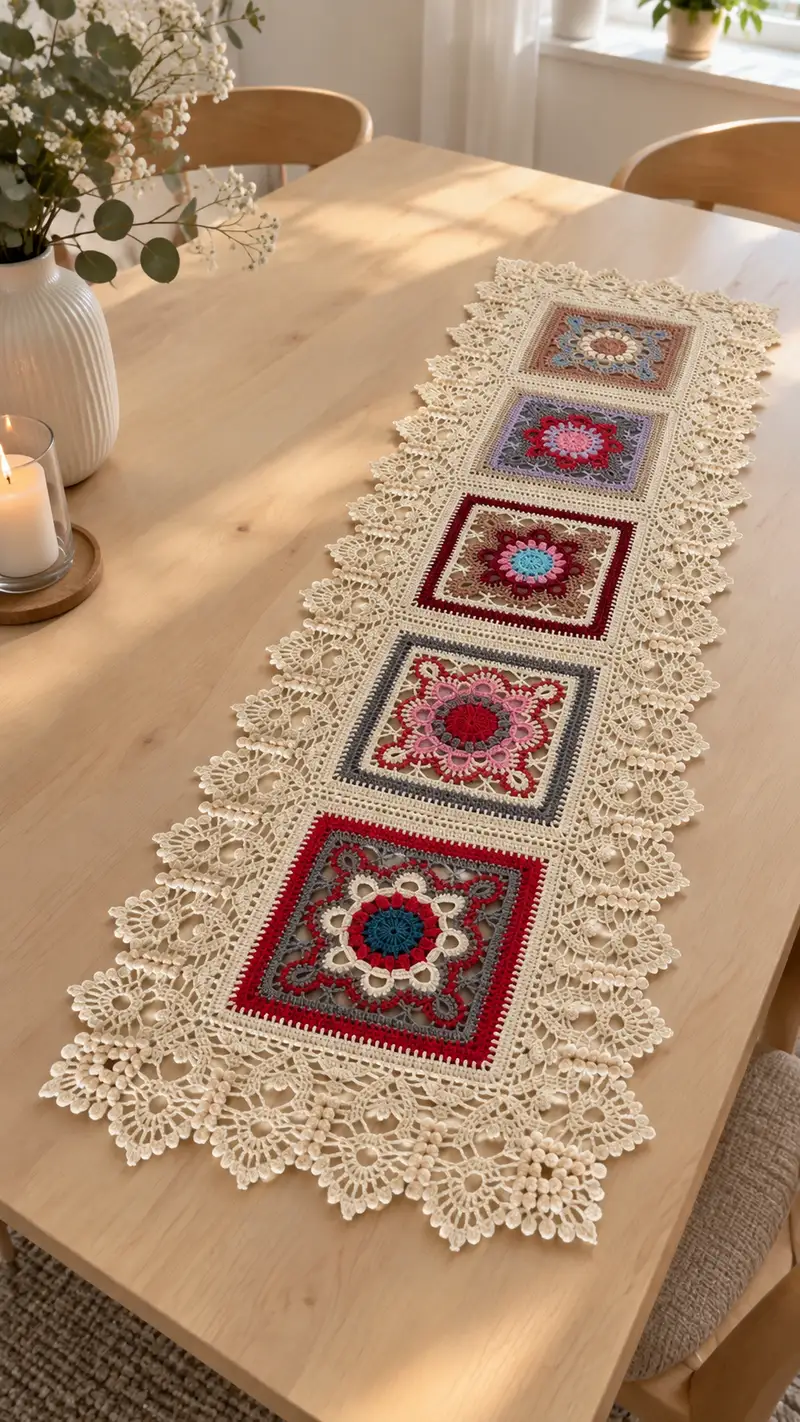
Create a vintage-inspired floral square table runner made from five ornate mandala squares joined and edged with a delicate cream lace border. Each colorful central square features layered petals, textured clusters and a squared frame, then joined to form an elegant long runner perfect for dining tables. The pattern uses small-gauge cotton yarn and a mix of textured stitches to achieve a classic heirloom look.
Progress Tracker
0% Complete
— Overview :
Info :
This runner is constructed from five identical mandala-to-square motifs, joined in a straight line, then edged with a continuous cream lace border. Make 5 motifs, block them flat and square to the same dimensions, join them with mattress stitch or join-as-you-go, and then work the lace edging all the way around the joined strip. The main motif uses multiple colors for the floral center; cream is reserved for the squared frame and lace edge.
Info :
Gauge note: each finished motif should measure approximately 18 cm (7 inches) square before blocking using 3.0 mm hook and light worsted cotton. Adjust hook if needed to achieve this measurement.
— Mandala Square Motif (make 5) :
Round 1 :
Using contrast color A (center color). Make a magic ring, ch 3 (counts as first dc), 7 dc into ring; join with sl st to top of ch3. (8)
Round 2 :
Ch 3 (counts as dc), *1 dc in next st, 2 dc in next st (inc)* repeat around; join. (16)
Round 3 :
Ch 3, *2 dc in next 1 st, 1 dc in next 2 sts, inc (2 dc in next)* this is best written (2 dc, 1 dc, inc) x 4? For clarity: (2 dc, 1 dc, 1 inc) sequence repeated to make 24 total. Practically: (2 dc, inc) x 8. (24)
Round 4 :
Ch 3, (3 dc, inc) x 8. (32)
Round 5 :
Change to contrast color B. Ch 3, (4 dc, inc) x 8. (40)
Round 6 :
Change to contrast color C. Ch 3, (5 dc, inc) x 8. (48)
Info :
Color changes: fasten off previous color and join new color with a standing dc or slip stitch + ch3. Carrying small sections of color across the wrong side is fine for short color changes; weave in tails as you go for neatness.
Round 7 :
Ch 1, sc in same st, *ch 3, skip 2 sts, sc in next st* around to create arch foundation for petals. End with sl st to first sc. (24 ch-3 arches)
Round 8 :
Change to contrast color D. In each arch: work (sc, hdc, 3 dc, hdc, sc) into each ch-3 arch to form a full petal. Join. Count petals: 24 petals established (stitch count is counted in petals rather than base dc count).
Info :
Petal shaping tips: keep petals consistent by placing the same number of stitches in each arch and pulling up loops neatly. Block petals later to open them evenly.
Round 9 :
Change to color A. Ch 1, sc around working 1 sc into the top of each petal cluster and placing 3 sc across each small gap; total approx 72 sc depending on petals (approx 72).
Round 10 :
Ch 3 (counts as dc), (1 dc in next 2 sts, 2 dc in next st) repeat around to add height and texture. Calculate: (2 dc + inc) x series = approx 96 after this increase round (approx 96).
Info :
At this stage the motif is a large round disk with a textured petal ring. We will now introduce turning points to form a square. Keep a stitch marker at the start of each new round.
Round 11 :
Ch 1, sc in each st around to even out the surface. (96)
Round 12 :
Change to contrast color E (this will be used for the inner square frame). Prepare to form corners: *sc in next 22 sts, (sc, ch 3, sc) in next st (corner)* repeat 4, join. Calculation: 4 corner clusters each using 2 sc plus side scs sum to 96 total (side scs 22x4 =88; plus 8 corner scs =96). (96)
Round 13 :
Ch 1, sc in each st and in each ch-3 corner space work (2 sc, ch 2, 2 sc) to form a stronger corner; join. New stitch count becomes 104 (adds 8 extra dc across corners because each corner's ch-space receives 2 additional sc on each side). (104)
Info :
Corner math: we are converting a round into a square by replacing single stitches with corner clusters built into the existing ch-spaces. Track corner additions carefully to keep all four corners identical.
Round 14 :
Ch 1, sc in each st around, placing (2 sc, ch2, 2 sc) again in each corner ch-2 space to stabilize. (104)
Round 15 :
Switch to cream (frame color). Ch 1, sc in each st around in cream to create a neat squared frame. (104)
Round 16 :
Ch 2, hdc in each st around for a firmer boxed edge; (104)
Info :
At this point your motif should be visibly square with four defined corners. Block the motif to a square measurement (approx 18 cm/7 in) to even out sides and center before joining. Make all five motifs to this point before proceeding to join.
Round 17 :
Optional decorative row: Change to contrast color A and work one round of reverse sc (sc in BLO) to create a framed ridge. (104)
Round 18 :
Change back to cream. Ch 1, sc in each st around. (104)
Info :
We use a few foundation rounds in cream to give a consistent joining edge and a neutral border once motifs are joined. Weave in all color tails at this stage or leave long tails for joining if you prefer mattress stitch with working yarn.
Round 19 :
Ch 3, dc in each st around keeping the corners as (2 dc, ch2, 2 dc); join. (104)
Round 20 :
Ch 1, sc around in cream to square up edges and prepare for joining. (104)
Info :
Repeat motif creation until you have 5 completed, blocked motifs. Keep them in order if you are matching color gradients or mirror patterns; this will affect the final look of the runner.
— Joining Motifs (join 5 motifs lengthwise) :
Info :
Choose your joining method: mattress stitch/seam for invisible seams, slip-stitch join, or join-as-you-go (JAYG). Below are instructions for a neat whip-join (recommended for a flat, subtle seam) and for a join-as-you-go alternative.
Round 21 (Whip-join, join motif 1 to motif 2) :
Place motifs with right sides facing up and edges aligned. Using cream yarn and yarn needle, mattress stitch along the vertical seam: insert the needle under the horizontal bars of both motifs and whip through, keeping tension even. Work from the center of the seam outward to both top and bottom edges, then fasten off. Repeat to join motifs 2-3, 3-4, and 4-5. Aim for a seam width that sits flush (no puckering).
Info :
If using JAYG: work the last round on motif B by slip-stitching into motif A instead of working free-form sts. Align corners and insert sl st through corresponding sc or dc in motif A. This can give a decorative joined round that is less visible from the right side.
Round 22 :
After joining all five motifs into a strip, work one round in cream around the entire outside edge of the joined strip: sc in each st around, placing (sc, ch2, sc) in each corner to keep corners square. Count will depend on joined length; work evenly so the border sits straight.
Info :
Check the joined strip on a flat surface. Steam-block or wet-block lightly pinned to dimensions so the strip lies flat and straight. This is essential before working the delicate lace border to ensure symmetry.
— Lace Border (worked all the way around after joining) :
Round 23 :
Change to cream if not already. Ch 1, sc evenly around entire outer edge of the joined strip. When reaching seams between motifs, work sc through both edges to secure; place (sc, ch2, sc) in corner points to anchor. This creates a reliable foundation round for lace. (Count depends on length; target consistent spacing approx 4-6 sc per motif side inch.)
Round 24 :
Ch 3, dc in next 2 sts, *skip 2, (5 dc shell) in next st, skip 2, dc in next 3 sts* repeat around; join. Shells will be positioned across sides and corners; this is the first ornamental row. Ensure shells match at motif seam lines; adjust spacing evenly if needed.
Info :
Shell placement tip: use pins to mark intended shell centers along the edge (for example, 6 shells per side) before crocheting the round. This prevents clumping of shells at seams.
Round 25 :
Ch 1, sc in each st and in the top of each shell: work 3 sc across each shell to compress it slightly and create a platform for the next lace round. (approximate stitch count will increase.)
Round 26 :
Ch 4 (counts as tr), tr in next st, *ch 3, skip 1, (5 dc cluster in next st) ch 3, skip 1, tr in next 2 sts* repeat around; join. This round builds raised rings and arches for a lacy silhouette.
Round 27 :
Ch 1, sc in each tr and working 3 sc across each 5 dc cluster. In the spaces created by ch-3, work (sc, ch 5, sc) to create loops for picots in the next round. Join.
Info :
The ch-5 loops become the decorative points seen in the photograph; spacing should be identical around the runner to keep the edge symmetrical. If your runner edge feels crowded, increase the number of sc between loops slightly for breathing space.
Round 28 :
In each ch-5 loop: *(sc, ch 3, picot, ch 3, sc) - picot defined as ch 3, sl st into same st* to create pointed loops; between loops, place 2 sc. This produces a delicate pointed lace. Join.
Round 29 :
Ch 1, sc across to stabilize edge, placing 1 sc in each picot point. (This tames the points and prepares for larger motif edge units.)
Round 30 :
Begin decorative cluster edge units: *ch 6, join with sl st to form ring, in ring: (ch 3, 3 tr, ch 3, sl st)* forming open flower-like loops along the edge; leave 3-4 sc between each flower unit, repeat around. These rounded flower motifs emulate the large star-lace edging in the photo.
Info :
Count and spacing: plan the number of flower units per side so they align with the motif edges. In the reference picture there are multiple flower units per motif side; adjust the ch count between flower units so they land in consistent positions along each side.
Round 31 :
Work a round of sc across, securing each flower unit by working 3 sc into its central ring before moving on. This anchors the units and prevents sagging.
Round 32 :
Decorative popcorn round: In each flower unit central ring work 5 dc, remove hook slightly and pull last loop to front to form a popcorn, sl st into ring to secure. Between popcorns work (ch 4, sc) to form small connecting arches. Join.
Round 33 :
Ch 1, sc evenly across to even out all popcorns. This makes the edge robust and stable.
Round 34 :
Begin outermost lace scallops: *in each connecting arch, work (sc, hdc, 5 dc, hdc, sc) to create large scallop; skip to next arch* repeat around. This is the wide scalloped border visible in the image. Work carefully to maintain even tension on each scallop.
Info :
If any scallops seem too narrow or wide, block them gently into shape. Blocking at the end makes scallops sit identically and creates the uniform triangular points seen in the photo.
Round 35 :
Ch 1, sc into each st across the scallop to tidy edges and reduce rolling. Place picot points at scallop tips every 5th dc (picot = ch 3, sl st into same st) for decorative beaded tips like the photo's small raised nubbins.
Round 36 :
Optional bead detail: Use a contrast cream bobble round by making clusters of 5 hdc worked in the same stitch (bobble) at select scallop apexes, then sc down the side. This mimics the knobbled texture in the reference lace.
Info :
Work slowly around corners—reduce or enlarge the number of stitches in the last scallop before a corner to keep scallops from bunching. If scallops pool at seams, add an extra ch-1 spacer in the previous round to disperse tension.
Round 37 :
Final tidy round: sc around entire border placing 1 sc in each picot and 3 sc across each popcorn unit; fasten off and weave in ends securely. Block the entire runner pinned flat, pulling scallops to sharp points and allowing lace to open fully. Steam-block lightly and leave pinned until dry.
Info :
Blocking is critical to reproduce the crisp lace look. Use rust-proof pins and a firm blocking surface. Spritz lightly and shape each scallop symmetrically. Allow to dry completely before removing pins and placing on table.
— Finishing Touches :
Info :
Weave in all yarn ends on the wrong side using a yarn needle. Trim close to fabric but avoid cutting into stitches. If any seams are visible, use matching cream thread to tidy them with small ladder-stitches.
Round 38 :
Optional: For extra stability, lightly starch the runner using diluted fabric starch and press carefully under a cotton cloth to maintain lace shape for display. This firming step is particularly useful if the runner will be used under heavier centerpieces.
Info :
Care instructions: Hand-wash in cool water with mild detergent if needed; reshape and block while wet. Avoid machine washing to keep the lace crisp and avoid color bleeding between multicolor centers and cream border.
Completing this runner is such a rewarding experience — the colorful mandalas pop against the soft cream lace border and the whole piece looks like a treasured vintage find. Each motif builds with satisfying texture and the lace border gives the runner an elegant, heirloom finish. It makes a gorgeous centerpiece for special meals or a thoughtful handmade gift. 🧶✨ Place it on your table, step back, and enjoy the bloom of hand-crocheted beauty! 🌸