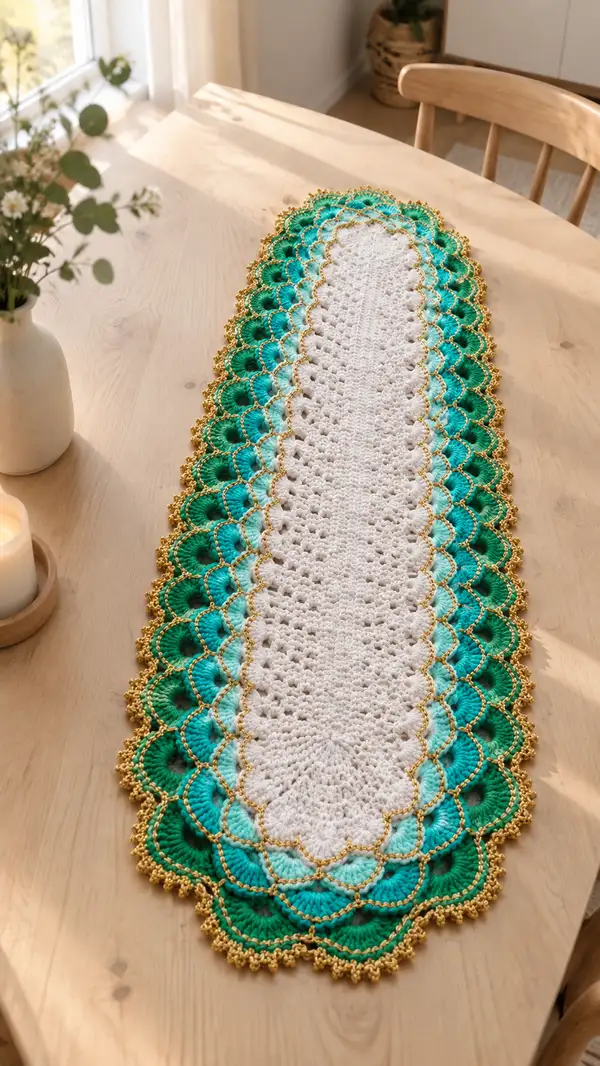
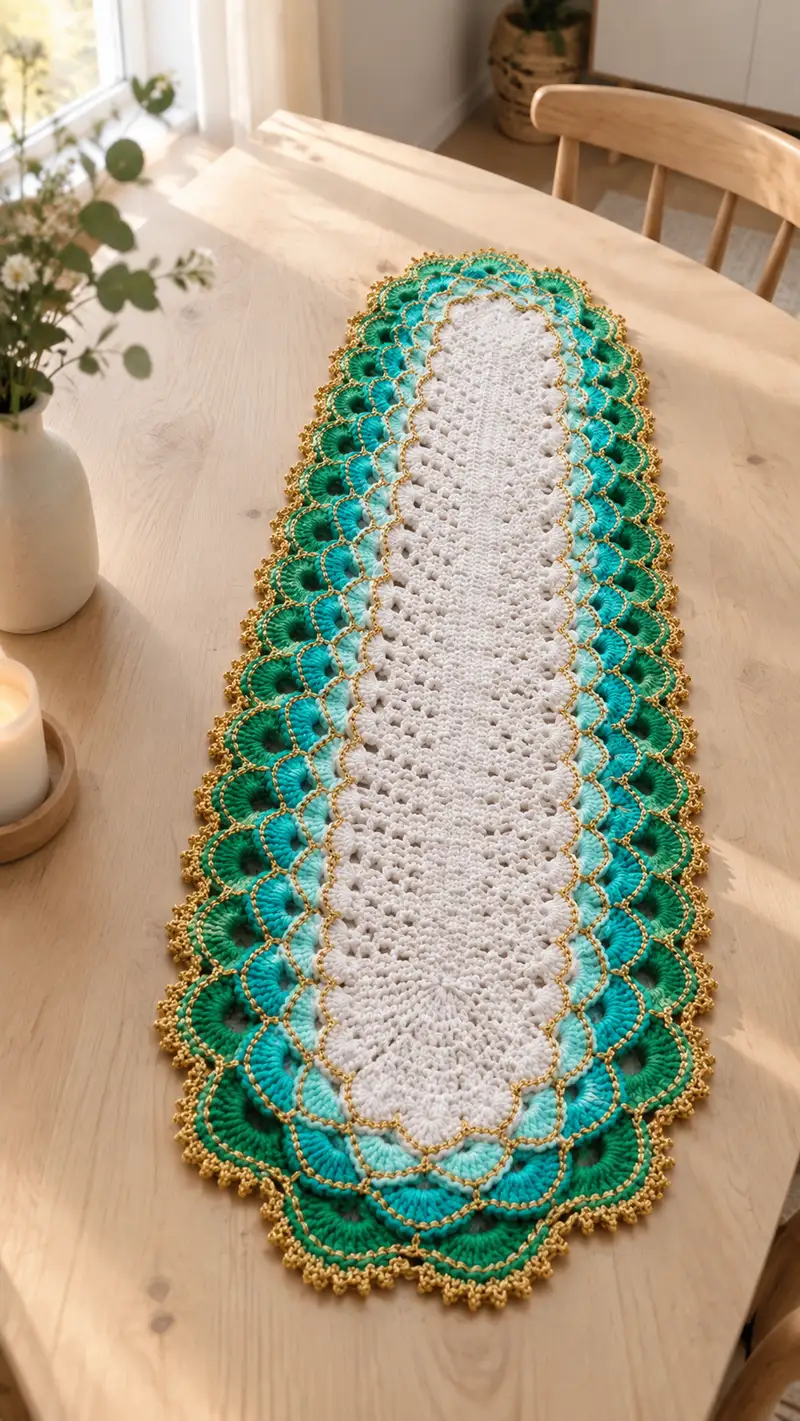
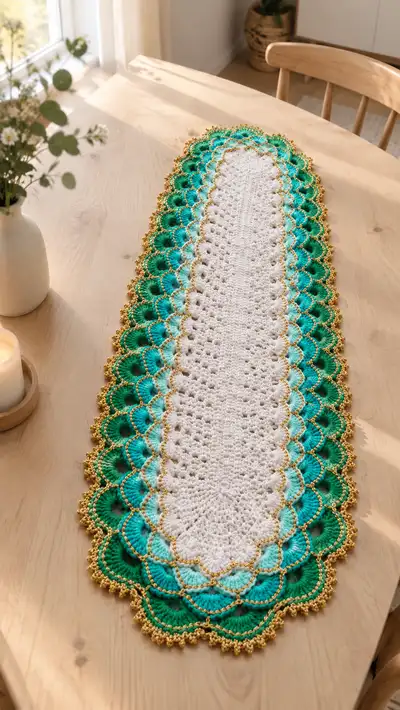
A long oval table runner featuring a crisp white lace center, graduating turquoise-to-emerald scalloped shells, and a sparkling gold picot edge. The design blends textured clusters and delicate shells for a classic, elegant centerpiece. Ideal for dining tables, sideboards, or seasonal displays — the gradient colorwork and gold trim make it a standout accent.
Progress Tracker
0% Complete
— Materials & Gauge :
Info :
This runner is worked in worsted weight yarn with a 4.0 mm hook. Gauge is not critical for the runner width: approximately 14 sts and 8 rows = 4 in (10 cm) in dc pattern, but adjust hook size if you want a significantly larger or smaller final runner.
— Center Panel (White) :
Foundation :
Ch 30. This chain length gives the elongated oval starting base; you may lengthen or shorten the foundation chain by increments of 2 ch to change final length slightly.
Round 1 :
1 sc in 2nd ch from hook and in next 28 ch, 3 sc in last ch; rotate and work 1 sc in each remaining chain across opposite side (28 sc), 3 sc in final ch (66)
Info :
When you join the foundation chain into the oval, place a stitch marker in the first stitch to mark the start of the round. This oval method creates 2 rounded ends with increases at each end.
Round 2 :
(11 sc, inc) x 6 (72)
Round 3 :
1 sc in each st around (72)
Round 4 :
(12 sc, inc) x 6 (78)
Round 5 :
1 sc in each st around (78)
Round 6 :
(13 sc, inc) x 6 (84)
Info :
Maintain an even tension. These alternating increase rounds widen the oval symmetrically. Continue to slip stitch to join each round and move the stitch marker up to the first sc.
Round 7 :
1 sc in each st around (84)
Round 8 :
(14 sc, inc) x 6 (90)
Round 9 :
1 sc in each st around (90)
Round 10 :
(15 sc, inc) x 6 (96)
Round 11-12 :
1 sc in each st around (96)
Info :
At this point the center is stable. If you wish a slightly narrower center before shells begin, omit the next increase round. For the pictured runner, we move out to a total of approximately 102 sts to allow scallop spacing.
Round 13 :
(16 sc, inc) x 6 (102)
Round 14-18 :
1 sc in each st around (102)
Info :
Work flat texture in the center using alternating rows of sc and subtle openwork if desired: for extra lace effect, you can substitute every other round with (1 sc, ch 1, sk 1) repeat, but the original shown uses solid sc texture for a crisp white lace-look center.
Round 19 :
Begin lightweight texture: *ch 3 (counts as dc), sk 1 st, dc in next st* repeat across curved ends, adjusting at end increases to maintain even spacing (102)
Round 20 :
1 sc in each st around (102)
Round 21 :
Work an openwork round to create shell foundation: *sc in next 4 sts, ch 5, sk 3 sts, sc in next 4 sts* repeat around (creates 17 ch-5 loops across outer edge)
Info :
Mark the outermost round as the shell foundation. The ch-5 loops (or ch-4 depending on your tension) will accept shells of double crochet clusters, giving the scalloped look. Count how many loops you have on one rounded end and on body side to ensure symmetry (aim for equal numbers each side).
— Transition to Color & First Shell Band (Mint) :
Info :
Fasten off white leaving a small tail and join Mint (light green) in any ch-5 space with a sl st. Carry tails neatly and weave later. If you prefer to carry color, twist with white on the inside for a tidy join.
Round 22 :
In each ch-5 loop around: sl st into loop, ch 3 (counts as dc), 4 dc in same loop (shell of 5 dc total), sl st to join to base. Repeat in every ch-5 loop around (17 shells) — total stitch footprint remains equivalent to 102 base (visual scallops created)
Info :
Place shells evenly into each loop. If your number of ch-5 loops differs, adjust shell count to fill all loops; you will likely have 16–18 shells depending on foundation chain and tension. The important point is to place one shell per loop for symmetry.
Round 23 :
Working behind shell row into spaces between shells: *sl st to apex of next shell, ch 3, 2 dc in same sp, ch 1, 3 dc in same sp, sl st to next space* repeat around to reinforce shell definition and create small arches (visual width remains)
Round 24 :
1 sc in each st and sl st around to tidy join (visual count equivalent)
Info :
Stuff the inner center slightly with a gentle hand to flatten and stabilize if desired, though the runner is a flat piece—avoid stuffing in a table runner. Continue to work from the outside of the center outward.
— Gradient Shell Rows (Aqua, Teal, Emerald) :
Info :
We will work 4 color bands: Mint (already worked), Aqua, Teal, and Emerald. Each color band uses 4-6 rounds to build progressively larger scallops. Use separate balls for each color and join with sl st in the same manner at the start of that band's first shell foundation round.
Round 25 (Aqua - foundation join) :
Join Aqua in the stitch behind a shell apex with a sl st. Ch 1, sc in same st, *ch 5, sk next shell apex, sc in next space between shells* repeat around to make ch-5 foundation loops for the next shell band.
Round 26 (Aqua - shell)
In each ch-5 loop: sl st, ch 3, 6 dc in same loop (7 dc shell), sl st to base. Repeat around for all loops (creates larger scallops; band unchanged in stitch count but visually larger).
Round 27 (Aqua - reinforcement)
Working behind shells, *sl st to apex of shell, ch 3, 3 dc in same sp, ch 1, 3 dc in same sp* repeat around. Sl st to join.
Round 28 (Aqua - tidy)
1 sc in each join stitch around to tidy edge and prepare for next color (visual count consistent)
Info :
Each subsequent color band follows the same structure: create ch loops between current shells, then place larger shells into those loops. Because base stitch count remains the same, the number of shells is consistent; the shells themselves grow outward, creating an ombre effect.
Round 29 (Teal - foundation)
Join Teal with sl st into a join stitch behind a shell apex. Ch 1, sc same, *ch 6, sk next apex, sc next* repeat around to create slightly larger ch-6 loops (space size increases to accommodate larger shells).
Round 30 (Teal - shell)
In each ch-6 loop: sl st, ch 3, 8 dc in same loop (9 dc shell), sl st to base. Repeat around.
Round 31 (Teal - reinforce)
*sl st to apex, ch 3, 4 dc in same sp, ch 1, 4 dc in same sp* repeat around. Sl st join.
Round 32 (Teal - tidy)
1 sc in each st and sl st to join (visual count maintained)
Info :
For a smooth gradient, change yarn color between the reinforcement and tidy round so the shell shapes read as a consistent band of color from a distance. Weave in ends later or carry small lengths along the back of the row to minimize ends.
Round 33 (Emerald - foundation)
Join Emerald in a join stitch behind a shell apex. Ch 1, sc same, *ch 7, sk next apex, sc next* repeat around to create ch-7 loops for the largest shell band.
Round 34 (Emerald - shell)
In each ch-7 loop: sl st, ch 3, 10 dc in same loop (11 dc shell), sl st to base. Repeat around to create broad outer scallops.
Round 35 (Emerald - reinforce)
*sl st to apex, ch 3, 5 dc in same sp, ch 1, 5 dc in same sp* repeat around to define scallops. Sl st to join.
Round 36 (Emerald - tidy)
1 sc around and sl st to join. Fasten off Emerald leaving tail for weaving or to join to gold edging.
Info :
If you prefer more subtle gradation, add an intermediate color band between Teal and Emerald repeating the same 4-round shell progression with slightly altered ch loop size to incrementally increase shell depth.
— Outer Scallop Shaping & Decorative Lace :
Round 37 :
With the last green still joined or after re-joining, work into the apex of each outer shell: ch 1, sc in apex, ch 3, 3 tr in same apex, ch 3, sc in next apex. Repeat around to start forming fan-shaped points between shells (apparent stitch footprint remains based on number of shells).
Round 38 :
Slip stitch around to tidy, then *ch 5, sl st at base between fan points* repeat to create small loops for picot detail (these loops will be used in the gold edging round).
Info :
At this stage, the runner should lie flat. If one side appears tighter, relax tension and block before adding gold edging. Blocking will open shells and make scallops crisp.
Round 39 :
Work a decorative row in BLO: 1 sc in each st BLO around to create a ridge that will catch and beautifully highlight the gold edging (visual count same as shell repeats).
Round 40 :
Ch 1, sc in each st around, finishing with sl st to join. Fasten off and weave any remaining green tails neat to the back.
— Gold Edging & Picot Border :
Info :
Use metallic gold fingering/sport weight yarn held single for a delicate look. Use a slightly smaller hook (3.5mm or 3.25mm) so the picots are neat and the gold trim does not stretch the scallops outward.
Round 41 (Gold - join) :
Join gold in a back-loop join behind any outer shell apex with a sl st. Ch 1, sc in same st to anchor (this first stitch is counted in the round total).
Round 42 :
*(sc in next 2 sts, picot: ch 3, sl st in 3rd ch from hook), sc in next 3 sts, (5 sc in next ch-5 loop apex)* repeat around. These groups create a repeating bead and scallop effect along the edge.
Info :
Picot instructions: ch 3, sl st in the 3rd ch from hook creates small knob-like points. If you prefer more delicate picots, ch 2 and sl st in 2nd ch from hook. Keep tension consistent to avoid pulling scallops out of shape.
Round 43 :
Work a second gold round to refine the bead-like border: *sl st into picot base, ch 4, 3 sc into top of next picot to form a tiny loop, sl st to base between loops* repeat around. This will create the small bead loops seen on the very edge.
Round 44 :
Optional decorative bullion/cluster row: *in spaces between bead loops work (ch 1, (hdc, dc, hdc) in same space), sl st to next join* repeat for a lacy scalloped finish. Fasten off gold and weave in ends carefully to the back.
Info :
If adding small beads, thread beads onto the gold yarn before beginning the gold round and slide them into place on the sl st that anchors each picot for that extra shimmer visible in the photograph.
— Finishing :
Info :
Weave in all ends on the reverse side using a yarn needle. Gently block the entire runner to shape scallops: wet block or mist lightly and pin scallops to desired shape, allowing to dry completely.
Round 45 :
Final check: secure any loose picots by sewing their bases with matching gold thread and trim any long tails.
Info :
Pressing metallic yarn is not recommended. Instead, shape by pinning and steam lightly (do not touch metallic yarn directly with iron). When dry, remove pins and admire the crisp scallops.
Extra Decorative Option :
For a slightly heavier border (as seen in some variants), repeat Rounds 42-44 adding an extra bead loop row to increase the golden ridge effect. Use a very small hook to avoid distorting scallops.
Info :
Notes on stitch counts: The foundation oval creates an initial circumference of 66 stitches, and the pattern's increase rounds step the circumference up by 6 stitches at each increase (72, 78, 84, 90, 96, 102). Shell placement is based on the ch loop foundation rather than raw sc stitch count; as long as one shell is placed per loop, the scallops will align evenly.
Maintenance :
Hand wash gently in lukewarm water and lay flat to dry. Metallic yarn may tarnish in harsh detergents, so use a gentle wool wash or mild soap.
Completing this elegant runner is so rewarding — the crisp white center, layered green scallops and sparkling gold trim come together beautifully. It makes a stunning table centerpiece and a lovely handmade gift. Block it, place it, and enjoy the glow it brings to your dining space! 🧶✨