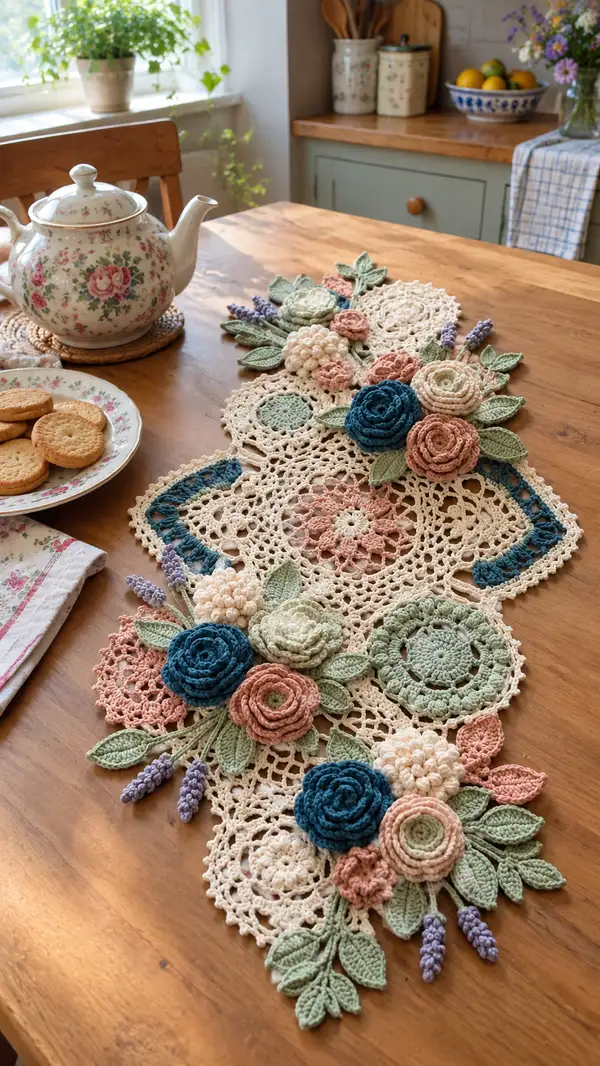
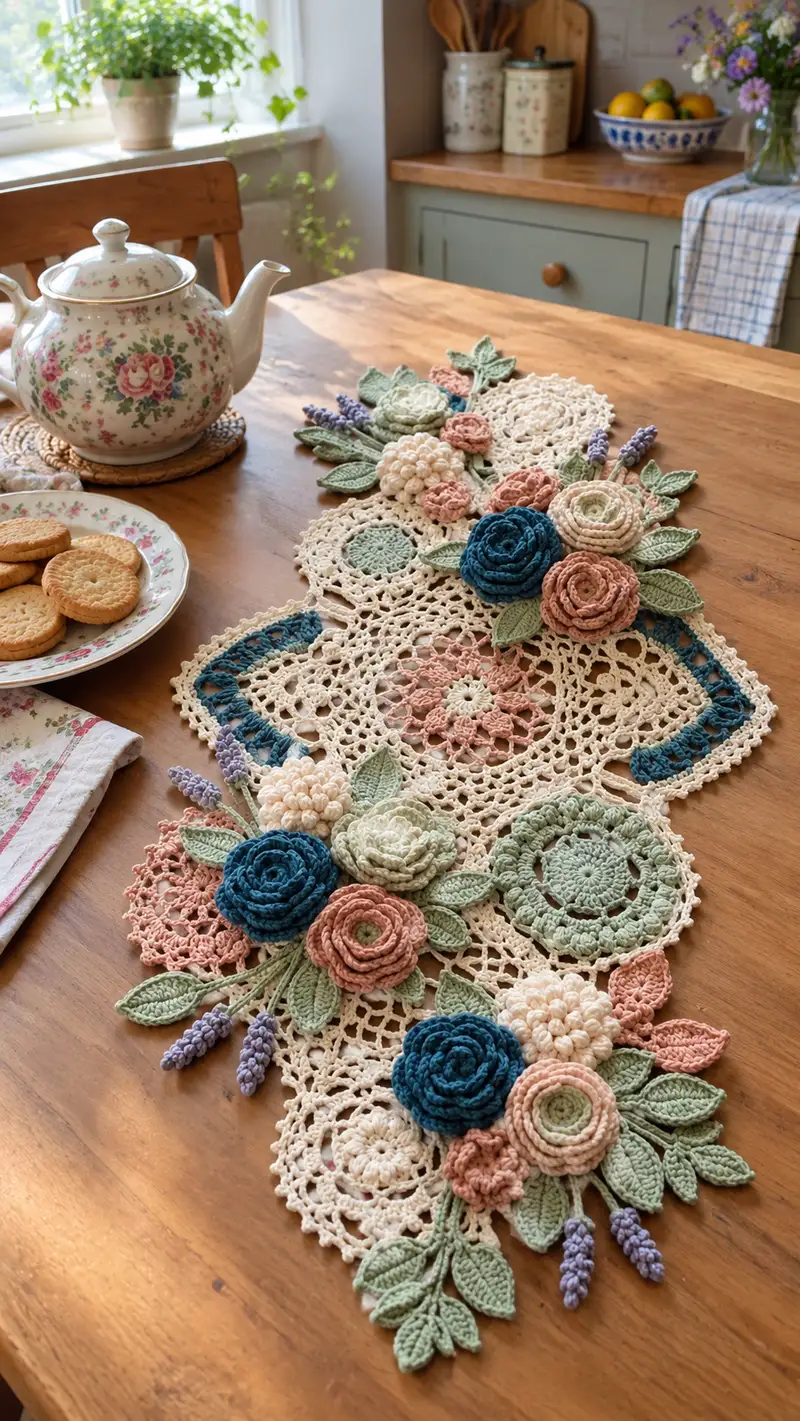
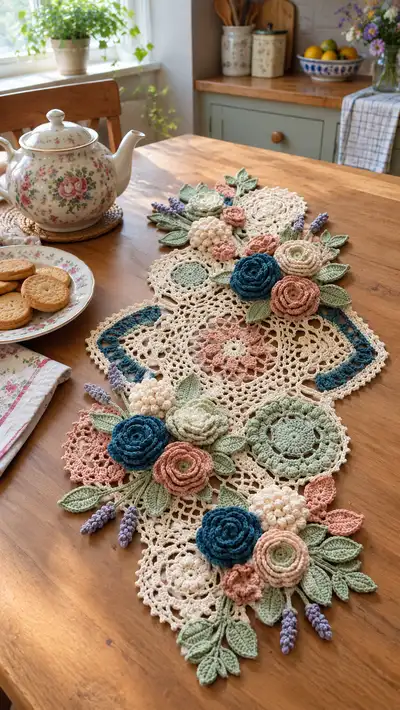
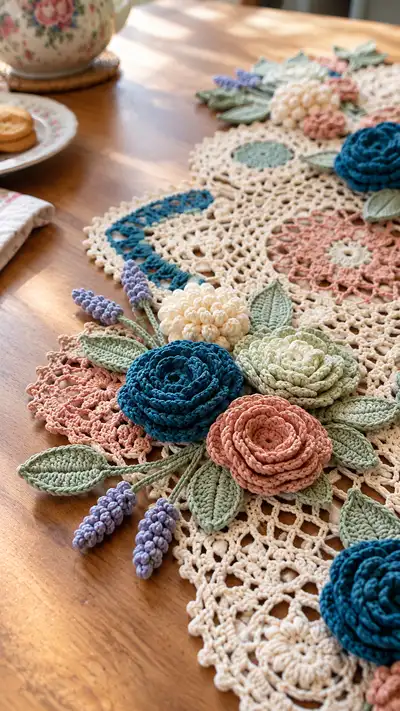
Create a romantic, vintage-inspired floral table runner made from layered crochet doilies and 3D flowers. This pattern features delicate lace discs, raised spiral roses, bobble clusters and sculpted leaves in soft pastel tones. Designed to lay flat or be pinned to shape, the runner is a stunning centerpiece for tea time or everyday charm.
Progress Tracker
0% Complete
— Supplies & Notes :
Info :
Work in continuous rounds for spiral flowers and magic-ring centers unless otherwise noted. Use stitch markers to mark the start of rounds on circular motifs. Block each doily/motif flat before assembly to ensure consistent joins. All rounds list stitch counts at end in parentheses.
Info :
Gauge is not strict for a decorative runner, but to match proportions shown use 3.5mm hook for main lace and 3.0mm or 3.25mm for flowers and leaves. Yarn: mercerized cotton is shown for crisp stitches and light sheen.
— Large Lace Doily A (Make 2) :
Round 3 :
(1 sc, inc) x 6 (18)
Round 4 :
(2 sc, inc) x 6 (24)
Round 5 :
(3 sc, inc) x 6 (30)
Round 6 :
1 sc in each st (30)
Info :
Begin creating lacy shell texture. Keep tension relaxed for openwork. Place a stitch marker at first stitch of this round for later reference when joining.
Round 7 :
*ch3, skip 1, sc in next* around to create open chain spaces (30 ch-3 sps)
Round 8 :
In each ch-3 sp: (sc, ch3, sc) to form small arches (30 arches)
Round 9 :
Into each arch: sc, hdc, 3 dc, hdc, sc (crowded shell) (30 shells, 60 sts total)
Info :
If your shells are too large, switch to a 3.25mm hook for this round to keep doily diameter in check. Blocking will open the pattern more evenly.
Round 10 :
Ch4, sk to center of next shell, sl st; repeat to create longer arches around (30 ch-4 sps)
Round 11 :
Work into each ch-4 sp: (2 sc, ch2, 2 sc) to make raised petals (30 petals)
Round 12 :
*ch5, sl st into ch-2 sp of next petal* around to form picot arches (30 ch-5 sps)
Round 13 :
In each ch-5 sp: sc, (3 dc, ch2, 3 dc), sc — a decorative shell (30 large shells)
Info :
After this round the disc diameter should be approximately 18-20 cm unblocked; block flat to true circular shape before adding outer round.
Round 14 :
Ch2, *(5 dc in shell, ch3, sl st in next shell center)* around to create ornate edging (30 clusters)
Round 15 :
Sc evenly around the outer edge working 1 sc in each dc and 3 sc in each ch-3 picot to stabilize (total approx 120 sc)
Round 16 :
*(sc, ch3, sc) in next 6 sts, sl st into next* to create scallop loops (approx 20 scallops)
Round 17 :
Work a picot picot: into each scallop: (sc, ch3, sc) then sl st into top to tack down (keeps scallops tidy)
Info :
Fasten off leaving 20cm tail for sewing to connector lace. Block and steam to flatten. Make two discs for alternating placement.
— Small Circular Motif B (Make 4) :
Round 3 :
(1 sc, inc) x 6 (18)
Round 4 :
1 sc in each st (18)
Round 5 :
*(ch4, sl st into next st) x 6* to form small petal arches (6 arches)
Round 6 :
In each arch work: sc, (3 dc, ch2, 3 dc), sc — small shell motif (6 shells)
Round 7 :
Edge: sc evenly around, working 2 sc in each shell top (total approx 48 sc)
Info :
These smaller motifs act as centers under layered flowers and help fill gaps in the runner. Block flat.
— Connecting Lace Panel (Make 1 long strip) :
Round 1 :
Ch 120 (or desired length to span runner) then join with sl st to form working ring if making an endless strip, otherwise work open chain foundation, turn (120 ch)
Round 2 :
Row style: sc in 2nd ch from hook and each across (119 sc)
Round 3 :
Turn, ch4 (counts as tr), *sk 2, tr in next, ch2* across to create raised tr columns (approx 40 tr columns)
Round 4 :
Turn, into each ch2 sp work (sc, ch3, sc) to form arches (40 arches)
Round 5 :
Row of decorative shells: into each arch: sc, hdc, 3 dc, hdc, sc — repeats across (40 shells)
Info :
This panel is the backbone of the runner. You can make two shorter strips and join, or make one long continuous strip. Block flat and pin to shape (s curves) before attaching motifs.
Round 6 :
Edge rows (both sides): sc evenly down the sides with (sc, ch2, sk1) to create picot-like edges for sewing motifs (approx 2 x 120 sts)
Round 7 :
Work a decorative scallop along each side: *(ch5, sl st in 3rd ch from base) repeat along edge to make loops*
Info :
When joining, use the ch loops as natural anchors for sewing doilies and flowers. This panel can be shaped into gentle S-curves as shown in the photo when blocked pinned to a template.
— Spiral Rose (Make 6; 3 large, 3 medium) :
Round 1 :
Ch 31 (large) or ch 23 (medium), sl st to first ch to form a ring if you prefer, otherwise work in a long strip (30 ch + turning ch)
Round 2 :
Row: sc in 2nd ch from hook and each across (large 30 sc / medium 22 sc)
Round 3 :
Row: (sc, hdc, 2 dc, 3 dc, 2 dc, hdc, sc) repeat across making a graduated petal set; create slightly larger petals for every 6 sts so the strip will coil (maintain overall stitch count)
Round 4 :
Repeat round 3 but increase the 3 dc cluster to 4 dc in the center petal every 8 sts for fuller outer petals (strip will start to ruffle)
Info :
When you have the petal strip completed, leave a long tail. Starting at one end, roll the strip tightly to form a central bud and continue coiling, adjusting petal overlap to form a rose. Stitch the roulade base every 4-6 mm through the coil with the tail using a yarn needle to secure. Make 3 using deep teal and 3 using dusty rose.
Round 5 :
After coiling, tack through the base in 6-8 evenly spaced spots using invisible whip or mattress stitch to keep coil flat (no additional round count)
Info :
Large roses will measure approximately 6-7 cm diameter when coiled tightly; medium roses approx 4-5 cm. Adjust number of chain stitches to change size.
— Layered Rosette (Make 4) :
Round 3 :
(1 sc, inc) x 6 (18)
Round 4 :
Change color if desired. *Ch4, sl st in base every 3 sts* produce small loops for outer petal
Round 5 :
Work into each loop: (sc, hdc, 5 dc, hdc, sc) to create pronounced petals (18 petals)
Round 6 :
Edging: sc in each st around, 2 sc in the top of each petal to round edge (approx 72 sc)
Info :
Stitch two or three rosettes as stacked layers if you want extra dimensional flowers; the pattern pictured uses one rosette under large spiral roses to push them up from the base doily.
— Bobble Cluster Flower (Puffy Pom) (Make 3) :
Round 1 :
Ch 6, join with sl st to form ring (6 ch)
Round 2 :
ch1, work 12 sc into ring (12)
Round 3 :
*bobble in next st (yarn over, insert, pull up loop) x 4 times then close bobble by pulling through all loops, sl st into next st* around to create clustered bobbles (approx 6 bobbles)
Round 4 :
Work sc evenly around to tidy (12 sc)
Info :
Stuff very lightly with polyester fill if you want a rounder pompom texture, or leave unstuffed for flatter clusters. Secure base with long tail for sewing.
— Lavendar Spike (Make 8) :
Round 1 :
Ch 20 for stem; attach lavender-color yarn to top with sl st to make spike (20 ch stem)
Round 2 :
At top: make a cluster of bobbles along top 6 ch: *(bobble, sl st)* across 6 ch to mimic tiny buds (6 buds)
Round 3 :
Turn down and sc back along stem into chain spaces to create a rounded stem (20 sc)
Info :
Optionally insert a thin floral wire inside stem before tacking down to allow slight posing. Wrap a little florist tape or color-matched yarn near base to secure wire.
— Sculpted Leaf (Make 24 assorted sizes) :
Round 1 :
Ch 12 for small leaf (ch 16 medium, ch 20 large) — starting chain equals the leaf length choice
Round 2 :
Row along chain: sc in 2nd ch from hook, sc in next half chain, hdc, dc in next, hdc, sc, sc in last. Rotate to work down other side of chain mirroring increases back to base; sl st to base (approx 22 sts small)
Round 3 :
Work BLO: sc in each st BLO to create a ridge down center (22 sc BLO)
Round 4 :
Edge ridge: sc evenly around leaves adding 2 sc at base to create slight cup (approx 28 sc)
Info :
Use sage green. Make leaves in 3 sizes for natural look: 12 small (ch12), 8 medium (ch16), 4 large (ch20). Stiffen lightly with spray starch if you prefer leaves to sit up.
— Small Filler Motif (Make 10) :
Round 3 :
*ch3, sl st in next* around to make tiny picot loop (6 loops)
Info :
These tiny motifs are used under roses or tucked under leaves to help blend large elements; they do not require blocking but a quick steam press can flatten them slightly.
— Medium Disk (Make 3) :
Round 3 :
(2 sc, inc) x 8 (24)
Round 4 :
1 sc in each st (24)
Round 5 :
*ch6, sl st into every 4th st* around to create long loops for large layered motif (approx 6 loops)
Round 6 :
Into each loop: work (sc, hdc, 5 dc, hdc, sc) to form prominent petals (6 petals)
Info :
These discs sit under clusters of roses and rosettes to lift them from the lace background; make in cream, sage or a soft accent color for subtle contrast.
— Assembly Prep & Layout :
Info :
Block every motif flat to the same plane. Arrange the lace panel on your table or blocking mat in desired S-shaped layout and pin in place. Place larger doilies first, then add medium disks where pictured. Tuck spiral roses and rosettes in groupings, spacing approximately 2-4 cm between flowers to allow natural shadows.
Info :
Plan clusters: each floral cluster comprises one large spiral rose, one layered rosette, one medium disk, one bobble cluster and 4-6 leaves plus 1-2 lavender spikes. The runner shows three distinct clusters spaced along the strip.
— Sewing & Joining Motifs :
Round 1 :
Using long tails, sew doilies to the connecting lace using neat whip stitch through ch-loops and edge sc rows; aim for 4-6 attachment points per doily depending on size
Round 2 :
Sew smaller motifs to centre positions of doilies, then attach rosettes and spiral roses on top by stitching base coil evenly around in 6-8 places
Info :
Tack leaves beneath flower bases with 2-3 small stitches each, aligning central veins towards stems. For a natural layered look, place some leaves under and some overlapping flower edges.
Round 3 :
Sew lavender spikes by catching stem base into underside of rosette or leaf base securing with several back-and-forth stitches; bend into position before final knot
Info :
When joining many pieces, use matching thread/yarn color for invisible joins. For extra security where the runner may be moved, tack additional stitches through lace panel to the table backing or a fabric base (optional).
— Final Edge Finishing :
Round 1 :
Work an edging around full runner: sc evenly with picots on outermost edge: *(sc, ch3, sl st in 3rd ch)* to create delicate looped edge
Round 2 :
Optional border: work a scallop row: *(5 dc, sl st) in each picot around* to give more vintage feel
Info :
Weave in all tails on the underside. Lightly steam-block the entire assembled runner pinned to shape so clusters sit in the intended positions. Use minimal steam near bobble clusters to avoid flattening them.
— Additional Tips & Troubleshooting :
Info :
If the runner waves after assembly, re-pin and spray-block it to the correct flat shape. If a spiral rose is too loose, unpick a few base stitches and re-tighten coil before re-securing. Keep one motif as a test piece to practice coiling and sewing technique.
Info :
Adjust the number of chain stitches in the spiral rose foundation to make smaller or larger roses to fit your composition. Remember to block each altered piece and test placement before permanently joining.
Bringing this vintage floral table runner together is such a rewarding creative journey! Each layered doily and sculpted flower adds personality and texture, creating a centerpiece that feels both heirloom and handmade. The soft pastels and dimensional blooms make a cozy statement for tea time or special gatherings. I hope the tutorial inspires you to mix colors and add personal touches as you craft — happy crocheting! 🌸🧶