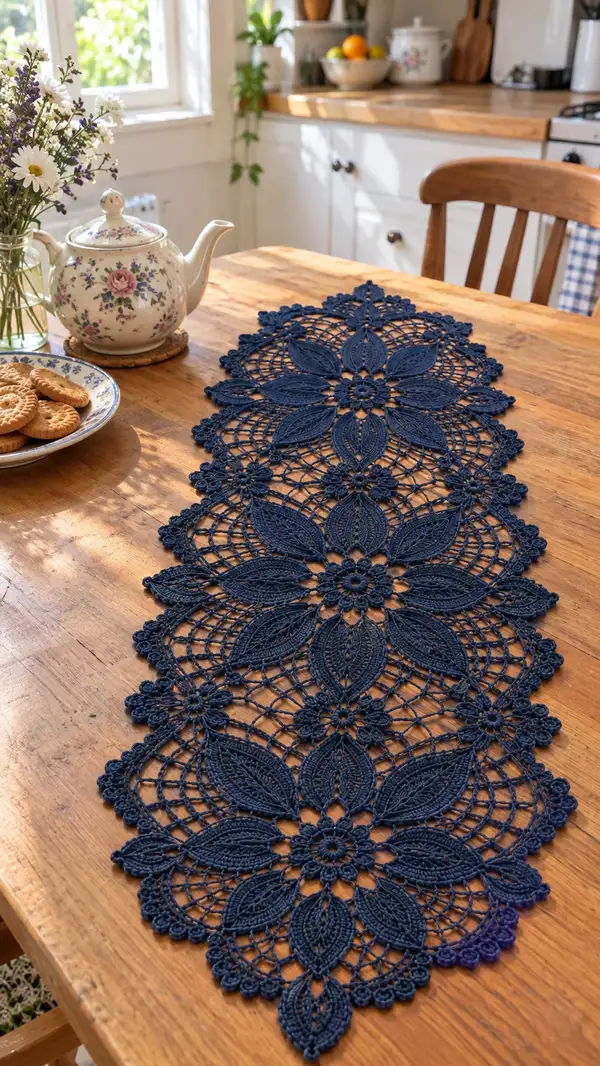
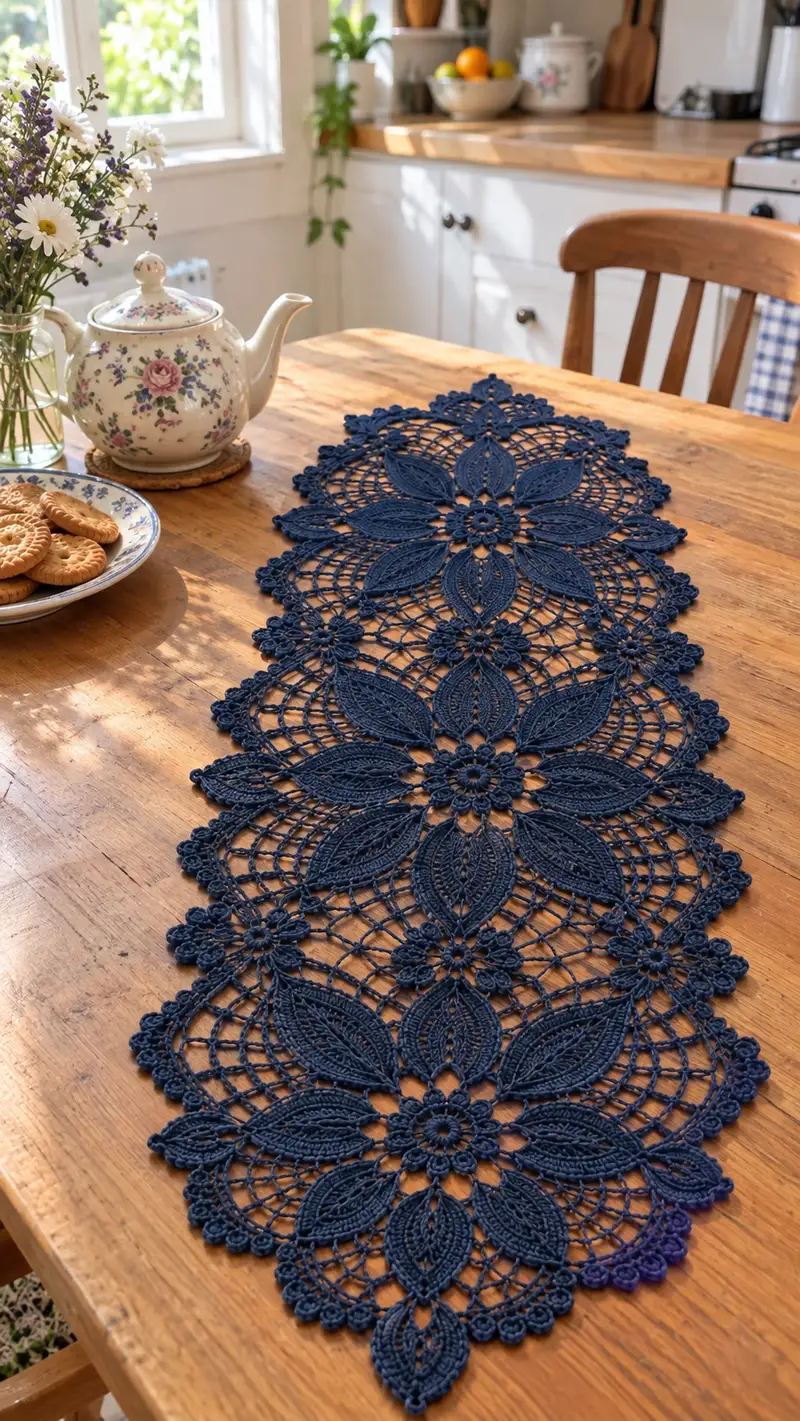
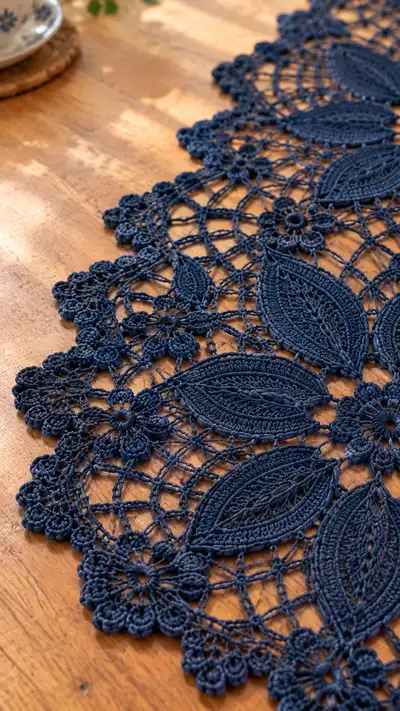
Create a stunning navy floral lace table runner inspired by delicate Irish crochet and vintage doily motifs. This runner features repeating floral medallions, raised leaf petals, airy mesh panels and a scalloped picot edge. The navy cotton cord used in the photo gives a crisp, modern look while retaining handcrafted vintage charm. The pattern is modular — make more or fewer motif repeats to fit any table size.
Progress Tracker
0% Complete
— Pattern Overview :
Info :
This runner is constructed from repeating large floral medallions connected with open mesh panels and small 6-petal connector flowers. Each large medallion consists of a central rosette, twelve raised leaf petals grouped as pairs across the medallion, and surrounding lattice rounds that shape the motif. Make as many medallions as needed for your table length; the pictured runner shows five full medallions linked in a straight strip. Work motifs individually, block flat to measurements, then join by crocheting or sewing through designated join points.
— Large Floral Medallion (Make 1 x repeated unit) :
Round 1 :
mr, ch1, 12 sc into magic ring, sl st to first sc to join (12)
Round 2 :
ch3 (counts as dc), dc in same st, (ch2, sk next sc, 2 dc in next sc) around to form 6 dc pairs and 6 ch2 spaces, sl st to top of ch3 (12 dc, 6 ch-2 sps)
Info :
Round 3 begins the small petal points that will later be built into larger raised leaf petals. Keep tension steady so small loops are even.
Round 3 :
Working into each ch-2 sp: (ch3, 5 dc cluster into same ch-2 sp, ch3, sl st into next dc) repeat around to produce 6 small petal clusters. Sl st to first sl st to join (six clusters)
Round 4 :
ch1, sc in same st, (ch5, sc in top of next petal cluster) around to form a ring of ch-5 loops; sl st to first sc (6 ch-5 loops)
Info :
These ch-5 loops will act as foundation arches for the larger petals. Keep them uniform in height to ensure leaf petals align.
Round 5 :
Working into each ch-5 loop: [sl st into loop, ch1, (sc, hdc, 3 dc, dtr, 3 dc, hdc, sc) into loop, sl st] repeat around to form 6 raised petal bases (6 raised petal bases)
Round 6 :
ch1, sc into each st around the base of petals (est. 48 sc) — count to keep even (48)
Info :
Beginning the multi-petal expansion. Each petal will be worked as an elongated leaf using post stitches and front loop/puff details. Place stitch markers at the start of each petal for easier counting.
Round 7 :
Work 12 raised leaf petals now: For each petal base (work twice into every petal base to yield 12 petals total): join yarn at first petal base, ch2 (does not count), (5 tr in same base, dc3tog across next 3 tr, ch4, slip 3 tr back to create elongated loop, 1 sc at base), move to the same petal base and repeat to make a mirrored petal. Repeat for each base to total 12 petals. After completing 12 petals sl st to base (12 raised leaf petals)
Round 8 :
ch1, 1 sc in each stitch and around the base area between petals, working 2 sc between paired petals to maintain shape (approx 96 sc) — count carefully to total 96
Info :
Round 9 begins the internal leaf filling rows. Use BLO on some rounds to create ridges inside each leaf for texture; alternate regular rounds with BLO rounds as noted.
Round 9 :
ch1, 1 sc in each st BLO around to create an internal ridge and define petals (96)
Round 10 :
ch2, (1 hdc, 3 dc, ch3, sl st into top of next petal) repeat across the 12 petals to form connecting arches between each leaf tip (12 arches)
Info :
This round begins building the outer lattice. Use longer chains and evenly spaced dc clusters to keep the mesh airy but stable. Keep counts consistent and mark the start of each petal sector.
Round 11 :
Into each arch: ch7, sl st to center point between petals (12 ch-7 loops)
Round 12 :
Working into each ch-7 loop: (sc, ch5, 3 dc cluster, ch5, sc) — repeat in each loop to create 12 framed arches (count: 12 sc + 12 x 3dc clusters)
Round 13 :
ch1, 1 sc between clusters and in each space to stabilize (estimated 144 sc) — use markers and recount to verify (144)
Info :
Round 14 adds worked spider-lace connections which create the lattice panel of the medallion. Keep tension slightly looser for chains and tighter for dc clusters for attractive visual contrast.
Round 14 :
*ch6, sl st into next sc to create netting; repeat from * across the round to form 24 net arches spaced evenly between petals (24 ch-6 sps)
Round 15 :
Into each ch-6 sp: (sl st, ch3, 5 dc shell, ch3, sl st) — creates 24 small shells that visually bridge petals (24 shells)
Round 16 :
ch1, sc in each stitch and in shell centers to even out count (approx 192 sc). Count and adjust by adding single increases where needed to get to 192
Info :
Now we will build the outer petal lobe that frames the medallion and will serve as the joining edge. Work tall clusters and picot details to create a scalloped outline.
Round 17 :
Into each petal tip area: ch2, (dc, tr, dtr, tr, dc) to form an outer lobe; sl st to next framed point. Repeat 12 times to form 12 lobes (12 lobes)
Round 18 :
Between each lobe: ch4, sl st to adjacent lobe base to create bridged arches (12 ch-4 sps)
Round 19 :
Into each ch-4 sp: (sc, picot, sc) to form small decorative picots between lobes (count will be 36 small picot units)
Info :
This phase finishes the medallion center and prepares stitches for joining points. Add two small 6-petal rosette join points positioned between selected lobes for later connections to adjacent medallions.
Round 20 :
At designated join positions (choose two opposite lobes): make 6-petal rosette: (mr, ch1, 6 sc into mr, sl st, fasten off leaving tail) - make two rosettes attached to the medallion with sewing (two rosettes attached)
Round 21 :
ch1, sc evenly around entire medallion edge picking up lobes and small picot edges to stabilize (approx 220 sc) — recount to reach 220
Info :
Add a last decorative edging round that produces a scalloped profile and provides plenty of points for joining. Block this medallion flat immediately after finishing to true shape.
Round 22 :
*(ch3, sl st in base sc, ch3, 5 dc cluster in next sc, ch3, sl st) across 12 scallops to create pronounced scallop edges — finish with sl st and fasten off, leaving long tail for sewing (12 scallops)
Info :
Block medallion flat, pinning each lobe and scallop to the desired measurement. Spray lightly with water or use steam; allow to dry completely before assembly. Make required number of medallions for runner length (photograph shows 5 medallions).
— Raised Leaf Motif (Alternate detail or standalone motif) :
Round 1 :
mr, ch1, 8 sc into mr, sl st to join (8)
Round 2 :
ch2, 2 dc in each sc around (16)
Round 3 :
(1 dc, inc) x8 = 24 total (work as: 1 dc in next st, 2 dc in following st; rep) (24)
Round 4 :
ch1, 1 sc in each st around to even out (24)
Info :
Now we begin shaping the leaf: work long post stitches on first half of the round and mirror on the second half to produce a pointed leaf shape.
Round 5 :
*Work 12 sts across to make the right half: (ch2, 4 tr, 3 tr cluster, ch2, sl st) then continue on remaining 12 sts to mirror: (sl st, ch2, 3 tr cluster, 4 tr, ch2) — join to create a single elongated leaf (one leaf)
Round 6 :
ch1, 1 sc around the leaf base (approx 36 sc) to stabilize (36)
Info :
Use BLO for one round to create a midrib ridge inside the leaf. This gives strong raised texture when blocking.
Round 7 :
ch1, 1 sc in each st BLO (36)
Round 8 :
Work 4 rounds of (ch4, sl st to spacing point) around leaf to create open lacy background for leaf; finish with sc round to tidy (create small open border)
Round 9 :
Fasten off leaving long tail; block leaf flat with pins, shaping the pointed ends carefully. Make multiples to insert between medallion lobes if desired.
— Small 6-Petal Connector Flower (Make many for joins) :
Round 1 :
mr, ch1, 8 sc into mr, do not join; continue to round 2 directly (8)
Round 2 :
*ch4, sl st into next sc to form 8 ch-4 loops; repeat around; sl st to first sc (8 ch-4 loops)
Round 3 :
In each ch-4 loop: (sc, ch3, 5 dc, ch3, sc) to create a small 6-petal rosette (8 small petals)
Round 4 :
ch1, sc around base to tidy (approx 48 sc); fasten off leaving long tail for sewing (connector flower complete)
Info :
These tiny flowers are used to anchor mesh intersections and to connect medallions. Make sufficient connectors to place between medallions and at border join points (about 18-24 for a five-medallion runner).
— Mesh Panel & Bridge (Work between medallions) :
Round 1 :
Attach yarn at designated join point on medallion A (see photos: two mirrored join points per medallion). ch1, sc into base stitch, ch6, sc into next designated base; repeat to create 6 ch-6 bridge loops across the sector (6 loops)
Round 2 :
Into each ch-6 loop: (sl st, ch4, 5 dc shell, ch4, sl st) to create small shells that span and visually tie medallions (6 shells)
Round 3 :
ch1, sc across to join shells and form small frame (approx 60 sc) count and adjust to correspond with medallion counts
Info :
For the airy lattice, work alternating chain arches and slip-stitch anchors. Each mesh panel should mirror its opposite to keep the runner flat and balanced.
Round 4 :
*ch8, sl st to anchor point forming open netting; repeat to create 12 ch-8 sps across the bridge section*
Round 5 :
Into each ch-8 sp: ch3, (sl st in next anchor, ch3) across to produce a net of ch-3 loops; then work sc round around entire bridge to tidy (approx 120 sc around bridge)
Round 6 :
Attach small 6-petal connector flowers into alternate intersections of the netting using yarn tail and whipstitch to secure. Space connectors evenly to match adjacent medallion join points.
Round 7 :
Fasten off and weave in ends. Block the bridge flat; pin connectors slightly raised to create three-dimensional highlights that cast gentle shadows under light.
— Outer Border & Scallop Edge (Work around entire connected runner) :
Round 1 :
After all medallions are joined and mesh panels attached, work a foundation sc round around entire runner edge to create uniform edge: attach yarn to any outermost scallop, ch1, sc evenly around picking up all outer lobes and mesh points. Count and aim for a multiple of 12 in total (estimate 720 sc for five-medallion runner)
Info :
This heavy round evens the edge and readies the fabric for the decorative scallop. Maintain consistent spacing; if area is very busy, skip every second stitch to keep counts manageable.
Round 2 :
Work 1 sc in next 3 sc, (ch3, skip 1 sc, sc in next 3 sc) repeat to mark scallop anchors (anchors spaced evenly)
Round 3 :
Into each scallop anchor: (sl st, ch5, 7 dc shell, ch5, sl st) to create pronounced shells around outer edge — repeat for each anchor (expected 60+ shells depending on runner length)
Round 4 :
ch1, sc around to secure shells; in gaps between shells, work 3 sc to smooth and keep counts even (adjust to keep edge flat)
Info :
Final decorative picot row: use clustered picots for a textured lace finish. This is important for a clean silhouette when viewed from table height.
Round 5 :
*In each shell apex: (sc, picot, sc, ch2, sl st into base between shells) repeat to define edge; sl st to join and fasten off leaving long tail for final weave (picot scallop)
Round 6 :
Weave in all ends and place the runner on a blocking board. Pin every scallop and lobe to desired size. Mist with water or use steam and allow to dry fully. If a crisper look is desired, spray with fabric starch while pinned and let dry.
— Optional Finishing Embellishments :
Info :
Add small embroidered centers in each medallion with contrasting thread for subtle colour pops. To do this, use a fine embroidery thread and a tapestry needle to couch a few French knots or chain-stitched lines in the center rosettes. Secure knots on underside and weave tails through multiple stitches.
Info :
If you prefer a soft runner that drapes, block less aggressively and skip starch. For a crisp showpiece, use spray starch and stretch the scallops slightly during blocking.
— Gauge & Sizing Notes :
Info :
Gauge will vary widely with cord size and hook. With a 3mm cotton cord and 3.0mm hook, one large medallion (as described) should block to approximately 28-30cm (11-12 in) across at its widest point. A five-medallion runner will measure approximately 140-155cm (55-61 in) long and 28-30cm (11-12 in) wide. Adjust medallion count to fit your table.
— Blocking & Care :
Info :
Wet-block each finished motif flat, pinning to measurement, then allow to dry thoroughly. Use rust-proof pins and a breathable blocking surface. Handwash gently in cool water with mild detergent. Reshape while damp after washing and lay flat to dry. Avoid machine washing to preserve the structure of the lace and picots.
Info :
When joining motifs using sewing rather than crocheting, use a fine needle and matching thread to create small invisible stitches through the base loops so the join is flexible yet strong.
Completing this navy floral lace runner brings a beautiful mix of vintage charm and modern color to any table. Each medallion is a rewarding milestone — watch them bloom into an elegant, flowing runner as you join them. The textured leaf petals and delicate picot edge make it a real showpiece. Enjoy the mindful time spent creating something truly unique and heirloom-worthy. 🧶🌿