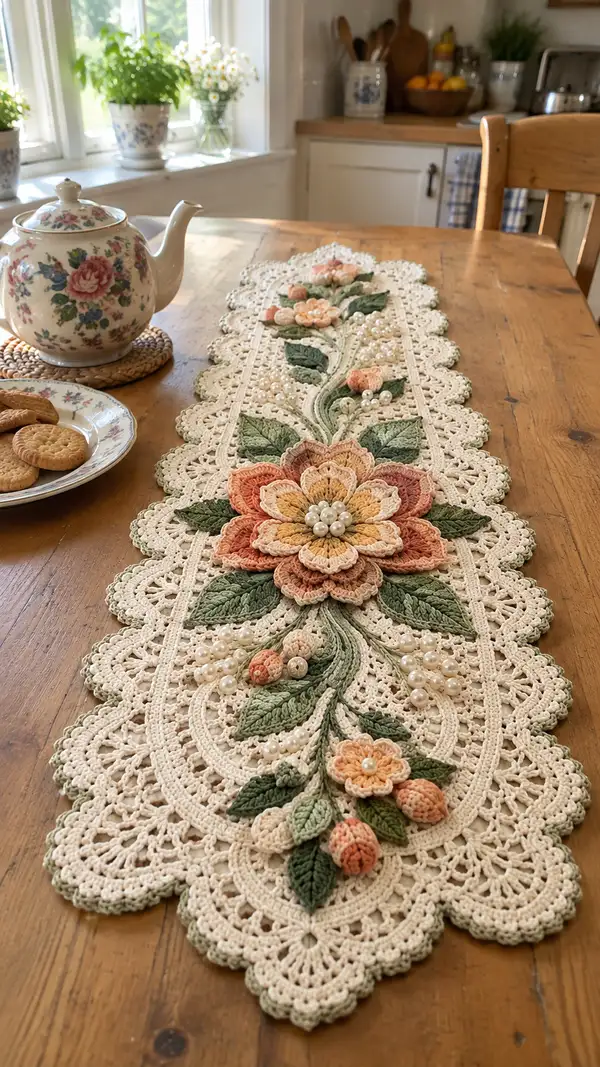
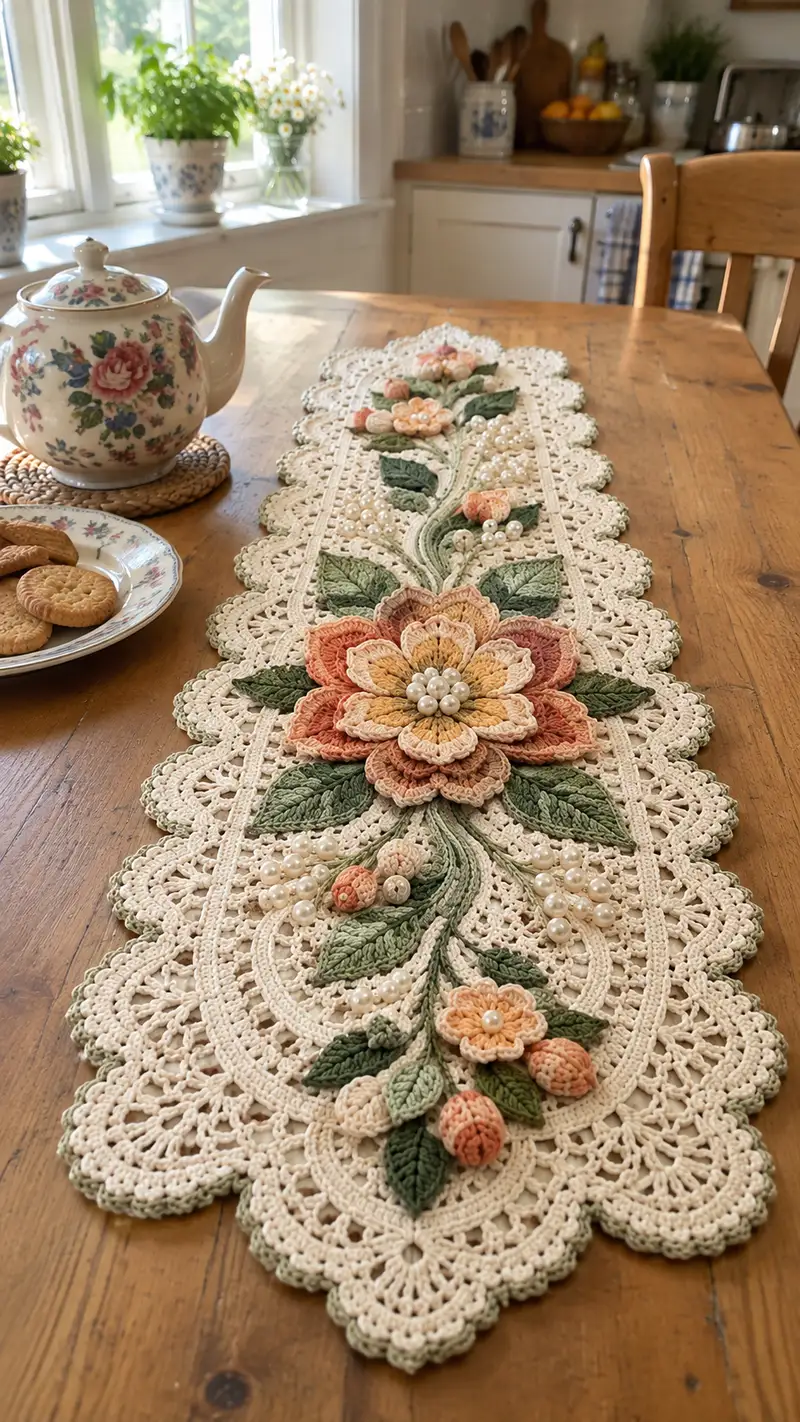
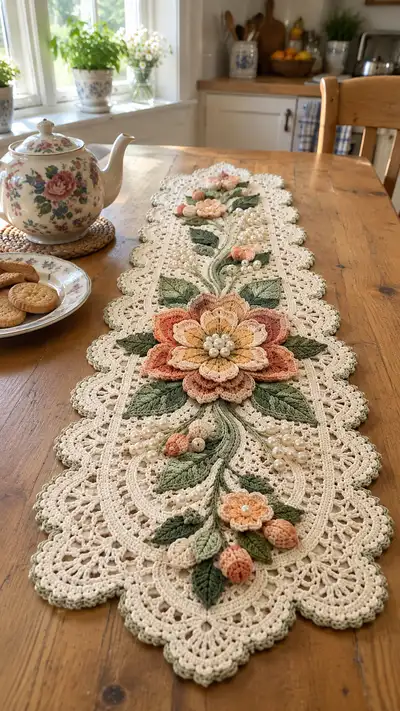
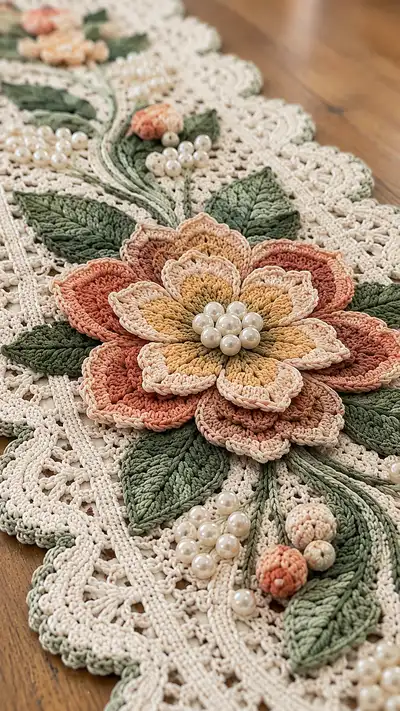
A romantic, vintage-inspired crochet table runner featuring a delicate lace base, layered 3D flower applique9s, textured leaves and pearl bead clusters. Soft cream lace contrasts with warm peach-to-terracotta gradient petals and sage green leaves for a timeless farmhouse look. Designed to be used as a centrepiece or dresser runner, this pattern includes step-by-step instructions to create the lace panel, floral applique9s, buds, vines and finishing touches. Perfect for gifting or dressing your table with handcrafted charm.
Progress Tracker
0% Complete
— Main Lace Panel (Make 1 long oval panel) :
Round 1 :
Ch 12, join with sl st to form ring, ch 3 (counts as dc), 23 dc into ring (24)
Round 2 :
Ch 3, dc in same st, 2 dc in each st around (48)
Round 3 :
Ch 3, dc in next st, (2 dc in next st, dc in next st) around (72)
Info :
These first rounds create a compact central oval; maintain even tension. Use stitch marker at round start
Round 4 :
Ch 2, hdc in next 2 sts, (hdc, ch 2, skip 2, hdc) around to create lace arches - 24 arches (72)
Round 5 :
Into each ch-2 arch: (sc, ch 3, sc) to form picot arches (72)
Round 6 :
Ch 3, dc across each previous sc row: 1 dc in each sc and 3 dc in picot spaces to widen (approx 96)
Round 7 :
Ch 1, sc in each st around to even edges (96)
Round 8 :
Ch 4 (counts as tr), tr in every 2nd st around to form tall arches (48)
Info :
From round 4 onward youe2�8�9re creating an open lace. If you prefer denser lace, replace some tr clusters with dc clusters
Round 9 :
Work (ch 5, sl st into the 3rd tr base) around to create loop chain scallops (48)
Round 10 :
Into each loop: (sc, hdc, 3 dc, hdc, sc) to make shell (48 shells, 240 stitches approx)
Round 11 :
Ch 1, sc across shell peaks, working (2 sc, ch 2, 2 sc) in the center of each shell to create lacy eyelets (48 eyelets)
Round 12 :
Ch 3, dc around working 2 dc in each eyelet ch-2 space to widen (96)
Round 13-16 :
Repeat rounds 9-12 twice to create length and repeat motif across the oval (maintain counts for each repeat)
Info :
Every 4 rounds check that the oval is keeping a flat plane; if it ruffles, block firmly before continuing
Round 17 :
Ch 1, sc around entire panel including ends and long sides, working (3 sc, ch 3, 3 sc) at the narrow ends to create firm end caps (approx 220 sc)
Round 18 :
Ch 3, dc in next 2 sts, (ch 2, sk 2, 3 dc) across sides inserting 5 dc clusters into each end arch to shape end lobes (approx 240)
Round 19 :
Ch 1, sc in each st for a firm foundation for the final scallop edging (240)
Round 20 :
Sc in next 4 sts, (ch 3, sl st in same st) to create base picot points every 5 sts around (approx 48 picot points)
Info :
At this stage measure runner width and length; if you want a longer runner, continue the central repeat sequences (rounds 9-12) before moving to scalloped edging
Round 21 :
Into each picot point work: (sc, hdc, 5 dc, hdc, sc) to form pronounced scallops all around (approx 240 stitches)
Round 22 :
Ch 1, sc around scallop bases to tidy edge and create a stable surface for sewing applique9s (240)
Round 23 :
Edging contrast: join sage green yarn in a back loop only of each sc: 1 sc BLO in each st to create delicate green rim (240)
Round 24 :
Ch 3, dc in next 2 sts, (ch 1, sk 1, 3 dc) around in BLO to create subtle ridged scallop (approx 80 shell groups)
Info :
Fasten off and weave in ends for main panel. Block the panel flat and pin to desired dimensions before attaching applique9s
— Large Layered Flower (Make 1 - center motif) :
Round 1 :
MR, ch 1, 8 sc into MR, pull tight (8)
Round 2 :
Inc in each st around (16)
Round 3 :
(1 sc, inc) x 8 (24)
Round 4 :
(2 sc, inc) x 8 (32)
Info :
Change to golden-yellow for inner petals at end of round 4. Join color with sl st and work first petal row in new color
Round 5 :
Ch 1, *sc in next 2 sts, ch 4, sl st in next st* around to create 8 petal loops (32)
Round 6 :
In each ch-4 loop work: (sc, hdc, 5 dc, hdc, sc) - small inner petals (8 petals)
Round 7 :
Change to peach gradient 1 (mid tone). Join into the base between petals with sl st, ch 2, (2 dc, ch 2, 2 dc) in base spaces to create gusset rounds for layer 2 (8 shell spaces, 64 sts approx)
Round 8 :
Into each shell space work: (sc, hdc, 7 dc, hdc, sc) to form broader petals (8 larger petals)
Round 9 :
Work a picot edge around each petal: (sl st, ch 3, sl st) evenly spaced into petal tips (approx 8 picots)
Info :
Optionally starch or slightly damp-block petals for a firmer, sculpted look before additional layers
Round 10 :
Change to coral/terracotta gradient. Work a second outer petal layer by picking up two stitches between each previous petal with sl st, ch 3, and creating 16 ch-5 loops for petal bases (16 loops)
Round 11 :
In each ch-5 loop: (sc, hdc, 9 dc, hdc, sc) to form 16 medium petals (each counts as one petal) (16 petals)
Round 12 :
Work (sc, ch 2, sc) in each petal tip to definition and shape edges (approx 160 sts)
Round 13 :
Create a final outermost layer: pick up alternate spaces between the 16 petals and create 8 larger ch-7 loops for outer scalloped petals
Round 14 :
In each ch-7 loop: (sc, hdc, 11 dc, hdc, sc) to form 8 dramatic outer petals (8 petals)
Round 15 :
Edging: sl st around petal edges and add small reverse sc border: 1 sc in each st around to tidy (approx 320 sts)
Info :
Cluster pearls in the center: thread 7-9 large 10-12mm pearls on beading thread, sew through center making tight circle and secure on reverse; hide knots under stitches
Round 16 :
Secure all layers by sewing through center with a tapestry needle: insert needle through all layers and tie firmly on reverse, weave the tail into the flower back
Info :
You can vary the number of petals and layers to scale the flower; maintain symmetry with an even number of petal bases
— Large Leaf (Make 6) :
Round 1 :
MR, ch 1, 6 sc into MR, pull tight (6)
Round 2 :
Inc in each st around (12)
Round 3 :
(1 sc, inc) x 6 (18)
Round 4 :
Work 1 sc in each st around for body (18)
Round 5 :
Shape tip: (2 sc, dec) x 4 (12)
Round 6 :
Ch 1, turn and work FLO 1 sc in each st back along opposite side to create a leaf ridge (12)
Round 7 :
Along the center ridge: ch 12, sl st back along chain to form midrib, sl st to leaf base
Round 8 :
Embroider veins: using matching yarn, run stem stitch from base to tip along the midrib and add 3-4 side veins on each side
Info :
Leaves look more realistic when blocked slightly curved. Use thin pins to shape and steam lightly if cotton allows
Round 9 :
Edge: sc around entire leaf working 2 sc in tip to maintain shape (approx 36)
Round 10 :
Fasten off and leave long tail for sewing. Make 6 identical leaves and 4 smaller leaves (follow small leaf section)
— Small Leaf (Make 4) :
Round 1 :
Ch 6, sc in 2nd ch from hook, sc across (5)
Round 2 :
Ch 1, turn, (2 sc in first st, sc next 3 sts, 2 sc in last st) (7)
Round 3 :
Foldlike center: sc along one side (3), ch 6, sl st to last st to form midrib, sc along other side (3)
Round 4 :
Edge: sc around with a tidy picot at tip (approx 18)
Info :
Small leaves are used to fill gaps around the flower and buds; make extra if you like a very leafy look
Round 5 :
Fasten off, leave long tail for sewing
— Curled Bud (Make 8) :
Round 1 :
MR, ch 1, 6 sc (6)
Round 2 :
(1 sc, inc) x 3 (9)
Round 4 :
(2 sc, dec) x 3 (6)
Round 5 :
Fasten off leaving a long tail. Lightly stuff and shape into small bud; sew base closed (6)
Info :
Use gradient peach shades for a variegated bud look; attach to vines by sewing through base
— Small Flat Flower (Make 4) :
Round 1 :
MR, ch 1, 6 sc into MR, pull tight (6)
Round 2 :
Inc in each st around (12)
Round 3 :
(1 sc, inc) x 6 (18)
Round 4 :
Create 6 petal loops: *ch 4, sl st in next st* around (6 loops)
Round 5 :
In each loop: (sc, 3 dc, sc) to form small petals (6 petals)
Info :
Sew a small pearl in center or embroider French knot cluster for center detail
Round 6 :
Fasten off and leave long tail for sewing
— Twisted Vine (Make 3 long vines) :
Round 1 :
Ch 60 (or desired vine length), sl st in 2nd ch from hook and across to create a corded vine (approx 59 sl st)
Round 2 :
With another strand, wrap chain loosely around cord and sl st every 3-4 sts to create twisted appearance
Round 3 :
At intervals along vine, leave 6-8 ch to attach a bud or small leaf with a sl st; continue wrapping to end
Info :
Vines are flexible; position them on the base runner before sewing. Use pins to hold layout
Round 4 :
Fasten off and weave tails; make 3 vines of varied lengths to compose the central stemwork
— Embellished Bead Clusters :
Round 1 :
String 8 medium pearls onto beading thread, leaving long tail for sewing
Round 2 :
Sew beads into tight circular cluster on a small felt/patched back or directly on flower center, anchoring thread through beads multiple times
Info :
For safety and longevity use beading thread knotted and secured with a dab of clear glue hidden under stitches
Round 3 :
Make multiple small clusters (10-14) to scatter across vines and near leaves as pictured
— Assembling Applique9s onto Lace Panel :
Round 1 :
Block main lace panel fully. Lay on flat surface and position large flower slightly off-center toward one end as in photo
Round 2 :
Pin large flower using rust-proof pins then sew through the inner base rounds (rounds 1-4 of flower) to anchor securely
Round 3 :
Arrange large leaves radiating from underneath large flower base; pin and sew through leaf centers and vine midribs (leaves should overlap slightly for natural layering)
Info :
Sew using a matching yarn and small stitches; for invisible stitches use ladder stitch to join applique9 edges smoothly to lace
Round 4 :
Place vines to create sweeping lines from the large flower toward opposite end; tack down every 1-2 cm/0.75 in with small stitches
Round 5 :
Sew buds and small flowers loosely clustered along vine endpoints and side branches, using long tails to bury ends on the reverse
Round 6 :
Sew bead clusters into specified areas: center of large flower, along vine junctions, and as berry clusters alternating with crocheted buds
Info :
Try pinning all pieces and living with the layout for a few minutes before sewing; shifting a single leaf can dramatically change the composition
— Final Edging & Finishing :
Round 1 :
Once all applique9s are sewn and beads attached, fasten off all threads and trim. Turn runner over and weave in yarn tails into reverse of lace
Round 2 :
Block the entire runner again, pinning each scallop evenly and steaming or wet-blocking cotton until dry to set the shape
Round 3 :
For additional securement, sew tiny whip stitch at strategic hidden points between applique9 pieces and the lace base to prevent movement during use
Info :
Use a soft needle and avoid piercing beads; reinforce thread knots with a dab of clear-drying craft glue if desired
Round 4 :
Give the runner a final press with low iron covered by a cloth to avoid beads and yarn shine; display on table
Info :
All round counts are approximate due to lace and stitch variance. Adjust repeats to keep runner flat and symmetrical. Enjoy the slow, meditative assembly process
This vintage floral table runner brings timeless elegance to any tabletop with layered petals, textured leaves and pearl accents. Each stitch builds a heirloom-quality piece you'll be proud to display. The mix of lace and applique9 lets you personalize colors and layout for a unique statement. Happy crocheting and enjoy watching this runner bloom under your hands! 🧶🌸