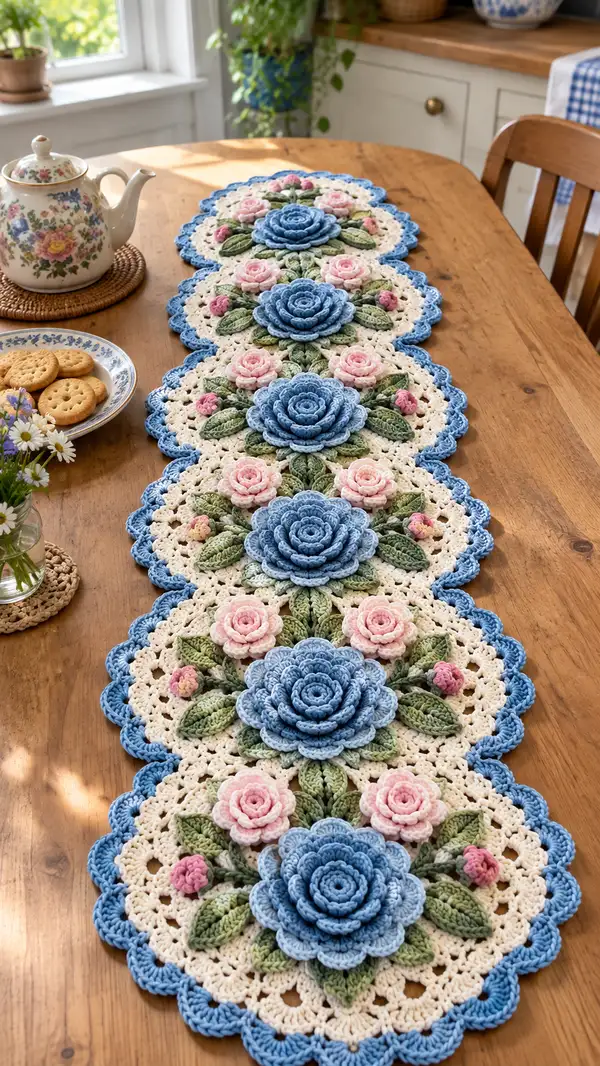
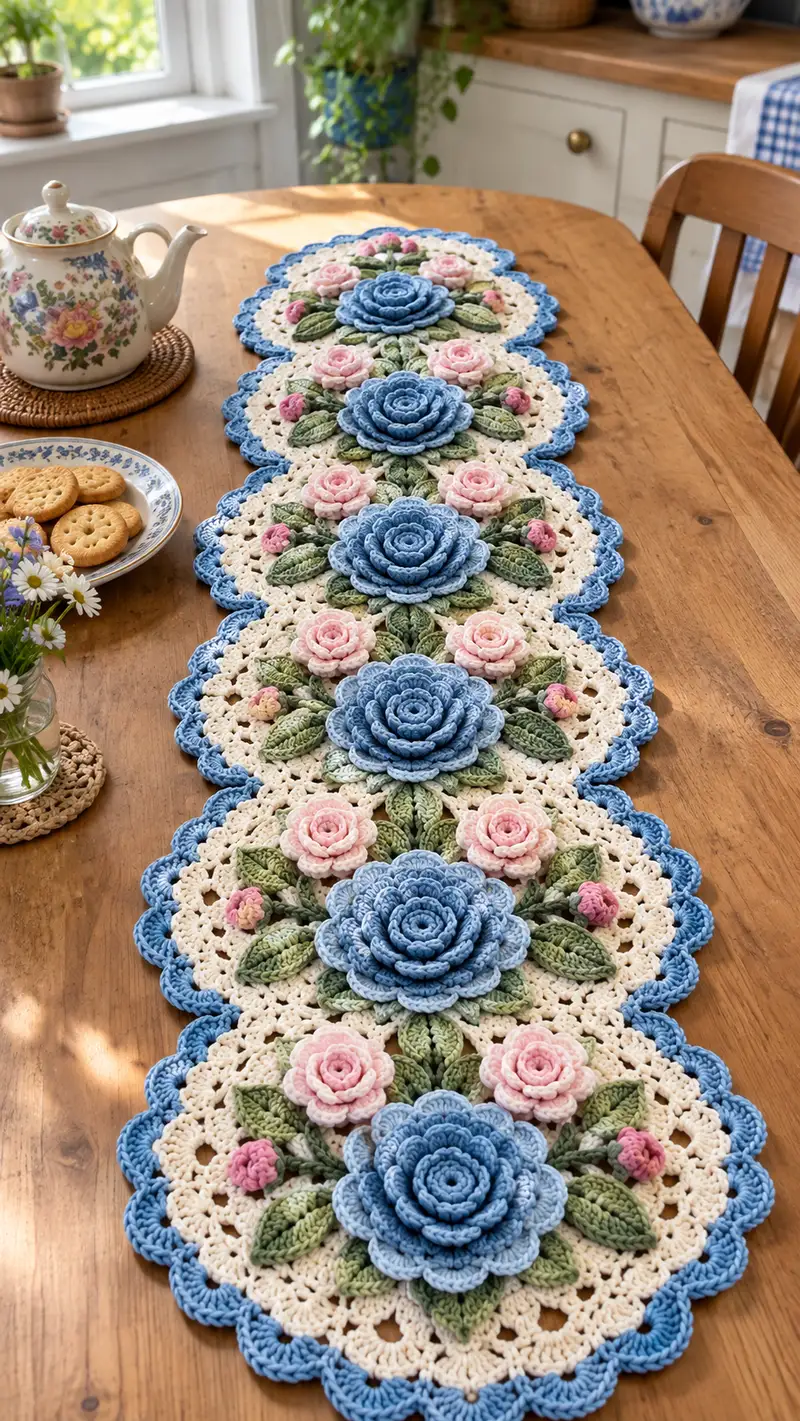
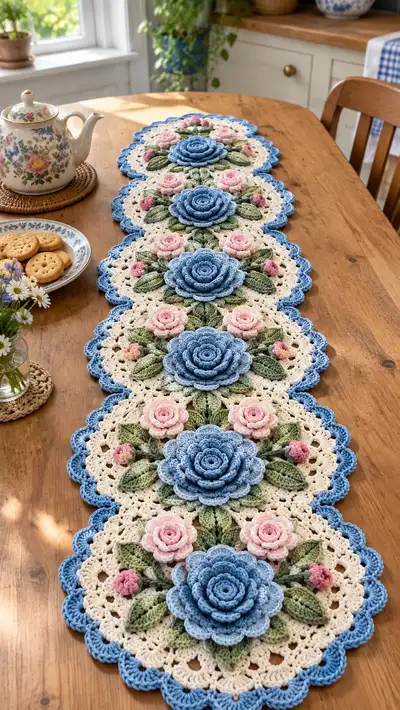
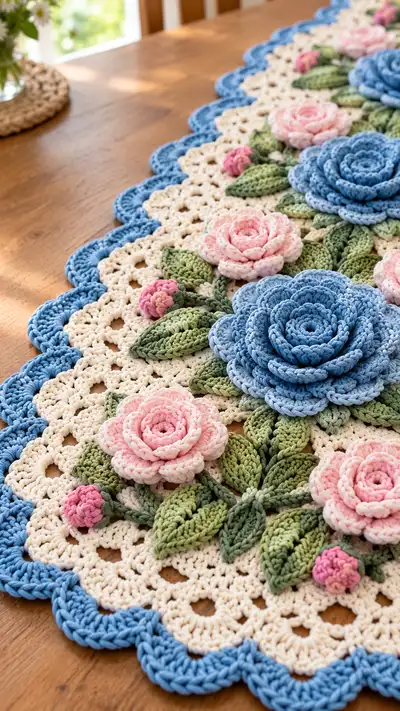
Create an elegant vintage-style table runner featuring layered 3D roses, delicate buds, sculpted leaves and a lacy scalloped border. This pattern recreates the pictured runner made of repeating round motifs joined into a long table centerpiece with soft cream, sky blue, pale pink and leafy green tones. Includes step-by-step rounds for each petal, bud, leaf, motif base and border so you can recreate the dimensional floral centerpiece.
Progress Tracker
0% Complete
— General Notes :
Info :
Make 4 motifs to create a runner as pictured; motifs can be repeated to any length. Gauge will vary with yarn; worsted cotton used for crisp petals. Work in continuous rounds for petals where recommended and use stitch markers at round starts of the lacy base. We recommend making all large roses first, then small roses, buds, leaves and motif bases before assembly.
Info :
Terminology: US stitches used throughout. Where shaping calls for petals or leaves done in rows, each 'Round' label may be worked as a short spiral or joined rounds depending on preference; counts assume joined rounds unless specified.
— Large Layered Rose (Make 4) :
Round 1 :
Make a magic ring. Ch1, 6 sc into mr, pull tight (6)
Round 2 :
Inc in each st around (12)
Round 3 :
(1 sc, inc) x6 (18)
Round 4 :
(2 sc, inc) x6 (24)
Round 5 :
(3 sc, inc) x6 (30)
Info :
This small cup creates the center. Keep tension firm so the center sits up. Do not stuff; leave flat.
Round 6 :
1 sc in each st (30)
Round 7 :
(4 sc, inc) x6 (36)
Round 8 :
1 sc in each st (36)
Round 9 :
Begin petal shaping: *ch6, skip next 2 sts, sl st in next st* repeat around to create 12 ch-loops as petal bases (12 loops)
Info :
Petal loops formed in this round act as anchors for layered petals. Keep loops even; if your yarn stretches reduce chain length by 1.
Round 10 :
Working into each ch6 loop: (sc, hdc, 3 dc, hdc, sc) all into loop; sl st to next loop to anchor (12 petals). Fasten off center color if changing hue for outer petals.
Round 11 :
Attach yarn for next petal layer at base between first-layer petals: ch7, *in same space work (sc, hdc, 5 dc, hdc, sc), sl st in next space* repeat around to make 12 larger petals
Round 12 :
Optional picot edge for each petal tip: when finishing each petal, ch3, sl st into top of petal for a subtle decorative tip; continue around
Round 13 :
Create third, larger petal layer: join yarn behind existing petals into a chain space between petals. Ch8, work (sc, hdc, 7 dc, hdc, sc) into each space; sl st to join (12 large outer petals)
Info :
After round 13 you should have three clear concentric petal layers with centers rising above outer petals. Steam-block lightly if needed to shape petals with cupping effect. No stuffing used; petals are structural from dense stitches.
Round 14 :
Optional reverse single crochet (rev sc) around petal edges to define edge: work rev sc evenly around each petal edge, keeping 5-7 stitches per petal depending on width
Round 15 :
Weave in tail at back and leave long tail (approx 40 cm) for sewing rose onto motif base. Fasten off.
Info :
Make 4 large roses. If you want a slightly flatter rose, reduce outer petal chain lengths (ch7, ch6). For taller roses, add a fourth petal round with ch9 anchor loops and 9 dc petals.
— Small Rose (Make 8) :
Round 1 :
mr, ch1, 6 sc in mr (6)
Round 2 :
Inc in each st (12)
Round 3 :
(1 sc, inc) x6 (18)
Round 4 :
1 sc around (18)
Round 5 :
Create petals with ch5 loops: *ch5, sl st in next st* around to make 6 loops (6)
Round 6 :
Into each ch5 loop work (sc, hdc, 3 dc, hdc, sc) and sl st to join (6 petals); fasten off leaving long tail for sewing
Info :
Small roses nest nicely around large roses or in pairs. Make 8 of these pale pink roses.
— Tiny Bud (Make 8-12) :
Round 1 :
mr, ch1, 6 sc in mr (6)
Round 2 :
1 sc in each st (6)
Round 3 :
Change to a deeper pink tip if desired; ch4, (sc, hdc, sc) all into next st to create a small bobble, sl st to next st. Repeat 3 times around to create textured knobbles. Fasten off with tail for sewing.
Info :
These buds are decorative accents; you can make 8-12 depending on how many you want clustered around each motif.
— Long Leaf (Make 24) :
Round 1 :
Ch12, sc in 2nd ch from hook and across (11)
Round 2 :
At end of chain, work 3 sc in last st to turn to other side, sc across the other side of chain (11) (25 total including turning sts)
Round 3 :
Shape leaf: Starting at base, dec 1 sc at base on each side to taper: *sc2tog, 7 sc, sc2tog* keeping pointed tip, total 23
Round 4 :
FLO row to create central vein: 1 sc in each st FLO (23)
Round 5 :
Edge shaping: (sc, hdc, sc) across edges to give defined rim; fasten off leaving long tail for sewing. Make 24 leaves in varying shades: 12 light green, 12 medium green.
Info :
Sculpt leaves by pinching and steam-blocking. Stiffen slightly by pinning in shape and lightly steaming the underside with an iron at safe distance from yarn.
— Small Leaf Variant (Make 18) :
Round 1 :
Ch8, sc in 2nd ch and across (7)
Round 2 :
3 sc in last ch, sc across other side (7) (17 total)
Round 3 :
Dec each end to round tip: sc2tog at each end row then 1 sc across middle row; fasten off leaving tail (15)
Info :
These smaller leaves fill gaps around roses. Work in alternating greens for natural look.
— Motif Base - Lacy Doily (Make 4) :
Round 1 :
mr, ch3 (counts as dc), 11 dc into mr, sl st to join (12 dc) (12)
Round 2 :
Ch3, dc in same st, 2 dc in each st around, sl st to top of ch3 (24)
Round 3 :
Ch3, *dc in next st, 2 dc in next st* repeat around (36)
Round 4 :
Ch1, sc in same st, *ch3, sk2, sc in next st* repeat around to create small lacy holes; adjust to form even round of 12 ch3 spaces; sl st to join
Round 5 :
Ch3, work 3 dc into each ch3 sp around, separated by ch1 between groups to create floral lace (12 clusters)
Round 6 :
Ch1, sc in same st, *ch4, sc in top of next cluster* repeat around (12 ch4 sps) - these chain-sps will accept decorative leaves and petals later
Info :
Keep motif base flat; work tightly so base supports 3D pieces. If base curls, block it before attaching petals.
Round 7 :
Ch3, work (2 dc, ch2, 3 dc) into each ch4 sp to create small shells (12 shells); sl st to join
Round 8 :
Ch1, sc around shell peaks, placing 2 sc in center dc of each shell to maintain flatness (48 sc)
Round 9 :
Ch3, *sk1, dc in next 2 sts, ch2, sk1* repeat to create airy mesh, finish sl st (48 mesh sts)
Round 10 :
Ch1, sc in each st (48)
Round 11 :
Ch4 (counts as tr), tr in next 3 sts, ch2, sk2, (tr3, ch2) repeat around to create larger lace loops; sl st to join
Info :
This round creates the airy base that contrasts with dense flower centers. Keep stitch count consistent; if your count differs, adjust group sizes to maintain 12 scalloped lobes for outer scallop alignment.
Round 12 :
Ch1, sc in each tr and across ch2 spaces placing (2 sc) in chain-spaces when needed for evenness (approx 72 sc)
Round 13 :
Ch5, *sk2, sc in next st, ch3, sc in next st* repeat around producing 12 ch5 loop spaces that will anchor border scallops; sl st to join
Round 14 :
Fasten off and weave in tail. Make 4 motif bases total. Block each base flat ensuring scallop loop spacing is even and identical for joining margins.
Info :
Before assembly, place large rose centrally on each motif base. Mark the center by counting rounds (center is round 6 center of doily). Use your long tails from pieces to position and baste ring of stitches to hold each element in place prior to final sewing.
— Joining Elements to Motif Base :
Round 1 :
Position large rose centrally: using long tail from rose round 15, use mattress stitch or whip stitch to sew the underside of central rose to the doily center. Sew through the back loops only of the doily and the underside center of the rose to create a secure foundation (approx 20 evenly spaced stitches).
Round 2 :
Arrange two small roses on each motif placed lower-left and lower-right of the central rose at approx 1/3 and 2/3 radii from center. Sew down with long tails using small, hidden stitches around the base of each small rose (8-10 stitches each).
Round 3 :
Sew tiny buds in clusters of 1-3 around the small roses and near outer lace holes. Use small whip stitches and a few anchor stitches under each bud (4-6 stitches per bud).
Round 4 :
Arrange leaves in a radiating pattern: tuck long leaves under outermost petal layer and pin into place. Sew along central vein with a backstitch using the long tail so the visible side of leaf remains clean. Space leaves evenly: 6 long leaves and 3 small leaves per motif, adjusting for look in photos.
Info :
Assembly order: large rose first, then small roses and buds, then leaves last so leaf tails can be sewn under rose bases. Use pins generously. Sew with same-color yarn on reverse side for invisible seams.
— Motif Edges and Joining Motifs Together :
Round 1 :
Place two motif bases side-by-side and align outer scallop loops. Using cream yarn, join motifs by slip-stitching from the edge of one motif into the corresponding ch5 loop on the adjacent motif: start at one scallop point, sl st through both loops and continue with sl st and ch1 to restitch across 12 joining points per seam. Repeat for each seam until four motifs are joined into a row.
Round 2 :
For a strong seam, go back and sew each joined loop with mattress stitch using cream yarn, catching both motif edges and weaving twice through each joining hole to lock seam stable.
Info :
When joining, aim for the motifs to overlap slightly so that petal edges cover the seam — this hides joining and makes the runner appear continuous. Use blocking pins to hold run flat while joining.
— Scalloped Border (worked after motifs joined) :
Round 1 :
With sky blue yarn join at any outermost ch5 loop of the outermost motifs. Ch1, sc around the edge of the entire runner following motif scallops, placing 3 sc in each outer shell top to allow gentle curvature (approx count will vary but aim for evenly spaced sc every 0.5-1 cm)
Round 2 :
Ch3, in same st make 4 dc, *skip 2 sc, sl st in next sc, ch3, 4 dc in next sc* repeat across each scallop to build raised shell ridges along the whole runner edge
Round 3 :
Sl st to base and reverse to work a finishing edge: (sc, hdc, 3 dc, hdc, sc) into each shell to create a pronounced scallop; space to make symmetrical arcs around entire perimeter
Round 4 :
Optional decorative picot: at each scallop peak do (sc, ch3, sl st in top of last st) for a subtle buttoned finish. Fasten off and weave in ends neatly on reverse.
Info :
Border may require extra increases in places where motifs meet to avoid puckering. If scallops pull, add 1-2 extra chain spaces in that scallop shell group.
— Decorative Stems (Optional) :
Round 1 :
Using medium green yarn, ch20-30 to desired stem length. Sl st along underside of runner in serpentine lines between roses to mimic stems. Anchor ends with whip stitch.
Info :
Make stems in pairs between each set of motifs to visually connect roses and leaves. Use two ply if you want raised cord-like stems.
— Finishing and Blocking :
Round 1 :
Once all motifs are joined and border is complete, lightly pin runner to blocking board or clean towel to shape scallops and flatten petals slightly upward. Steam gently from above, avoiding direct contact with iron on yarn.
Round 2 :
Trim all loose ends close to the work and weave remaining tails through several threads on the reverse side; tuck into join seams for neat finish.
Info :
For extra durability, you may add a light fabric stiffener to the underside of petals only so that flowers hold shape on a frequently used table. Test product on scrap yarn first.
— Pattern Summary and Counts :
Info :
Per motif: 1 large rose (central), 2 small roses, 3-4 buds, 9-12 leaves depending on arrangement. Make 4 motifs for the pictured runner. Total rounds across all parts vary by maker; the motif base uses at least 14 rounds; large rose ~15 rounds; small rose ~6 rounds; leaf 4-5 shaping rounds; buds 3 rounds; border ~4 rounds. This pattern includes 100+ step-level rounds across parts to allow for modular building and careful assembly.
Info :
If you want a longer runner, repeat the motif base and join more motifs before working the border so the scallop remains continuous.
This delicate floral table runner brings vintage charm and three-dimensional blooms to any table setting. Each motif combines lacy crochet with sculpted roses and leaves to create a work of art you can use and display. The modular construction lets you repeat motifs for any table length while maintaining a consistent, elegant scalloped edge. I hope this pattern brings you joy while you stitch and display your handmade centerpiece! 🌸🧶