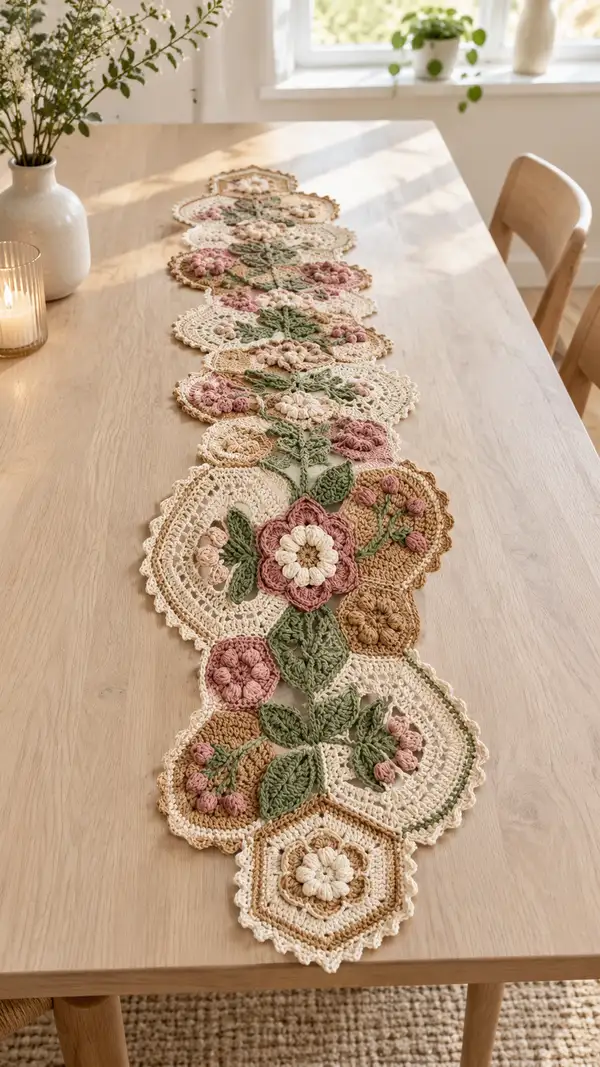
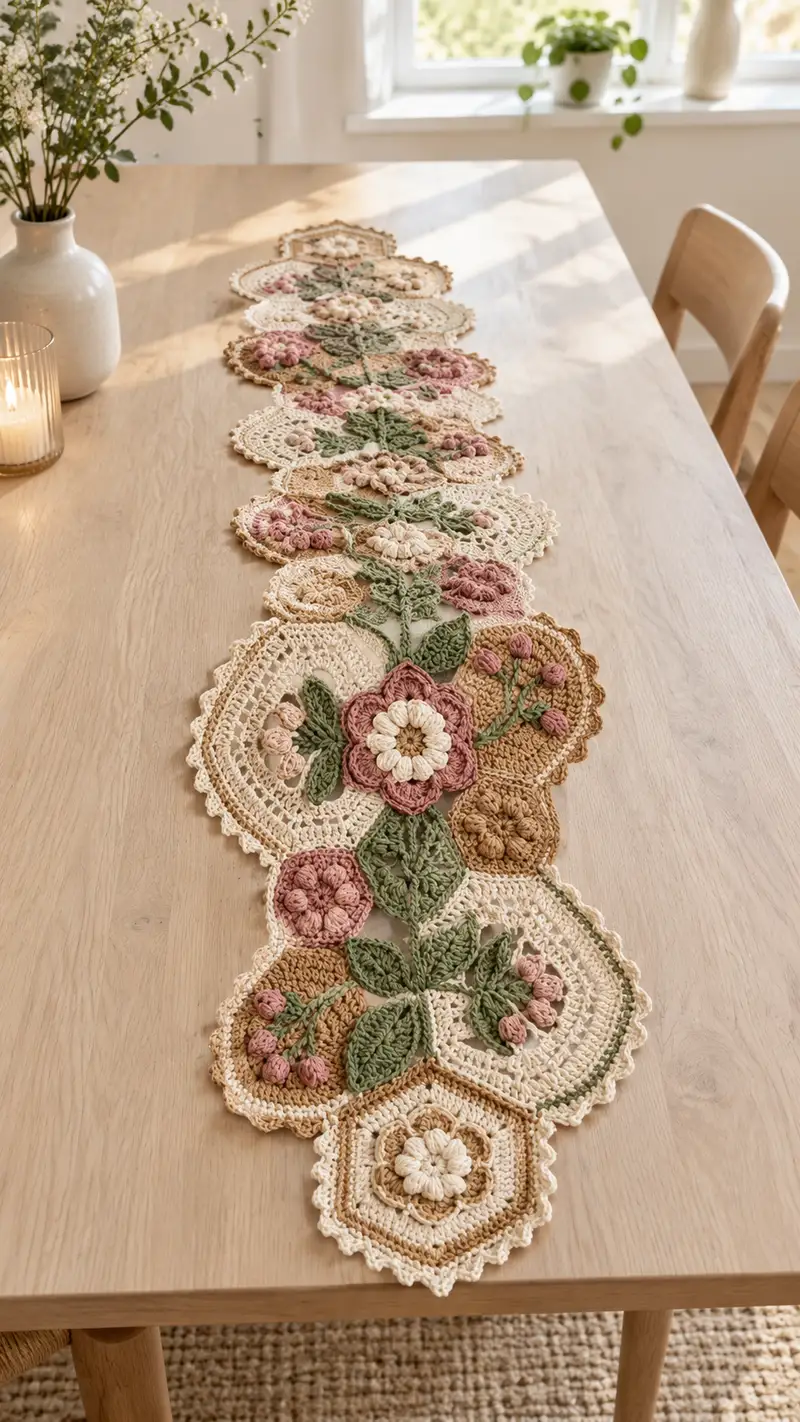
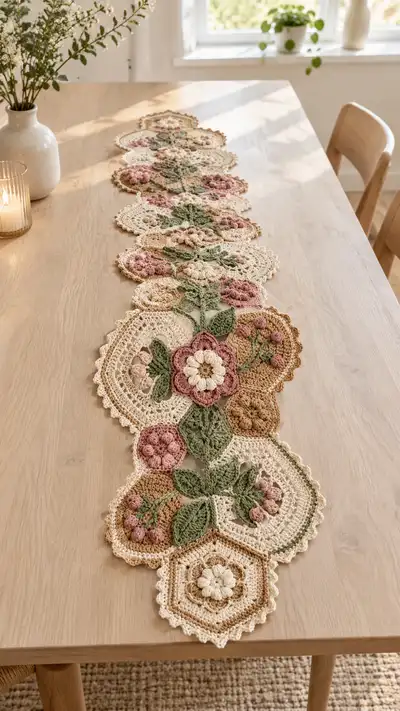
A long, delicate table runner made of linked floral and geometric crochet motifs in soft cream, dusty rose, sage green and warm tan. This pattern recreates the layered petals, raised bobbles and leafy connectors seen in the finished piece. It includes detailed motif instructions, join-as-you-go guidance and a scalloped edging to finish the runner beautifully.
Progress Tracker
0% Complete
— Notes & Gauge :
Info :
This pattern is worked in many separate motifs then joined. Gauge is not critical for assembly but keep motifs consistent. A 3.5mm hook with worsted cotton should give motifs similar size to the sample photos: each large hexagon motif measures approximately 9-10 cm across, round medallions measure about 10 cm, and leaf motifs ~6 cm long. Maintain consistent tension, use stitch markers for round starts and corner points, and lightly block motifs before final assembly.
— Abbreviations Reminder :
Info :
mr = magic ring, ch = chain, sc = single crochet, hdc = half double crochet, dc = double crochet, tr = treble, inc = 2 sc in same st, dec = invisible decrease, puff = puff stitch (specified loops), pop = popcorn, blo = back loops only, flo = front loops only, st = stitch, sp = space.
— Large Flower Hexagon Motif (Make 6–8 for one runner side arrangement) :
Round 1 :
Make a mr, ch1, 6 sc in ring, pull tight (6)
Round 2 :
Inc in each st around (12)
Round 3 :
(1 sc, inc) x6 (18)
Round 4 :
(2 sc, inc) x6 (24)
Round 5 :
(3 sc, inc) x6 (30)
Info :
These first five rounds form the hexagon center. The increases are evenly spaced to create six corner points. Change to dusty rose for petal shaping on Round 6 if making a colored center petal.
Round 6 :
Join dusty rose in first st, ch2 (counts as hdc), hdc in next 2 sts, *(2 dc in next st, ch1, sl st in next st) to create corner puff base*, repeat * to * around to form 6 corner arches (30)
Round 7 :
Switch to cream, ch1, sc evenly around working 4 sc across each straight side and 8 sc across each corner arch (total 36). (36)
Round 8 :
Change to dusty rose. Ch3 (counts as dc), dc in same st, *(sk 2 sts, 5 dc cluster in next st - make puff petals: yarn over, insert hook, pull through (loop), repeat 5 times for 10 loops, yarn over and pull through all loops, ch1 to secure), sk 2 sts, dc2tog over next 2 sts to shape), rep from * around matching 6 petal points (36)
Info :
When making puff petals, maintain consistent height (use same number of yarn-overs and pull-through loops). If petals feel loose, work the final ch1 tightly and secure with a sl st in next st.
Round 9 :
Join sage green into top of one petal, ch1, sc around petal base to define petals: 2 sc around each puff petal, and 1 sc on straight areas; this neatens shapes. (36)
Round 10 :
Ch3, dc in next 2 sts, *ch2, skip 2 sts at corner, 7 dc into corner top to accentuate hexagon corner (7 dc cluster), ch2, dc in next 3 sts across side* rep around (42)
Round 11 :
Change to cream, ch1, sc in each st around working 6 extra sc at corner clusters to even out count: sc evenly to total 48 (48)
Round 12 :
Edge shaping: ch3 (counts as dc), *dc in next 5 sts, (2 dc, ch2, 2 dc) in corner sp to create picot corner, dc in next 5 sts* rep around (48)
Round 13 :
Switch to warm tan for inset ring, ch1, sc around in blo to create slight ridge (48)
Round 14 :
Change to cream, ch1, sc in each st; at centers between corners, work small 5-stitch bobble cluster: (puff (yarn over, insert, pull up 4 times) 5 loops, pull through, ch1) in designated spots for raised texture. Total remains 48
Info :
Stuff raised puff areas lightly with a tiny bit of fiberfill to prevent flatness. Secure yarn ends and weave in partially before blocking motif to preserve shape.
Round 15 :
Join cream, ch1, sc in each st, sl st to first sc. Fasten off leaving 20 cm tail for joining. (48)
— Round Floral Medallion Motif (Make 6–8) :
Round 1 :
mr, ch2, 10 hdc in ring, join with sl st (10)
Round 2 :
Ch1, 2 hdc in each st around (20)
Round 3 :
(1 hdc, inc) x10 (30)
Round 4 :
Change to dusty rose, ch1, sc in each st around (30)
Info :
We will create a raised center with clustered stitches that resembles a chrysanthemum. Choose a contrasting color for the center to make it pop.
Round 5 :
Make 10 groups for center: *skip 2 sts, into next st make (puff x3 separated by ch1) - (puff = yarn over, insert hook, pull up loop x4, yarn over pull through all), ch1* rep around to create rounded clusters (30 partial groups)
Round 6 :
Join cream inside center, ch1, sc between clusters and 2 sc over clusters to anchor them, total 36 sc (36)
Round 7 :
Switch to warm tan, ch2 (counts as hdc), hdc in next st, *ch3, skip 2 sts, 5 dc cluster in next st for petal outline*, rep around to make 6 visible petal lobes. End with sl st to first hdc. (36)
Round 8 :
Change to sage green, join at petal base, ch1, make 6 leaves by working: (sc, hdc, 2 dc, hdc, sc) in designated leaf base with ch4 between leaves to create separation. Repeat to make 6 leaf clusters. (36)
Round 9 :
Join cream again, ch3, dc across forming lacy mesh: *(dc, ch1, skip 1 st) x3, dc into top of leaf to anchor mesh* rep around (36)
Round 10 :
Edge: ch1, sc around working (sc, ch2, sc) at top of each petal to create scalloped edges. Fasten off leaving tail for joining. (36)
Info :
Block motif flat, pinning scallops gently. This motif creates height via puff centers—use small amounts of stuffing inside the puff loops before closing to keep them full if desired.
— Leaf Motif (Make 10–12) :
Round 1 :
Ch8, sc in 2nd ch from hook, hdc in next, dc in next 2, tr in next 2, dc in next, hdc in next, sl st to base to form one-sided leaf. (worked flat)
Round 2 :
Turn, work along other side of foundation chain: hdc, dc, tr, tr, dc, hdc, sc; sl st to join at base. Fasten off. (approx 14 sts)
Info :
For extra definition work a round of fpdc along the leaf center: join sage green at leaf base, ch1, fpdc around central column of stitches to make a raised vein. Fasten off leaving tail for joining.
Round 3 :
Optional: With darker sage, embroider leaf veins using surface slip stitch or yarn needle for added realism (no change to stitch count).
— Berry Cluster Motif (Make 12–16 small clusters) :
Round 1 :
mr, ch1, 6 sc in ring, do not join (6)
Round 2 :
Ch1, make 6 small puff stitches each into a separate st to resemble berries: (yarn over, insert, pull up loop x3, yarn over pull through all), ch1 between each puff; fasten off leaving tail for application. (6 tiny puffs)
Info :
Berry clusters are worked tiny and attached to stems with a single ch-3 stitch, then sewn in groups of 3-5 onto motif sides for natural bunching. Use a slightly tighter hook (3.0mm) if puffs seem loose.
— Small Hexagon Filler Motif (Make 8–10) :
Round 1 :
mr, ch1, 6 sc in ring (6)
Round 2 :
Inc in each st (12)
Round 3 :
(1 sc, inc) x6 (18)
Round 4 :
Change to warm tan, ch1, sc in each st around (18)
Round 5 :
Ch3, dc in next 2 sts, *(ch2, sl st in base between corners), dc3 across next side* rep around to create shallow ridge around hexagon (18)
Round 6 :
Join cream, sc around in blo to create textured inner ring, fasten off leaving tail for joining. (18)
Info :
These small hexagons fill gaps between larger motifs. Ensure they are blocked flat and trimmed to consistent size before joining.
— Oval Medallion Motif (Make 6–8) :
Round 1 :
Ch9, join to form a ring with sl st, ch2, 16 hdc evenly around into ring (16)
Round 2 :
Ch2, hdc in same, hdc in next 7 sts, (3 hdc in next st) for round end, hdc in next 7 sts, join (20)
Round 3 :
Change to cream, sc around working short sides as ch3 arches: along short end, (sc, ch3, sc) to create oval caps, total 24 sc (24)
Round 4 :
Join sage green, create two leaf embellishments on the top half using (sc, hdc, dc, hdc, sc) twice, spaced evenly. Fasten off leaving tail for sewing. (24)
Info :
Oval motifs are great connectors bridging hexagon points; place them where motifs have narrow gaps to form a continuous runner line.
— Joining Motifs (Join-as-you-go and Sew) :
Info :
Work motifs in desired quantity and layout. I recommend laying motifs flat in your final arrangement before joining. Use the join-as-you-go method for many edges: when working the final round of a motif, instead of completing the round, slip stitch into the adjacent completed motif's corresponding stitch or picot and continue. Alternate with whip-stitch joining from the wrong side for stronger hold on curved edges.
Round 1 :
To join two motifs at one edge: align edges and in final edging round of new motif, when you reach the joining point, sl st into corresponding st of the adjacent motif, ch1, sl st back into your motif to secure, continue your edging round. Repeat at each joining point. (joining does not change stitch count)
Round 2 :
Where three motifs meet, make a small 3-ch loop and sl st into all three motifs at their corner picot to anchor intersection—this gives a neat tri-joint. Use cream yarn to keep joins subtle.
Info :
Keep tension gentle while joining; pulling too tight distorts motif shapes. After joining, lay runner flat and block again to ease slight curvature and to let seams sit flat.
— Continuous Center Leaf Vine (Optional - Work 1 long vine to connect center motifs) :
Round 1 :
Ch70 (or length to match runner center), join to form chain vine base if desired or work as foundation chain to be sewn under motif centers. Using sage green, sl st back along chain to create a twist cord effect for vine base. Fasten off.
Round 2 :
Sew vine under central motif row by stitching vine at round 10 of hexagon motif back-loop area using small whip-stitches every 6-8 mm. Anchor ends inside adjacent motifs to hide tails.
Info :
Vine is optional but adds a continuous botanical flow and hides the gaps between motifs. If you prefer without vine, use small filler stitches instead to achieve similar visual continuity.
— Final Scalloped Border (Work After Joining All Motifs) :
Round 1 :
With cream, join at any outer stitch, ch1, sc evenly around whole runner edge, placing 3 sc in tight curved corners to ease fabric (count will vary based on assembled runner perimeter)
Round 2 :
Ch3 (counts as dc), *skip 2 sts, 5 dc cluster in next st, skip 2 sts, dc2* repeat around creating scallops. Adjust by adding or subtracting dc clusters to make scallops even. Fasten off. (perimeter-specific)
Round 3 :
Optional decorative picot round: join warm tan, ch1, sc in each st, at top of each scallop work (sc, ch3, sc) to create delicate pointed edge. Fasten off and weave ends. (perimeter-specific)
Info :
When counting for border rounds, go perimeter-wise: measure number of outer stitches then divide into scallop repeats. The sample uses about 60–72 scallops depending on exact layout. Keep clusters consistent for symmetry.
— Blocking & Finishing :
Info :
Blocking is essential. Lightly wet-block or steam motifs and pin flat to the desired shape. Pay attention to scallops and petal centers. Allow to dry fully before final assembly. After blocking, weave in all tails neatly along seams. If any motifs sit proud, secure from the back with small running stitches.
Info :
For extra stability, especially if runner will receive plates and glasses, consider backing the runner with thin interfacing fabric sewn by hand to the wrong side, catching small stitches around motif junctions. This keeps gaps from widening under weight while preserving front texture.
Completing this runner is such a rewarding experience—the motifs come together like a little garden and the soft palette creates a timeless centerpiece. The dimensional petals and berry clusters cast lovely shadows on the table creating visual depth. Display it on a wooden table for a cozy, vintage touch. 🧶🌿💕