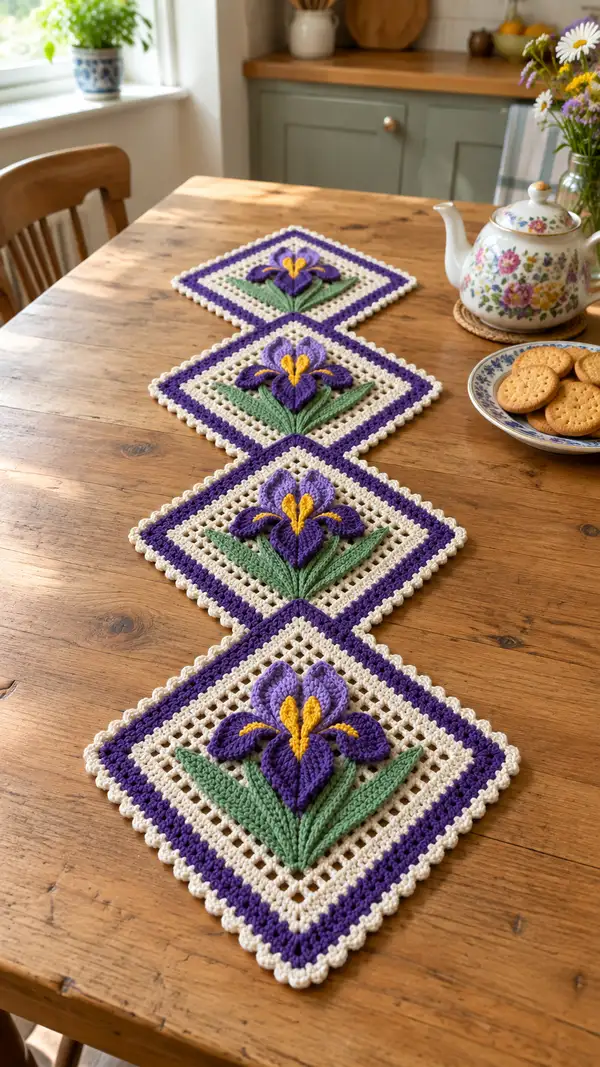
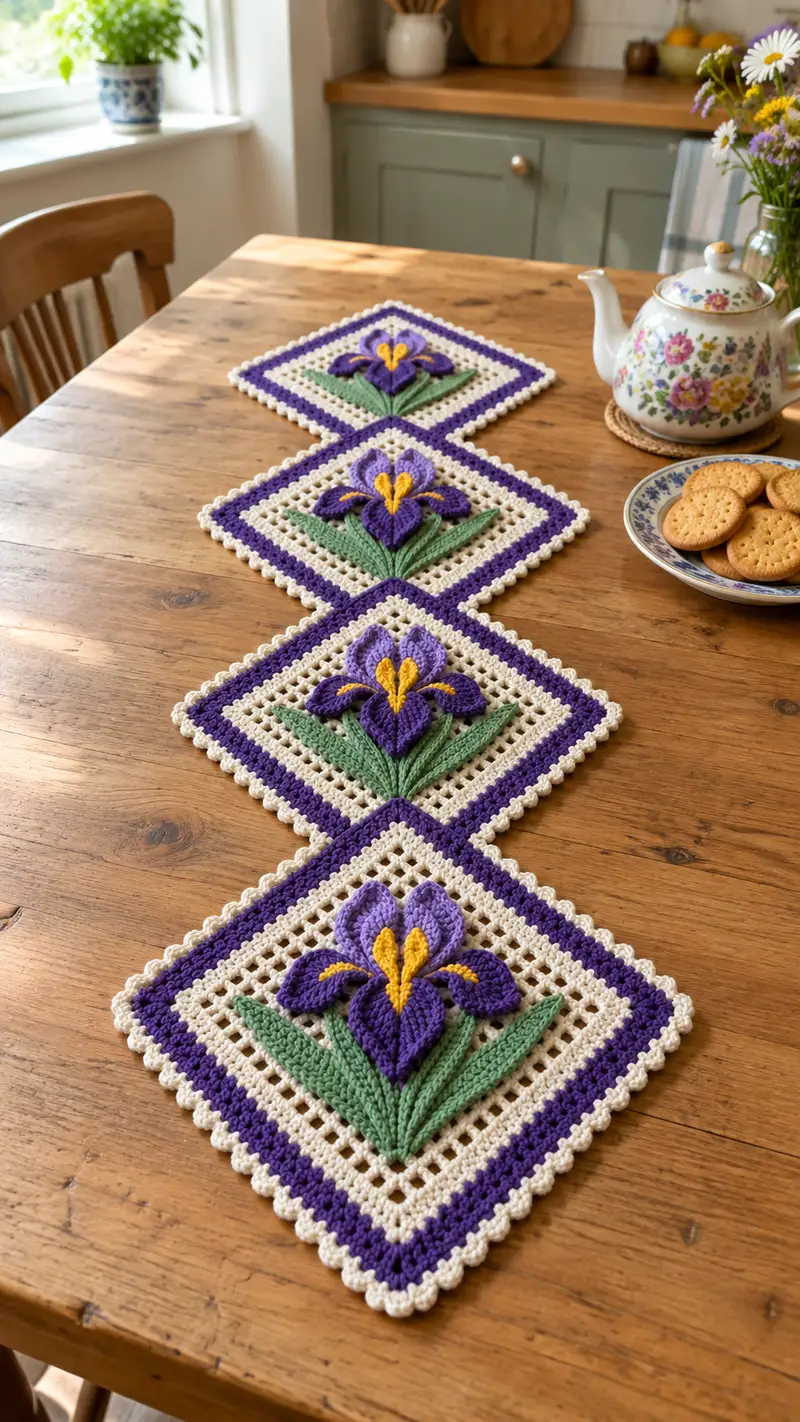
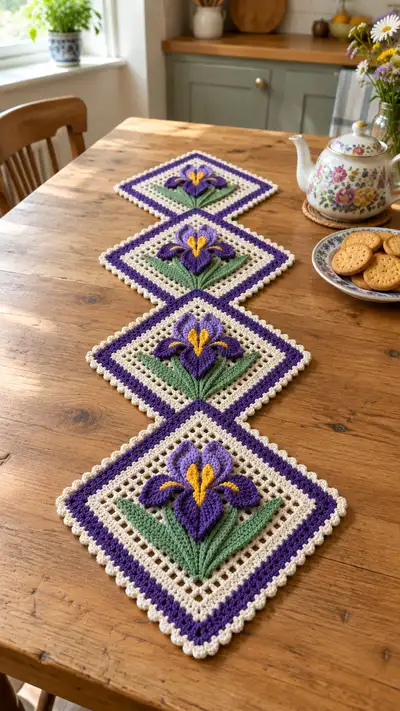
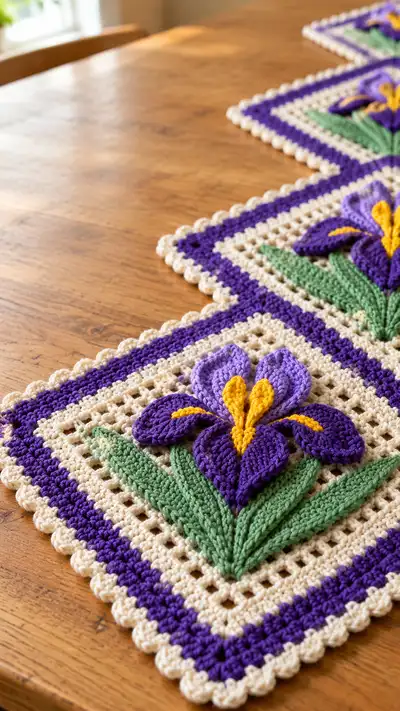
Create a charming diamond-style table runner composed of four joined square motifs featuring raised 3D iris flowers in purple, lilac and cheerful yellow centers set against a warm cream mesh. Each square is finished with a deep purple inner border and a delicate scalloped cream edge for a classic, cottage-style look. The design uses textured overlay petals and sculpted leaves for a beautifully dimensional centerpiece perfect for a dining table or sideboard.
Progress Tracker
0% Complete
— Overview :
Info :
This design is made from 4 identical square motifs worked flat and joined in a diamond layout. Each square has a mesh background worked in cream, a deep purple inner band, and a layered 3D iris composed of six petals (three large downward petals, two smaller upward petals and a central small top petal) plus a yellow stamen/crest and six sculpted leaves in green. Make 4 complete motifs and join them in a line or diamond arrangement depending on desired layout. Gauge is not critical but maintain consistent tension for matching squares.
— Notes & Gauge :
Info :
Gauge: One finished square measures approximately 19cm (7.5") from corner to corner when blocked. If your gauge is different, adjust hook size so each square measures consistently. Work tightly enough that the mesh holes are well-defined but not overly open. Block each square before attaching appliques if you prefer perfectly square motifs.
— Materials Summary :
Info :
Main yarn: worsted weight. Hook: 3.5mm for body; 3.0mm optional for petals. Make 4 squares, 4 full iris flowers, 24 leaves (6 per flower), 4 sets of small yellow stamens.
— Square Base (Make 4) :
Round 1 :
Start with cream. Make a magic ring, 6 sc in magic ring (6)
Round 2 :
Inc in each st around (12)
Round 3 :
(1 sc, 1 inc) x6 (18)
Round 4 :
(2 sc, 1 inc) x6 (24)
Round 5 :
(3 sc, 1 inc) x6 (30)
Round 6 :
(4 sc, 1 inc) x6 (36)
Round 7 :
(5 sc, 1 inc) x6 (42)
Round 8 :
(6 sc, 1 inc) x6 (48)
Info :
The first 8 rounds create a firm, even circular foundation. We will now expand this into a square and then change to a mesh (filet) pattern. Use stitch markers to identify 4 quadrant points approximately every 12 stitches; these will become the corner transition points when we build square turns.
Round 9 :
1 sc in each st (48)
Round 10 :
1 sc in each st (48)
Round 11 :
1 sc in each st (48)
Round 12 :
1 sc in each st (48)
Info :
Rounds 9-12 stabilize the circle and prepare for the square shaping and mesh. Place markers at four roughly equidistant points (every 12 stitches) — these will mark corner clusters for the square shaping and help keep edges straight.
Round 13 :
Change to filet mesh: *(sc in next 3 sts, ch 3, sk next 3 sts)* repeat around; adjust final repeats to join neatly (this establishes regular ch-3 windows). Aim to maintain 48 active stitch positions including ch-3 spaces. After joining, sl st to first sc to finish round.
Round 14 :
Ch1, sc in same st, *ch3, sc in next sc (i.e. sc into each sc created previous round), rep across; work sc into each 3-sc group from last round, maintaining ch3 windows (keep even tension and spacing)
Info :
If your mesh looks too tight, use a looser tension for the ch-3s; if it is too loose and floppy, tighten up. The goal is a neat grid of square-shaped holes to accept the iris applique. You should now have a clearly defined mesh with sc columns separated by ch-3 windows.
Round 15 :
Repeat Round 14 (maintain the same number of sc columns separated by ch-3 windows; work evenly) — this stabilizes the mesh (counts will remain consistent with the number of sc positions created in Round 13)
Round 16 :
Repeat Round 14 (work neat sc columns into scs and ch3 spaces; do not alter corner markers yet)
Info :
We will begin shaping the mesh into a square by creating small corner clusters where your quadrant markers are placed. On the next round, work a corner sequence at each marker: (sc, ch2, sc) into the same position to create a corner hinge. This will begin to form four slight squaring points on the circular base.
Round 17 :
Ch1, sc in same st, *work sc in each sc column until you reach a quadrant marker; at marker work (sc, ch2, sc) into same st as corner shell, then continue across the side; rep at all 4 corners; finish round quietly
Round 18 :
1 sc in each sc and in each ch2 corner space (work sc into the ch2 to anchor corner, continue sc columns between ch3 windows). The break between sides will have small anchored scs to form a soft square shape.
Info :
At this point the motif should begin to have a soft square look when pinned. If your corners are not visible enough, you may deepen the corners next round by working (sc, ch3, sc) into the corner instead of ch2 — but keep both corners identical for symmetry.
Round 19 :
Repeat Round 18 to strengthen corners and square shape. Work evenly around maintaining your ch3 windows on sides.
Round 20 :
Change to deep purple yarn. Work 1 sc in each sc and 1 sc in each ch-3 space (treat ch-3 spaces as anchor points) around to create a solid purple band — aim to keep the stitch count consistent with previous sc positions. After joining, fasten off and weave in the tail tidy but leave ends near the join for the edging later.
Info :
The purple band provides a visual square outline around the cream mesh and a strong anchor for the scalloped cream edge later. Make sure your purple stitches are neat and even. If you prefer a thicker inner band, work an additional round of sc in purple.
Round 21 :
Change back to cream. Join cream in any visible sc of the band. Ch1, sc evenly around the purple band placing 3 sc into each corner ch-2 or ch-3 corner point to keep corners squared up. (approx. count will align with previous positions)
Round 22 :
Ch3 (counts as dc), *skip 1 sc, dc into next sc, ch1, sk 1 sc, dc in next sc* across to produce a framed grid texture; at corners work (dc, ch2, dc) into corner scs. This forms the final framed mesh in cream just outside the purple inner band.
Round 23 :
1 sc evenly around the row of dcs, placing 3 sc in each corner space (round looks neat and defined). Finish and fasten off; weave in ends and lightly block the square to true up corners and mesh holes.
Info :
Repeat these 23 rounds to create a total of 4 identical squares. Block each square flat to the same dimensions before attaching appliques. The mesh in the center is designed to be a slightly recessed surface to accept the sewn-on iris. When blocked the square should measure roughly 19cm corner-to-corner.
— Leaves (Make 6 per square — total 24) :
Pet Leaf (Pattern) — Leaf A :
Use green yarn. Leaves are worked flat with shaping to create a long lanceolate leaf. Make 6 per square.
Round 1 :
Ch 12, sc in 2nd ch from hook, sc across to last ch, 3 sc in last ch (turn to work along opposite side), sc across other side skipping first ch, sl st to first sc. (approx. 22 sc total including 3-sc end)
Round 2 :
Ch1, sc in same st, sc across to end, dec at tip (sc2tog at last 2 sts), work down opposite side mirroring increases/dec so that leaf narrows — aim for 20 sc now
Round 3 :
Ch1, sc in first 2 sts, hdc in next 3 sts, dc in center 8 sts (for a faint center ridge), hdc in next 3 sts, sc in last 2 sts. Sl st to join. (texture: center ridge formed with dc band)
Round 4 :
Work surface slip stitch veins: Using the right side facing, attach yarn at leaf base and surface sl st up the center ridge in a straight line to create the main vein. Make 2-3 short surface veins on each side angled slightly outward using slip stitches. Fasten off and weave in ends.
Info :
Alternative method: Work leaf using short rows, increasing to center then decreasing for a cleaner pointed tip. The leaf count above yields a leaf roughly 6-7cm long with a nice raised center ridge. Make 6 leaves per square: 3 layered along each side of flower center as shown in photos.
— Leaves Variant (Make 6 per square) :
Round 1 :
Ch 10, sc in 2nd ch from hook, sc across to last ch, 2 sc in last ch, turn and work back along the other side with sc across. (approx 18 sc)
Round 2 :
Ch1, sc around entire formed oval, placing 2 sc at tip and base to keep shape. (approx 20 sc)
Round 3 :
Work 1 sc in each st; FLO only for next round to create a raised folded edge (optional). Fasten off and shape with light steam blocking if desired.
Info :
Mix the two leaf shapes per flower for a more natural look: use three of the long lanceolate leaves and three of the narrower oval leaves per square arranged as in photo (two slender leaf pairs under each of the outer petals and a central grouping under the center petal).
— Iris Petals — Large Downward Petal (Make 3 per flower) :
Round 1 :
Using deep purple, ch 7, sc in 2nd ch from hook and across forming a small foundation row (6 sc). Turn, ch1.
Round 2 :
Work 1 sc in each st across (6). Ch1, turn.
Round 3 :
Start shaping: Inc in first and last stitch of row, sc across middle 4 sts (8 sc). Turn.
Round 4 :
(1 sc, inc) at each end to flare; sc across center (10 sc). Turn.
Round 5 :
Ch2 (counts as first hdc), work 1 hdc in each st across, ch2, turn. This creates a gentle curve for the petal tip (10 hdc).
Round 6 :
Work 2 dc in central 4 sts to bulk up body of petal: *dc in next st, 2 dc in next* across center; shape by working 1 hdc at very tip row ends to round the petal (approx. 14-16 stitches across top).
Assembly Instructions
- Attach head to body by inserting the neck portion into the body opening. Pin in place first, then sew securely using whip stitch all around, ensuring even attachment
- Position arms on sides of body at rounds 20-22 for natural look. Sew through both arm and body using ladder stitch for invisible seam
- Attach legs to bottom of body at rounds 1-3, spacing them evenly. Sew securely, adding extra stitches for stability if character will be posed
- Sew ears to top of head at rounds 5-8, spacing them 12-15 stitches apart. Curve slightly forward for natural appearance
- If applicable, attach tail to back center of body at round 10. Sew securely in spiral pattern
- Add any facial embroidery: nose, mouth, eyebrows using yarn needle and matching colors
- Secure any loose ends by weaving through several stitches and trimming close to work
- Optional: Add blush to cheeks using fabric paint or makeup for extra cuteness
Important Notes
- 💡Use stitch markers consistently at the beginning of each round to avoid counting errors and maintain proper shaping
- 💡Stuff body parts gradually as you work rather than waiting until the end, especially for narrow openings like arms and legs
- 💡For safety eyes, position and secure before stuffing head fully - they cannot be repositioned once locked in place
- 💡Maintain consistent tension throughout the project; too tight creates stiff, small pieces, too loose creates floppy, holey fabric
- 💡When sewing pieces together, use yarn slightly thinner than working yarn for neater, less visible seams
- 💡Pin all pieces in position before final sewing to ensure proper placement and symmetry
- 💡For amigurumi, work tightly enough that stuffing doesn't show through stitches
- 💡Keep a row counter or notepad to track rounds, especially in long even-stitch sections
This floral table runner blends classic filet mesh with dimensional applique to create a centerpiece that’s both decorative and useful. The textured iris petals and sculpted leaves give each square a small burst of spring colour and tactile interest. Enjoy the meditative process of building each motif and arranging them to your liking — it’s a lovely project to gift or keep for your home. 🧶🌼✨