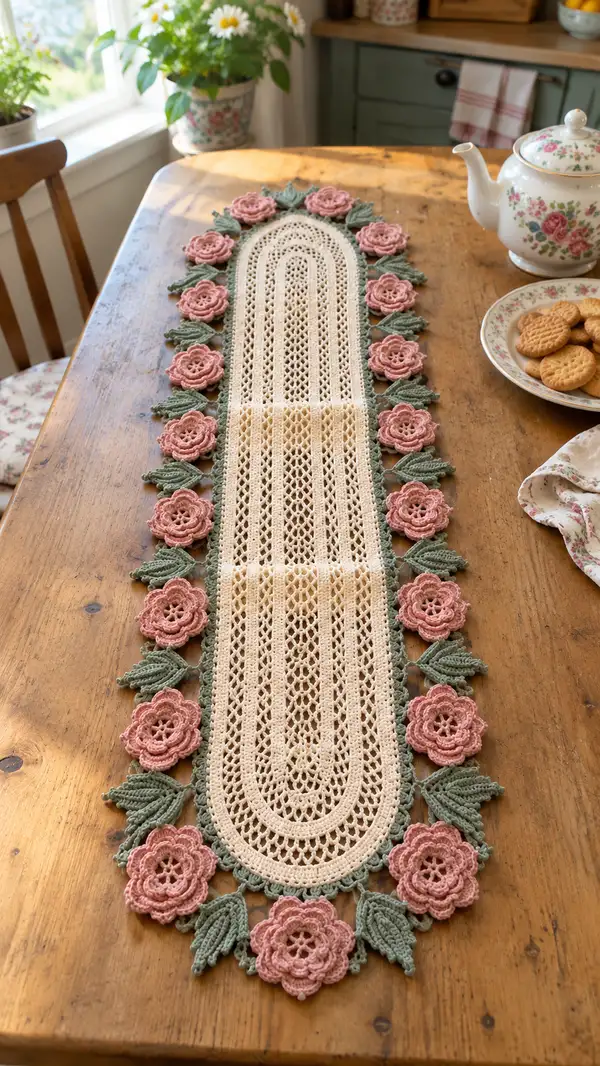
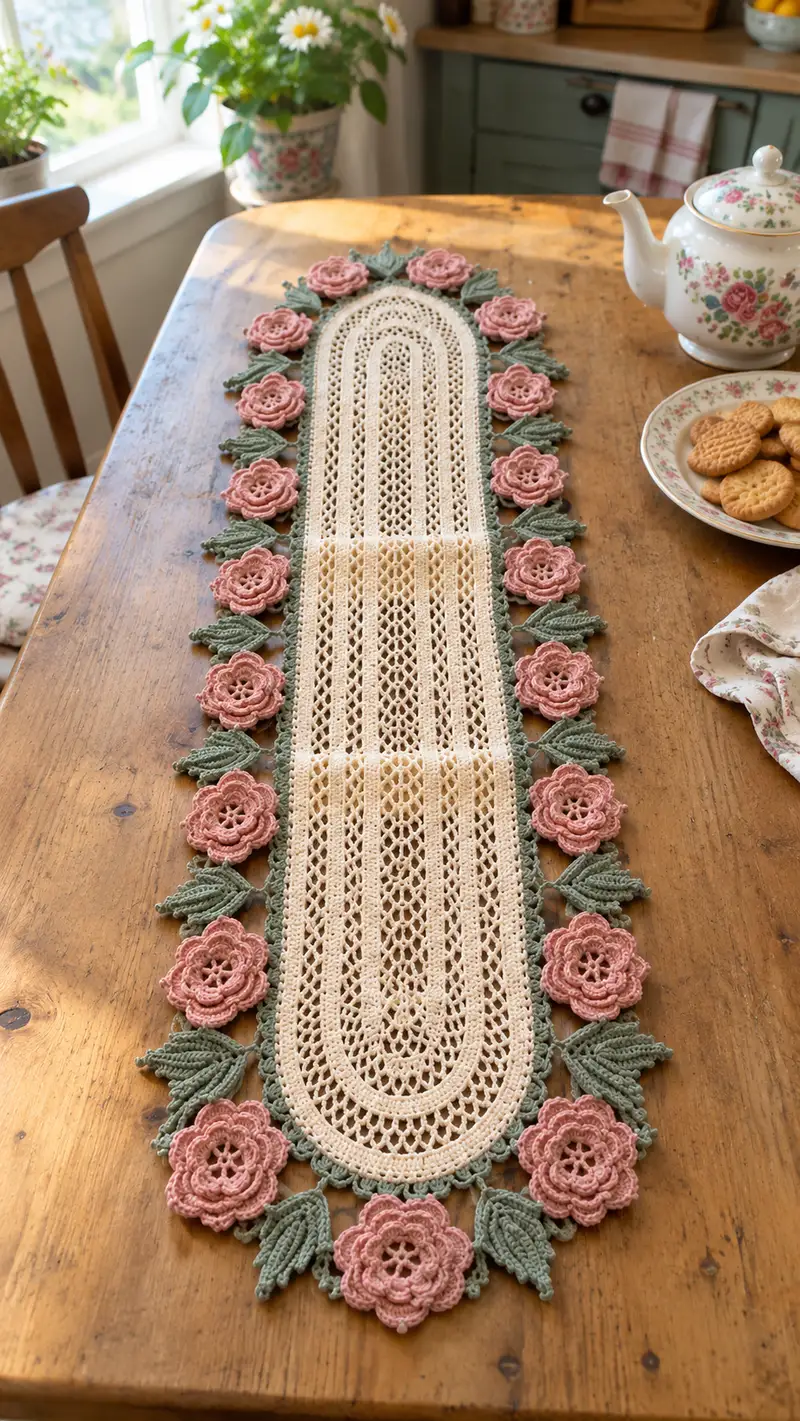
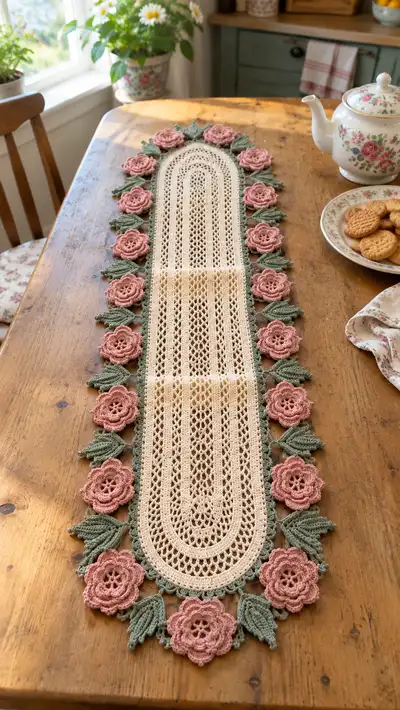
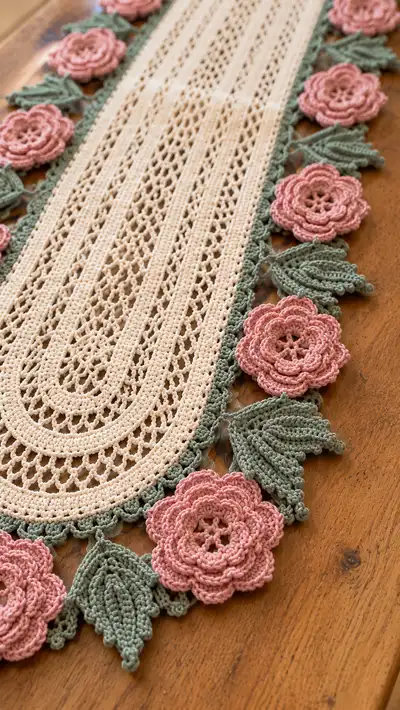
A long, elegant oval lace table runner edged with sage-green scallops and adorned with dusty-rose layered crochet roses. The delicate center features open lacy panels and narrow crocheted ribs, creating a vintage, romantic look perfect for a dining table, sideboard, or dresser. This pattern uses lightweight cotton yarn, detailed motifs (flowers and leaves), and an assembly method that joins motifs as you work for a seamless finish. A beautiful heirloom-style project.
Progress Tracker
0% Complete
— Overview :
Info :
This runner is constructed in three main components: 1) the central oval lace panel, worked in joined rounds from an elongated foundation; 2) a narrow decorative ridge and scalloped border in sage green; 3) separate layered roses and sculpted leaves worked in dusty-rose and sage green then joined around the border. The pattern below breaks each part into detailed rounds and motif instructions. Follow the Info notes for color changes, blocking, and assembly.
— Gauge & Finished Size :
Info :
Gauge is not critical for lace runner fit, but for reference a 10x10 cm swatch in dc mesh worked with 3.25mm hook and sport cotton should be about 18 dc x 22 rows. Finished length using specified yarn and hook: approximately 90-100 cm (35-39") for the photographed narrow size; width approximately 18-20 cm (7-8") not including flowers. Adjust length by adding or subtracting centre repeat rows.
— Center Oval Panel :
Round 1 :
Ch 60 (this is the elongated foundation chain that sets the inner length). Turn and work into second ch from hook: sc in next 58 ch, 3 sc in last ch to turn the end, now work along opposite side of foundation chain: sc in next 58 ch, 2 sc in final ch (corner) - total stitches around approx (58+3+58+2)=121 sts.
Round 2 :
Ch1, sc in same st, 1 sc in each st around, placing 1 sc in each of the 3 sc in the end corner groups (121)
Round 3 :
Ch3 (counts as dc), *sk 1 sc, dc in next sc, ch1*, rep across straight side; at round ends work (dc, ch1, dc) into each corner stitch to preserve oval curve. End with sl st to top of ch3. This begins the mesh motif base (approx 61 dc positions, 60 ch1 spaces).
Round 4 :
Ch1, sc in same st, sc in each dc and in each ch1 space across until corner; in corner sc sequence work 5 sc across corner chain loop to maintain curve. Continue around. Count should be approx (121) sc (even round).
Info :
Place a stitch marker at the start of each round. This centre panel uses alternating mesh (dc/ch1) rows and solid sc rows to create the lacy ribs. Keep tension even and count carefully to maintain symmetry.
Round 5 :
Ch3, *dc in next st, ch1, sk next st* rep along; at corners work (dc, ch1, dc, ch1, dc) in the rounded group. Sl st to top of ch3. This round establishes the diamond-like openwork when combined with inner repeats.
Round 6 :
Ch1, sc in each dc and sc in each ch1 sp across. Work extra sc in corner clusters to maintain curve. (121 sc)
Round 7 :
Ch4 (counts as tr), tr in next st, *ch2, sk 2 sts, (tr, ch1, tr) in next st for little fan cluster* across straight sides; in corners work (tr, ch1, tr, ch2, tr, ch1, tr). Sl st to top of ch4.
Round 8 :
Ch1, sc in each tr and in each ch space to close fans. Maintain 121 total sc. This stabilizes fan pattern.
Round 9-12 :
Repeat Rounds 3-6 twice more (Mesh row then solid sc row, then fan row then sc row) to build height of central oval. Keep counts equal to maintain shape. (After each pair return to 121 sts)
Info :
At this stage you will have established a regular lace rhythm. Use which-round marker to keep track of where you are in the four-round repeat. Slight block and steam after 12 rounds can help identify alignment before continuing.
Round 13 :
Ch2, hdc in same, *dc in next st, ch1, sk next st* rep along straight side; at corners work (hdc, 3 sc in corner sp, hdc). Sl st to join. This introduces a slightly denser rib for visual contrast.
Round 14 :
Ch1, sc in each st and ch-space, evenly distributing to keep oval shape (121 sc).
Round 15 :
Ch3, *sk 1, dc in next st, ch1, dc in same st (creating small V-open)* across straight sections; work symmetrical dc clusters in corners (dc, ch1, dc) in corner scs. Sl st to join.
Round 16 :
Ch1, sc in next 2 sts, *1 sc in ch1 sp, sc in next dc* repeat across; place extra scs in corner clusters to maintain 121 sc.
Info :
Check center panel for flatness. If the oval waves or ruffles, adjust tension or add one additional sc in each corner group in the next sc round. Conversely, remove extras if it puckers. The center should lie flat before moving to decorative narrow ribs.
Round 17 :
Ch1, sc in each st for two rounds (Round 17-18). Keep counts consistent (121). These rounds stabilize and create a solid edge baseline for the later inner ribbing.
Round 19 :
Info : Change to cream (if using a slightly different shade, ensure center remains uniform). Ch4, treble cluster rib pattern begins: Work 1 tr in next st, *ch1, sk 1 sc, tr in next st* across each straight side. In corners work (tr, ch1, tr) in corner scs. Sl st to join (approx 61 tr)
Round 20 :
Ch1, sc in each tr and ch space to stabilize (121 sc). This defines first narrow rib around the central oval.
Round 21-30 :
Work a repeating sequence creating three narrow raised ribs separated by single-sc rounds: Pattern repeat = [Round A: ch4, tr in each st across round; Round B: ch1, sc in each st]. Repeat this two more times to create three ribs total (6 rounds per rib including stabilization rounds). After Round 30 you will have three prominent ribs around the center (121 sts each sc round).
Info :
Use BLO for the sc round that immediately follows a tr rib to create a subtle ridge between ribs. On the first sc stabilization after a tr rib try: '1 sc in each st BLO' to make ribs pop. Note which sc rounds used BLO to maintain consistency.
Round 31 :
Ch5, dc cluster openwork: *sk 1, (dc, ch2, dc) in next st, ch1* repeat along straight sides; make the corner clusters larger (dc, ch2, dc, ch2, dc). Sl st to join.
Round 32 :
Ch1, sc in each st and ch-sp across to even the edge (121 sc). Keep counts equal. This is the last center mesh round before the narrow green border begins.
Info :
Fasten off cream and weave ends, or carry cream if you prefer to continue without fastening off. Blocking the center oval at this stage helps make the ribs and mesh distinct and makes joining motifs easier later.
— Narrow Decorative Ridge & Joining Row (sage green start) :
Info :
We will work a narrow ridge and small fan edging in sage green that forms the base for attaching leaves and flowers. Change to sage green yarn now. Join with sl st into a sc on outermost round; ch1 to begin.
Round 33 :
With sage green, ch1, sc in each st around working 121 sc. Mark start. This creates a visible border where motifs will attach.
Round 34 :
Ch3, *dc in next 2 sts, ch2, sk 2*, rep across straight sides; in corners work dc clusters (dc, ch3, dc) to maintain curve. Join with sl st to top of ch3. (approx 60 dc positions)
Round 35 :
Ch1, sc in each dc and in each ch2 space, placing 3 sc in corner groups to preserve shape (121 sc)
Round 36 :
Ch1, *sc in next 3 sts, picot (ch3, sl st into first ch), sc in next 3 sts, sk 1*, repeat along straight sides; at corners make picots evenly across corner cluster to create tiny attachment loops for leaves. Sl st to join. (121 with picot decorations)
Info :
These picot points are helpful anchor points for connecting leaves and flower stems with slip stitch or small ch-bridges. Pin the runner flat to maintain consistent picot spacing when attaching motifs.
Round 37 :
Ch1, sc around in BLO for a subtle ridge: 1 sc in each st BLO (121). This makes a raised ridge visually separating center and scallops.
Round 38-40 :
Repeat two plain sc rounds (ch1, sc in each st) to firm the attachment base (121). Use these rounds to tidy any joins and weave in ends from color changes on the wrong side where possible.
Info :
At the end of Round 40 the central panel and narrow border are complete. Lay the panel out and count the number of picots along each long edge to determine spacing for rose/leaf pairs. For the photographed runner there are 7 roses on each long side and 1 at each semicircular end (total 16 roses). There are two leaves placed between each pair of roses (approx 32 leaves). Adjust the number to fit the runner length you made.
— Scalloped Edge Base :
Round 41 :
Ch1, attach sage green and make small scallops around edge: *sk 2 sts, (5 dc in next st) - shell, sk 2 sts, sl st into next st* repeat across straight sides; at corners work larger shells (7 dc clusters) to maintain curve. After completing the loop sl st to join. This forms the base scallop row (approx 20-24 shells around each long side depending on length).
Round 42 :
Ch1, sc in each st and in the top of each shell to even fabric and add stability. Insert extra sc in larger corner shells. (count varies with shell count but keep shells symmetrical)
Round 43 :
Ch3, *3 dc in shell top, ch1, sl st in next sc between shells* repeat to enhance scallop height. Sl st to join.
Info :
These scallops create a wavy base where motif leaves and flower stems will attach. Work them slightly snug so flowers sit close to the runner edge rather than flopping outwards.
Round 44 :
Ch1, sc in each st across, working 3 sc into shell peaks if needed. Finish and fasten off base scallop round. We will now work motifs separately and join to the scallop edge using slip-stitch bridges and picots.
— Leaf Motif (Make 32) :
Info :
Each leaf is worked in sage green. The leaf is slightly cupped with raised ridges using front post stitches. Make a gauge swatch leaf to match spacing between scallops; each leaf will be approx 6.5 cm long in the pictured yarn. Make as many leaves as needed to fill spacing (approx 2 leaves between roses along each side).
Leaf Round 1 :
Ch12, sc in 2nd ch from hook and next 8 ch (9 sc), 3 sc in last ch to turn the tip, work down opposite side of chain: sc in next 8 ch, 1 sc in last (that was the first ch) - total 9+3+8+1=21 sc. Sl st to first sc to join and form a flat leaf shape.
Leaf Round 2 :
Ch1, sc in first 3 sts, hdc in next 5 sts, dc in next 5 sts, hdc in next 5 sts, sc in remaining sts; in tip cluster work (sc, ch2, sc) into the 3-sc tip to give rounded tip. Sl st to join. (21 st profile)
Leaf Round 3 :
Ch1, work BLO for first half to create cupping: 1 sc in BLO in next 10 sts, turn leaf and work FLO on opposite side: 1 sc in FLO in next 10 sts, sl st to join. This creates a ridge down the leaf center.
Leaf Round 4 :
Ch1, *fpdc around corresponding stitch 1 row back to create raised rib (work front post half double around each 4th stitch across the center), otherwise sc in next sts* repeat across to make a central raised rib. Sl st to join.
Leaf Round 5 :
Edge finishing: ch1, sc evenly around leaf placing 3 sc in the tip ch2 loop for a neat rounded edge. Fasten off leaving a 20 cm tail for sewing. (approx 26 sc with edging)
Info :
Pin and lightly steam each leaf to shape the cupping and define the raised rib. Use the yarn tail to sew leaves to scallop base at picot points; sew through the scallop and secure leaf base with tiny whip stitches. Space two leaves between roses with their tips alternating direction for a natural garland effect.
— Rose Motif (Layered Flower) Make 16 :
Info :
The rose is constructed in layered rounds forming a spiral of petals. Work in dusty-rose yarn. Each rose has a small center wheel, then three petal rounds (inner small petals, medium petals, outer larger petals). Finished diameter approx 7-8 cm in shown yarn.
Rose Round 1 :
Ch5, sl st to form ring (or magic ring alternative). Round into ring: ch1, (10 sc) into ring - total 10 sc. Sl st to first sc. This is the flower center wheel.
Rose Round 2 :
Ch2, (hdc, ch2) in each sc around to create 10 little loops - {hdc, ch2} x10. Sl st into top of first hdc. These loops become anchor points for petals.
Rose Round 3 (Inner Petals) :
Into each ch2 loop: sl st, ch1, (sc, hdc, dc, hdc, sc) in same loop, sl st to join to next loop. Work this into each of 10 loops to form short inner petals. Fasten off or continue to next round. Petal count = 10 small petals.
Info :
Use a smaller hook (2.75mm) for tighter petals if you prefer firmer roses. After Round 3, gently shape petals by pressing with your finger or a blunt tool to make them sit proud.
Rose Round 4 (Second Petal Layer) :
Join yarn at base of any petal: ch3, *into next petal base work (sc, hdc, 3 dc, hdc, sc) to form larger petal; ch1, sl st into space between petals* rep around to create 10 medium petals. These will stagger between inner petals.
Rose Round 5 (Outer Petal Layer) :
Join yarn at base of any medium petal: ch4, *in next petal base work (sc, hdc, 5 dc, hdc, sc), ch2, sl st into ch1 space* repeat around to form 10 large petals. The final petal layer gives the rose fullness. Fasten off leaving long tail for sewing (approx 25-30 cm).
Rose Round 6 :
Info : Optional: For a more ruffled rose, add an extra outer row with larger dc clusters (7 dc) into each petal base. Fasten off and weave in beginning tail under petals to create a slightly spiral shape if desired.
Rose Round 7 :
Steam-block each rose gently, shaping petals outward so the rose looks three-dimensional. Use a darning needle to sew through the base of the rose securing inner petal layers to the outer layer so petals keep orientation. Each rose is now ready for attachment.
— Flower & Leaf Spacing Plan :
Info :
For photographed layout: place one rose centered at each semicircular end; along each long edge place 7 roses evenly spaced; between each adjacent rose pair place two leaves angled outward. Use pins to check spacing before sewing. Adjust spacing to suit your runner length if you made a longer/shorter center.
— Attachment & Joining Rounds :
Round 45 :
With a long sage tail from scallop round, work a connecting chain-bridge where each rose will sit: find the picot near intended rose point and ch5, sl st into picot to create a small stem-loop. Repeat for each rose location around the runner. These chains will be used to anchor rose centers with slip-stitches and secure with a yarn tail.
Round 46 :
Place rose over anchor chain. Using long rose tail, thread tapestry needle and work small whip stitches through the base of rose and into fabric loops created by chain-bridges and picots: make 10-12 small stitches around base to secure. Weave tail through underside and hide.
Round 47 :
Sew leaves into the picot points between roses. Using leaf tails, sew the leaf base through picot and scallop base securely with at least 6-8 tight stitches so leaves do not flop away. Adjust leaf angle so tips alternate and create motion.
Info :
Work on one side first then mirror the layout on the other long side to maintain even balance. For semicircular ends, cluster a rose centered with two pairs of leaves fanning from either side to create a focal end motif.
— Final Edge Picot & Bead Finish (Optional) :
Round 48 :
With sage green, rejoin at any sc on scallop row: ch1, *sc in next st, ch3, sl st into 3rd ch to form tiny picot, sk next two sts* repeat evenly around to create tiny bead-like finish on scallops. This gives a neat dotted edge under flowers. Sl st to join and fasten off. Weave in ends.
Info :
If desired, add tiny glass or wooden beads at the tip of each picot by sewing a bead onto picot with a short embroidery thread before final weaving; this adds subtle sparkle but is optional for washability.
— Blocking & Finishing :
Round 49 :
Info : Lay the finished runner flat on blocking mats. Pin scallops and flowers in position at final desired spacing and shape. Damp-block with spray water or steam lightly and let dry completely. Blocking sets openwork and shapes petals and leaves. Remove pins and trim any loose ends. Your runner is complete.
Info :
Tip: For storage and future laundering, roll flat with tissue to prevent crushing petals. Hand wash gently and re-block after each wash to keep the runner pristine.
— Alternate Sizes & Modifications :
Info :
To lengthen the runner: increase foundation chain by increments of 10-12 chains and repeat center mesh repeats until desired length. For wider runners, increase initial chain by more and add additional inner ribs. The number of roses and leaves will scale proportionally. Changing to finer yarn and smaller hook will make a narrower, more delicate runner; heavier cotton will give a more substantial piece.
Info :
Optional border: replace scallop rounds with a picot-lace edge worked in cream for a more subtle floral frame if you prefer less green. Similarly, alternative motif colors like apricot or soft blue change mood dramatically.
Completing this runner is such a satisfying experience — watching the lacy oval come together and then seeing the floral garland take shape is pure joy. Each rose you attach adds personality and charm, turning a simple lace panel into a vintage-inspired centerpiece. Take your time, block as you go, and enjoy the calming rhythm of repeating motifs. 🌸🧶 Your finished runner will be a beautiful heirloom to treasure or gift with love. ✨