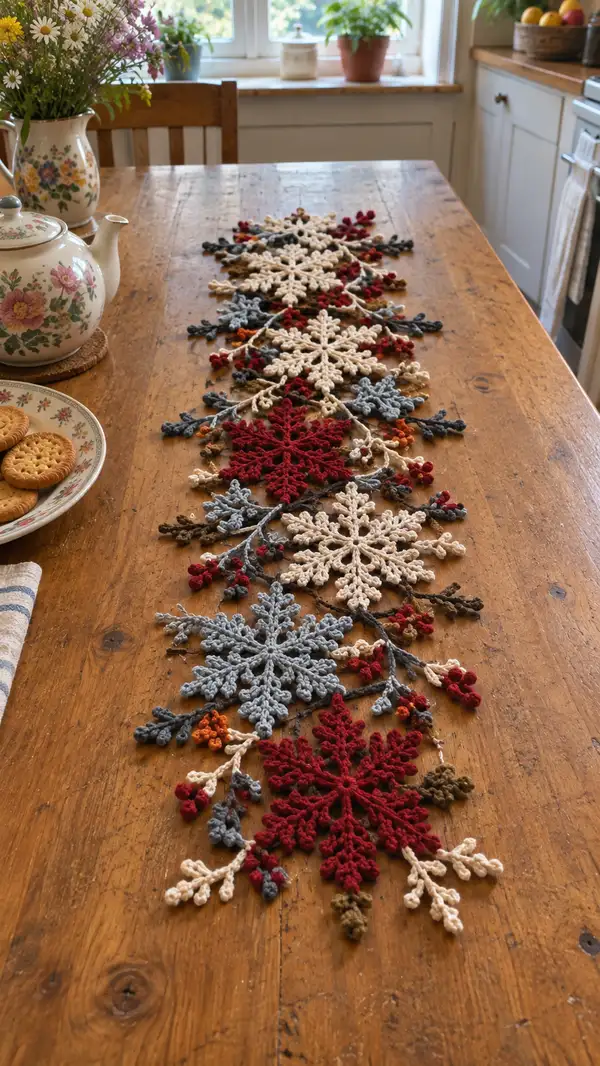
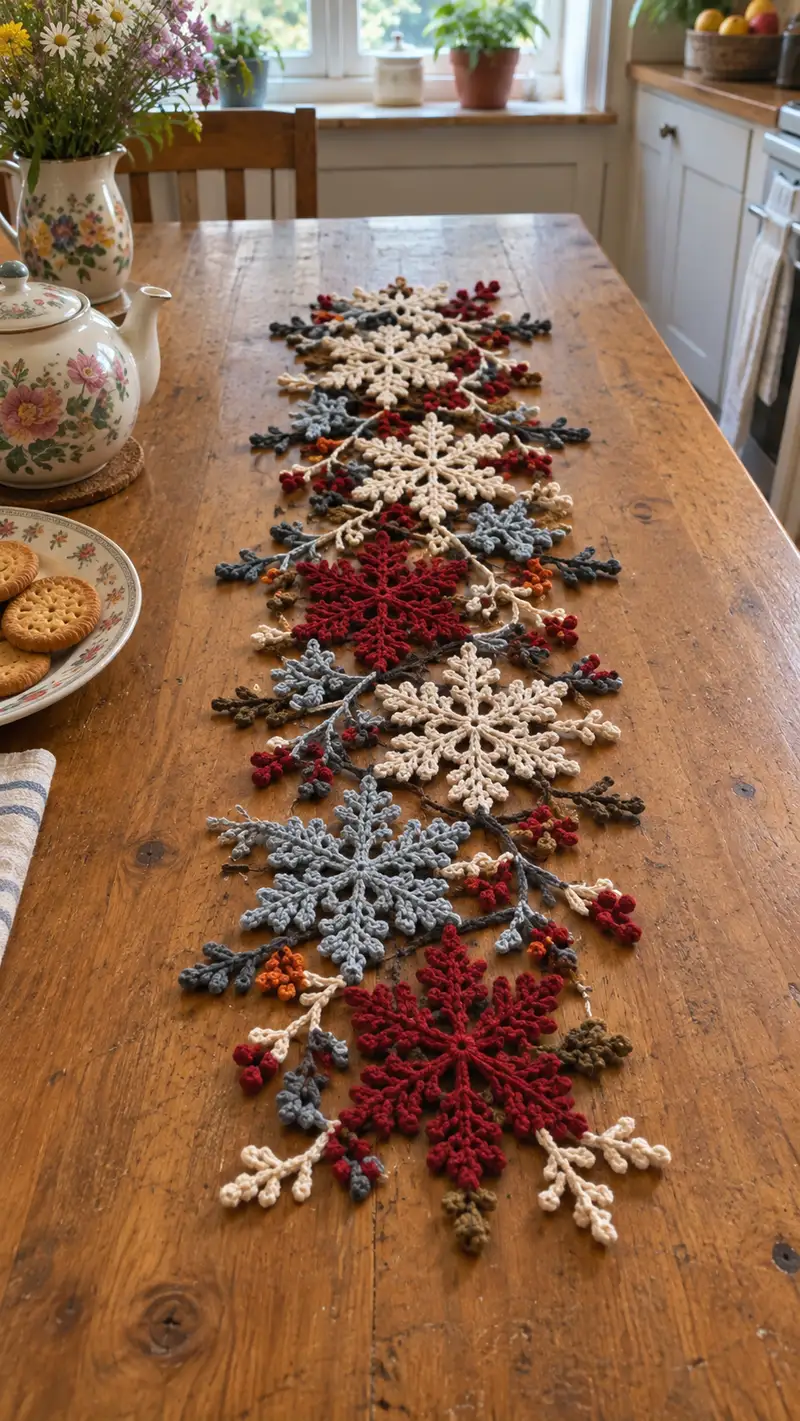
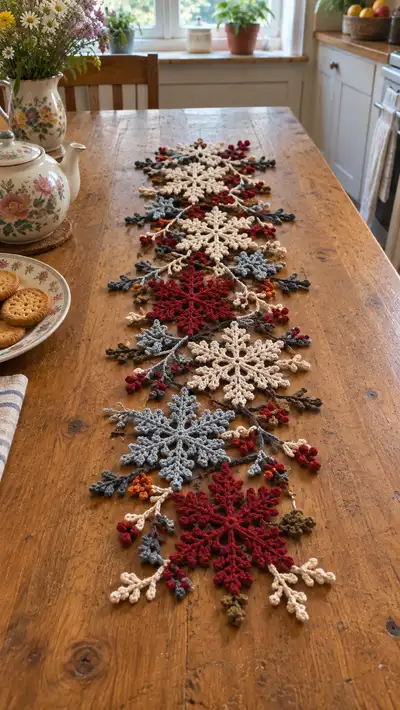
Create a poetic winter table runner built from delicate crochet snowflake motifs, leafy sprigs and tiny berry clusters. This runner features layered 8-point snowflakes in cream, deep red and slate blue, with neutral brown branches and warm orange accents. The finished piece is airy, rustic and perfect for seasonal tables or year-round cozy decor. Clear step-by-step motif instructions and assembly guidance help you recreate this elegant runner.
Progress Tracker
0% Complete
— Main Large Snowflake Motif (make 4-6 depending on runner length) :
Round 1 :
Make a magic ring, ch1, 8 sc into ring (8). Pull ring tight and sl st to first sc to close (8)
Round 2 :
Inc in each st around (2 sc in each stitch) (16)
Round 3 :
(1 sc, 1 inc) x 8 around (24)
Round 4 :
(2 sc, 1 inc) x 8 around (32)
Round 5 :
(3 sc, 1 inc) x 8 around (40)
Round 6 :
(4 sc, 1 inc) x 8 around (48)
Info :
These first six rounds create a steady, smooth circular base. Keep tension even; this ring will form the centre from which eight pointed arms are worked. Place a stitch marker at the start of each round while building the circle to keep your count accurate.
Round 7 :
1 sc in each st around (48)
Round 8 :
1 sc in each st around (48)
Info :
We will now prepare the base for eight points. Count and mark every 6th st (48/8=6) to use as anchor stitches for each snowflake arm. Use safety pins or removable stitch markers for these anchor points to avoid losing count during point construction.
Round 9 :
*Ch8, sl st into marked anchor stitch; sl st in next 5 sts, ch8, sl st into next anchor stitch* - repeat across all 8 anchors. After final sl st, sl st to first sl st to close base. (48 base sl st anchors; chain loops create 8 foundation loops)
Info :
The ch8 loops will be used as the scaffolding for each long point. Keep chain tension relaxed but even; each loop should be approximately the same length to create symmetrical points.
Round 10 :
Working into first ch8 loop: join yarn into loop, (ch3 counting as first dc), 11 dc evenly in loop, sl st to base anchor. Repeat in each of the 8 loops (12 dc per loop including ch3 base). (96 dc worked around in loops, base round still 48)
Round 11 :
On each point: (ch3, tr, ch2, tr) into next 2 dc cluster, sl st into center dc to create a peaked top; work a small picot (ch3 sl st into base) at the top of the point. Repeat across all 8 points. Base remains 48 stitches.
Info :
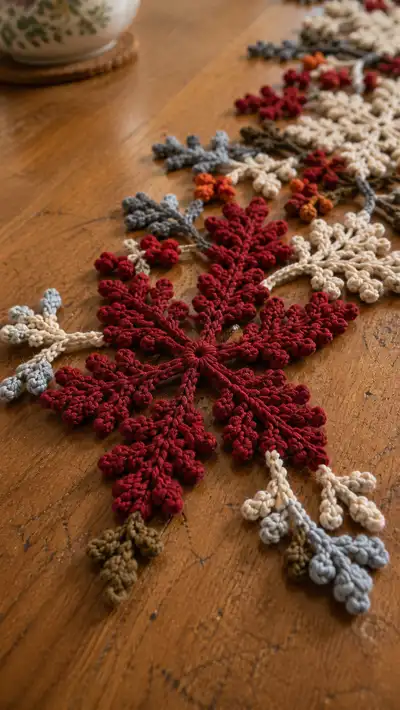
Use taller stitches (tr, dtr) for the point peaks to produce the lacy, spikey look seen in the photo. Keep the picots small and consistent to echo the delicate snowflake tips.
Round 12 :
Work decorative side branches on each point: Attach yarn at base of a point, *ch4, sl st into dc 3 stitches down to create side loop, (ch4, sl st back into same base), sc into base, move to next point* - repeat x8. This creates small sidebuds along each arm. (No change in central base count)
Round 13 :
Work 2-round bobble edging along each point: Into each ch4 side loop work (ch1, 5 dc cluster (bobble), ch1) and sl st to base. On the top of each main point work a 5-dc bobble cluster with ch2 separation for airy texture. Repeat for all arms.
Info :
Bobble clusters are created by working five dc into the same stitch (or loop), leaving the last loop of each dc on the hook, then yarn over and draw through all 6 loops, secures as a bobble. Practice one bobble on scrap yarn to get a consistent size before working on the motif.
Round 14 :
Reverse round: Sl st across base into each of the 48 base stitches to tidy foundation and secure points. Finish with sl st to first sl st. (48)
Round 15 :
Optional decorative finish: In between each arm, sl st into base stitch, ch5, picot (ch3, sl st to base of ch), sl st to next base stitch to create delicate connecting arcs. Repeat around (48 connection arcs)
Info :
Fasten off leaving a 20-30cm tail for sewing. Wet-block each snowflake to a 20-22cm diameter for large motif using pins to shape points evenly. Let dry completely before assembly.
— Secondary Medium Snowflake Motif (make 4-6) :
Round 1 :
mr, ch1, 8 sc into ring (8). Close with sl st (8)
Round 2 :
Inc in each st (16)
Round 3 :
(1 sc, inc) x 8 (24)
Round 4 :
1 sc around (24)
Round 5 :
Mark every 3rd stitch to form 8 anchor points (24/8=3). In each anchor: ch6, sl st to anchor. Repeat to create 8 small loops (24 base remains).
Round 6 :
Work into each ch6 loop: (ch3, 9 dc) evenly in loop, sl st to base (10 dc per loop). Repeat x8. (80 dc worked in loops)
Round 7 :
On each point work (ch3, tr, ch1, tr, ch3) and finish with a small picot. Repeat x8. Base original count remains 24.
Info :
Medium snowflake is scaled for visual variety in the runner. Block to about 15-17cm diameter so it sits proportionally next to the large motif.
Round 8 :
Create side clusters: Into the ch3 spaces between point petals work (sc, ch3, sc) to make little notches and then attach a 3-dc bobble on alternate petals for texture. Repeat all around.
Round 9 :
Sl st through base to tidy, fasten off leaving 20cm tail for sewing. Block and pin evenly to dry.
— Small Accent Snowflake Motif (make 6-8) :
Round 1 :
mr, ch1, 6 sc into ring (6)
Round 3 :
(1 sc, inc) x 6 (18)
Round 4 :
1 sc around (18)
Round 5 :
Form 6 mini points: *ch5 sl st into every 3rd st* repeat x6 creating 6 mini loops
Round 6 :
Into each loop: ch3, 5 dc cluster, picot. Repeat for all 6 points. Sl st back to base and fasten off leaving tail.
Info :
Small motifs act as infill and connectors in the composition. Block to 8-10cm diameter. Keep small motifs tight and firm for crisp negative space between large motifs.
— Leaf Sprig (Make many; attach between snowflakes) :
Round 1 :
Start with ch12 for a small stem (use dark brown/olive). Join with sl st to first ch to form a chain loop or leave as a chain depending on desired look. For twig-like structure leave chain open.
Round 2 :
Working back along chain: Starting in 2nd ch from hook, sc in each ch across (11 sc). This forms a narrow tubular stem. (11)
Round 3 :
In targeted stem positions create leaves: *At ch3 from base: (ch4, sl st into stem base) to form leaf scaffold; move 2 ch forward and repeat* - repeat along stem to create 3 leaf notches.
Round 4 :
Work into each ch4 loop: (sc, hdc, 3 dc, hdc, sc) to shape a miniature leaf. Repeat for each loop across stem. Fasten off leaving tail.
Info :
Make leaf sprigs of various lengths by changing initial chain length (8-20 ch). Make more short sprigs in cream and slate blue for color variety. Block lightly or use finger-shaping; stems may be slightly stiffened with a little starch if desired.
Round 5 :
Optional accent: Add tiny picot fronds by attaching contrasting yarn and working ch4-picot clusters along stem; fasten off.
— Berry Cluster (Make many small clusters) :
Round 1 :
Using small amounts of burnt orange or deep red, ch4, join with sl st into ring (or make mr and 4 sc) (4)
Round 2 :
Work three small bobbles into ring: *[yarn over, insert, pull up loop] x4 then pull through all loops* to make tightly packed berries; repeat to make 3-5 bobbles around centre. Fasten off with 10cm tail for sewing.
Info :
For natural clustered berries, vary size: two large bobbles and one tiny. Use a 3.0mm hook for firmer tiny bobbles. Stitch clusters onto branches using tail end with small, neat stitches to secure.
— Connector Stem and Joining Chain (many rounds of work for long runner) :
Round 1 :
Using dark brown/olive yarn, ch120 (or desired runner length divided by motif spacing) to form main linking cord. This will be braided or crocheted chain that connects motif centers. For a 120cm runner use ch120 in worsted cotton (adjust for gauge).
Round 2 :
Working back along chain, sl st into each chain to create a tidy cord (120 sl st). This cord forms the visible stem connecting motifs. Fasten off leaving long tails at both ends for attaching motifs.
Info :
Instead of a chain you can braid three separate small cords created by ch40 each and plait them for a thicker natural stem. Or use a crocheted i-cord technique: ch6, hdc in 2nd ch from hook across then slip stitch and continue for i-cord fullness.
Round 3 :
At intervals along the connector stem, join on short branch sprigs (see Leaf Sprig) by whip-stitching the base tail into the stem and securing with a backstitch; hide ends along stem.
Info :
Spacing: Place large snowflake motifs approximately 24-26cm apart centre-to-centre, with secondary motifs in between by offsetting half the distance. Use pins and a measuring tape to get consistent spacing before sewing.
— Assembly & Joining Motifs (many small rounds of attachment and finishing) :
Round 1 :
Layout: On blocking mat or flat workspace, pin the connector stem along the center line of your table runner shape. Position snowflakes (large then medium then small) alternating colors as in the photo: cream, slate blue, cream, deep red, cream, etc. Temporarily pin each motif in place with rust-proof pins.
Info :
Take a photograph of the pinned layout from above before sewing so you remember exact placement. Work from the center outwards to maintain balance and symmetry as you join motifs.
Round 2 :
Sew each motif to the connector stem by bringing the motif centre tail through the stem and back out. Use a mattress stitch or sl st along the inner ring of the snowflake, working anchoring stitches into the stem at 8 or 12 points depending on motif size. For the large motif use 8 secure stitches; for medium use 6; for small use 4.
Round 3 :
Attach leaf sprigs and berry clusters: Using tails left from each sprig and berry, attach to the stem and between snowflake arms in clusters. Arrange some stems to cross over the runner edge to create organic drape.
Info :
Sew berry clusters into groups of 2-3 along branch tips, with a small stitch through the stem base only to leave bumpy berries free and dimensional. Hide tails by weaving into the nearest stem for a neat back.
Round 4 :
Edge finishing: Work a decorative picot sc border along selected exposed edges of the runner - using cream or contrasting color pick a lengthwise edge and work sc evenly then (ch3, sl st into same sc) picot every 6th stitch to mimic the tiny buds. Continue along both sides for a clean finish.
Round 5 :
Blocking final assembly: After sewing all pieces, lightly steam or wet-block the entire runner pinned in final shape. Gently shape branches so they fall naturally. Allow to dry fully before use.
Info :
Weave in all ends with a tapestry needle, burying ends in the connector stem where they are less likely to show. If any motifs feel insecure, add an extra invisible stitch or small dab of fabric glue on the back centre to keep them stable on the stem.
— Optional Decorative Variations and Finishing Details :
Round 1 :
Add metallic thread: Using a fine metallic thread held together with the main yarn, work tiny accent picots around selected snowflake tips for a subtle shimmer. Attach by weaving thread through back loops and tying off on underside.
Info :
To create staggered depth like the photographed runner, slightly offset medium motifs so their tips fall between the points of larger motifs. This creates a pleasing layered effect when viewed from above.
Round 2 :
To lengthen the runner, add more repeats of (large+medium+small) motifs and corresponding connector length. Each repeat adds about 22-26cm in length depending on blocking size.
Info :
Store flat or rolled gently to prevent crushing the bobbles and picots. If you fold, put acid-free tissue between folds to avoid permanent creases.
This snowflake table runner is a delightful blend of lace-like snowflakes and organic twiggy branches — a perfect centerpiece that feels handcrafted and charming. Each motif and little berry cluster adds texture and story to your table. Enjoy the slow, satisfying process of creating each snowflake and seeing them become a cohesive, seasonal accent. 🧶❄️ Bring it out each year or keep it on display for year-round rustic elegance. 🎀