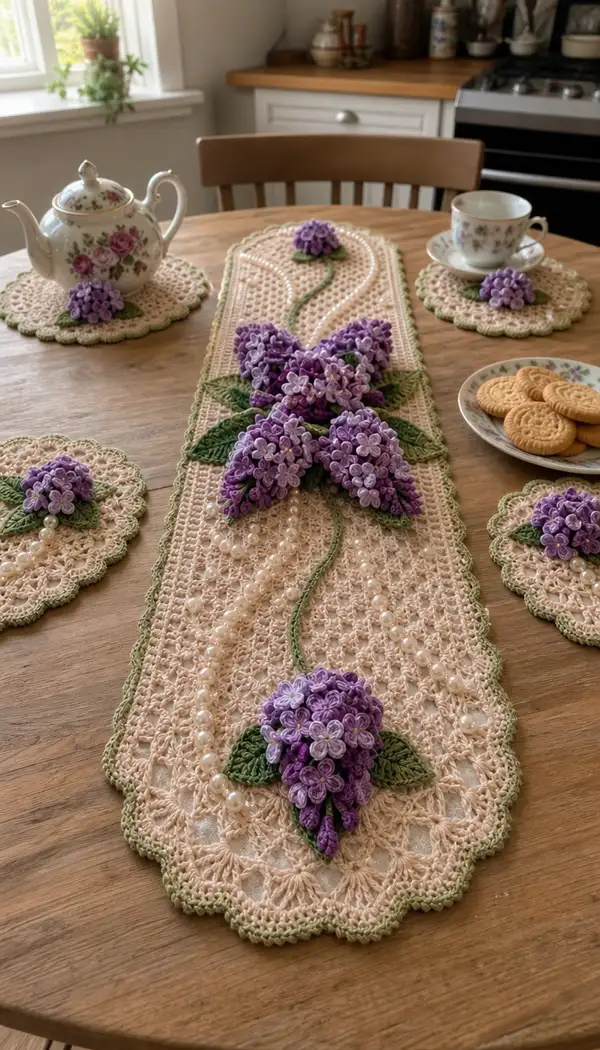
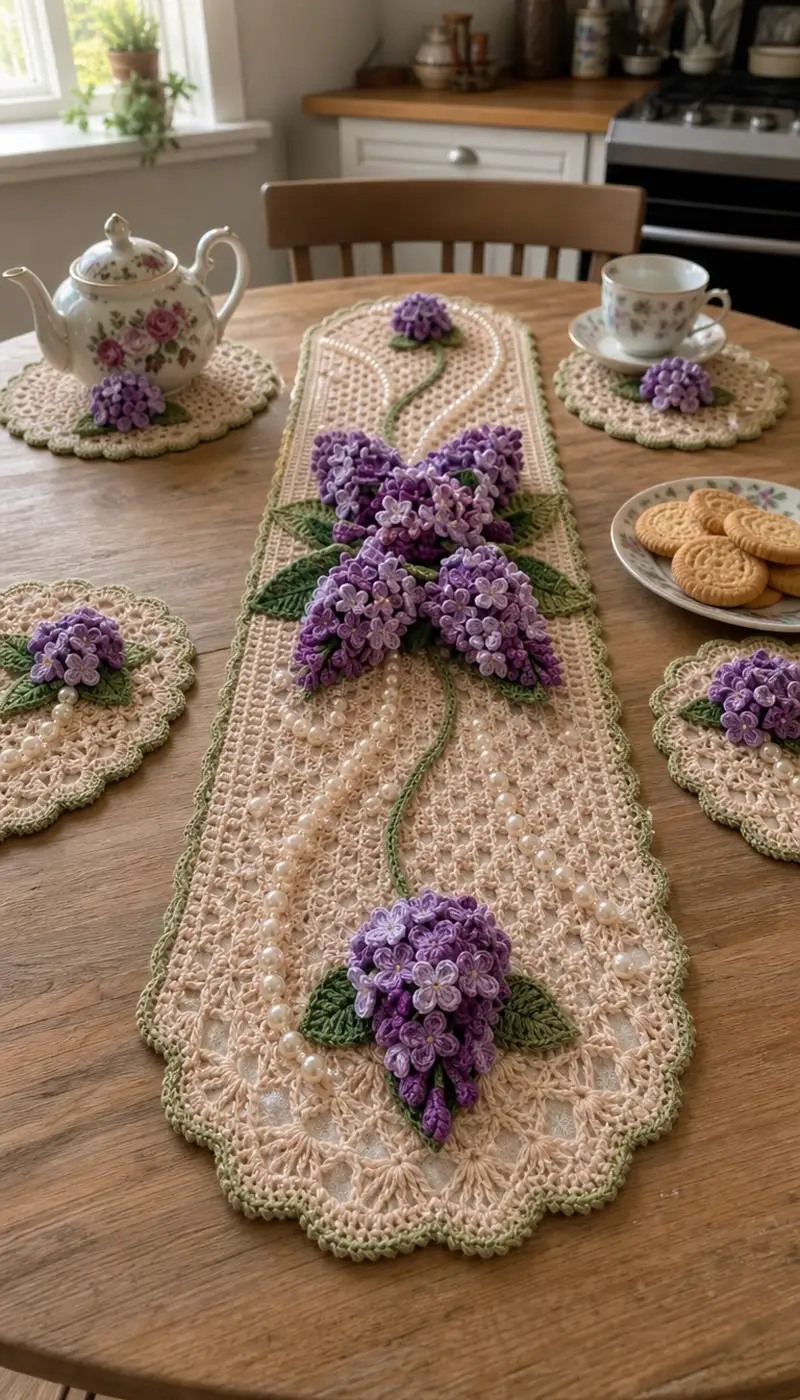
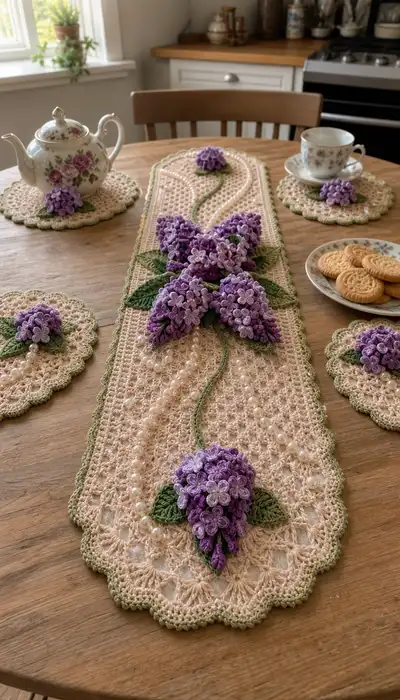
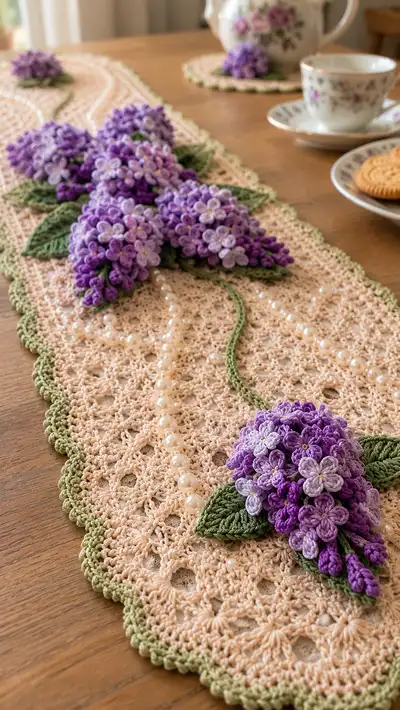
Create an elegant vintage-inspired table runner and matching coasters adorned with lush 3D lilac clusters and delicate scalloped edging. This pattern uses fine mercerized cotton to produce a soft peach lace ground, soft green border and stems, and layered purple lilac blossoms for a dimensional centerpiece. Detailed instructions cover the lace runner base, individual flower petals, layered clusters, leaves, stems, bead embellishment and coaster variants.
Progress Tracker
0% Complete
— Notes & Gauge :
Info :
This pattern was designed for cotton crochet thread size 10 and a 1.5 mm hook. Gauge is flexible for decorative work; the runner shown measures approximately 34 cm wide x 110 cm long. If using thicker thread, expect a proportionally larger finished piece. Work tightly to get crisp three-dimensional petals and to avoid pearl droop.
Info :
Abbreviations follow standard notation as listed. All pieces are worked mostly in rounds or short rows and then sewn in position. Block flat before assembly; use light steam or wet-blocking and pin into shape on a blocking mat.
— Runner Base (Flat Lace Panel) :
Round 1 :
Ch 78, turn. (This chain gives a 34 cm width; adjust in multiples of 6+2 to widen or narrow.)
Round 2 :
RS: In 4th ch from hook (counts as dc), dc, ch2, skip 2 ch, *3 dc in next ch, ch2, sk 2 ch; rep from * across to last 3 ch, dc, ch1, dc in last ch. (This starts the shell mesh foundation row.)
Round 3 :
Ch3 (counts as dc), turn. *3 dc in ch-2 sp of previous row, ch2; rep across to end, finish with dc in turning ch-1. (Count keeps pattern aligned; shell clusters made of 3 dc with ch-2 spacing.)
Round 4 :
Repeat Round 3. (This establishes a stable mesh; count should remain consistent with 13 shells across the width for 78 ch foundation.)
Round 5 :
Ch1, turn. Work 1 sc into each dc and into each ch-2 space across to create a firm working edge (approx 156 sc including spaces). This converts the lace to a slightly denser fabric for bead stitching later.
Info :
Change to pale peach cotton thread for the runner base if not already using it. Use stitch markers at the first and last shell to keep count for edge shaping later.
Round 6 :
Ch3, turn. *3 dc in next ch-2 sp, ch2; rep across. End with dc in turning ch-1. (This reopens the mesh with shell groups.)
Round 7 :
Repeat Round 6. Keep a consistent right-side appearance; if you prefer a visible right-side, make all shells with the same orientation.
Round 8 :
Ch1, turn. Sc in each stitch across to firm the edge (same count as Round 5). This alternating sc row every two mesh rows provides stability and prevents stretching.
Round 9-12 :
Repeat Rounds 6-8 twice (two mesh repeats). (Maintain counts consistent across repeats; each repeat adds approximately 3–4 mm in height depending on tension.)
Info :
At this stage you have formed a sturdy lace panel with alternating mesh and sc rows. Count shells across each row and place temporary markers at row centers to plan where main clusters will sit (center, upper-middle, lower-middle etc.).
Round 13 :
Ch3, turn. Begin a decorative diagonal chain line: 2 dc in first ch-2 sp, ch2, sk next shell, 2 dc in next shell ch-2 sp to create a subtle raised path that will guide bead stitching later. Continue this spaced 2 dc repeat across and end with dc in turning chain. (This is decorative and optional.)
Round 14 :
Ch1, turn. Sc in each st across, including dc groups and ch-2 spaces, to compress the raised path slightly. (Even count should equal prior sc row.)
Round 15-28 :
Repeat the pattern sequence: (mesh 2 rows, sc firming row) for 14 more rows to reach the runner length. At the end of Round 28 you will have built a long lace panel approximately half the length shown; measure and continue repeats until you reach desired length (aim for 34 cm wide by 110 cm long total).
Info :
Place stitch markers at the long-panel center and at quarters - these guide where clusters and leaves will be sewn later. Keep the same stitch count across all repeats by counting shells at the first and last mesh rows regularly.
Round 29 :
Once runner is desired length, work one full sc row across to prepare the edge for border: ch1, turn, sc in each st across. (This evens the edge and produces a solid surface for scallop joining.)
Round 30 :
Begin scalloped edging foundation: ch1, sc in first 3 sts, *ch3, skip 3 sts, 5 dc in next st (shell), ch3, skip 3 sts, sc in next 3 sts; rep from * across to end. (This forms a series of shells along the long edges.)
Round 31 :
Turn and work picot scallops: Into each 5-dc shell work: sl st into first dc, ch3, sl st into first ch (picot), sc into shell center, ch3, sl st into picot, sl st to join. (This creates the dainty scallop and picot detail.)
Info :
Change to mossy green for the final border rounds to frame the runner with a subtle green scallop. Work firmly to keep scallops even. If your runner width differs, adjust shell spacing so scallops meet the corners nicely.
Round 32 :
With green: Ch1, sl st evenly around the entire runner edge (long sides and short ends), placing 3 sc into each shell peak and 1 sc per sc on straight edges. Aim for neat even spacing; count scallops to ensure matching at both ends.
Round 33 :
Final scallop polish: *In each shell: (sc, ch3, picot, sc) across the shell peaks; on straight edges sc in each st. Fasten off and weave in ends. Block carefully to open scallops. (Edge finished.)
Info :
Press and block the lace panel flat now. Pin scallops rounded and smooth along the edge; allow to dry fully. Blocking prevents pearls from pulling and makes sewing clusters much easier.
— Lilac Petal Motif (Make many for Clusters) :
Round 1 :
Make a small ring: ch 4, join with sl st to form ring (or magic ring if preferred). (This forms the small center loop for each five-petal motif.)
Round 2 :
Ch1, into ring: (sc, ch2, 3 dc, ch2, sc) x 5 to form 5 petal bases. Sl st to first sc to close. (You now have five spaced petal bases.)
Round 3 :
Petal shaping round (petal 1): Into first petal base (sc, ch2, 3 dc, ch2, sc) work: *ch1, 5 dc in ch-2 arch, ch1, sl st back into arch; repeat into each arch to puff petals. (Work across all five petals.)
Round 4 :
Refine petals: For each petal: sl st in next stitch, ch1, (sc, hdc, 2 dc, hdc, sc) all worked into the top of the 5-dc group to create a curved petal outline. Fasten off leaving a 20 cm tail for sewing. (Petal counts are stable at 5 petals.)
Info :
Petal color variations: Use deep purple for inner petals that will sit lower, mid purple for the main layer, and pale lilac for highlight petals that sit on top. You will need approximately 24 petal motifs for each large cluster (mix of shades) and fewer for small clusters.
Round 5 :
Optional bead center: Thread a small pearl bead onto the tail and stitch it at the center of the petal cluster using the tail, then weave the tail into the back of the motif. This secures bead centers for extra sparkle.
Round 6 :
Make additional petals in required color. For 1 large cluster plan for 22-28 petal motifs; for small clusters plan 10-14 motives depending on desired fullness.
Info :
Keep petal motifs consistent in size by using the same tension and hook for each. If petals look floppy, try 1.25 mm hook for petals or pull additional sl st at top of each petal to tighten shape.
— Lilac Cluster Assembly (Make 5 large clusters and 3 small clusters) :
Round 1 :
Arrange petals in layers on a flat surface: bottom layer (dark purple) 10-12 petals, middle layer (mid purple) 8-10 petals, top highlights (pale lilac) 4-6 petals. Overlap edges slightly for natural fullness.
Round 2 :
Start assembly: Using a long tail from one petal, sew the first bottom layer petals together by overlapping base rings and whipstitching through the back loops only, joining each petal to its neighbor. Form a tight semicircular fan of bottom petals. (This creates a wedge-shaped cone for the cluster.)
Round 3 :
Continue with middle layer: Layer mid-toned petals slightly higher and more central on top of the bottom layer, sewing through the bases and into the curve so the middle petals sit elevated. Secure each petal with two small stitches through the central ring and the base of the adjacent petal.
Round 4 :
Add top highlight petals: Place 4–6 pale lilac petals at the most visible positions on top of the cluster and sew securely. These should be sewn slightly forward so the cluster looks rounded and natural. Hide tails by weaving inward.
Round 5 :
Create tapered bud tips: For tapered dangling buds at the cluster tip, make small cone motifs: ch6, sl st to form a small ring; ch1, 6 sc into ring; continue 2 rounds of sc without increases to form a short cone (3 rounds total). Make 4–6 cones and sew them in a tapered group to the underside tip of the cluster so the cluster tapers downward.
Info :
Each large cluster will use about 22–28 petals and 3–6 small cones. Small clusters use 10–14 petals and 1–3 cones. Keep petals sewn tightly so clusters hold a compact rounded appearance similar to natural lilac floret bunches.
Round 6 :
Finish base backing: Cut a small circular backing of matching peach fabric or a sturdy felt circle (approx 2–3 cm diameter) and sew the assembled cluster to this backing to provide a secure sewing surface when attaching to the runner. Knot securely and hide ends into backing.
Round 7 :
Repeat assembly for all clusters. Block each cluster lightly by pinning petals into a pleasing shape; steam lightly to set if needed, avoiding excessive moisture.
Info :
When grouping petals, think about natural lilac clusters: tighter at the top and tapering downward. Place deeper tones on the underside and lighter tones on top and front-facing petals for depth and highlight.
— Leaves (Make 10–14) :
Round 1 :
Ch 16, sc in 2nd ch from hook and across (15 sc). (This forms the leaf center chain.)
Round 2 :
Ch1, turn. 1 sc in next 3 sts, hdc in next 4 sts, dc in next 4 sts, hdc in next 2 sts, sc in last 2 sts. (Creates graduated height towards center.)
Round 3 :
Turn, working along opposite side of foundation chain: sc in next 2 sts, hdc in next 2 sts, 3 dc in next 4 sts (forming the leaf tip cluster), hdc in next 4 sts, sc in next 3 sts. (This completes a symmetrical leaf.)
Round 4 :
Edge detail: Sl st evenly around leaf edge to tidy; into the tip cluster work: (sl st, ch3, sl st) as a tiny picot to mimic serration. Fasten off leaving long tail for sewing. (Each leaf approx 7–9 cm long depending on tension.)
Info :
Make leaves in mossy green and slightly darker green for contrast. For a more sculpted look, work Round 2 and Round 3 in BLO to create a folded midrib, or add a central line of raised single crochets for vein definition.
Round 5 :
Optional reverse leaf: For leaves that sit flat under clusters, block them over a curved surface and sew the midrib to create a gentle curve. Make 10–14 leaves total: 2–3 under each large cluster and 1–2 under small clusters.
— Stems and Rope (Make 2 long vines for runner) :
Round 1 :
With mossy green, ch 200 (or desired vine length), sl st in 3rd ch from hook and each ch back along chain to make a thin rope (i-cord style). Fasten off leaving long tail for sewing. (This creates a twisted stem that sits on top of the lace.)
Round 2 :
Alternatively make a crocheted cord: Ch 4, work 3 rows of sc in back loops only along chain to form a flat tubular cord; fold and sew edges together to create a thicker stem. (Both methods give a neat raised stem.)
Info :
Steam or block the stem gently to remove kinks and make it lie flat on the runner. When attaching, curve stems naturally between flower groups and tack in place with discrete whipstitches using the same green thread.
— Beaded Strand Inlay :
Round 1 :
Thread a fine beading thread through 60–80 lightweight pearls (6–8 mm) and knot secure. Position bead strand on runner following the decorative diagonal lines or center path you worked earlier.
Round 2 :
Sew beads in place using beading thread: take a small stitch through mesh at each bead interval, anchor bead, then pass through underside and return to next bead. Keep beads lightly tensioned so they rest on top of the mesh without pulling it down.
Info :
Space beads evenly along the path. If beads create too much weight, use fewer beads or smaller sizes. Secure ends with knots on the underside and dab with a tiny drop of fabric glue for extra security if desired.
— Coaster Variant (Make 4 matching coasters) :
Round 1 :
Ch 22, join with sl st to form small ring (or start with magic ring). Ch 3 (counts as dc), work 11 dc evenly around ring, join with sl st to top of ch-3 (12 dc). (This is coaster centre.)
Round 2 :
Ch 1, sc in same st, *ch 3, sk next dc, sc in next dc; rep around to make a lacy mesh (12 ch-3 spaces). Join. (This creates the openwork similar to the runner mesh.)
Round 3 :
Ch3, in each ch-3 sp work (3 dc, ch2, 3 dc) to make small shells, join. (Coaster is starting to take scalloped form.)
Round 4 :
Sc around, placing 3 sc into each shell peak, sc in each st on the straight edges. (This evens the edge for a scalloped border.)
Round 5 :
With green: Edge with (sc, ch3, picot, sc) into each shell peak to create a tiny scallop. Fasten off and block. Make 4 coasters matching runner colors. Attach a single small lilac cluster (6–8 petals) to each coaster top as shown in photo.
Info :
Coasters are worked quickly; size can be adjusted by adding more shell rounds. Use same bead technique here for a small accent line if desired.
— Small Accent Buds (Make 6–10) :
Round 1 :
Ch 4, sl st to form ring. Ch1, 8 sc into ring, join. (Small dense bud center.)
Round 2 :
Ch1, into each sc: (sc, ch2, 3 dc, ch2, sc) to make tiny 8-petal ring. Fasten off leaving tail for sewing. (Used to fill gaps around larger clusters and on coasters.)
Info :
Use deep purple for most of these buds and scatter a few pale lilac blossoms for highlight. These tiny units add the impression of fullness in the clusters.
— Final Assembly :
Round 1 :
Lay your blocked runner on a large flat surface. Position the 5 large clusters and 3 small clusters as shown in the photos: one large cluster at center, two large clusters staggered above it, two large clusters staggered below, plus three small clusters near ends. Place leaves under clusters so they slightly peek out. Pin all pieces in place.
Round 2 :
Sew clusters: Using matching thread and long tails from cluster backings, whipstitch clusters to the runner through the backing fabric and into the lace mesh. Use many small stitches around the backing, catching multiple runner threads so clusters feel secure. Sew through several mesh loops to avoid tearing the lace when the runner is handled.
Round 3 :
Attach stems: Position the long beaded and plain green stems so they run naturally from cluster to cluster. Tack stems down with small whipstitches at 2–3 points along each vine, hiding knots under cluster bases and at leaf junctions.
Round 4 :
Sew beads: If you mounted beads separately, tack the bead strand along the marked path now using fine beading thread and discreet stitches. Make sure beads are centered between the mesh openings and do not snag on the edges of shells.
Round 5 :
Finishing touches: Sew small accent buds between larger petals to hide visible backing stitches. Weave all tails into the underside of the runner and trim close. Add a few extra securing stitches through cluster centers and leaf tips if any movement is felt.
Info :
Before final trimming, place the runner on your table and check the visual balance. Move any cluster slightly and resew if composition looks off. When satisfied, wash gently and press if desired, or reblock for final shaping.
— Care & Storage :
Info :
Hand wash in cool water with gentle detergent. Reshape while damp and lay flat to dry. Avoid ironing directly over beads or petals; use steam from a distance or press through a cloth if necessary. Store flat or rolled with acid-free tissue to preserve 3D petals and pearls.
Info :
Optional customization ideas: Make a shorter runner by reducing mesh repeats, or make matching napkin rings using small clusters and leaf motifs. Swap colors for seasonal variations (whites/pinks for spring, deep burgundy for autumn).
This vintage lilac table runner pattern brings together delicate lacework and dimensional floral appliques for a truly special heirloom-quality project. Each tiny petal and pearl adds personality and charm, and the finished runner makes a lovely centerpiece for tea, brunch, or special occasions. I hope you enjoy the meditative process of crocheting petals and arranging clusters as much as I do — every stitch is a love note to the table it adorns. 🧶🌸✨