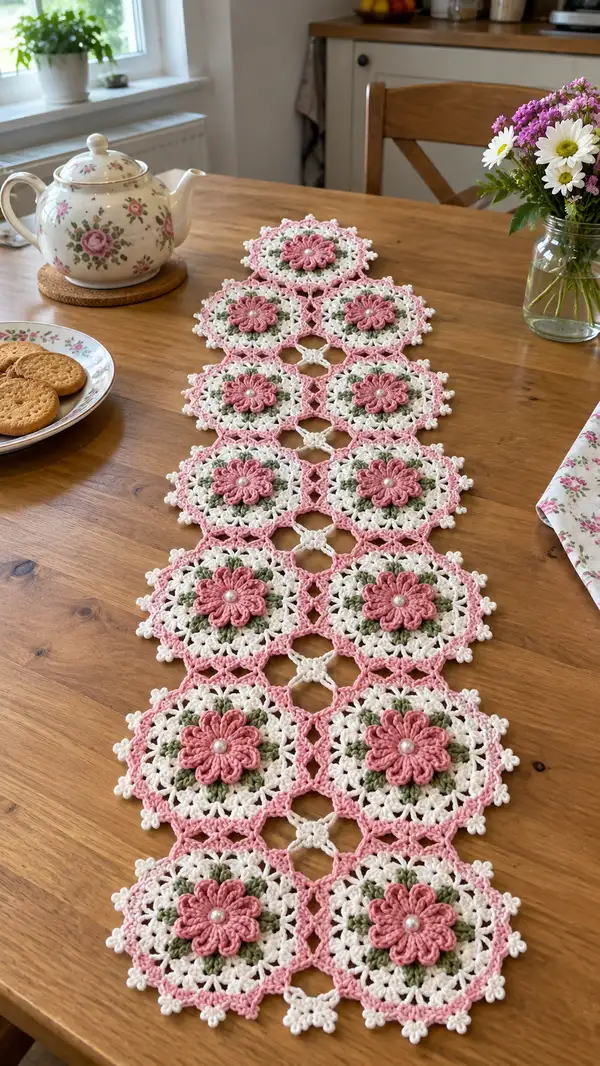
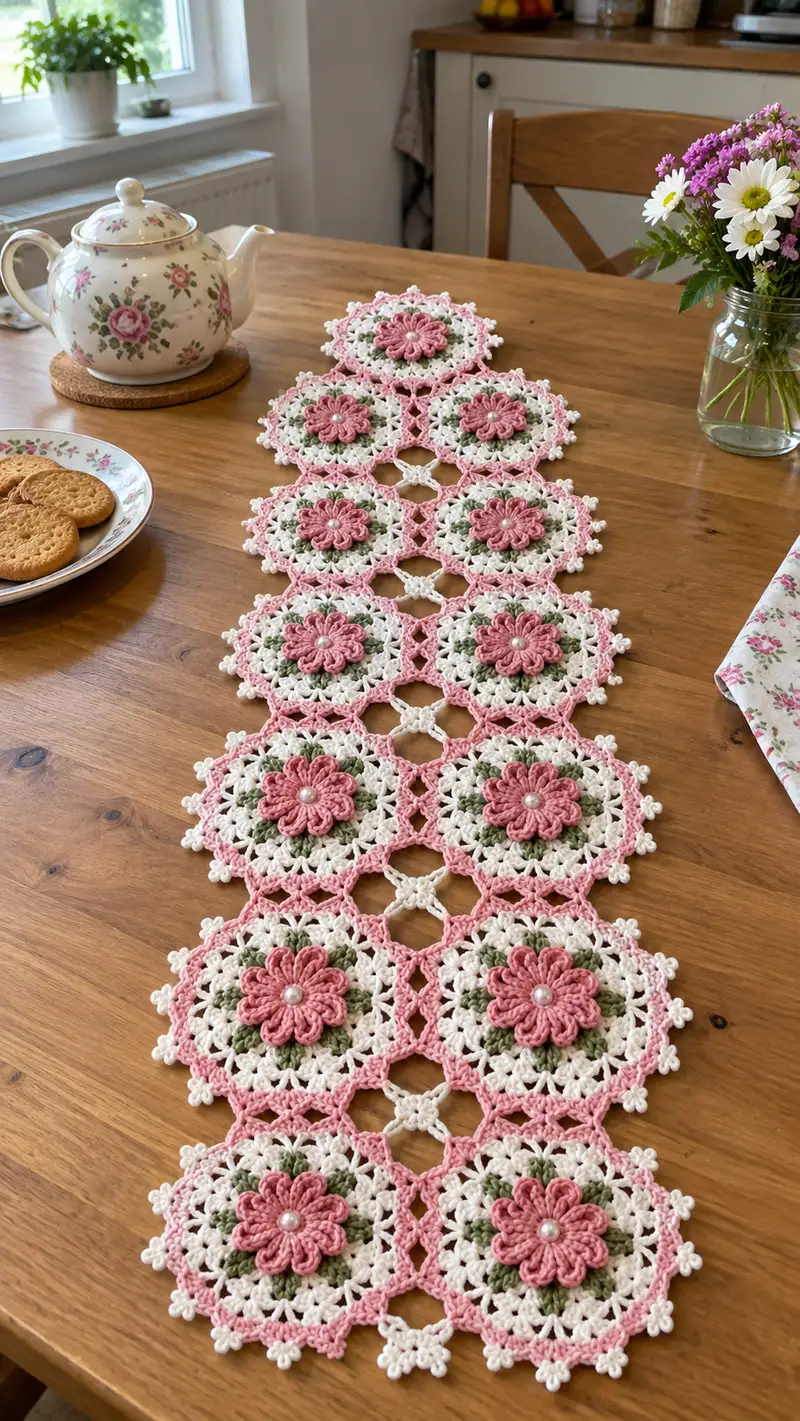
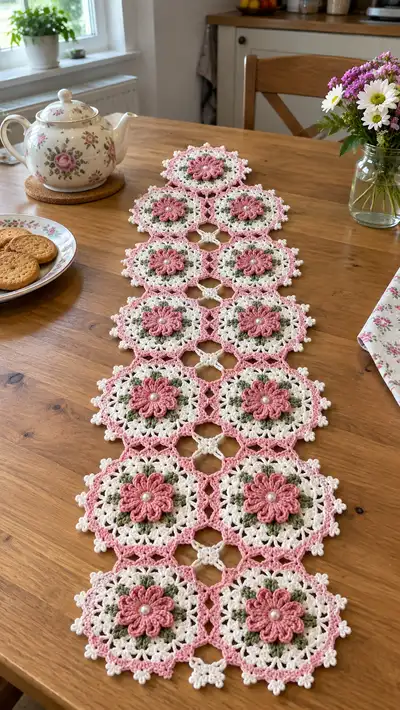
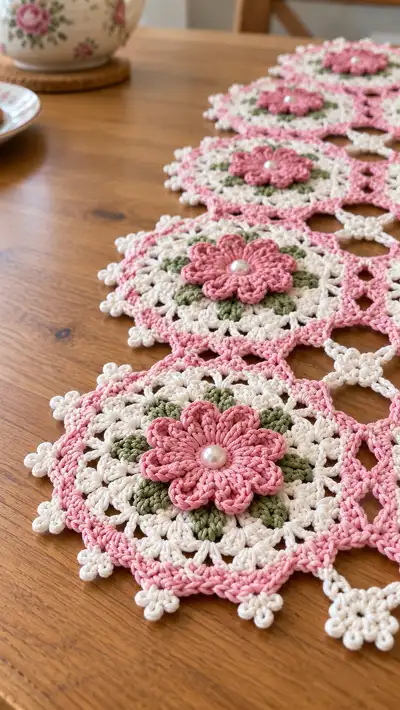
A delicate floral hexagon table runner worked in soft rose pink, cream and sage green cotton. Each hexagon medallion features a raised 8-petal flower center with a pearl bead, surrounded by open lacy rounds and finished with a scalloped pink edge. The medallions are joined with tiny quatrefoil connectors to create a long elegant runner that looks beautiful on a wooden table or dresser.
Progress Tracker
0% Complete
— Overview :
Info :
This runner is built from floral hexagon medallions. Work each medallion (called Motif) following rounds below, blocking each motif before joining where possible. Join motifs using join-as-you-go (JAYG) connectors described in the Join section, then finish with the continuous scalloped border.
— Motif — Make 9 (or desired number) :
Info :
Each motif is constructed in color order: center dusty rose (petals), change to sage green for leaves, change to cream for lacy body, finish with dusty rose scallop. Use a 3.25mm hook. Each finished motif measures approximately 11-12 cm / 4.25-4.75 inches across (unblocked). Block motifs to 11.5 cm for consistent joining.
Round 1 :
mr, ch1, 8 sc in ring, sl st to first sc to join (8)
Round 2 :
ch2 (counts as first hdc), hdc in same st, 2 hdc in each st around, sl st to top of ch2 (16)
Round 3 :
ch1, sc in same st, (ch3, sk next st, sc in next) x8 to create 8 ch3 loops around the center (8 ch-3 loops)
Info :
These ch-3 loops will become the base for the raised petals worked as puff or elongated stitches in dusty rose. Join dusty rose yarn with a sl st into any ch-3 loop to begin petals.
Round 4 (Petal base) :
Join dusty rose. *Into one ch-3 loop: (ch2, 7-tr-puff cluster) — work 7 yarn-over pulls into same loop leaving last loop on hook, yo and pull through all loops, ch1 to close petal; sl st into next ch-3 loop* repeat around to create 8 puff petals, sl st to base of first petal (8 petals)
Round 5 :
ch1, sc around working 2 sc between each petal to stabilize: (2 sc between petals) x8 (16)
Info :
When working puff clusters, keep each petal consistent in height: use the same number of yarn-over pulls and the same tension. If you prefer, substitute 8 dc clusters instead of puff clusters for a simpler look.
Round 6 (Transition to leaves) :
Change to sage green. Join with sl st to the back of a petal base, ch2, 2 dc in same st, ch1, sk 1, *(3 dc cluster around base of next petal, ch1, sk1)* repeat around to form 8 small leaf clusters, sl st to top of ch2 (8 leaf clusters)
Round 7 :
ch1, sc in each dc and ch1 space around, working 2 sc in each ch1 space to round out leaves (24)
Info :
At this point the motif should have a raised petal ring with small sage leaf clusters that peek out between petals. Adjust stitch counts if your leaf clusters look too tight; the goal is even spacing for the next lace round.
Round 8 (Switch to cream) :
Change to cream. Join in any sc. ch1, sc in same st, (ch3, sc skipping next 2 sts) x12 creating 12 ch-3 loops around (12 ch-3 loops)
Round 9 :
Into each ch-3 loop: (3 dc, ch2, 3 dc) shell; sl st to first dc to join — shell count =12 shells (12 shells)
Round 10 :
ch1, sc in top of first shell, (ch2, sk next shell, sc in next) x12 forming 12 chain spaces between shells (12 ch-2 spaces)
Info :
These shells create the primary lacy body of the motif. Keep your tension even; the chain spaces will later be connection points when joining motifs.
Round 11 :
In each ch-2 space: (ch3, 2 dc, ch3) in same space to create taller arched loops—this increases the openwork (work 12 arches) (stitch count variable but each arch occupies ch-2 space)
Round 12 :
ch1, sc in top of first arch, *(ch4, sk arch, sc in next arch top)* repeat around to create 12 ch-4 loops (12 ch-4 loops)
Round 13 :
Into each ch-4 loop: (2 dc, ch2, 2 dc) shell — 12 shells (12 shells)
Info :
Round 11-13 create a multi-layered lacy effect which gives the motif body its open texture. Count loops and arches carefully to keep 12 repeats—this will align with the outer hexagon shaping.
Round 14 (Begin hexagon shaping) :
ch1, sc across first shell top (work 3 sc across each shell top), *(ch3, sk next 2 shells, 3 sc across next shell top)* repeat 3 times to form first hexagon side; continue around for 6 sides total. After working entire round you should have 72 sc and 6 ch-3 corner loops (72 + 6 corner loops)
Round 15 :
Into each ch-3 corner loop: (ch3, 2 dc, ch3) to establish corner arch; sc evenly across side between corners—aim for 12 sc between corners. After completing round total equals 6 corner arches + ~72 sc across sides (approx 78-84 sts depending on exact spacing)
Info :
We are forming a hexagon outline around the circular lacy motif by adding four- or five-stitch sides joined with corner arches. The stitch numbers along sides can vary slightly; keep spacing even and count 6 equal corners.
Round 16 (Outer cream stabilization) :
ch1, sc in each st and 3 sc in each ch-3 corner arch to stabilize the hexagon edge (approx 96-102 sc total). This builds a consistent base for the pink scallop edge.
Round 17 (Change to dusty rose) :
Change to dusty rose. Join with sl st to any sc. ch1, sc in same st, *(ch4, sk 6 sc, sc in next sc) repeat around creating small open arches between scallop points. Count to ensure 24 ch-4 loops around (24 ch-4 loops)
Round 18 :
Into each ch-4 loop: (sc, picot, sc) where picot = ch3, sl st into base of ch3 to create tiny picot bump; this produces picot clusters around edge. Result: (sc-picot-sc) x24 (48 sc plus 24 picots)
Info :
Round 18 forms the delicate 'bobbles' and picots visible on the outer edge in the photo. Work picots gently and consistently. If you prefer a smoother scallop, replace picot with 3 sc.
Round 19 (Scallop finalizing) :
ch1, *(5 dc in next sc, sl st in next sc)* repeat around to make scallops over every second position — aim for 12 scallops evenly spaced. Finish with sl st to join.
Round 20 (Edge picot beading) :
ch1, sc evenly around working a small 3-ch picot at points between scallops to create tiny clustered bobbles that resemble photo's small 3-loop clusters (count ~36 picots). Fasten off and weave in ends.
Info :
Sew a pearl bead to the center of each motif using a small hand-sewing needle with matching thread; secure knot inside back of motif and hide tail by weaving into adjacent stitches. Block motif flat with pins to desired shape before joining.
— Small Square Connector Motifs (Make connectors for JAYG) :
Info :
Between each pair of hexagon motifs there are small 4-armed quatrefoil connectors made in cream. Work these in batches as you join motifs using join-as-you-go to create the lattice seen in the photo.
Round 1 :
mr, ch1, 8 sc in ring, sl st to join (8)
Round 2 :
ch2, hdc in same st, *ch2, sk1, hdc in next* repeat to form 4 ch-2 arms; sl st to join — small quatrefoil base (4 arms)
Round 3 :
ch1, sc around each arm and in spaces creating tiny 8 sc round; finish with small picots on each arm tip (8 sc + 4 picots)
Info :
These connectors are joined into the hexagon edges during the Join-as-you-go rounds. You will work them when the adjacent motif round provides chain loops to sl st into; details in Join section below.
— Join-as-you-go (JAYG) Instructions :
Info :
Arrange finished motifs in your desired linear layout (photo shows a single-file runner of 9 hexagons). Connect motifs using the small quatrefoil connector method: on the final cream stabilization round of motif A, where ch-spaces appear at edge, you will sl st the connector into those spaces while you complete the round of motif B, effectively joining them without sewing later.
Join Step 1 :
Work motif 1 through Round 16 and block. Work motif 2 through Round 15. On motif 2 Round 16 when you reach a specific corner ch-3 loop where it should meet motif 1, instead of working 3 sc in that ch-3 loop alone, hold motif 1 adjacent and sl st into the corresponding sc or chain space of motif 1, then complete the 3 sc in motif 2 — this creates permanent joined points. Repeat at each corner and every designated joining loop for a total of 6 strategic joins per motif edge that meets another motif.
Join Step 2 :
When joining side edges (not corners) use the ch-4 or ch-2 loops from motif A and motif B: bring motif edges together ensuring loops align, and sl st motif 2's loop into motif 1's loop (sl st through both loops) then continue pattern on motif 2. This provides a flat bridge and tiny quatrefoil openings visible between motifs.
Info :
Place pins to hold motifs in place before joining; move slowly and use stitch markers to mark corresponding joining loops. Always keep right sides facing up when joining. Work evenly to keep runner flat.
— Linear Join Sequence (example for runner of 9 motifs) :
Info :
Start by laying out motifs 1–9 in order. Join motif 2 to motif 1, then join motif 3 to motif 2, and so on. After each join, press lightly with steam-blocking to set the join. Leave outer edges unjoined for final continuous border.
Join Round 1 :
On motif being joined, at each of the middle-of-side ch-4 loops (Round 17 ch-4 loops) sl st into corresponding ch-4 loop of adjacent motif before completing the sc shell; do this three times along the side to achieve even connection (total 3 sl sts per side connection)
Join Round 2 :
At the corner arches, sl st motif 2 corner arch to motif 1 corner arch by inserting hook through both arches and completing a sl st. Repeat for all corners that match up between motifs. This forms the diamond openings between hexagons visible in the runner.
Info :
The result after joining should leave a repeating small diamond opening with a tiny four-petaled cluster at each intersection if done correctly. Re-block motifs after joining each set of 2-3 motifs to keep shape consistent.
— Final Continuous Scalloped Border Around Runner :
Info :
After all motifs are joined in a single-file runner and connector holes are complete, you will work a continuous border around the entire assembly to tidy joins and add finished scallops. Use dusty rose and cream as shown for a layered edge: first stabilization round in cream, final scallop in dusty rose.
Border Round 1 (Stabilize joins) :
With cream yarn and 3.25mm hook, join at any outer edge sc. ch1, sc evenly around entire runner working 1 sc in each visible stitch and 3 sc in each corner arch where motifs meet to create even placement (stitch count variable; aim for even coverage). Sl st to join and do not fasten off.
Border Round 2 :
ch3, dc in same st, *skip 2 sc, (3 dc, ch2, 3 dc) in next sc (to form shell), skip 2 sc, dc in next sc* continue around to place scallop shells spaced evenly at the outer points. Adjust spacing to have shells centered on each motif side and corner (approx 1 shell per motif-side). Sl st to join.
Info :
Check alignment frequently: lay runner flat and make sure scallops land centered on outermost motif edges. If you need to increase or reduce shells slightly to match spacing, make small adjustments in number of skipped sc.
Border Round 3 (Dusty rose scallop) :
Change to dusty rose. Join with sl st into top of a shell. *(5 dc in center of cream shell, sl st in base between shells)* repeat around to form prominent scallops on dusty rose. Sl st and fasten off.
Border Round 4 (Edge picot trim) :
With cream, join and sc around the edge, making a small picot (ch3, sl st into base) at each scallop tip to mirror the motifs' outer picots and create continuity. Fasten off and weave in ends.
Info :
For extra crispness, lightly steam-block with pins to set scallops and picots in position. Use a low-heat steam and do not press yarn too hard to avoid crushing petals.
— Finishing Touches :
Info :
Sew a pearl bead into the center of each dusty rose petal flower. Use small stitches to anchor the bead firmly; tie off thread on underside and weave in. Trim any remaining yarn ends. Give the runner a final blocking to set shape.
Care Instructions :
Hand wash cold in mild detergent, reshape and lie flat to dry. Avoid tumble drying. Pearls should be removed if you intend to launder aggressively; consider sewing them on with removable thread if laundering often.
Info :
If you want a longer runner, simply make more motifs and continue joins using the same pattern. For a table centerpiece width, create two columns and adapt the join pattern to create a wider panel.
Congratulations — you now have a beautiful vintage-inspired rose hexagon runner that adds a touch of handmade elegance to any table! Each motif came together to form a flowing line of petals, leaves and lacy edges, finished with delicate pearls for a charming center. Enjoy the satisfaction of a polished, heirloom-style piece you can display proudly or gift to someone special. 🧶🌸✨