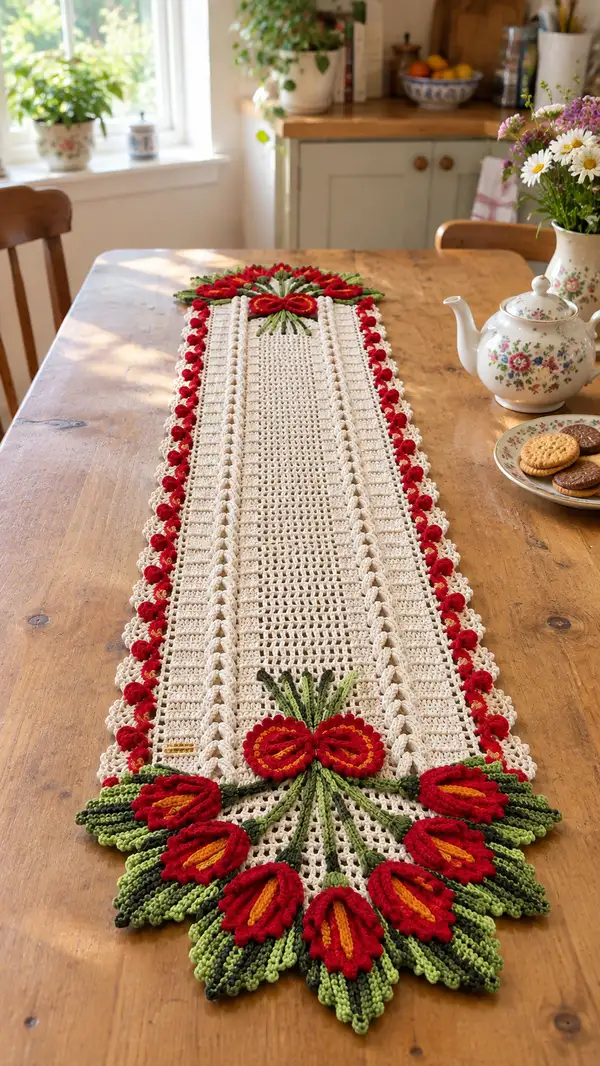
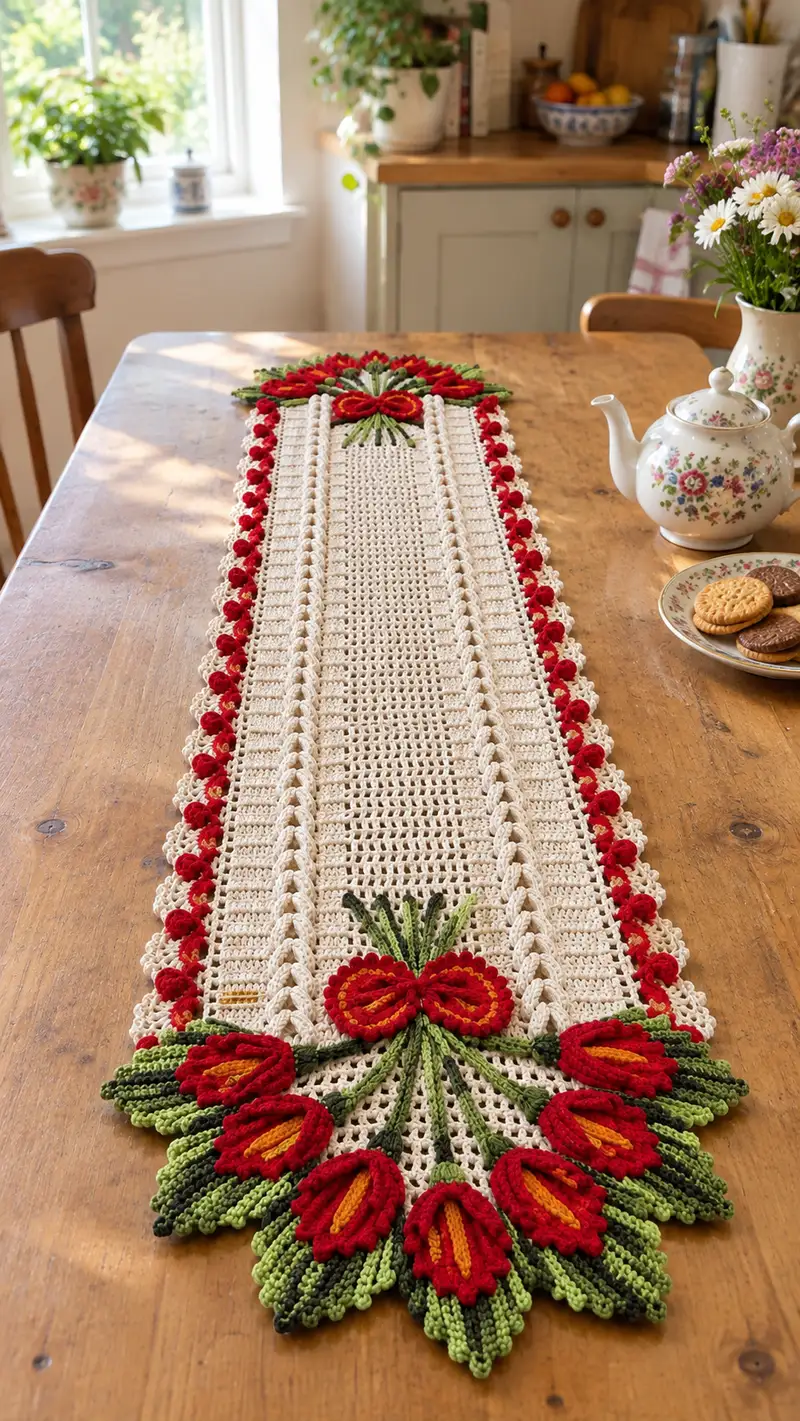
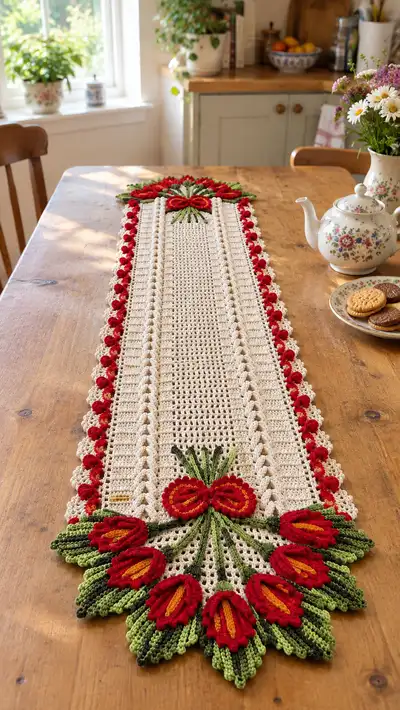
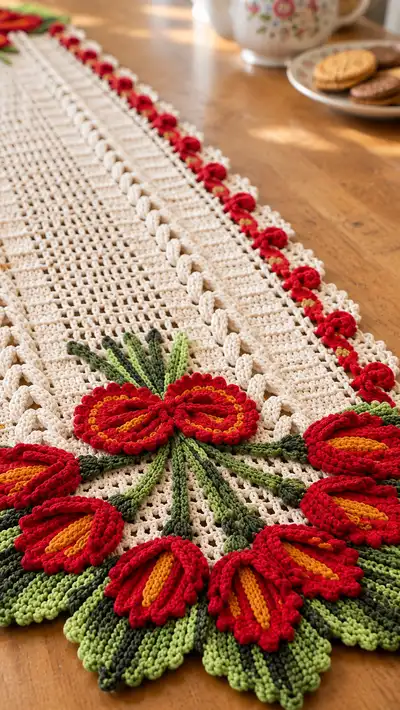
A long, elegant table runner featuring rich red tulip appliques and a creamy openwork central panel. The design pairs twisted rope columns and delicate scalloped edges with a row of tiny red rosettes for a classic, vintage-inspired finish. Perfect for dining tables, buffets, or a special seasonal display.
Progress Tracker
0% Complete
— Notes & Gauge :
Info :
Gauge is not critical for length, but for fabric drape you should have approximately 10 dc = 4 inches in worsted weight cotton with 4.0mm hook. The pattern is worked flat in rows for the central panel and worked appliques are sewn on afterwards. Keep tension consistent and block the central panel lightly before attaching appliques for best results.
— Materials Prep :
Info :
Prepare yarn bobbins or small cake balls for red, gold and greens. Label pieces to avoid color mix-ups while working multiple petal sets. Use stitch markers to mark three vertical column boundaries on the first row (left rope column, right rope column, and center panel division).
— Central Panel (work flat - counts shown per row) :
Foundation :
Ch 123 (this yields 120 dc across after turning ch-3). Turning ch-3 counts as first dc. (Total sts each row = 120)
Row 1 :
Dc in 4th ch from hook and in each ch across to end. (120 dc)
Row 2 :
Ch 3, turn, dc in each st across. (120 dc)
Row 3 :
Ch 3, turn. Work 12 dc for left sash, then work column A (6 sts) for left rope start: FPDC around next 6 stitches as [FPDC around next st, BPDC around next st] repeating to create a reversible textured column, then work center panel 84 dc, then mirror column A for right rope (6 sts), then 12 dc for right sash. (120 sts total)
Info :
Mark the first stitch of the row with a removable marker; keep the three column boundaries (left sash = 12 sts, left rope = 6 sts, center = 84 sts, right rope = 6 sts, right sash = 12 sts) constant. This division stays constant throughout central panel rows so appliques and edges align perfectly.
Row 4-8 :
Ch 3, turn. Work 12 dc (left sash), then for left rope column work repeat pattern: [FPDC, BPDC] across 6 sts (i.e., 3 FPDC and 3 BPDC arranged to create twist), then 84 dc across center, then mirror rope column (6 sts), then 12 dc sash. (120 sts each row)
Info :
For a more pronounced rope, on odd-numbered rows make the post stitches alternate in order so columns appear to spiral slightly: e.g., Row 3: FPDC in odd positions, Row 5 reverse with BPDC then FPDC to offset the texture.
Row 9 :
Ch 3, turn. Create a subtle openwork center to lighten the runner: Work 12 dc (left sash). For left rope, continue textured column in post stitches across 6 sts. Now in the center 84 sts work pattern repeat across: [dc, ch 1, sk 1] across to make a netting effect — work *dc in next, ch 1, sk 1* rep across total 84 sts (this will create 42 dc and 42 ch-1 spaces). Finish with rope column and sash. (120 sts)
Row 10-14 :
Ch 3, turn. Repeat Row 4 texture for rope columns and Row 9 filet netting across the center (i.e., alternate solid rows with netting rows) to build a gentle openwork body. Keep totals 120 sts each row.
Info :
Alternate 4 solid dc rows then 1 netting row across the center panel to match photos: this provides rectangle bands of denser fabric separated by airy mesh segments. Keep rope column post-stitch sequences consistent and always work the same number of posts into the 6-st column.
Row 15-24 :
Continue pattern: 4 rows solid (dc across), 1 netting row (dc,ch1,sk1 sequence), repeating this block until you have completed 24 total rows across the panel. Maintain 120 sts each row and keep rope columns in FPDC/BPDC alternation to maintain the twisted appearance.
Info :
At this point your runner’s body is forming and will show parallel textured rope columns with an open center. If you prefer a longer runner, repeat the solid/netting block more times before proceeding to the decorative side border rounds. Measure to ensure the runner length suits your table.
Row 25-32 :
Work 8 rows solid (dc across all 120 sts) to create a longer central section while keeping rope columns prominent. Keep stitches tight so the fabric remains stable under appliques later. (120 dc each row)
Info :
If adding a second smaller filet motif in the center, replace Rows 29-30 with two rows of filet pattern and then return to dc rows. Make notes on charting any motif changes for symmetry.
Row 33-40 :
Repeat the previous openwork block: 4 rows dc, 1 row filet (dc,ch1,sk1), alternating for a total of 8 rows. This gives a balanced banding along the runner. (120 sts)
Info :
Count your rows: when you reach roughly two-thirds of your intended runner length you will add the short rows that transition into the scalloped edging; place markers at the midpoints of the runner to help align the end appliques later.
Row 41-50 :
Work 10 solid dc rows to stabilize and create a flat area for appliques to be sewn. Maintain rope columns using FPDC/BPDC patterns. (120 dc each row)
Row 51-56 :
Work 6 rows alternating: 2 rows dc, 1 filet row, 1 dc row, 1 filet row, 1 dc row. This helps visually step down towards the end star where tulip appliques will attach. (120 sts)
Info :
Fasten off the central panel if you prefer to work both ends separately; otherwise continue to full length. For the photographed runner the central panel length is approximately 56 rows of the established pattern before edging and appliques are added. Block the central panel lightly on a flat surface to even out stitches and set shape before attaching decorations.
— Side Rope Columns (worked as part of panel but described for texture detail) :
Info :
Each rope column occupies 6 stitches and is shaped entirely with front and back post double crochet. The sequence below shows a 6-row repeat that creates a twisting rope appearance when offset on alternating rows.
Repeat Pattern Rows 1-6 :
Row A: FPDC, BPDC, FPDC, BPDC, FPDC, BPDC across the 6-st column (6 post stitches)
Row B :
On the next row, reverse the sequence: BPDC, FPDC, BPDC, FPDC, BPDC, FPDC (6 post stitches), so that the posts cross and appear to spiral when viewed along multiple rows.
Row C :
Return to Row A pattern for the next row, repeating A/B alternating for the length of the panel. (6 post sts per column per row)
Info :
When working the first post of a column at the start or end of a row, make sure to orient your hook in the preceding stitch foundation so post stitches are even; insert hook around the post of the indicated stitch from front to back for FPDC and from back to front for BPDC.
— Side Sash (12 sts each side) :
Row 1-56 :
Work 12 dc at the outermost edges each row (these are the 12-st sidings). For visual interest, on every 6th row work 12 dc in BLO to create a subtle ridge along the outer edge. (12 sts per side)
Info :
The BLO ridge at every 6th row helps the edge hold the scalloped edging later and creates the slight raised ladder effect visible in the photograph. Keep the sash consistent and square to avoid flaring edges.
— Rosette Border (make multiple; attach along both long edges) :
Info :
Small red rosettes are spaced along both long edges in the photo; each rosette is worked separately and sewn through the outermost chain loops. Plan to make approx. 20-24 rosettes per side depending on your final runner length; spacing is approx every 4-5 sts along edge.
Rosette - Round 1 :
With red and 3.5mm hook: ch 6, join with sl st to form a ring. (6 ch)
Rosette - Round 2 :
Ch 1, 8 sc into ring, join with sl st to first sc. (8 sc)
Rosette - Round 3 :
Ch 1, *sc in next st, ch 2, 3 dc in next st, ch 2, sc in next st* around to create small petals, join. (3 small petals, repeating pattern as needed to sit neatly)
Rosette - Round 4 :
Ch 1, work 6 sc around the base to form a neat button; fasten off leaving tail for sewing. (6 sc)
Info :
Sew each rosette to the outermost sash stitches along the runner, spacing approximately every 4 sts. Use contrasting golden thread to secure center if desired to mirror tiny golden centers in the image.
— Scalloped Outer Edge (worked after rosettes attached) :
Round 1 :
Join cream yarn at corner of runner outermost stitch. Ch 1, sc evenly across the outermost loop across the long edge (work approx 120 sc across the long side to create a neat edge; count will vary by blocking). For corners work 3 sc in corner sts to turn the edge smoothly. (approx 120 sc)
Round 2 :
*Skip 2 sc, 5 dc in next sc (shell), skip 2 sc, sc in next sc; rep from * across the long edge. For corner shells work 7 dc in corner. Fasten off. This creates scallops between which rosettes rest visually. (approx 20-24 shells)
Info :
Place rosettes by sewing them into the space between shells so each rosette sits snug against the scallop ridge. Block scallops gently to shape shells into even curves before final sewing.
— Tulip Appliques (Make two identical fan clusters, one for each end) :
Info :
Each end features a fan of 9 tulips (in the photographed runner) with overlapping leaves and a central bow. The following sections describe creating the tulip inner center (gold), outer petal (red), folded petal assembly, long leaves and short leaves. Make 9 tulips per end or adjust quantity to taste.
— Tulip Inner Petal (center seam - golden) :
Petal - Row 1 :
With golden yarn and 3.5mm hook: ch 18. (18 ch)
Petal - Row 2 :
Sc in 2nd ch from hook and across to end (17 sc). Turn. (17 sc)
Petal - Row 3 :
Ch 1, sc across, dec at last 2 sts (sc2tog) to create slight taper at tip. (16 sc)
Petal - Row 4 :
Ch 1, sc across, dec at end again every 3rd row until you have a slightly tapered strip of approx 12-14 rows long total; fasten off leaving long tail for sewing. The finished strip will be folded into the tulip center and sewn to hold shape. (final length approx 12 sc rows)
Info :
This narrow golden strip forms the inner 'tongue' of the tulip. It is lightly shaped by tapering the ends and folding slightly lengthwise so it nestles inside the red outer petal when assembled.
— Tulip Outer Petal (red folded shell) :
Petal - Row 1 :
With red yarn and 3.5mm hook: ch 22. (22 ch)
Petal - Row 2 :
Sc in 2nd ch from hook and across to end (21 sc). Turn. (21 sc)
Petal - Row 3 :
Ch 1, sc in first 3 sts, *hdc in next 2 sts, dc in next 6 sts, hdc in next 2 sts, sc in next 8 sts* — this sequence builds a gentle dome; turn. (21 sts total)
Petal - Row 4 :
Ch 1, sc in first 3 sts, *sc in hdc, dc in dc row to accent column, sc across last 8 sts*; repeat shaping for three more rows to create a thickened ruffled outer edge. (21 sts)
Petal - Row 5-7 :
Repeat Row 4, then work Row 8 making the outermost edge with a picot/loop: (sc, ch 3, sl st back into sc) across last 6 sts to create a folded scallop. Fasten off leaving a long tail for sewing. The red petal should be pliable for folding around the golden center and creating a layered tulip shape.
Info :
Make petals a bit longer than the inner golden strip so the gold peeks out. Block petals flat and press lightly with your fingers or a warm, dry iron through a cloth if needed to flatten before assembly.
— Petal Assembly (folding + seaming) :
Step 1 :
Fold the red petal lengthwise so the domed dc section becomes the outer rounded face; fold the base slightly to form a cup. Place the golden strip inside the cup with a little of the gold protruding at the tip to mimic the natural tulip tongue.
Step 2 :
Sew the petal base through three evenly spaced stitches across the base with matching yarn and yarn needle; pull stitches gently so the petal cups around the gold center. Fasten off, weave in ends. Repeat for each tulip (9 per end if following photo). (assembly step)
Info :
Pin petals to a small piece of scrap card or use a tiny dab of fabric glue inside the base to temporarily secure shape while sewing. Tuck the golden strip slightly inside the red shell so the gold centers appear nestled and natural.
— Tulip Stem / Connector (green) :
Stem - Row 1 :
With dark green and 3.5mm hook: ch 40 for a long stem piece per tulip cluster (adjust length for placement). Work 1 sc in 2nd ch from hook and 1 sc in each ch across to make a narrow cord (39 sc). Fasten off leaving long tail for sewing. (39 sc)
Info :
Stems are worked as flat cords and sewn in a radiating fan at the end of the runner. For a thicker stem you can work a 3-strand braided cord of 3 slim sc strips and then twist them; the flat sc cord is easier to sew and lies flatter under appliques.
— Long Leaf (variegated green; make 9 larger leaves per end) :
Leaf - Row 1 :
With light green and 3.5mm hook: ch 26. (26 ch)
Leaf - Row 2 :
Sc in 2nd ch from hook, sc across to end (25 sc). Turn. (25 sc)
Leaf - Row 3 :
Ch 1, sc in first 3 sts, hdc next 4 sts, dc next 10 sts, hdc next 4 sts, sc last 4 sts. (25 sts) This shapes the center into a pointed leaf with a tall middle section.
Leaf - Row 4 :
Repeat Row 3 once more to bulk the leaf, then work a symmetrical decrease row: sc across but dec 1 st evenly near each tip edge to form a tapered end. Fasten off leaving tail for sewing. Block leaf into a point for a crisp look.
Info :
Alternate colors for the leaves on each tulip: make the inner leaves darker green and outer leaves lighter to mimic the variegation in the photo. Use 2 rows of dark green at the base of each leaf then switch to light green to create an ombre effect if desired.
— Short Leaf / Sepal (dark green little caps at base of petals) :
Sepal - Row 1 :
With dark green and 3.5mm hook: ch 10. (10 ch)
Sepal - Row 2 :
Sc in 2nd ch from hook and across (9 sc). Turn. (9 sc)
Sepal - Row 3 :
Ch 1, sc across then dec at last 2 sts to form a point. Fasten off leaving tail. Make one sepal for each tulip and sew it snugly at the petal base to create a natural transition to the stem.
Info :
Sew the sepal to the underside of each red petal cluster and then stitch the stem behind the sepal so the sepal wraps the stem visually, hiding the seam where petal and stem attach.
— Bow Motif (center fan tie) :
Bow - Part A (loop petals) :
Ch 14 with red, sc in 2nd ch from hook across (13 sc), work 4 rows sc to make a small rectangle, then fold and seam short ends to form two loops. Stuff slightly with a small bit of fiberfill if you want a puffed bow. Make two loops and position crossing as in photo.
Bow - Part B (center knot) :
Ch 6, sc across to make narrow band, wrap around the center of bow loops and sew snugly on the underside. Fasten off and weave ends. Attach the completed bow at the middle of the fan to anchor the stems visually.
Info :
The bow is decorative and sits between two groups of tulip stems. Use matching red yarn so it reads as part of the floral cluster; you can add a few gold braided stitches on the knot for a vintage flourish.
— Leaf Vein Detail (optional embroidery) :
Info :
Using a tapestry needle and dark green yarn, embroider central veins on each leaf with a simple straight stitch. Start from leaf base and stitch toward the tip with evenly spaced short stitches to mimic the ribbed look visible in the photographs.
— Assembly Prep :
Info :
Block central panel to flatten and square the edges. Lay the panel flat on a blocking surface with the long edges aligned. Arrange the tulip fan clusters at each end and place the bow in the center of each fan. Pin leaves and stems in a radiating pattern so the tulip heads overlap slightly and the leaves sit beneath them.
— Sewing Appliques (detailed placement) :
Step 1 :
Position the stems so the point where all stems join aligns with the last solid dc row at the end of the central panel (Row 56 in the written pattern). For symmetry, measure the runner width and center the fan on the middle of the width (i.e., centered across 120-st width). Pin stems and sew through the flat sc cord into the panel’s base stitches using small whip stitches spaced 3-4 mm apart to secure.
Step 2 :
Position each tulip with 1-2 cm overlap between adjacent flowers. Sew each petal base and sepal to the panel with small hidden stitches using the long tails left during petal construction. Anchor the center knot/bow over the sewn base to hide seam ends.
Info :
Sew leaves so they slide under the tulip petals and create layered depth. Use a few small gathering stitches at the leaf base to give a cupped shape if desired. Reinforce stems with additional stitches at the seam point to make the appliques durable for table use.
— Final Edge Finishing :
Step 1 :
With cream yarn, pick up loops along outermost rows and work a final sc round to neaten the edge if you have not already. Make sure all rosettes and appliques are securely sewn prior to this finishing round to avoid catching them in the final edge stitches.
Step 2 :
Work the scalloped shell round described earlier (skip 2, 5 dc shell, skip 2, sc) around the entire runner. At corners increase the shell to 7 dc into the corner stitch to allow for a smooth turn. Fasten off and weave in all ends.
Info :
Gently steam block the entire runner flat to even the shells and smooth appliques. Use rust-proof pins to shape shells and leaves while the piece cools. This will give the runner its finished crisp presentation.
— Care & Maintenance :
Info :
Wash the runner gently by hand in cool water with mild detergent and reshape on a flat surface. Avoid wringing. If you have glued any small accent (not recommended), avoid immersion and instead spot clean. Store flat or rolled to prevent creasing of applique petals.
Completing this vintage tulip table runner is such a rewarding project — the crisp cream panel and joyful red tulips come together into a show-stopping centerpiece. The textured rope columns and scalloped border give it a handcrafted, heirloom quality perfect for special occasions or everyday warmth. I hope you enjoy the step-by-step process and the beautiful results as much as I do. 🧶🌷✨