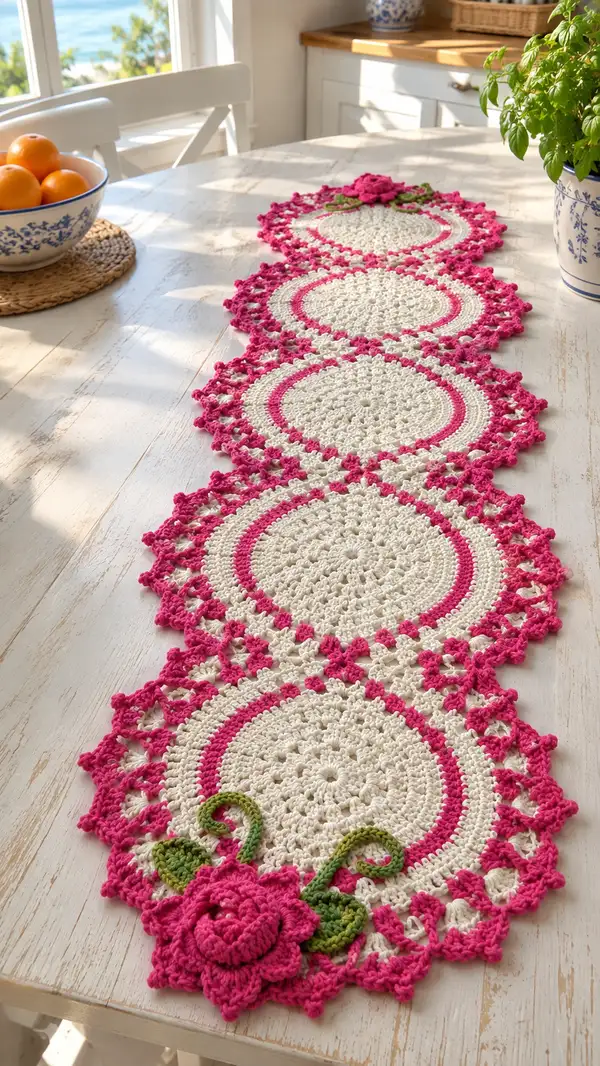
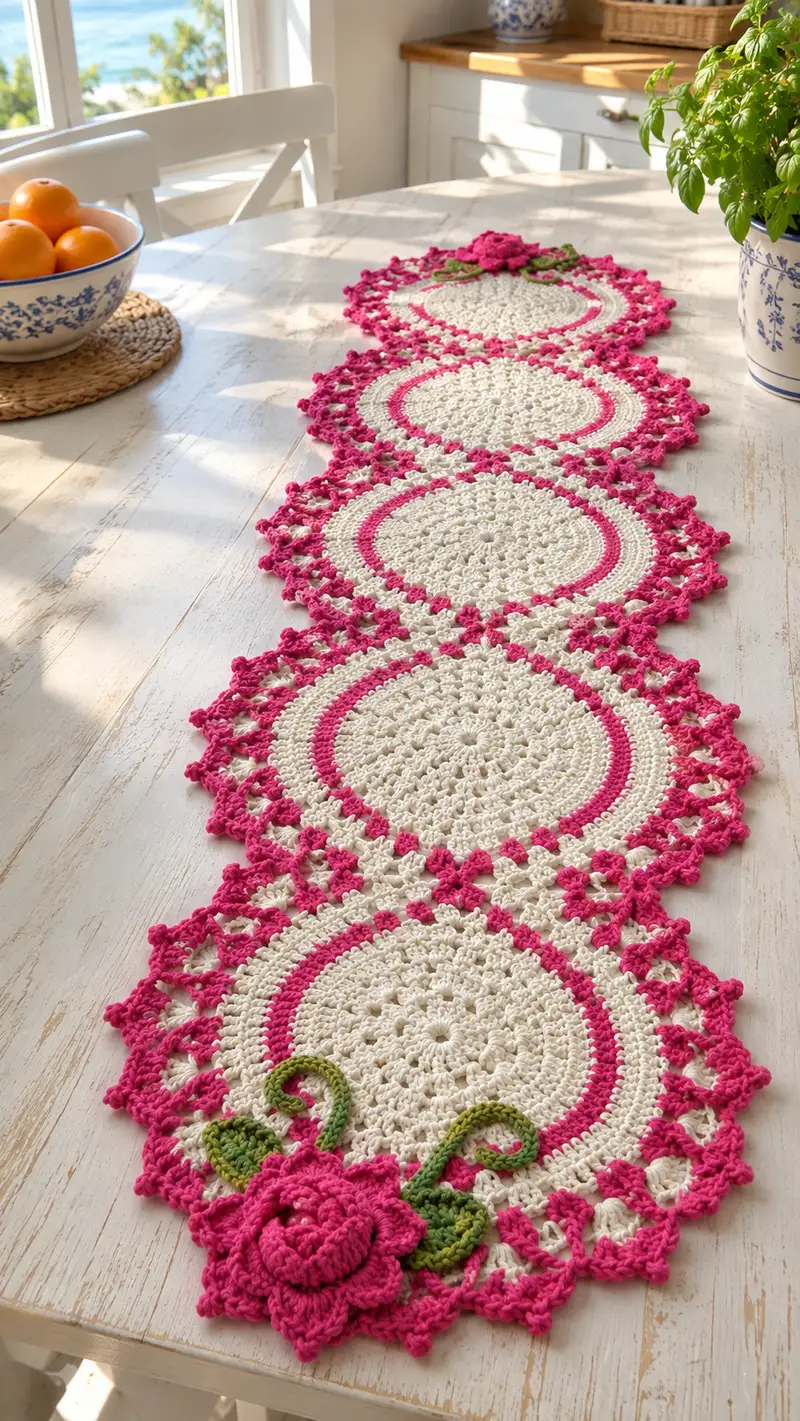
A romantic, vintage-inspired table runner made from linked circular motifs with a delicate lacy border and crochet rose embellishment. Cream centers contrast with vibrant hot-pink rings and a bold scalloped edge. The runner is composed of four joined medallions, accented with layered crochet roses and curled green leaves for a timeless handmade statement.
Progress Tracker
0% Complete
— Notes & Gauge :
Info :
Gauge is not critical for table runner but affects finished diameter. Using worsted cotton and 3.5mm hook each circular medallion should measure approximately 15cm (6") across before blocking. Adjust hook size if your motif is significantly smaller or larger.
Info :
Throughout the pattern counts are written for US terms (sc = single crochet, dc = double crochet). Carry and fasten off colors as instructed. We use join-as-you-go for linking motifs; you may choose to sew later if preferred.
— Circular Medallion (Make 4) :
Round 1 :
6 sc in magic ring (6)
Round 3 :
(1 sc, 1 inc) x 6 (18)
Round 4 :
(2 sc, 1 inc) x 6 (24)
Round 5 :
(3 sc, 1 inc) x 6 (30)
Round 6 :
(4 sc, 1 inc) x 6 (36)
Round 7 :
(5 sc, 1 inc) x 6 (42)
Round 8 :
(6 sc, 1 inc) x 6 (48)
Round 9 :
(7 sc, 1 inc) x 6 (54)
Round 10 :
(8 sc, 1 inc) x 6 (60)
Info :
Begin each round with ch1 and work continuous rounds unless otherwise noted. Use a stitch marker in the first stitch and move it up each round to track your starting point.
Round 11 :
1 sc in each st around (60)
Round 12 :
1 sc in each st (60)
Round 13 :
Ch3 (counts as dc), *sk next st, dc in next st; ch1; rep from * around to create a gentle open texture (30 dc, 30 ch-1 sps) (60 total stitches worked as 30 dc)
Info :
If you prefer a denser center, replace Round 13 with 1 sc in each st. The lacy round gives more visual contrast to the hot-pink ring.
Round 14 :
Switch to hot-pink yarn. (Change color in last pull of previous round.) Ch1, 1 sc in same st and in each st around (60)
Info :
Carry the cream color behind work for 1-2 rounds if you will be reusing it; otherwise fasten off and weave in tail. We recommend weaving in later after blocking for neatness.
Round 15 :
1 sc in each st around (60) — this creates a solid hot-pink band
Round 16 :
Ch3 (counts as dc), *sk next st, dc in next st; ch1; rep from * around (30 dc, 30 ch-1 sps) (work into dc rows and ch-1 spaces as they appear)
Info :
Round 16 adds a subtle lacy band. Ensure stitches remain evenly spaced. If your stitch count differs slightly, increase or decrease dc repeats evenly across the round to maintain symmetry.
Round 17 :
Switch back to cream yarn. Ch1, 1 sc in each st and ch-1 space around (60)
Round 18 :
1 sc in each st around (60)
Round 19 :
(2 sc, 1 inc) x 15 (75)
Info :
Round 19 expands the circle slightly to prepare for the lace border. If you want a larger medallion, repeat a gentle increase round (add 15 stitches each extra round) before proceeding.
Round 20 :
1 sc in each st (75)
Round 21 :
Ch3 (counts as dc), *skip next 2 sts, (5 dc in next st) shell, sk next 2 sts, sl st into next st; rep around to create shell lace (15 shells total, with sl st anchor between shells) — approximately 75 worked elements
Info :
Placement of shells determines outer lace symmetry. Visual counting: 15 shells spaced evenly around gives a balanced scallop. If your count is slightly off, adjust shells to space evenly.
Round 22 :
Switch to hot-pink yarn. Ch1, 1 sc in each st around, working sc into each dc and sl st to create a solid base for the scalloped edging (75)
Round 23 :
*In next shell space work (ch2, 3 dc, ch2, sl st) to form an open picot arch; sl st into space between shells; rep around (15 arches)
Info :
Round 23 builds the airy lattice that will later be emphasized by the outer scallop. Keep tension relaxed in arch chains to avoid pulling the shell closed.
Round 24 :
Ch1, in same space work (sc, ch3, sc) to create small picot loops on each arch, sl st to next space; rep around (15 picot-loop units)
Round 25 :
Build outer scallop: *In ch3 picot space work (5 dc, ch2, 5 dc) all in same space; sl st into base between arches; rep around (15 large scallops)
Info :
After Round 25 you will have a pronounced scalloped outer edge. Fasten off pink if you are making separate motifs to join later, or leave live for join-as-you-go instructions below.
Round 26 :
Optional finishing round in cream: attach cream in the base between scallops and work 1 sc in each base st to tidy the transition (75)
Info :
We recommend blocking each medallion flat before joining—wet-block the motif pinned to a circle template to maintain round shape and crisp scallops.
— Lace Variation & Alternative Textures :
Info :
If you prefer a more open lace, substitute shell rounds with (3 dc, ch3, 3 dc) shells and increase spacing to 12 shells for a more airy look. For heavier texture, replace shell rounds with 1 round of hdc in BLO for subtle ribbing.
— Join As You Go: Attaching Motifs End-to-End :
Info :
Place the first medallion flat and complete outer scallops fully. For the second medallion, when you reach Round 25 (outer scallops), instead of finishing a sl st in the last scallop, join into designated sl st anchor points on the edge of the first motif to link them.
Round J1 :
Working last scallop of second motif: when you reach the scallop that aligns with the seam area, work the scallop stitches but replace the sl st at the base with sl st through corresponding base stitch on first motif; continue to next scallop and repeat at the points where motifs meet (join 7-9 points depending on motif spacing)
Info :
Pin both motifs together before joining to check alignment. Join points should be evenly spaced; count scallop bases and anchor every 2–3 scallops for a smooth join. If you prefer fewer visible joins, sew through adjacent scallop centers with invisible ladder stitch after finishing both motifs.
Round J2 :
Continue outer scallops around the second motif, slipping through first motif anchors at three or four evenly spaced points to secure a flat join; fasten off and weave ends.
Info :
Repeat join-as-you-go to attach all four motifs in a linear sequence. Start by joining motif 2 to motif 1, then motif 3 to motif 2, and motif 4 to motif 3. Ensure runner alignment by measuring center-to-center distances as you go.
— Rose Embellishment (Make 1 large rose) :
Info :
The rose is constructed from a long spiraled strip worked in rounds of petal shapes, then rolled and sewn into a layered flower. You may make 1 large rose or several small ones for different placements.
Round R1 :
With hot-pink yarn ch 60 (or 80 for larger rose). Join with sl st to form a ring, being careful not to twist.
Round R2 :
Chain 3 (counts as dc), dc in same ch, *skip next ch, (2 dc in next ch) repeat across to end to create a ridged effect — approximately 90 dc total depending on chain count
Round R3 :
Ch1, (sc, ch3, sc) in every 3rd stitch to create petal loops across the strip (approx 30 loops)
Round R4 :
Working in each ch3 loop: (sc, hdc, 3 dc, hdc, sc) to form shaped petals along the strip (approx 30 petals)
Info :
Work petals evenly spaced. If your strip is longer or shorter, adjust number of base chains or petal counts so petals sit tightly when rolled.
Round R5 :
Optional second petal layer: repeat Round R4 in each space between petals for fuller rose (this will add volume)
Info :
Finish by leaving a long tail for sewing. Roll the strip from one end to the other, overlapping petals slightly. Use the long tail and yarn needle to sew through the petal bases and secure the spiral into a rose. Stitch through the underside, catching the base of every 2–3 petals to hold shape. Sew a few anchoring stitches through the center to stabilize.
Round R6 :
After sewing, you may adjust petals by steam shaping lightly or tugging for desired fullness. Fasten off and weave in ends hidden on underside.
— Leaves (Make 2–4) :
Round L1 :
With green yarn ch 12. Sc in 2nd ch from hook and next 3 ch, hdc in next, dc in next 2, hdc in next, sc in last 2, ch1 and turn to work along other side of foundation chain: sc in next 2, hdc in next, dc in next 2, hdc in next, sc in remaining sts. Slip stitch to first sc to close leaf (approx 22 sts)
Info :
Shape the leaf by working a central ridge: with right side facing, working into FLO only of the next round, sc in each st across to form a subtle midrib. Increase leaf length or fullness by adding chains to foundation (make odd number to keep symmetry).
Round L2 :
Optional: work BLO sc across leaf center to form raised midrib and then slip stitch around edge to tidy (22)
Info :
Starch lightly or steam-block leaves to hold curved shape. Sew leaves under rose at base using small whip stitches, angling slightly outward for natural look.
— Curled Tendrils (Make 2–4) :
Round T1 :
With green yarn ch 30. In 2nd ch from hook work 2 sc, in next ch work 2 sc, continue 2 sc in each chain to end. Fasten off and roll between fingers to form curled tendril. Attach under rose as desired.
Info :
Adjust chain length for longer or shorter curls. Wet the tendril slightly, wrap around a pencil and let dry to set curl if desired.
— Additional Small Flowers (Optional) :
Round F1 :
Ch 8, join to form a small ring. Round 2: ch1, (sc, ch3, sc) 6 times into ring to make 6 small petals. Round 3: working in ch3 loops, (sc, hdc, 3 dc, hdc, sc) to build tiny petals. Fasten off and sew near main rose for cluster effect.
Info :
Small flowers are quick embellishments and can be made in alternating colors for variety. Tuck them under the rose or scatter along the runner edges for a cottagecore aesthetic.
— Final Joining & Edging :
Round E1 :
After joining all 4 medallions, inspect the joins for gaps. Weave the cream yarn through base stitches on either side of the seam and whip stitch to reinforce seams invisibly.
Info :
If you used join-as-you-go method, the runner should lie flat; if not, lay motifs on a flat surface and pin to shape before sewing to avoid distortion.
Round E2 :
Border round around entire runner: join hot-pink yarn at any scallop and work 1 sc evenly around entire runner edge, placing 3 sc in each scallop apex and 1 sc in chain spaces (approx 300–360 sc depending on motif counts)
Round E3 :
Work a final decorative round: *in each sc on outer edge work (ch3, sl st to same st) to create small looped fringe; rep around. Fasten off and weave in ends.
Info :
For a more delicate finish, substitute Round E3 with single picots spaced every 4–6 sts. The looped fringe shown in the photo is bold and gives a lively silhouette.
— Blocking & Finishing :
Info :
Wet-block each medallion and rose separately. Pin to an accurately measured circular template to achieve consistent diameter and crisp scallops. Allow to dry fully (overnight). Attach the rose to one end of the runner by sewing through the underside of the scallops into the base of the rose, catching leaf stitches and tendril anchors.
Info :
Weave in all ends on the wrong side of runner. Trim any excess. Optionally, press very lightly with an iron (use a cloth) to flatten and set final shape when completely dry.
— Troubleshooting & Tips :
Info :
If the runner cups or waves after joining, re-block the entire runner pinned flat and gently stretch into shape. If scallops droop, add one more tidy round of sc in cream to firm up the base before final edging.
Info :
Adjust motif spacing by changing number of join points or by working an extra round of sc between motifs to increase distance. Keep records of any modifications so you can reproduce the runner consistently.
This beautiful table runner blends structured central medallions with airy lace and a bold floral accent to create a stunning handmade centerpiece. The layered rose and curled leaves add natural charm, while the hot-pink scallops give a joyful pop of color. Whether you make it for a special occasion or everyday elegance, the finished runner will bring warmth and personality to your table. 🧶🌸 Happy stitching — enjoy the rhythmic process of crafting each medallion and the satisfaction of watching the runner come to life! ✨