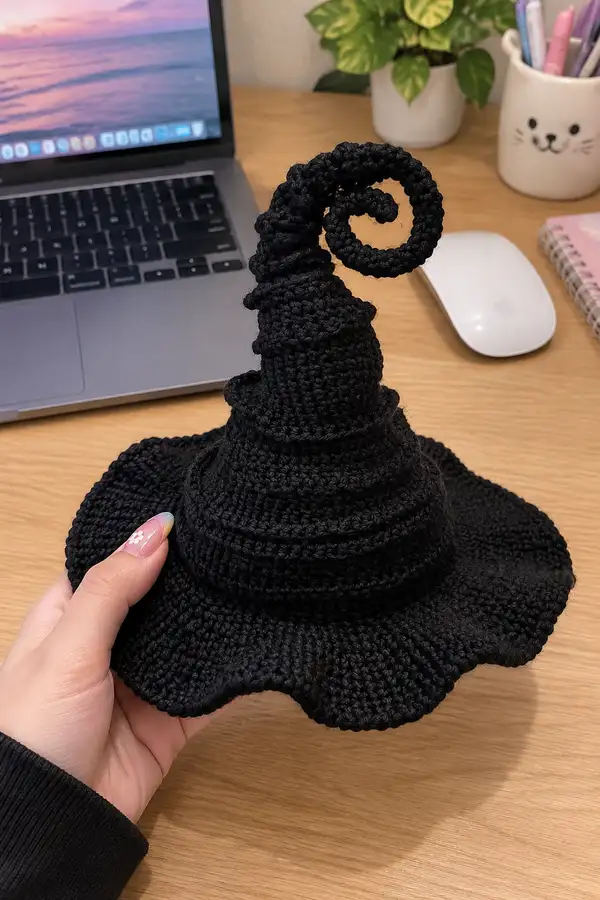
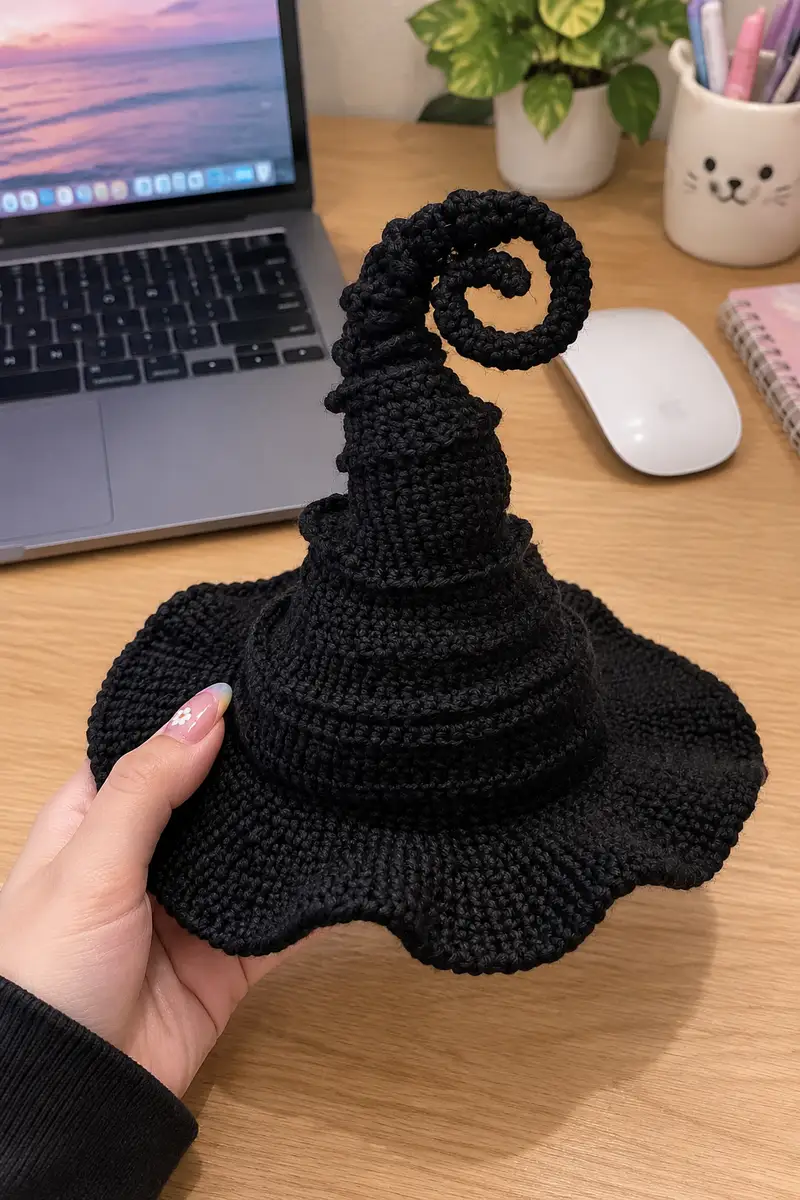
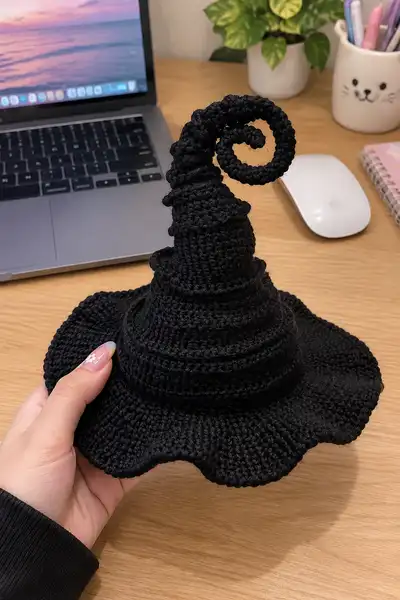
Make a dramatic curled witch hat with a wide wavy brim and a spiraled tip — perfect for Halloween decorations, table displays, or costume accessories. Worked top-down with textured ridges and a separate spiraled tip that attaches securely. This pattern uses simple stitches with shaping and optional wire for a poseable curl.
Progress Tracker
0% Complete
— Crown & Cone (Top-Down Crown) :
Info :
Work in continuous rounds unless noted. This section builds the top cone of the witch hat, starting from the very tip and increasing to the widest point at the crown base where the brim will later be joined. Use a stitch marker at the beginning of each round and move it up as you go.
Round 3 :
(1 sc, inc) x 6 (18)
Round 4 :
(2 sc, inc) x 6 (24)
Round 5 :
(3 sc, inc) x 6 (30)
Round 6 :
(4 sc, inc) x 6 (36)
Info :
By now the little cone is widening. Keep tension even; the cone should sit neatly in your hand and not twist. If it puckers, try pulling a bit less yarn per stitch or switching to a slightly larger hook temporarily and then tightening later with blocking.
Round 7 :
(5 sc, inc) x 6 (42)
Round 8 :
(6 sc, inc) x 6 (48)
Round 9 :
(7 sc, inc) x 6 (54)
Round 10 :
(8 sc, inc) x 6 (60)
Info :
60 stitches at round 10 forms the crown circumference where the brim will eventually attach; if you want a narrower or wider final hat, adjust the number of increase rounds before working the even rounds. Mark round 10 as 'base circumference' for reference.
Round 11-20 :
1 sc in each st (60)
Info :
Work 10 even rounds to build crown height. These rounds create the tall profile of the hat. If you want a taller hat, add 2-4 extra even rounds here, keeping the same stitch count.
Round 21 :
(8 sc, dec) x 6 (54)
Round 22 :
(7 sc, dec) x 6 (48)
Info :
These decreases begin a gentle taper that will help the crown slope into the start of the spiraled tip later. Stuffing is not required for the crown; the crown is mostly firm from tight stitches and does not need internal stuffing unless you desire a padded look.
Round 23 :
1 sc in each st (48)
Round 24 :
1 sc in each st (48)
Round 25 :
1 sc in each st BLO (48)
Info :
Working one round in the BLO will create a subtle ridge. This is an accent ridge on the crown—use it to add texture and to give the crown a more layered, aged appearance similar to the sample hat.
Round 26 :
(6 sc, inc) x 6 (54)
Round 27 :
(7 sc, inc) x 6 (60)
Round 28 :
1 sc in each st (60)
Info :
These rounds re-expand the crown slightly to create a soft, slouched band under the later spiral and to leave enough circumference for the brim to attach. Many hats play with alternating small decreases and increases to produce a broken cylindrical slouch; that is what we are doing here.
Round 29 :
(5 sc, dec) x 10 (50)
Round 30 :
1 sc in each st (50)
Round 31 :
1 sc in each st (50)
Info :
At this stage you should have a slightly tapered crown with a visible textured ridge. The transition from crown to spiral base will be made by working a few rounds that tighten the circumference and then beginning the spiral tube piece separately. Use a marker to note which round will be the junction for attaching the spiral later.
— Decorative Ridge Band & Texture :
Info :
Work decorative ridges and small folded bands around the crown to mimic the layered look in the photos. These are worked as short rounds or 360-degree ridges using BLO or alternating sl sts for a rope-like effect.
Round 1 :
Join black yarn at desired height (where you want the first band), ch1, 1 sc in same st and continue 1 sc in each st for one round (50)
Round 2 :
1 sc in each st BLO (50)
Round 3 :
1 sc in each st (50)
Info :
To create a layered, rolled band, work 3 or 4 narrow rounds and then fold the rounds to sit on top of the crown and tack them in place with a few stitches. These ridges are visible in the sample photo and add the 'stacked' appearance.
Round 4 :
Work a spiral slip-stitch rope: ch1, *sl st in next 2 sts, ch1; rep around.* Fasten off leaving a tail to sew the band down in several places.
Info :
Use short tails to sew the decorative bands down so they create raised rings around the crown. This produces the layered texture seen where the crown narrows toward the tip.
— Spiral Tip (Make Separately, then Attach) :
Info :
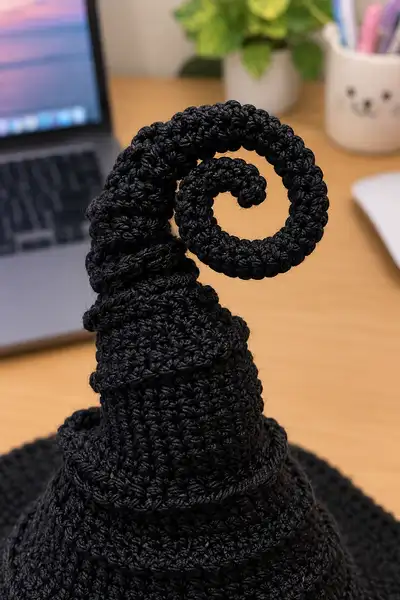
The spiral tip is made as a long crocheted tube, worked either tightly with a smaller hook for crispness or using the same hook for a soft tube. The sample shows a tightly worked spiral with consistent diameter, then coiled into the curl. If you want the spiral to be poseable, insert a length of craft wire into the tube before closing the end.
Round 1 :
Make a mr, 6 sc in mr (6)
Round 3 :
(1 sc, inc) x 6 (18)
Round 4 :
(2 sc, inc) x 6 (24)
Round 5 :
(3 sc, inc) x 6 (30)
Info :
These increase rounds create a short tapered tube beginning with a small cap. The spiral in the photo has a tapered tip that quickly widens to a tube diameter of about 12-14mm, then continues evenly for the coil. If you prefer a thinner spiral, stop increasing at 18-24 sts.
Round 6-12 :
1 sc in each st (30)
Round 13-42 :
1 sc in each st (30)
Info :
Work rounds 13-42 (30 rounds) to make a long tube of consistent diameter. This will create approximately 30 rounds of tube length; if you want a longer spiral, add extra rounds in multiples of 4 for a similar curve density. For a shorter tight spiral, work 18-24 rounds instead.
Round 43 :
(3 sc, dec) x 6 (24)
Round 44 :
(2 sc, dec) x 6 (18)
Round 45 :
(1 sc, dec) x 6 (12)
Info :
Stuff lightly before you close the end. If you plan to insert wire for poseability, thread the wire down the tube now (leave at least 5cm protruding from the end so you can bend and fold the end securely). Close the last round firmly and weave in tail, leaving a tail long enough to stitch the spiral base to the crown.
Round 47 :
Fasten off leaving long tail for sewing (6)
Info :
After fastening off, coil the tube gently to determine the spiral shape. For a neat spiral like the image, coil from the tip inward, forming 2–3 visible non-overlapping turns, and then flatten the inner portion to create a tight central spiral. Adjust the coil so it lays flush against the crown base when attached.
— Brim (Wide Wavy Brim with Scallop Edge) :
Info :
Attach to the crown base where you marked the brim attachment round earlier (the round where crown circumference is 60 or 50 stitches by your adjustments). The brim is worked outward with planned increase repeats to make it flare. The sample hat uses repeated groups to create a gently flared hat brim and finishes with a scalloped edge for the waves.
Round 1 :
Join yarn at base of crown (where marked). Work 1 sc in each st around to establish join (60 or 50 depending on your crown circumference). If your crown ended at 50 sts, work 50 sc (50).
Round 2 :
If base = 60: (4 sc, inc) x 12 (72) — If base = 50: (4 sc, inc) x 10 (60)
Round 3 :
If prev = 72: (5 sc, inc) x 12 (84) — If prev = 60: (5 sc, inc) x 10 (70)
Round 4 :
If prev = 84: (6 sc, inc) x 12 (96) — If prev = 70: (6 sc, inc) x 10 (80)
Info :
Continue increasing in the same repeat anchor (the same number of repeats as you established) to gently flare the brim. The formula uses groups that keep the increases evenly spaced around the circle. The sample hat reaches around 108–120 stitches at the outer brim before working the scalloped edge.
Round 5 :
If prev = 96: (7 sc, inc) x 12 (108) — If prev = 80: (7 sc, inc) x 10 (90)
Round 6 :
If prev = 108: (8 sc, inc) x 12 (120) — If prev = 90: (8 sc, inc) x 10 (100)
Round 7-10 :
1 sc in each st (work 4 even rounds) — st count unchanged (120 or 100)
Info :
These even rounds build brim depth and thickness. If you prefer a thicker brim, add extra even rounds. Keep tension consistent so the brim lies flat.
Round 11 (Begin Scallop Shaping) :
To create a wavy scalloped edge, work repeats of short increases and decreases. Example (for 120 sts): *(4 sc, dec, 2 sc, inc, inc) x 12* — worked as subgroups to create a scallop outline. If you have 100 sts, *(3 sc, dec, 2 sc, inc, inc) x 10*.
Round 12 :
Work 1 sc in each st, adjusting where scallops fell to smooth the curve (120 or 100)
Round 13 (Edge Finishing) :
For a crisp edge, switch to a smaller hook and work: *sc in next 3 sts, 3 sc in next st (shell), sc in next 3 sts, sl st in next st* around. This creates a subtle shell that adds weight and a decorative finish. Repeat to match your stitch count (12 shells for 120 sts, 10 shells for 100 sts).
Info :
If the brim waves appear too pronounced, block the brim flat by pinning it to shape and steaming lightly; conversely, if the brim is too flat, add one more increase round before scallop shaping to make deeper waves.
Round 14 :
Fasten off and weave in ends securely. Trim tails.
— Brim Waving Alternative: Ripple Edge :
Info :
If you prefer a more pronounced wavy hem, use a ripple technique: work a repeat of *2 sc, dec, dec, 1 sc, inc, inc* working over 6-st segments to create ups and downs. Make sure repeats divide evenly into your stitch count.
— Small Folded Band & Stitching Detail (Optional) :
Round 1 :
With main color, pick up at crown base and work 6 rounds of 1 sc in each st to create a band (use BLO for 1–2 rounds to create a fold)
Info :
Fold the band slightly and tack at intervals to create a worn, layered look like the sample. Sew with long tails and hidden stitches to keep the fold stable. This band also helps hide where you sewn the spiral tip.
— Assembly & Attaching Spiral :
Info :
Position the spiral tip on top of the crown so the outer coil flows toward the front or side as desired. Use the long tail left on the spiral to sew through the crown base rounds. Stitch several times through the spiral base and crown to secure it fully. If you inserted wire, fold and twist the wire ends flat, then tuck into the tube and stitch closed or glue to secure before sewing the base.
Round 1 :
Place spiral base at the crown top (the round you designated earlier). Use tapestry needle and long tail to whip stitch through underside of spiral and through two or three rounds of the crown (make 10–15 passes to secure), then knot and weave in tail.
Info :
If you prefer a more stable connection, sew a small felt disc (cut to match base diameter of spiral) to the underside of the spiral, then sew the felt disc to the crown. This hides the stitching and adds stability.
Round 2 :
Tuck and weave all ends. Optional: use a small dab of fabric glue inside to secure the first few stitches if the yarn is slippery.
— Optional Structural Support & Poseable Spiral :
Info :
If you want the spiral to hold an exact curl, insert a length of craft wire into the spiral tube before closing the end. Make sure to fold the wire tip back on itself or cap it with glue to avoid poking. Sew the base thoroughly so the wire is held safely inside and the spiral returns to shape during use.
Tip :
To add strength to the brim and help it retain shape, you can spray-starch lightly and block the brim over a rounded form, or sew a thin strip of fusible interfacing to the underside during assembly (glue sparingly).
— Finishing Touches & Variation Ideas :
Info :
Add a narrow ribbon around the crown base, a metallic thread whip stitch for tiny studs, or a small crocheted rose pinned at the band for a decorative accent. For a child-sized hat, use lighter yarn and smaller hook; for an adult prop, increase rounds before brim and use heavier yarn or two strands held together for a chunkier look.
Final Check :
Inspect seams and ensure spiral is stable. Block the brim to shape and steam lightly to set curves. Enjoy your new whimsical witch hat!
This whimsical curled witch hat is a joy to make and display — the tall cone, layered ridge bands, and dramatic coiled tip create a playful and moody silhouette. The wide wavy brim adds movement and personality, making it ideal for Halloween displays, costume parties, or a quirky home accent. I hope you enjoy the creativity of shaping the spiral and customizing the trim — every hat becomes a little character of its own. Happy crocheting and may your stitches be delightfully spooky! 🖤🎃