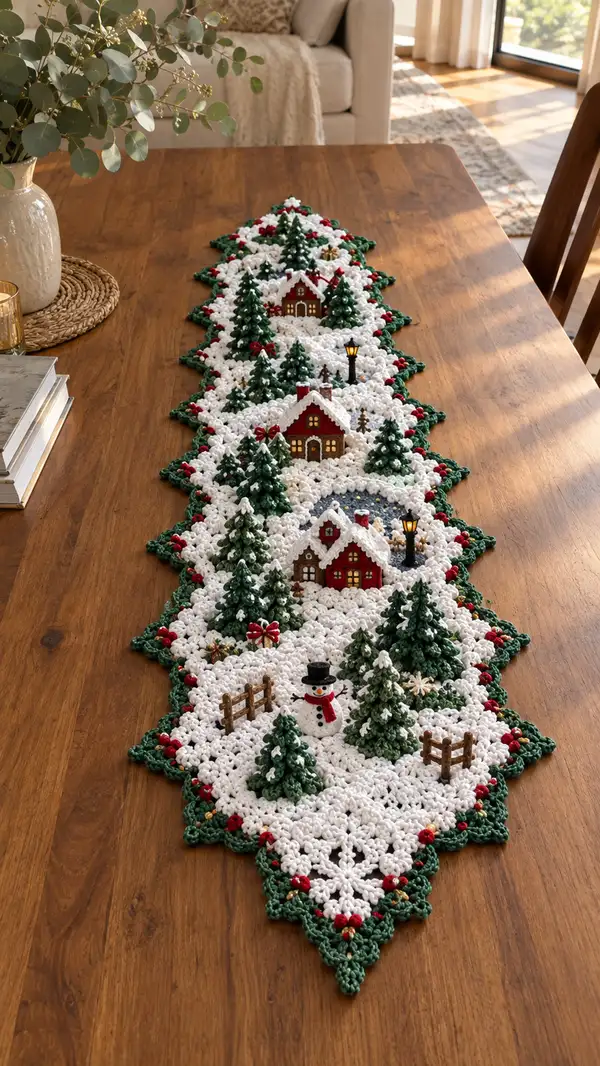
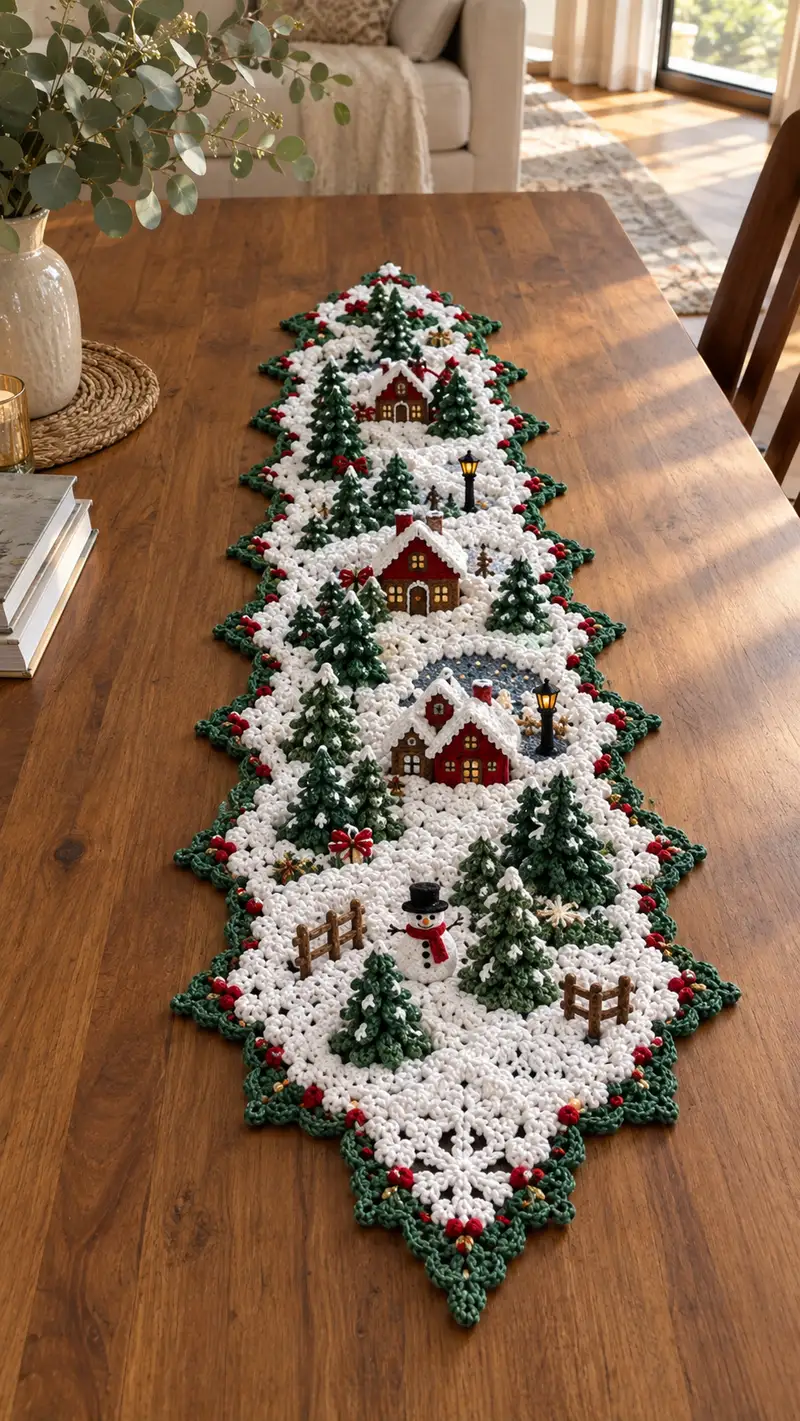
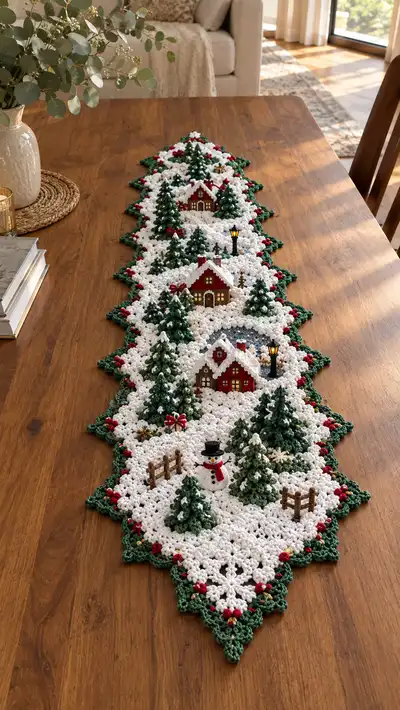
Create a cozy winter scene for your table with this detailed Crochet Winter Village Table Runner Pattern. The runner features diamond-shaped snowy motifs joined into a long strip, scalloped green edges, tiny houses with snowy roofs, layered 3D pine trees, a cheerful snowman, lampposts and fence details. Worked in crisp white with accents of evergreen, deep red and warm neutrals, the design brings charming holiday atmosphere to any dining surface. Perfect for festive décor or a handmade seasonal gift.
Progress Tracker
0% Complete
— Diamond Motif :
Round 1 :
6 sc in magic ring (6)
Round 3 :
(1 sc, inc) x 6 (18)
Round 4 :
(2 sc, inc) x 6 (24)
Round 5 :
(3 sc, inc) x 6 (30)
Round 6 :
(4 sc, inc) x 6 (36)
Round 7 :
(5 sc, inc) x 6 (42)
Round 8 :
(6 sc, inc) x 6 (48)
Round 9-10 :
1 sc in each st (48) - These two even rounds stabilize the center and give height to the snowy field
Info :
Place a stitch marker in the first stitch of Round 9 to mark the center front and help with later alignment of houses and applique placement. Keep tension even so the lacy rounds will sit flat.
Round 11 :
Change to white if not already. *Ch3 (counts as dc), sk 1, dc in next st; ch1, dc cluster in next 3 sts* rep around, ending with dc in last st to form the first lacy shell round (48 shells equivalent, stitch count maintained by grouping)
Round 12 :
Ch1, sc in each dc and chain space around to create foundation for shell edging (48)
Round 13 :
Shell shaping: *(sc in next 4 sts, 5-dc shell in next st, sc in next 4 sts, inc) x 6* — this round increases subtly at diamond corners; resulting count 54 (54)
Round 14-15 :
1 sc in each st (54) - two rounds for solidity before lacy diamond shaping
Info :
At this stage the motif is almost circular. To create the elongated diamond shape, we will add extra increases at four points spaced evenly; these will become points of the diamond. Mark those four increase points now.
Round 16 :
*(7 sc, inc in next st) x 6* (60) - continue to widen slightly so future shell clusters have room
Round 17 :
1 sc in each st (60)
Round 18 :
Begin diamond shaping: *sc in next 10, 2 sc in next 2 sts (increase pair), sc in next 10, dec over next 2 sts* x3 — work methodically to create four subtle tapered edges. New count 60 (60)
Info :
Use the four increase pairs you marked earlier to guide where points will form. Keep increases mirrored across the centerline of the motif to keep perfect symmetry.
Round 19 :
Ch3, *skip 2, 5 dc shell in next st, sk 2, ch1, sc in next st* around to create larger snowflake-like shells on the surface (60 shells equivalent)
Round 20 :
1 sc in each st to anchor the shells (60)
Round 21 :
Edge diamonds: *(4 sc, dec) x 12 + adjust to maintain 48 visible peaks* — mathematically perform (4 sc, dec) twelve times giving 60 -> results in 48 (48)
Info :
Round 21 creates scalloped internal shaping; check counts carefully. If you miscount, rip back to the last even round rather than fudge decreases later.
Round 22 :
Work a decorative picot-row: *sc in next 2, ch3, sl st in 3rd chain from hook to secure picot, sc in next 3* rep around to give light texture (48)
Round 23 :
1 sc in each st (48)
Round 24 :
Start corner points: *sc next 6, (3 dc, ch2, 3 dc) cluster in next st to make a point, sc next 6, sl st in next st* rep 4 times to form four diamond points (48 base stitches plus added point height)
Round 25 :
Fasten round with sc around point edges to tidy and bring the motif into a flattened diamond (48)
Info :
Block each motif lightly if you want very crisp diamond points — steam or wet-block and pin to shape. Blocking helps with join seam accuracy later.
Round 26 :
Decorative berry anchors: With green, join in corner picot ch2 space and make (ch3, sc) to leave a tiny loop for later attaching a red knot or bead. Repeat every corner highlight (4 loops)
Round 27 :
Switch back to white and sc around entire motif working 1 sc in each stitch and 3 sc in each point apex to maintain shape (approx 56 — adjust to match surrounding motifs)
Round 28 :
Final tidy round: sc in BLO around to create a defined ridge for joining (approx 56). Fasten off and weave ends. Block motif flat.
Info :
Make 6 diamond motifs for the pictured runner (or more if you want a longer runner). Keep motifs consistent by counting stitches and blocking all motifs before assembly.
— Joining & Central Snow Panel :
Round 1 :
With motifs blocked and arranged in a line, prepare to join by placing two motifs right sides together. Join white yarn in a stitch at the center edge where motifs meet.
Round 2 :
Whip stitch through both BLO ridges holding motifs flush, working evenly every 3-4 stitches to maintain the lacy pattern. Continue joining motifs one by one to create an aligned strip.
Info :
Use a thin yarn needle and match yarn color. Align diamond points so that top/bottom points meet adjacent motif centers leaving small gaps that will become snowy pockets for trees and houses.
Round 3 :
Once all motifs are joined, work a bridging round in white around the internal joins: sc evenly into the seam holes and ch2 spaces to close large gaps without eliminating the snow pockets (work approx 1 sc per join stitch)
Round 4 :
1 sc in each st around the entire runner to tidy seams (total varies with number of motifs; approx 320–360 sts for 6 motifs)
Info :
At this point test-fit the houses and trees onto the runner. The raised lacy shells make natural pockets for small appliques — plan placement symmetrically from one end to the other.
— Scalloped Green Border :
Round 1 :
Join forest green in any corner point; ch1, sc evenly around the runner working 2 sc in each point apex to round corners (approx 1 sc per white sc, increased at apexes)
Round 2 :
(ch3, 2 dc in same st, sk 2, sc in next st) repeat around to create open scallops; increase at diamond points by working an extra dc cluster to keep edges flat
Round 3 :
Ch1, sc in each stitch and in the dc clusters work 5 dc shells to beef up the scallop peaks. Count shells at regular intervals to ensure even distribution (approx 64 shells total)
Info :
Check that the scalloped border lies flat; if it folds inward, add extra sc between clusters; if it ruffles, remove a few stitches at regular intervals.
Round 4 :
Decorative berry accents: join deep red in selected small spaces along the scallop base and work small popcorns or French knots of yarn: *(4 dc in same st, remove hook, insert hook in first dc and pull loop through) sec* making small raised berries. Space every 7–9 stitches and at corners (approx 20–30 berries)
Round 5 :
Switch to green and sc around to secure berries; finish with sl st and fasten off.
Info :
Consider sewing small red beads onto the berry bumps for shine. Use matching thread and secure knots tightly behind the border.
— 3D Pine Tree Applique (Make 18) :
Round 1 :
With forest green, 6 sc in magic ring (6)
Round 3 :
(1 sc, inc) x 6 (18)
Round 4 :
(2 sc, inc) x 6 (24)
Round 5 :
1 sc around (24)
Round 6 :
Start first skirt: *(ch3, 4 dc cluster) in every 3rd st around to create first tier of branches yielding 8 clusters (24 cluster spaces)
Info :
This tier forms the top of the tree; keep clusters close and ensure they poke outward for realistic branches. Do not fasten off.
Round 7 :
Working behind the clusters join next round: sc in base stitches between clusters to secure foundation (24)
Round 8 :
Second skirt: *(ch4, 5 dc shell in next st, sl st in next st) around to create larger shells (24 shells)
Round 9 :
Sc around to anchor shell tier (24)
Round 10 :
Third skirt (largest): *(ch5, 7 dc shell in next st, sl st in next st) around to create outer branches (24)
Round 11 :
Fasten off leaving a long tail for sewing. Lightly stuff the center base with a tiny amount of fiberfill to give body and press tiers to shape outward.
Info :
For snow-dusted look, use a very small amount of white yarn chopped into fibers and needle-felt lightly or add a tiny white loop-on technique to branch tips. Alternatively, lightly brush on a fabric-safe glitter spray.
Round 12 :
Optional trunk: With brown, make a 6-sc tube 2 rounds high and sew into tree base, tucking trunk into the motif pocket when attaching (6)
Round 13 :
Make varying sizes by adjusting shell tiers: For smaller trees use only two tiers; for taller trees repeat the largest skirt once more for a taller silhouette.
Info :
Make 3 larger, 6 medium and 9 small trees for the pictured balanced look; pin them into place before sewing so spacing creates a natural forest cluster.
— House Applique (Make 4) :
Round 1 :
Base: With brown, ch7, sc in 2nd ch from hook and across (6)
Round 2 :
Ch1 turn, 2 sc in first st, sc across, 2 sc in last st (8) - form a small rectangle for the house base
Round 3 :
Ch1, sc across sides and foundation turning around to close rectangle, working 1 sc in each edge stitch to produce a small box (approx 12) - this creates a stout wall base
Round 4 :
Change to red; ch1, sc around the top edge to begin siding (12)
Round 5 :
(1 sc, inc) around to widen top wall subtly (18)
Round 6 :
Work two even rounds of sc to build height (18)
Round 7 :
Roof base: Switch to white, join at top center with ch1, sc around the top edge space making 1 sc per top stitch (18)
Round 8 :
Roof shaping: *(ch4, dc cluster) 2 times in next 3 sts to make a peaked roof effect, sl st to next stitch* repeat across to create a scalloped snowy roof ridge
Round 9 :
Fasten off with long tail. Sew roof to stationary edges and stuff base slightly to keep house stable. Embroider door and window outlines with gold or tan using backstitch technique.
Info :
Make 4 houses in combinations of red and tan according to the picture. Use small yellow beads or embroidery for glowing windows — attach before sewing houses into runner.
Round 10 :
Optional chimney: With red, ch4, sc in 2nd ch from hook and across (3), work 4 rows of sc, fasten off and sew to roof. Add a tiny loop of grey for smoke or felted tuft if desired.
— Snowman Applique :
Round 1 :
Body ball: 6 sc in magic ring (6)
Round 3 :
(1 sc, inc) x 6 (18)
Round 4 :
1 sc around (18) - fasten off leaving long tail for sewing to runner; this is the bottom section
Round 5 :
Head: 6 sc in magic ring (6)
Round 7 :
1 sc around (12) - fasten off leaving long tail
Round 8 :
Sew head to body using long tails; stuff both sections lightly before closing to maintain a soft look. Embroider eyes and mouth with black yarn and add a small orange embroidered carrot nose.
Info :
Add a tiny red scarf by crocheting a short i-cord or 6-ch strip and wrap around neck; secure with a few stitches. Make 1 or 2 snowmen for end panels as pictured.
— Lamppost (Make 2) :
Round 1 :
Base: With black, ch6, join to form ring, work 6 sc (6)
Round 2-6 :
1 sc around (6) - create a 5-round post column (6)
Round 7 :
Top lantern: change to yellow/gold, ch1, make 8 sc in a ring then work 1 round of dc clusters to form a small cup; add clear bead inside and secure with thread for glowing effect
Round 8 :
Sew lantern to top of post and fix post into runner seam by sewing through loops; secure with extra stitches and hide tail inside column.
Info :
If using battery tealights, size will be too big; instead mimic lamp glow using metallic thread or a small gold bead sewn into lantern interior as pictured.
— Fence & Small Accessories :
Round 1 :
Fence post: With brown, ch3, sc in 2nd ch and next, sl st to form 2-st post. Make 3 posts per short fence section and join with a 6-ch rail sewed across at desired height.
Round 2 :
Sew fences into corner pockets of motifs using whip stitch; anchor firmly on runner underside for stability.
Info :
Fence pieces are small and decorative; keep stitches neat. Multiple fence sections create the little yard feel present near the snowman and houses.
— Attachment & Decorative Embellishments :
Round 1 :
Plan placement: Lay runner flat and place houses centrally within alternate diamond pockets (every second motif) so houses are staggered down the center line.
Round 2 :
Secure appliques: Sew houses and trees using long tails and a tight ladder stitch through both applique base and the runner pocket. Make 3–4 small stitches at each anchor point to secure.
Info :
Sew trees first and then houses to hide base stitches behind tree trunks. When attaching trees use the trunk tube to slip-wrap around a few white loops in the runner for extra grip.
Round 3 :
Add berry beads: Using matching thread, sew small red beads to the berry bump locations on the green border. Space evenly to match photo motif clusters (approx 24–30 beads).
Round 4 :
Final tidying: Weave all ends into the runner fabric through multiple stitches, trim close. Lightly steam and reshape any flattened appliques.
Info :
To make the trees stand more upright, tack the lower tier of each tree to the runner with a few hidden stitches through the tree base and runner shell foundation. This gives the appearance of planted trees.
— Alternative Panel Variations & Finishing Touches :
Round 1 :
Ice pond option: For one motif center, before adding a house, work 5 rounds of blue-gray thread in a concentric small circle using dc and tr clusters to form a pond; secure edges with white scallops to look frozen.
Round 2 :
Snowflake embellishments: Use gold or metallic thread to embroider tiny starbursts in some snow pockets; a single long running stitch can create a delicate snowflake silhouette.
Info :
These finishing touches are optional but highly effective. Add them sparingly to avoid visual clutter—one or two shiny accents per runner is enough.
Round 3 :
Edge reinforcement: If you expect heavy wear, work one last round of invisible slip-stitch reinforcement in matching color under the scallops to strengthen the edge.
Round 4 :
Blocking final piece: After all appliques are sewn, lay runner flat on blocking mat and lightly steam from a distance; pin scallop points back into shape for crisp edges.
Info :
Allow runner to dry completely before removing pins. Avoid direct intense heat on beads or delicate trims.
This winter village runner becomes a treasured seasonal centerpiece, full of tiny details and holiday charm. Each motif is a little story — snow-frosted trees, glowing windows, and neatly trimmed edges come together into a beautiful handmade display. Enjoy the slow, meditative process of crocheting and assembling this scene, then delight in the warmth it brings to your home or the joy it will bring to someone special. 🧶🏡✨