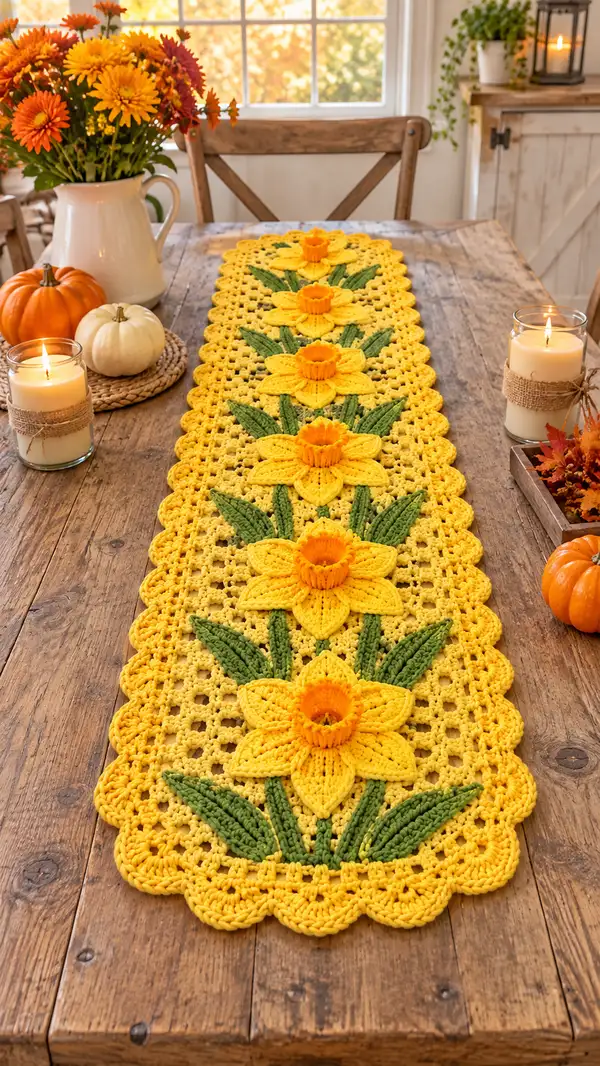
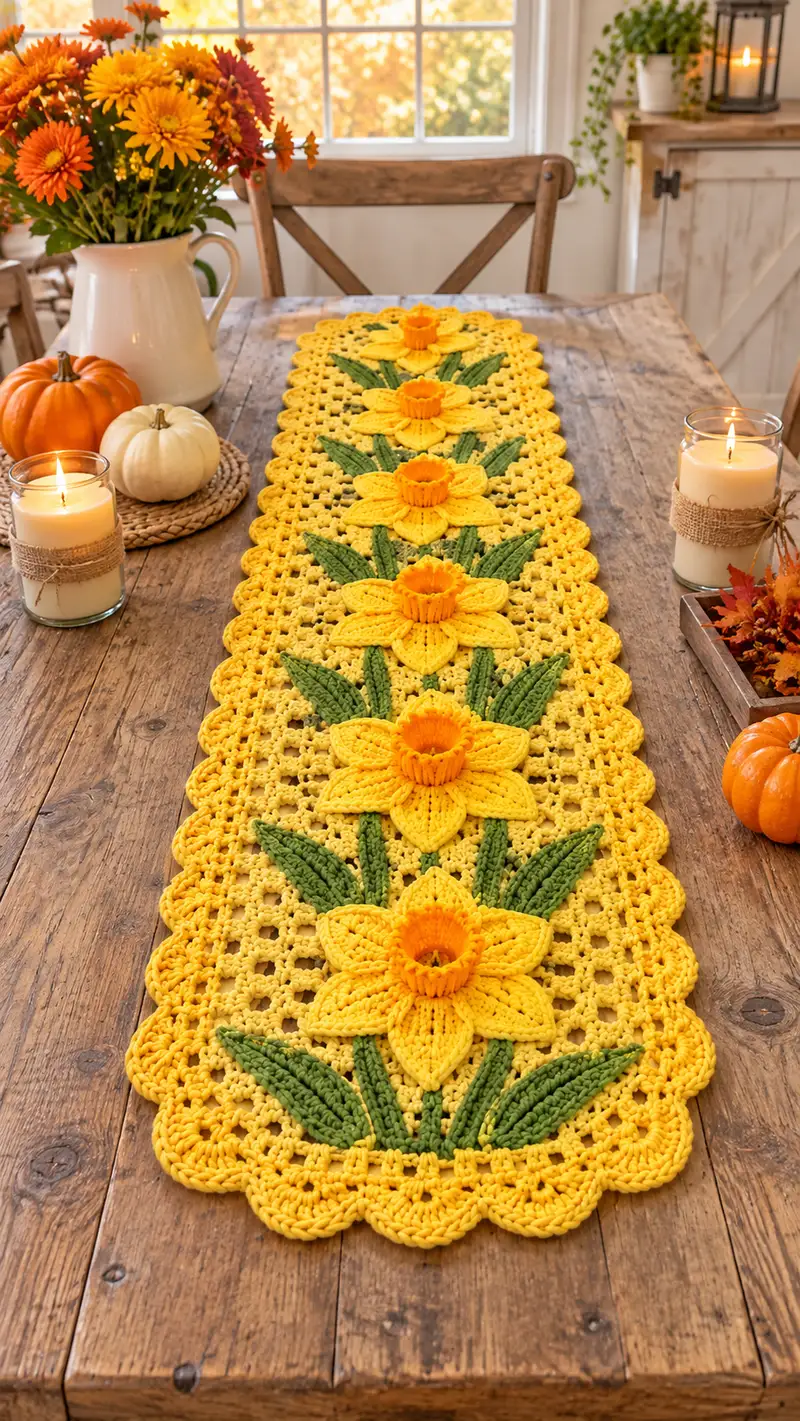
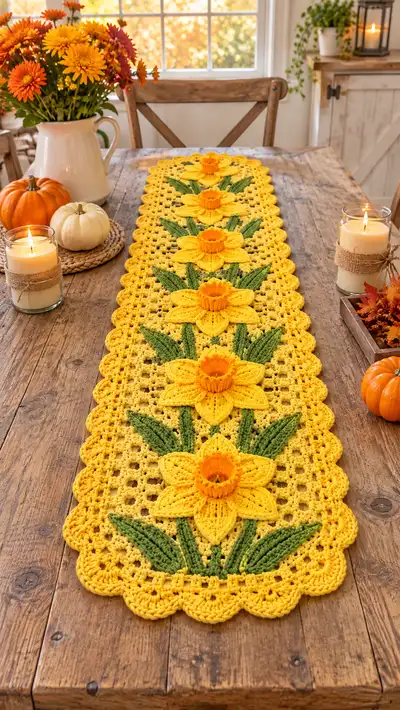
Bring a burst of sunny spring to your table with this richly textured Yellow Daffodil Trumpet Table Runner. The pattern features a wide open mesh background, five raised 3D daffodil appliques with trumpet centers and sculpted leaves, and a scalloped edge for a finished, professional look. Worked in worsted-weight cotton for durability and table-ready drape, this runner layers color and stitch texture to create a striking seasonal centerpiece.
Progress Tracker
0% Complete
— Notes & Gauge :
Info :
Gauge is flexible for a runner but for best proportions use worsted weight cotton and a 5.0mm hook. Finished runner pictured measures approximately 14" wide x 48" long. Adjust foundation chain (center panel length) to lengthen or shorten. Maintain consistent tension between panel and appliques for even join.
— Center Mesh Panel (work in rounds/rows, Rounds 1-30) :
Round 1 :
Ch 122 (this chain creates a 48" long foundation; for a longer runner add multiples of 12 chains). Row foundation counts: 122 ch.
Round 2 :
Dc in 4th ch from hook (counts as dc + ch1), *ch1, sk 1 ch, dc in next ch; rep from * across to last 3 ch, dc in last ch. Turn. Mesh base now set. Count approx 60 dc points across.
Round 3 :
Ch3 (counts as dc), *ch1, sk next ch1 space, dc in next dc; rep across, ending with dc in top of turning ch. Turn. Maintain open filet-style mesh. Approx stitch count is 60 dc.
Round 4 :
Repeat Round 3, keeping the ch-1 spaces aligned across rows. This forms the lacy background for appliques. (60 dc)
Info :
Work mesh in rows until you reach the positions where the centers of daffodils will be placed. Mark placement approximately every 9" along the center line (for five flowers on a 48" runner). Use stitch markers to note the center stitch for each flower placement.
Round 5-12 :
Continue working even mesh rows as in Round 3 for 8 additional rows (total mesh height here 10 rows). Keep tension even. (60 dc each row)
Round 13 :
Ch3, dc in next 2 sts, *ch1, sk 1 sp, dc in next 3 sts; rep across; turn. This slightly widens clusters where motifs will attach. (60 dc)
Round 14-18 :
Repeat Round 3 (even mesh) for 5 rows. Keep panel flat; block if necessary before attaching appliques. (60 dc)
Info :
If planning to sew flowers on later, leave the mesh flat and unblocked until appliques are ready. If crocheting appliques onto mesh, leave stitch markers to guide placement.
Round 19-22 :
Work two-row edging base across the length to stabilize future joins: Row A (Round 19): Ch3, dc in every st across; Row B (Round 20): Ch2, hdc in each st across. Repeat A and B for Rounds 21-22. (60 dc/hdc)
Round 23 :
Even row to prepare for motif attachment: Ch3, dc in each st across. (60 dc)
Round 24 :
Ch1, sc in first dc, *ch3, sk 2 dc, sc in next dc; rep across to create a series of 3-ch loops to anchor scalloped edging later. End with sc. (approx 30 sc and 29 ch3 loops)
Info :
Panel is now prepared for applique placement. The ch-3 loops mark anchor points for the scalloped border; the mesh rows above are locations for flowers. Pin the panel flat and mark five equally spaced centers along the runner for the daffodils (approx every 9" center-to-center).
— Daffodil Flower Motif (Make 5 identical motifs for placement) Rounds 25-60 :
Info :
Each daffodil is made in two major components: the trumpet (center cylinder) and the petal disc built around a flat round, then petals are layered and seamed together. Work motifs in bright yellow for petals and golden-orange for trumpets.
Round 25 :
Petal base - MR: Make a MR with main yellow. Work 6 sc into MR. Pull tight. (6)
Round 26 :
Inc round: (1 sc, inc) x 6. (18)
Round 27 :
(2 sc, inc) x 6. (24)
Round 28 :
(3 sc, inc) x 6. (30)
Info :
Petal disc is increasing to create a flat base for petals. Keep the disc flat by checking for slight cupping; if cupping occurs, work one extra even round before forming petals.
Round 29 :
1 sc in each st around for two rounds (Round 29-30) to stabilize base of petals. (30)
Round 30 :
1 sc in each st around. (30)
Round 31 :
Begin petal lobes: *Ch8, skip 4 sts, sl st into next st; rep from * around for 6 petals (you will have 6 ch-8 loops). Join with sl st to base. (6 petal loops)
Round 32 :
Work petals in rounds on each ch-8 loop: Into each loop work (sc, hdc, 3 dc, hdc, sc) across the loop to form a rounded petal lobe. Fasten off yellow after completing all 6 petals. Petal outer edge now formed. (6 petals)
Round 33 :
Petal shaping round: Rejoin yellow to base of each petal and work 1 sc around the base of each petal to define separation: (sc in next 4 sts, ch2) between petals to create slight ridges. End and fasten off. (30 sc around disc)
Info :
Block petals lightly on a flat surface with pins to open the petal lobes. This makes them crisp and easier to sew or crochet together in layers. Use a steam iron at a safe distance if using cotton yarn.
Round 34 :
Second petal layer (optional for fuller flower): Join yellow at a point between two petals and *ch6, sl st into base 2 sts ahead; rep to create 6 inner loops offset from first layer. Work (sc, hdc, 2 dc, hdc, sc) in each loop to create a slightly smaller petal set that sits beneath top petals. Fasten off. (6 smaller petals)
Round 35 :
Petal join: With yellow, sew or sl st inner layer to outer layer by working sc in base stitches around, aligning petal tips. Use whip stitch with yarn needle for neater finish if preferred. No change in stitch count -- simply anchor petals.
Round 36 :
Edge definition: Rejoin yarn around petal tips and work a round of sc evenly around outer petal edges to give a neat profile. Approximate count depends on petal shaping (approx 48-60 sc total). Fasten off and weave in ends.
Info :
Make 5 of these petal discs. Keep them blocked and flat until trumpets are made and leaves are ready. Using stitch markers to mark 6 petal seams will help align the trumpet center evenly.
— Trumpet/Cup Center (Make 5, Rounds 37-50) :
Round 37 :
Using golden-orange yarn, MR and 6 sc into MR. (6)
Round 38 :
Inc round: (1 sc, inc) x 6. (18)
Round 39 :
(2 sc, inc) x 6. (24)
Round 40 :
Work 1 sc in each st around for two rounds to firm the base of the cup. (24)
Round 41 :
Begin forming the trumpet wall: Ch2, work 1 hdc in same st and in next 23 sts (24 hdc) joining with sl st to form a shallow cylinder. (24)
Round 42 :
Work in BLO to create a fluted edge: Ch2, (hdc BLO in same st, hdc BLO in next st) around for 24 hdc BLO. (24)
Round 43 :
Fluting round 1: Change to brighter golden-orange if desired for contrast. In each st work (ch2, 3 dc cluster) into the BLO of next st to create vertical flutes; sl st between clusters as needed to maintain 24 clusters. This creates texture for trumpet rim. (24 clusters)
Round 44 :
Fluting round 2: Work sl st into top of each cluster then 1 sc around to unify clusters, finishing the trumpet rim. Fasten off leaving a long tail for sewing. (24)
Info :
Lightly stuff the trumpet cylinder with a small amount of polyester fill as you make Round 43 so the trumpet retains an open cup shape. Do not overstuff — the trumpet should be lively but not rigid.
Round 45 :
Attach trumpet to petal disc: Position trumpet at center of petal disc, aligning seam to sit between two petals. Using the long tail, sew trumpet base to center ring of petal disc with whip stitch, distributing gathers evenly. Secure and weave tail into underside of flower. Repeat for each motif. (Attachment only; no stitch count change)
Info :
When sewing, place the trumpet so its fluted rim sits slightly above petal plane to cast realistic shadows and create depth. Use pins to hold in place while you stitch one quadrant, then adjust before finishing.
— Leaf Pattern (Make 10 or as needed per runner) Rounds 46-65 :
Info :
Leaves are worked flat and sculpted with decreases and post stitches for a raised central vein. Each flower in the pictured runner has two to three leaves; make number required to tuck beneath each motif. Leaves are worked in green.
Round 46 :
Ch 18. Row 1: Sc in 2nd ch from hook, sc across (17 sc). Turn. (17)
Round 47 :
Row 2: Ch2, hdc in first 3 sts, dc in next 7 sts, hdc in next 4 sts, hdc in last 3 sts. Turn. (17)
Round 48 :
Row 3: Ch1, sc across working into BLO on this row to create a defined edge: sc in each st across (17). Turn. (17)
Round 49 :
Row 4: Ch2, *sk 1, dc2tog over next 2 sts to begin tapering; repeat across center then mirror to shape tip (reduce counts gradually). Aim after shaping to reduce to 11 sts at tip. (approx 11)
Round 50 :
Row 5: Work central vein in post stitches: With RS facing, join yarn at base and work (hdc, fpdc around center post for next 3 stitches), creating a raised central rib. Work sc on edges to keep leaf crisp. Fasten off leaving tail for sewing. (final approx 11 sts)
Info :
For a plumper look, make a second leaf slightly smaller and layer on top of the first leaf, sewing through the center vein only so the edges remain free. Make 10 leaves total to place 2 per flower plus extras tucked between flowers.
Round 51 :
Optional leaf edging: Rejoin and work sc around leaf edge in FLO to create a neat border. Count will depend on final shape (approx 28 sc around). Fasten off.
Round 52-65 :
Repeat Rounds 46-51 to make the required number of leaves (make 10-12 leaves total). Keep sizes varied for a natural look: some slightly longer (20 ch start) and some shorter (14 ch start).
— Joining Flowers & Leaves to Panel (Rounds 66-84) :
Round 66 :
Info : Positioning - Lay the mesh panel flat and measure centerline. Mark five centers evenly spaced for the daffodils. Pin each petal disc centered on the marked points with pins or stitch markers.
Round 67 :
Securing petals: Using a matching yellow yarn tail and yarn needle, baste the petal disc to the mesh at 6 equidistant points aligning to mesh dc rows. Make gentle stitches so the petal base conforms to the mesh. No stitch count change.
Round 68 :
Attach trumpet: Sew each trumpet cup to the petal disc center as described previously ensuring even spacing. Fasten and weave in ends. (Attachment)
Round 69 :
Place leaves: Tuck leaves beneath each flower: position 2-3 leaves per flower, pinning them so that tips radiate outwards. Sew leaves with yellow or green yarn from the underside to anchor without visible stitches on the front. (Attachment)
Round 70 :
Adjust spacing: Step back and adjust positions so flowers form an evenly spaced line down the runner. Unpick and move if necessary before final stitching. Ensure trumpet rims are centered and petals do not overlap unevenly.
Info :
Use small whip stitches through the mesh loops (from Round 24's ch-3 loops area) to hide the joining stitches and give a secure hold. Insert the needle under chains rather than through visible dc stitches to keep the surface clean.
Round 71-74 :
Sew all motifs in place working along the runner from one end to the other, finishing each flower fully before moving to the next. Check alignment against edge scallops. Allow 1-2 mm spacing between flower edges for a natural gap.
Round 75 :
Weave in all loose ends from appliques onto the underside of the runner, trimming close once secure. Double-check trumpet stuffing is not visible.
— Stabilizing Backing & Optional Join (Rounds 76-82) :
Round 76 :
Info : If you prefer a neater underside, attach a thin fabric backing or a second crochet panel to completely enclose appliques' tails. For crochet-only finish, create a reverse mesh panel identical to the first and slip stitch or whip stitch edges together around the perimeter leaving motifs sandwiched inside.
Round 77-78 :
Work a reverse mesh panel to same dimensions using the same pattern as Round 1-24 (2 rows less in height to account for applique thickness). Block both panels and align.
Round 79 :
Join panels around long edges using slip stitch through both loops or whip stitch with yarn needle for invisible seam. Join bottom and top short edges carefully aligning scallops. (join counts depend on length; approximate 30 join points per long side)
Info :
Joining with slip stitches gives a flat seam; whip stitch with yarn needle gives a smoother underside. Choose based on desired look.
— Scalloped Edge (Rounds 83-110) :
Round 83 :
With main yellow and RS facing, join at any corner of runner. Ch1, sc evenly across edge nubs created in Round 24, working 2 sc in each ch-3 loop from Round 24 to fill and prepare a rounded base. Work sc evenly across ends and continue along opposite long side. (approx 120 sc per long side)
Round 84 :
Sc base round complete. Turn work slightly if needed to shape corner; maintain even sc count. (approx matched sc)
Round 85 :
Scallop foundation round: *Skip 3 sc, in next sc work (sc, hdc, 3 dc, hdc, sc) to form a scallop; skip 3 sc and sl st into next sc to anchor; rep across long side and short sides evenly making 18-22 scallops per long side depending on length. Adjust to keep scallops symmetric at both ends. (scallops formed)
Round 86 :
Even round: Sl st into center of each scallop, ch1, sc around the top of each scallop to tidy edge (5-7 sc per scallop) forming a delicate rim. Fasten off.
Round 87 :
Optional decorative picot round: Rejoin yarn and work 1 sc between scallops and (ch3, sl st in last sc) at scallop peaks for a lacy edge. Fasten off and weave ends. (decoration)
Info :
When forming scallops, count stitches carefully on both long edges to ensure the number of scallops is the same front and back. Adjust by adding an extra dc in a scallop to even counts if needed.
Round 88-92 :
Reinforce edge: Work a final round of sc around the entire runner through both loops to stabilize scallops and keep runner flat. This also hides any remaining joining stitches from the backing join. (approx total sc 360-420 depending on length)
Round 93 :
Finish: Fasten off, weave in all ends ensuring tails are hidden between layers or around edge stitches. Block the runner gently, pinning scallops and petals into final shape. Allow to dry completely before use.
Info :
Final blocking brings scallops and petals into crisp definition and evens any slight rippling. Use light steam for cotton yarn if necessary and shape petals so trumpet rims sit proud of petals.
This daffodil trumpet table runner transforms your table into a bright, botanical centerpiece that invites smiles and compliments. Each carefully crocheted daffodil builds playful, tactile interest through layered petals, sculpted trumpets, and sculpted leaves. The scalloped edge finishes the piece with an elegant flourish that ties the whole design together. 🧶🌼 I hope this pattern brings sunny charm to your home and hours of satisfying stitching. Happy crafting and enjoy your beautiful handmade table accent! 😍