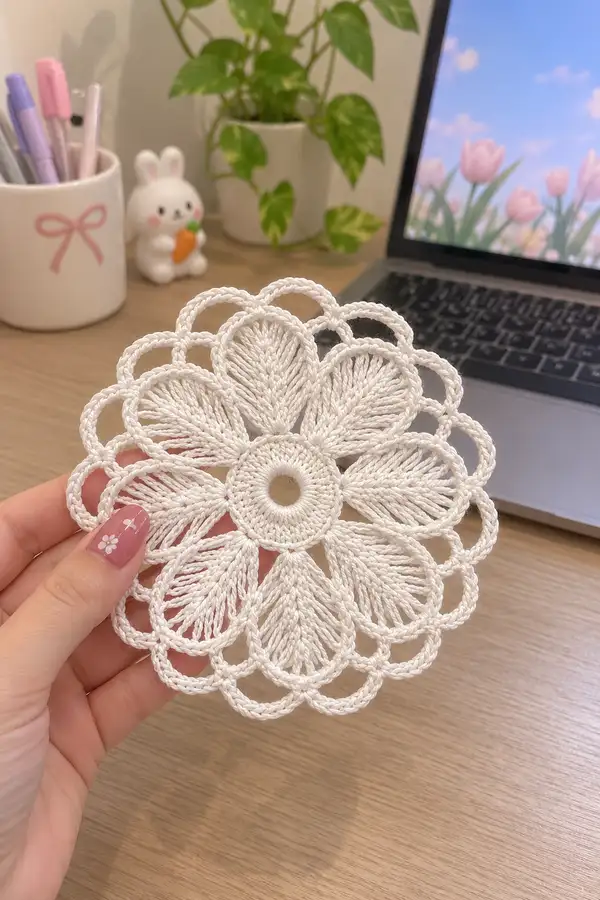
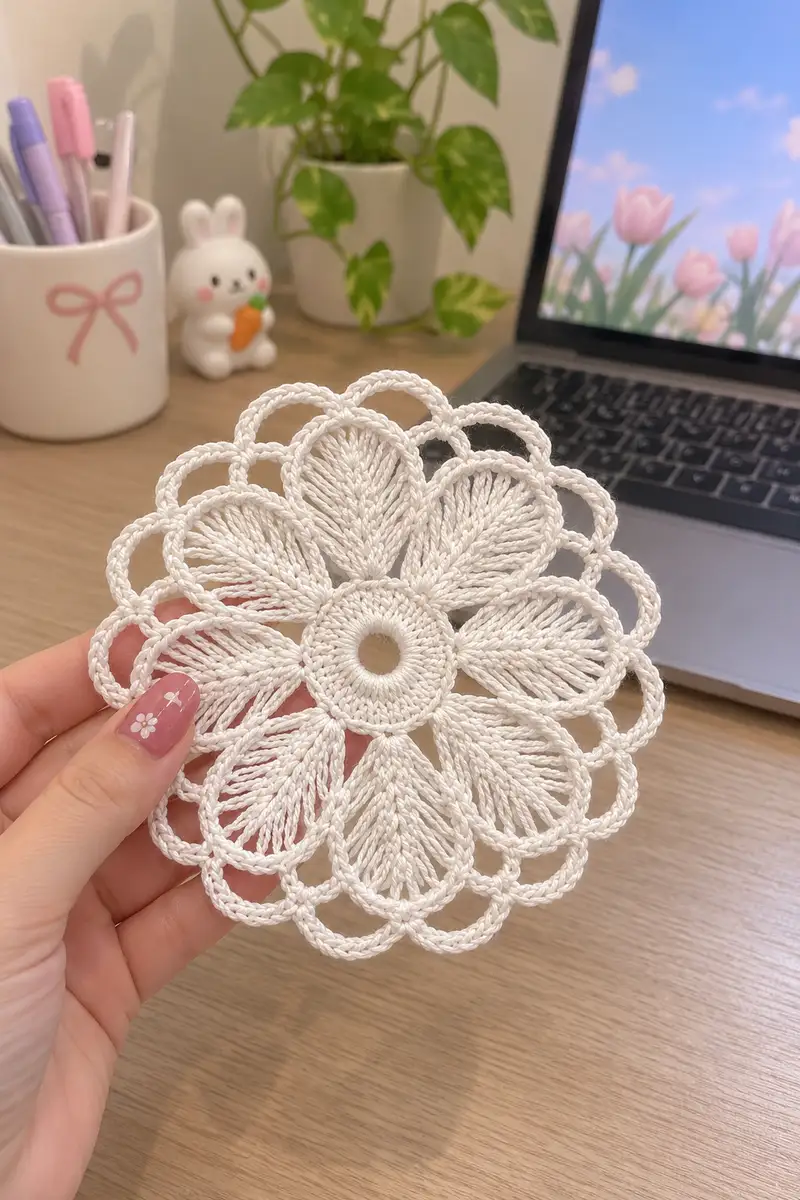
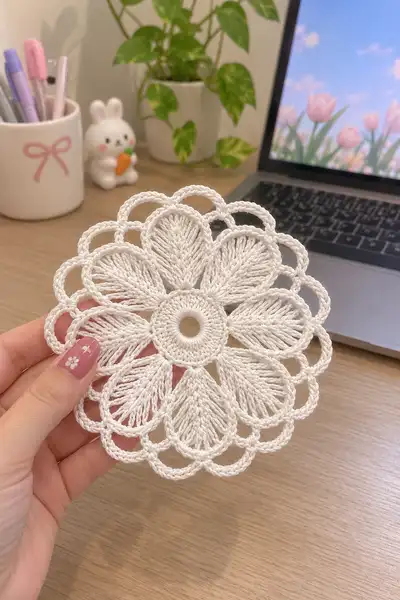
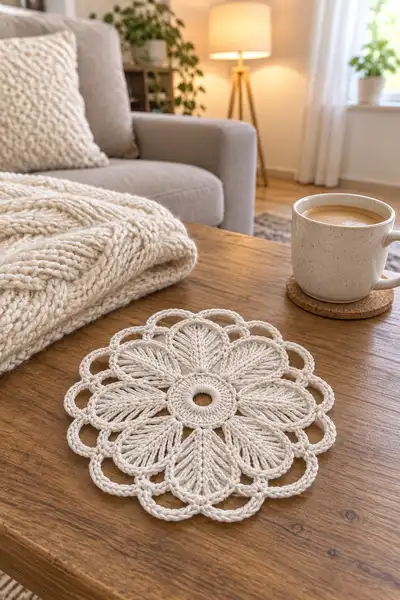
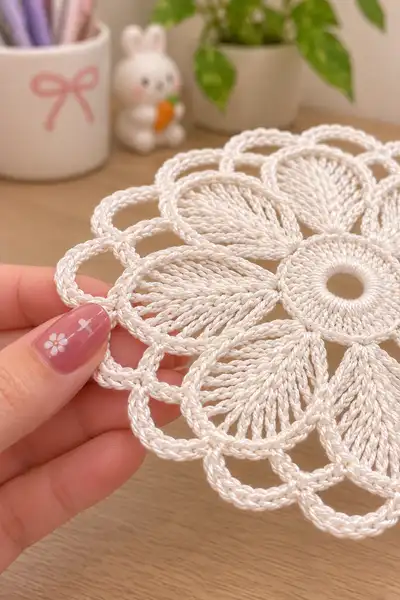
A delicate, lacy daisy-style motif that reads like vintage crochet but with crisp modern lines — perfect as a standalone coaster, joinable motif for a bedspread, or decorative accent. Worked in crisp snow-white cotton and built from a small central ring into graceful elongated petals and scalloped outer loops. The finished motif is lightweight, flat and incredibly elegant — ideal for heirloom bedding or layering into an airy bedspread.
Progress Tracker
0% Complete
— Materials & Gauge :
Info :
This motif is shown using mercerized cotton thread size 10 and a 1.75mm hook. Gauge is not critical for motif appearance but influences final size. Expect each finished motif to measure approximately 12-13 cm (4.75-5") across when blocked (size will vary by yarn/hook).
— Overview :
Info :
The motif is worked flat in rounds beginning with a small closed center ring, followed by rounds that establish petal loops. Tall clusters are worked into chain loops to build each petal; petals are then shaped and joined by rounds of single crochet and shell work to create the scalloped edge. Final rounds add rope-like chain loops and a picot-style finishing edge to mimic the crisp lace effect.
— Abbreviations & Notes :
Info :
Stitch counts are given at the end of each round in parentheses. Work in continuous rounds (do not join) unless stated. Place a stitch marker at the first stitch of each round and move it as you work. For tall stitches (tr, dtr), maintain even tension and pull loops carefully to keep petals consistent.
— Center :
Round 1 :
Make a magic ring. Ch1, 8 sc in magic ring. Tighten ring. (8)
Round 2 :
Inc in each st around (2 sc in each st). (16)
Round 3 :
(1 sc, inc) x16. (32)
Round 4 :
(1 sc, inc) x32. (64)
Round 5 :
(1 sc, inc) x64. (128)
Info :
By Round 5 you should have 128 stitches forming a stout center disc. The increases produce a flat disk which becomes the anchor for the petal foundations in the next round. Keep your tension even to avoid cupping or ruffling.
— Petal Foundations (create 8 petals) :
Round 6 :
1 sc in each st around (128). Move marker. (128)
Round 7 :
1 sc in each st around (128). (128)
Info :
We will create 8 chain loops that will be worked into to form petals. Each petal foundation will consume 16 base sts (128/8 = 16) so we will space anchors evenly across the round.
Round 8 :
*Sc15, ch12, sl st into next st*; rep from * to * 8 times. (Anchors consumed: 16 per repeat, total base stitches used: 128)
Info :
The ch12 loops will become the petal bodies. Keep the chains loose enough to allow working multiple tall stitches into each loop in the next round; avoid creating tight chain tension.
— Build Petal Bodies :
Round 9 :
Working into the first ch12 loop: join with sl st into the chain space, ch3 (counts as first dc), work 15 dc evenly into the loop, ch1, sl st to anchor at the base point. Repeat for each chain loop around. (16 dc x 8 petals = 128 tall sts placed across 8 petals; total new work is 128 dc)
Info :
Distribute the 16 double crochet stitches evenly along each ch12 loop. The exact number of dc per loop (16) gives a full petal shape when the stitches are gathered and later shaped. Keep ch3 as first dc where you begin; ending each petal with a sl st into the base anchor keeps petals stable.
Round 10 :
1 sc in each st around, working around and through the petal dc stitches (128). (128)
Round 11 :
1 sc in each st around (128). (128)
Info :
At this point the petals are visible as filled sections radiating from the center. The next rounds will shape the petal tips by decreasing slightly within each petal group so that the top narrows slightly and the petal reads as an elongated leaf.
— Petal Shaping Rounds :
Round 12 :
(Sc14, dec over next 2 sts) x8. (112) // Pattern note: dec = sc2tog invisible decrease
Round 13 :
(Sc13, dec) x8. (104)
Round 14 :
(Sc12, dec) x8. (96)
Info :
Each shaping round reduces 8 stitches (one per petal). Work the dec cleanly at approximately the center/top area of the petal to narrow the apex without distorting the base.
Round 15 :
1 sc in each st around (96). (96)
Round 16 :
1 sc in each st BLO around to create a slight ridge defining the petal edge. (96)
Info :
Work this round in the back loops only to give a slight ridge between the petal body and the outer scallop zone. This ridge reads nicely once blocked and helps the petal maintain its form.
— Outer Loop Foundation (prepare for scallops) :
Round 17 :
*Sc5, ch10, sl st into next st*; rep from * to * 12 times. (Base stitches consumed: 6 per repeat x12 = 72 — to keep counts symmetrical we will work into every second stitch starting from the current spiral; if you prefer exact spacing check positioning with markers.)
Info :
This round creates chain-loops between petals to form the base for the scalloped decoration. You can adjust ch length to alter loop size; ch10 produces the look in the photo.
Round 18 :
Into each ch10 loop: join with sl st, ch3 (counts as dc), work 12 dc evenly into loop, ch1, sl st to anchor. Repeat around on each chain loop. (12 dc x 12 loops = 144)
Round 19 :
1 sc in each st around (144). (144)
Round 20 :
1 sc in each st around (144). (144)
Info :
Now the piece has a broad ring of stitches surrounding the petals. The outer scallop impression comes next by working shells into evenly spaced anchor points.
— First Scallop Row :
Round 21 :
We will create 16 scallops. (Sc8, shell in next st) x16 where shell = (2 dc, ch3, 2 dc) worked into the same anchor stitch. Calculation: sc8 consumes 8 stitches, shell consumes 1 anchoring stitch per repeat -> 9 consumed per repeat x16 = 144 consumed. Resulting stitch count after round = 144 + 16*(shell extra stitches - 1 consumed) = 144 + 16*(4 - 1) = 144 + 48 = 192. So Round 21 final count = 192. (192)
Round 22 :
1 sc in each st around (192). (192)
Info :
The shell work raises the outer edge and creates distinct scallops. If shells appear too large, reduce ch3 to ch2 in the shell to firm them up.
— Second Scallop & Rope Edge :
Round 23 :
(Sc10, picot) x16 where picot = ch3, sl st into first ch (this gives a small ornamental point between scallops). Each repeat consumes 12 base stitches (10+2 consumed by picot anchor rule) across 16 repeats. Maintain placement by counting and moving marker carefully. (192)
Info :
The picot points add delicate texture between scallops. Work picots lightly — avoid pulling the loop too tight or the edge will pucker.
Round 24 :
Work 1 sc in each st around in the FLO to add definition (192). (192)
Round 25 :
Rope edge foundation: *Ch6, sl st into next st*; rep across to create rope chain loops spaced evenly. This is worked into the existing 192 stitches; choose spacing of ch6 every 6 stitches to create 32 rope loops across the edge (192/6 = 32). (192 consumed)
Info :
The rope loops give the motif the twisted outer ring visible in the photo. Adjust ch length to taste; ch6 on size 10 cotton replicates the airy look.
— Rope Loop Reinforcement :
Round 26 :
Into each ch6 loop: join with sl st, ch3 (counts as dc), 6 dc into loop, ch1, sl st to anchor. Repeat around. This yields 7 dc per loop x32 loops = 224 dc. (224)
Round 27 :
1 sc in each st around (224). (224)
Info :
At this stage the motif has a beautifully layered look: a dense center, arced petals, scallops and a rope-like outer ring. The counts have increased with shells and rope loops; this is expected and helps the piece lie flat once blocked.
— Decorative Lacing & Final Picot Edge :
Round 28 :
(Sc13, ch3, skip 2) x16 to create small decorative spaces between rope units. This uses groups of stitches designed to place small chain arches between outer rope clusters. Resulting count remains (224) but stitch patterning produces spaces for the final picot work.
Round 29 :
1 sc in each st around (224). (224)
Round 30 :
Edging round — *sc3, picot (ch3, sl st to first ch)*; rep around to place small picots on the outermost rope loops. Work picot onto every third stitch to create evenly spaced decorative points. Count remains close to 224 but will vary by join approach; aim to have picots spaced evenly along the outer rope. (224 approx)
Info :
Fasten off and weave ends through the back loops of the last round for a neat finish. When blocking, gently pull the scallops into a rounded shape and pin each picot outwards to open the lace pattern.
— Optional Extra Rounds for Larger Motif (Add-on layers) :
Round 31 :
If you want a larger motif: join a new ball of white. 1 sc in each st around (224). (224)
Round 32 :
(Sc7, shell (2 dc, ch4, 2 dc) in next st) x32. Calculation: sc7 consumes 7 stitches per repeat, shell consumes 1 anchor per repeat -> 8 consumed per repeat x32 = 256 consumed; new total will be 224 + 32*(shell extra -1) = 224 + 32*(5-1) = 224 + 128 = 352. (352)
Info :
Large outer shells create impressive edging for a bedspread motif. Continue adding rounds in multiples that divide into the current stitch counts so spacing remains even.
Round 33 :
1 sc in each st around (352). (352)
Round 34 :
(Sc11, ch6, sl st into next st) x32 — creates larger loops for connecting motifs and decorative arches. Each repeat consumes 12 base stitches x32 = 384 consumed; adjust spacing to match your actual prior count. (Adjustments may be needed)
Info :
When working additional outer rounds to enlarge the motif, always count and test-join small sections before proceeding all the way around. It's easier to add or remove 1-2 stitches in an outer round than to rip back many rounds later.
— Joining Motifs for Bedspread (Join-As-You-Go options) :
Info :
To assemble a full bedspread, make multiple motifs (count depends on bed size). The motif pictured is joinable via the outer loops created around Round 12–18 (the ch10/ch12 loops). You have two main options:
Option A :
Make all motifs individually. When working the outermost loop round (for example Round 18 or 26 depending on where you choose to join), align motifs and join using sl st or mattress stitch through loop pairs: work the last round up to the loop, then instead of closing the loop individually, sl st through corresponding loop of the adjacent motif and complete. This creates a subtle seam that sits flat once blocked.
Option B :
Join-as-you-go (JAYG): Work the first motif completely. For the second motif, when you reach the row that forms outer loops (for example Round 12/18), after creating each loop that touches an already-made motif, sl st through both loop chains (new motif loop + existing motif loop). Continue around so motifs are linked in a grid without separate sewing. JAYG keeps joining neat and consistent.
Info :
Spacing and orientation are crucial for bedspread assembly. Use pins and blocking boards to align many motifs before permanent joining. For a rectangular bedspread, work motifs in rows and join each row to the previous as you go.
— Blocking & Finishing :
Info :
Soak motifs in lukewarm water (optionally with a touch of starch for crispness), then pin flat on blocking board matching outer scallop points to a template (12–13 cm diameter). Pin each scallop and picot to open the lace. Allow to dry fully. Weave in all ends with a yarn needle on the back side; keep joins tidy and invisible when possible.
Info :
If assembling a bedspread: after joining all motifs, press with a steam iron (holding iron a little above the work) to set shape if desired; avoid direct high heat on mercerized cotton if you want to preserve luster.
— Alternate Variations & Tips :
Info :
- For a more compact motif, reduce chain loop lengths by 2–4 chains at the petal foundation and rope loops. - For more open lacy look, increase chain lengths and add additional outer shells. - To make a bedspread, decide motif count in advance and plan seam placement so petals align across joins for visual continuity. - Keep consistent tension across all motifs so your bedspread lays flat without sections pulling tighter.
Info :
Final motif notes: The stepwise increases early on produce a stable center that supports long petal stitches. The petal construction relies on chain loops and a measured number of tall stitches per loop (we used 16 dc in Round 9). If you change that number, maintain the relative ratios so later scallop spacing remains even.
Info :
If you prefer to use DK cotton rather than thread size 10, use a 2.5mm hook and expect an increased motif diameter (approx. 14–16 cm). Adjust chain lengths for petals and outer loops to maintain proportion.
This crisp snow-white daisy motif blends vintage charm and modern elegance — a perfect accent for heirloom bedding or delicate table decor. Each motif invites patience and care and blossoms into a beautifully lacy circle when blocked. Make a set, join them into a luxurious bedspread, or use single motifs as coasters — whatever you choose, you'll enjoy the timeless results. 🧶✨