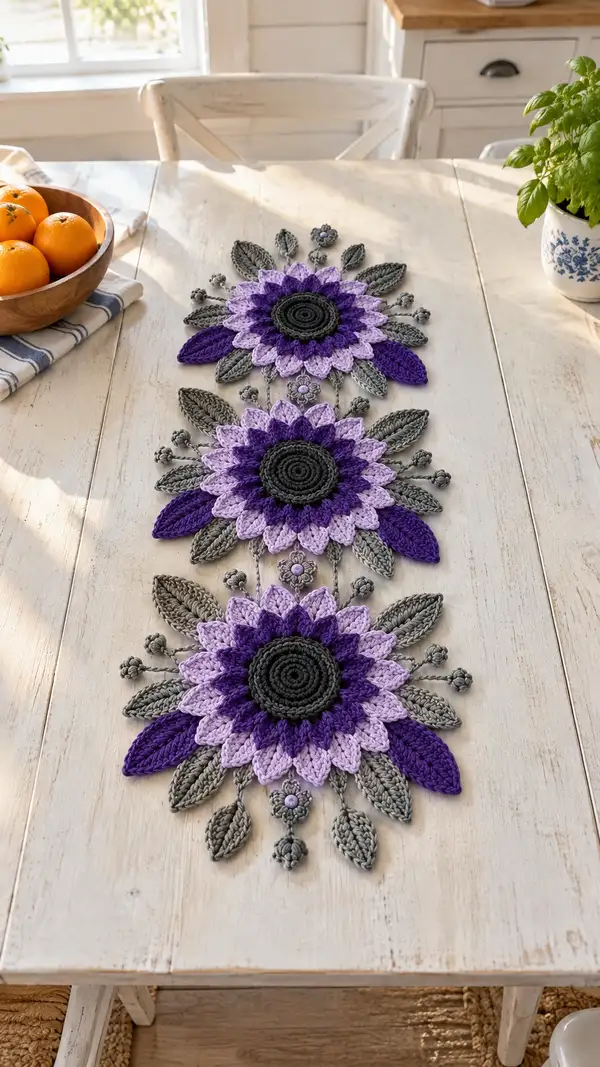
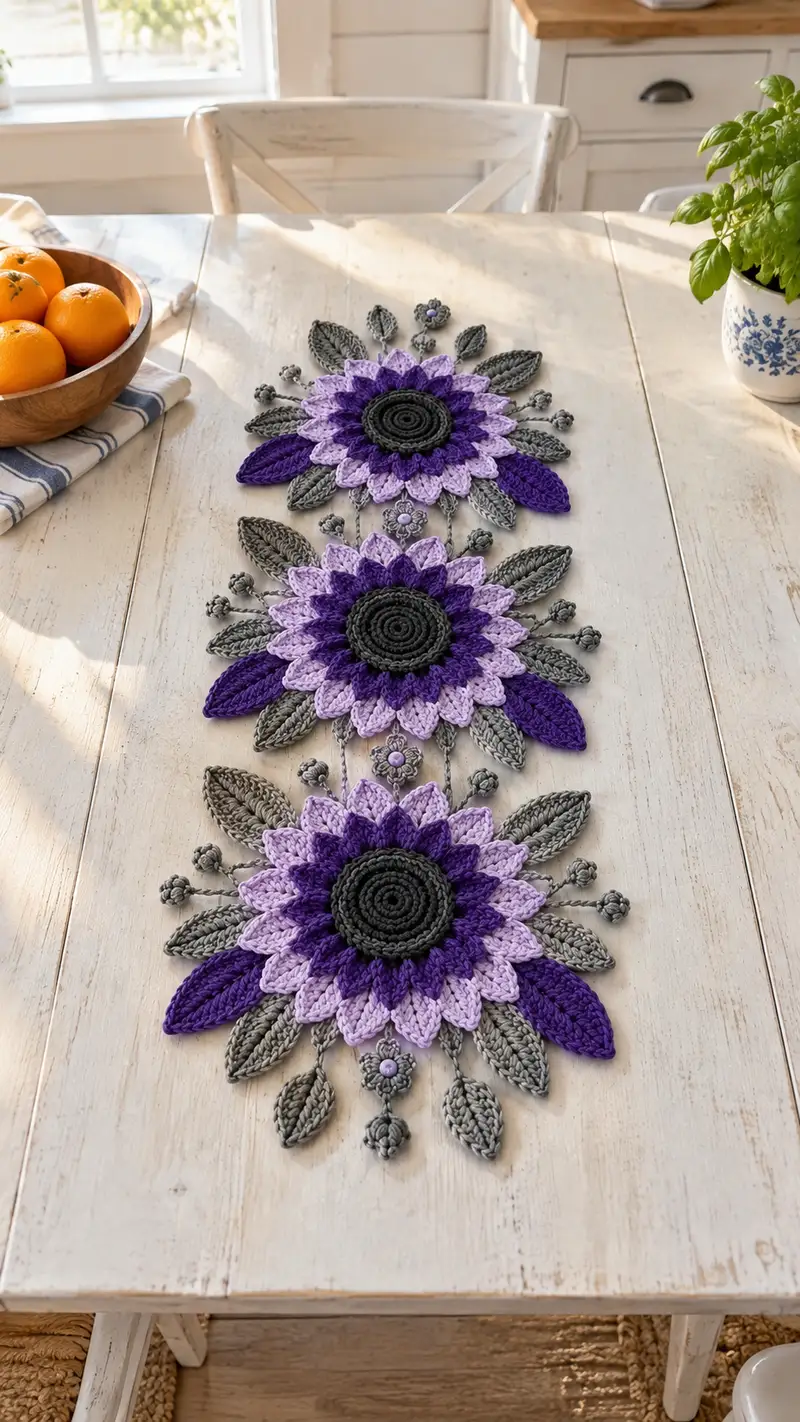
Create a stunning three-motif sunflower table runner featuring layered petals in purple and lavender with sculpted gray centers, leaves and bead-tipped branches. This pattern uses textured stitches, petal shaping, and modular joining so you can make one motif or a full runner. Detailed stitch-by-stitch instructions and assembly notes make it easy to follow and customize.
Progress Tracker
0% Complete
— Center Medallion :
Round 1 :
With dark gray yarn, mr, 6 sc in ring (6)
Round 2 :
Inc in each st around (12)
Round 3 :
(1 sc, inc) x 6 (18)
Round 4 :
(2 sc, inc) x 6 (24)
Round 5 :
(3 sc, inc) x 6 (30)
Info :
Keep rounds worked tightly so the center sits flat. Use a stitch marker in the first stitch of every round to track the start.
Round 6 :
(4 sc, inc) x 6 (36)
Round 7 :
(5 sc, inc) x 6 (42)
Round 8 :
(6 sc, inc) x 6 (48)
Round 9-11 :
1 sc in each st around (48)
Info :
Rounds 9-11 build a sturdy disk base for the 3D petals. If your center is cupping, block it flat before attaching petals.
Round 12 :
*sc 2, fpdc around next sc (to create raised ridge), rep from * around (48)
Round 13 :
1 sc in each st (48)
Round 14 :
Make 8 small bobble clusters around the center for visual interest: *ch 2, 5 dc cluster in next st, sl st into next st* repeat 8 times evenly around. Fasten off and weave ends (48)
Info :
If you prefer a deeper center like the photo, optionally work a spiral of sc with a smaller hook (3.25mm) for a tighter coil and sew it onto the disk.
— Inner Petal Layer (Deep Purple) :
Info :
Change to deep purple yarn. We will work sixteen inner petals evenly around the medallion. Mark every 3 stitches around the center if using 48 sts (48/16 = 3).
Round 1 :
Join purple with sl st at any marked point, ch 1, sc in same st. *Ch 3, skip 2 sts, sc in next st* repeat around to create 16 ch-loops. Join with sl st to first sc (16 loops)
Round 2 :
Work petals into each ch-3 loop: *(sc, hdc, 3 dc, hdc, sc) in loop; sl st into next sc on center* x16 (creates small petal base)
Round 3 :
Join finishing round: ch 1, 1 sc in each petal tip st and 1 sc in center join stitch between petals (approx 80 sc total) count to ensure even distribution (80)
Info :
Use a smaller hook (3.25mm) if these petals feel loose. The petals should stand slightly up from the center; block lightly if needed to shape lines.
Round 4 :
Work a popcorn round to define petal tips: *into each petal center ch-space work 5 dc, remove hook from last loop, insert into first of 5 dc, draw loop through to close popcorn; sl st in next base* repeat around (16 popcorns)
Round 5 :
Secure popcorns with sc around the petal row: 1 sc in between popcorns and 2 sc around base of each popcorn (approx 48)
Round 6 :
1 sc in each st around (48)
Info :
Check that inner petals are evenly spaced. Adjust by sewing down bases slightly with matched purple yarn if one petal appears loose.
— Outer Petal Layer (Lavender) :
Info :
Change to lavender yarn. Outer petals are worked larger and will overlap inner petals, creating the double-layer sunflower effect visible in the image.
Round 1 :
Join lavender with a sl st at a midpoint between two inner petals (work to create 16 outer petals). Ch 1, sc in join, *ch 4, skip to next petal base, sc* repeat to make 16 ch-4 loops. Join with sl st (16 loops)
Round 2 :
Work petals into each ch-4 loop: *(sc, hdc, 5 dc, hdc, sc) in loop; sl st into next base stitch* x16 (larger petals)
Round 3 :
Ch 1, sc around petal bases creating a tidy join: 1 sc between petals and 2 sc around base of each petal (approx 64 sc)
Round 4 :
Petal scallop: *into tip of each petal work (2 dc, ch 1, 2 dc) to make a pointed scallop; sl st into next join* repeat (16 scallops)
Round 5 :
Reverse crab stitch edging: working in FLO, sc in each st around to give a textured edge and encourage petals to sit slightly up (64)
Info :
Wet-block or steam lightly while shaping petal tips on a blocking mat to get a crisp sunflower silhouette. Pin each petal tip to the desired angle and allow to dry.
Round 6 :
Optional decorative stitch: ch 1, *fpdc around the post of the dc two rows below across each petal central post to create veins* repeat for visual texture (64)
Info :
If creating multiple identical motifs, make a small sample motif first and compare petals; adjust ch-loop sizes if petals sit too tight or too flat.
— Large Leaf Motif (Make 10-12 leaves per motif) :
Info :
Leaves are worked in gray to frame each sunflower. There are two sizes: large and small. Work 6 large leaves and 6 medium leaves per floral medallion in alternating positions.
Round 1 :
With mid-gray yarn, mr, 6 sc in ring (6)
Round 2 :
Inc in each st around (12)
Round 3 :
(1 sc, inc) x 6 (18)
Round 4 :
(2 sc, inc) x 6 (24)
Round 5 :
Work one side of leaf shaping: ch 1, sc in next 6 sts, hdc in next 4 sts, 2 dc in next 4 sts (this creates the leaf body). Do not turn; now continue along opposite edge of the leaf working symmetric decreases: hdc next 4 sts, sc next 6 sts. Sl st to first sc to close (approx 24)
Round 6 :
Edging and central vein: ch 1, sc in each st around working: *(sc 1, fpdc around the body post every 3rd stitch to create raised vein)* repeat around. Fasten off (24)
Info :
For larger leaves, increase initial rounds by one repeat (work to 30 sts) and make an extra dc cluster on the widest row to lengthen the leaf shape.
Round 7 :
Block leaf on slight curve: dampen and pin on mat to create a gently cupped leaf that sits around the petals as in the photograph.
Info :
Make leaves with FLO on the last edging round if you want a ribbed edge. Make 6 leaves for each side of a motif: 3 large, 3 medium.
— Small Leaf / Bud and Bead Branches :
Info :
These create the delicate hanging details between motifs and at the ends. They are worked as little cords with small buds and bead centers. Make 10-14 branches per motif depending on how full you want the runner to appear.
Round 1 :
With mid-gray, ch 30 (or adjust length desired), sl st into base at chosen point to create a hanging cord. Repeat for number of cords per motif.
Round 2 :
Work small buds along cord: at desired positions make a tiny bud: *sl st into cord, mr, 6 sc in ring, sl st to cord; leave a tail for sewing. Repeat* making 4-6 buds per branch (buds are approx 6 sc each)
Round 3 :
Attach bead centers: sew small craft bead to center of one bud using embroidery needle and short matching yarn tail, knot well on the wrong side and weave in 2 in.
Info :
Use minimal stuffing if you want plump buds; for tiny beads, skip stuffing and rely on tight stitches to mimic bead shape.
— Connecting Chains and Decorative Braids :
Round 1 :
Between each prepared motif, make connecting braids by chaining 60 and working single crochet back (or adjust length to fit your table spacing). For runner with three motifs, you will make two long chains to join them as shown.
Round 2 :
To give braid body, make 3 parallel chains and single crochet across each, then sew them together side-by-side to form a braided look. Secure with slip stitch ends for tidy joins.
Info :
When joining motifs, place chains so they fall naturally between flower centers; pin them in position before sewing to check drape and length.
— Joining Motifs (Make 3 motifs and join) :
Info :
Lay three finished floral motifs flat and arrange spacing visually to mirror the reference photograph (roughly 12-14 inches center-to-center depending on petal spread). Use blocking pins to hold each motif in place on a blocking mat while joining.
Round 1 :
Sewing the first join: Using a long tail from a petal base on motif A, align motif B next to the first and use surface whip stitch to attach outer petal bases to the braided connectors and to the neighboring petals at approximately 8 evenly spaced points per join.
Round 2 :
For a flexible join, use mattress stitch around the outer petal base; for a firmer, flatter join, use whip stitch and add a few extra passes through the chain connector.
Info :
Take care to match petal rows when joining so the seam falls under a petal point, camouflaging the attachment. Use matching yarn color to keep joins discreet.
Round 3 :
Attach all leaf motifs around each flower using ladder stitch: position 6 leaves around the outer petal circle spaced evenly and sew through both leaf and petal base. Secure tightly but not so tight the petal fabric puckers.
Round 4 :
Add hanging bud branches between joined motifs: sew chain ends to underside of outer petal bases and secure by stitching at both ends to prevent twisting.
Info :
Periodically flip the runner to check drape and symmetry. Adjust stitches before final weaving in so motif spacing remains even.
— Decorative End Motifs and Edge Leaves :
Round 1 :
At each end of the runner, make a small fan of three leaves and two bud-branches to echo the photograph's tapered ends. Sew them to the outermost petal bases and secure with extra stitches.
Round 2 :
For a finished look along the runner sides, add small single-leaf motifs every 3-4 petals: whip stitch leaves to outer petal join points so the runner edges read as a continuous leafy border.
Info :
Trim tails and weave them through underside stitches so the top remains clean. If you used beads, make sure each bead knot is concealed and glued lightly if desired.
— Finishing Edging :
Round 1 :
With mid-gray, work a single crochet round around the entire assembled runner's perimeter: 1 sc evenly around, working 3 sc in tight corners to prevent ruffling. This neatening round unifies motifs and hides join points (approximately varies with motif size but maintain even spacing).
Round 2 :
Picot edge option: *sc 3, ch 3, sl st in the first of ch 3* repeat around to create a delicate picot scallop along the runner edge. Fasten off and weave in ends.
Round 3 :
Clipping and weaving: Clip all tails close after securely weaving them in with tapestry needle. Steam-block the finished runner on a flat surface, pinning each petal tip to hold the sunflower silhouette. Allow to fully dry.
Info :
To keep the runner from sliding on a slick table, attach a few discreet non-slip pads on the underside at the center and both ends.
— Optional Extra Embellishments :
Round 1 :
Use embroidery floss to add French knots in the center of each small bud for added texture. Use a contrasting light purple thread for tiny flower centers between motifs like the reference photo.
Round 2 :
Create small decorative leaves on connecting chains by working tiny sc leaf units and attaching them at intervals along the chain.
Info :
These extra touches add a handcrafted, couture look and are the finishing details that make the runner feel professional.
— Measurements and Scaling Notes :
Info :
Each completed motif measures approximately 8.5-10 inches across depending on your tension and yarn; with three motifs joined and small spacing, the full runner in the photograph is about 34-38 inches long and 10-12 inches wide at its widest point. To make a longer runner, add more motifs and scale spacing by increasing chain lengths.
Info :
If you prefer a smaller runner, use DK weight yarn with a 3.25mm hook; to make an oversized table centerpiece, use bulky yarn with a 5mm hook. Adjust counts by testing a gauge swatch for the center disk to maintain radial symmetry.
Completing this sunflower table runner is such a satisfying project — the layered petals and delicate bead-tips create a real showpiece for your table. Each motif is like making a small floral work of art, and joining them into a runner brings the look together beautifully. Enjoy the process of shaping, blocking and assembling; the result is a handmade statement piece you'll love to display. 🧶🌼✨