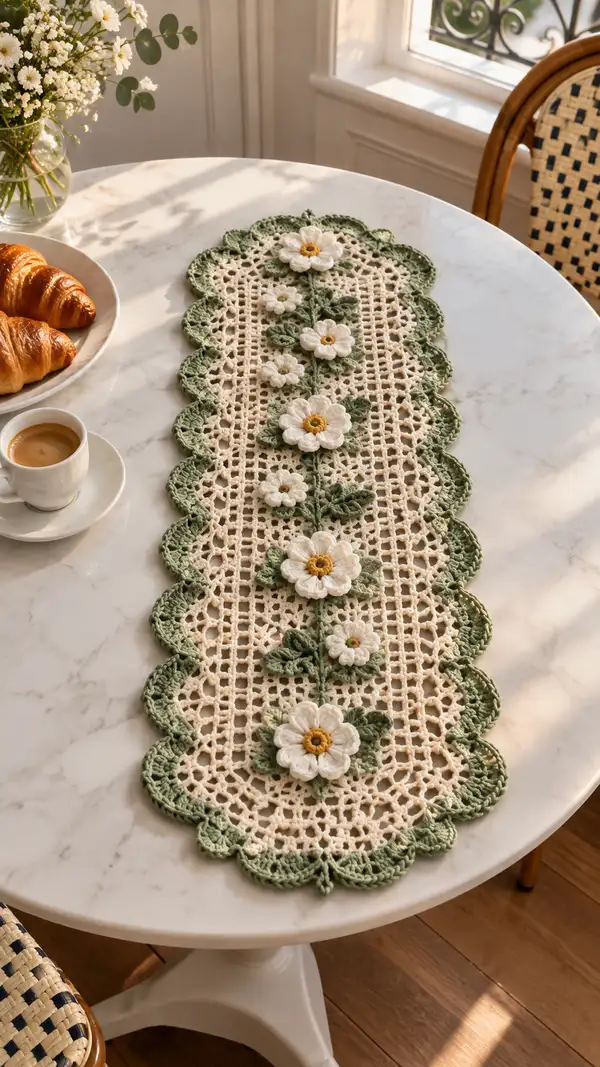
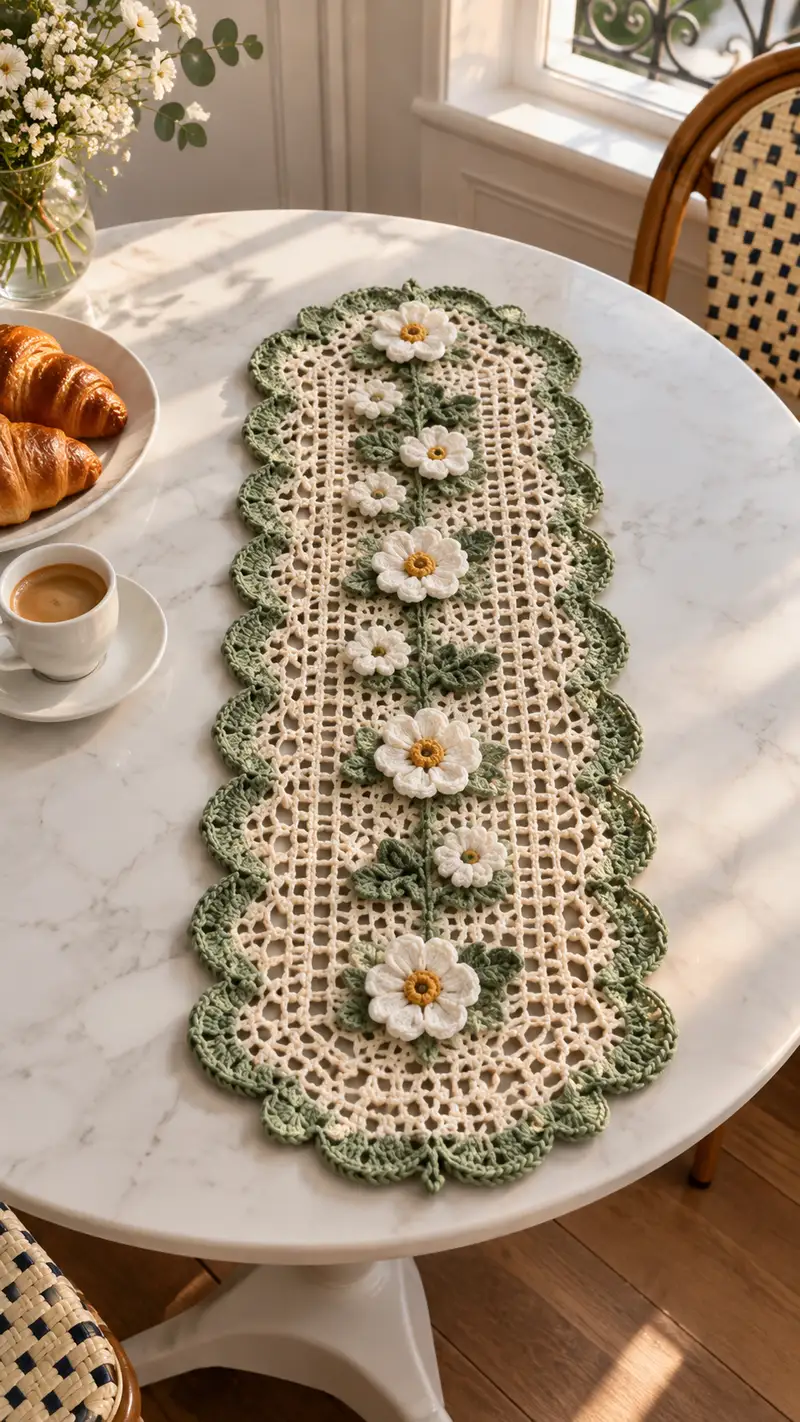
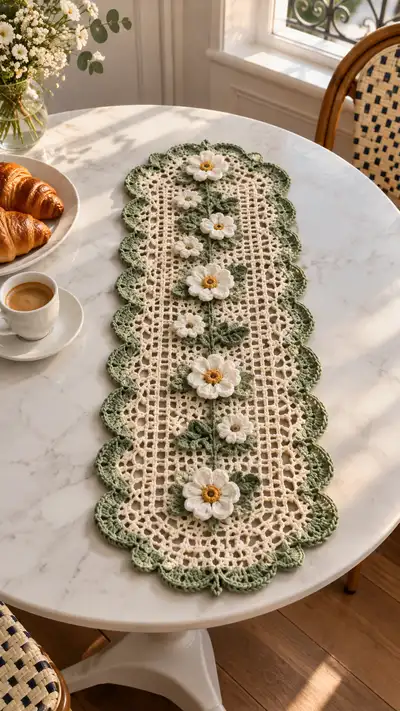
A delicate vintage-inspired table runner worked in cream filet lace with a sage green scalloped border and 3D daisy motifs down the center. This pattern recreates the airy open mesh, elegant scalloped edge and layered flowers for a romantic, cottagecore tabletop accent. Finished runner fits a small bistro table or console and adds a timeless handmade touch to any room.
Progress Tracker
0% Complete
— Notes & Gauge :
Info :
Gauge is not critical for lace table runner sizing but influences finished dimensions. With DK cotton and 3.5mm hook, 10 filet blocks across (measured as 10 'squares' of the filet pattern) ≈ 4 cm. Adjust starting chain to scale runner width. The sample runner measures approximately 68 cm long x 18 cm wide when finished.
Info :
Throughout this pattern I refer to 'mesh block' as one filet square (1 dc + ch2 space). Work tightly enough that stuffing and applique sewing won't show through the lace.
— Foundation & Base Mesh Panel :
Round 1 :
Foundation: ch 121. This chain gives a rectangular width similar to the photo and works as ch multiple of 4 + 1 which suits the filet repeat (121)
Round 2 :
Row 1: dc in 4th ch from hook (counts as first dc), dc in each ch across to end. Turn. (119 dc)
Info :
Count your stitches after Row 1. You should have one fewer dc than foundation chain minus three for the turning chain. Place stitch markers at both ends of the row to mark the outer edges — this helps when you later center the vine.
Round 3 :
Row 2 (start filet): ch 3 (counts as dc), sk next st, *ch 2, sk 2, dc in next st; rep from * across to last st, dc in last st. Turn. (This creates approximately 39 mesh blocks across, depending on counts)
Round 4 :
Row 3: ch 3 (counts as dc), dc into each dc across where the previous row had dcs, and into each ch-2 space work: ch 2, dc. End with dc in top of turning ch. Turn. (same number of mesh blocks)
Round 5 :
Row 4: Repeat Row 3 to continue the open mesh pattern. Maintain consistent tension; this will be the main fabric of your runner. (mesh width unchanged)
Info :
Work rows 3–18 in this filet pattern to establish the central panel. Place temporary thread placeholders across the center line where you plan to attach the vine, marking every 10 mesh squares to help place motifs later.
Round 6-18 :
Row 5–17: Repeat Row 3 (mesh pattern) for a total of 15 rows in the initial mesh section. Keep a consistent count of the open squares across each row. (mesh remains consistent)
Round 19 :
Row 18 (stabilizing row): ch 3, dc in next 2 sts, *ch 1, sk 1, dc in next 3 sts; rep from * across ending with dc in last 2 sts. Turn. This row reduces very slightly the airy openness and gives a stable attachment row for vine foundation. (same overall stitch count)
Info :
At this stage count across and ensure you have the same number of mesh spaces in each row. If you have an extra/less space, subtly increase/decrease at edge to correct before continuing.
Round 20-30 :
Row 19–29: Continue filet mesh rows (ch3, *ch2, sk2, dc in next*) repeating the layout for 11 more rows to create the central length of the runner panel. These rows form the foundation where the vine and daisies will be attached. (mesh unchanged)
Info :
Measure your panel now; the photo sample uses roughly 30 rows of mesh total before decorative sections are added. Adjust number of rows for desired runner length — add or remove mesh repeats in multiples of the motif spacing (generally every 6–8 mesh rows).
Round 31-36 :
Row 30–35: Work 6 more filet mesh rows maintaining the same pattern to reach a panel that will host 5 large daisies and 4 small daisies spaced evenly along the center vine. Keep markers at center column of mesh (see Info for vine center).
Info :
To find the physical center column for the vine: count mesh blocks across and divide by 2. Add a removable marker in the center ch-2 space of the central column on an even row — this is where you will anchor your chain vine.
— Center Vine Foundation (worked in situ) :
Round 37 :
Row 36 (vine anchor): With sage green yarn, attach with sl st to the center ch-2 space of the mesh at the topmost position for your vine. Ch 1, sc around that ch-2 loop to create a small anchor (1 sc). This creates the 'stem base'.
Round 38 :
Row 37: Ch 10 from anchor (this chain will create the first vine segment), join with sl st into the mesh center approximately 6–8 rows lower (count down measured rows to position motifs). Fasten off and weave tail. This builds a delicate vine line down the mesh.
Info :
Rather than crocheting a long continuous chain that pulls the mesh, we anchor short chain segments every 6–8 rows to mimic the vine look in the photo. Each chain segment will have leaves and flowers attached at its junctions.
Round 39-48 :
Row 38–47: Repeat: attach sage with a sl st at the center mesh ch-2 space, ch 10, sl st down into mesh 6–8 rows below. Repeat this for a total of 9 vine segments down the length of the runner, spacing segments evenly to match photo spacing (9 vine joins approximate 5 large and 4 small flower positions). Fasten off each segment after sl st and weave ends invisibly to the back of the mesh.
Info :
When placing vine segments, leave long tails for sewing leaves and flowers; you can weave these to the back and use them as tails for secure sewing. Pin segments lightly while positioning motifs to ensure symmetry.
— Large Daisy Motif (Make 5) :
Round 40 :
Make 1 – Center ring: With golden yellow, make a magic ring. ch 1, work 10 sc into ring; pull tight and join with sl st to first sc (10)
Round 41 :
Round 2 – Petal foundation: ch 1, *[1 sc in next st, ch 3, 1 tr in same st, ch 3, sl st in next st]; rep from * around to create petal anchor points. You will have 5 petal anchors (5 sets). End sl st to first sc.
Info :
The stitched petal anchors create the spaces where petals will later be worked in rows using front post and back post technique to give a layered look.
Round 42 :
Round 3 – First petal row: Attach cream yarn at the base of an anchor, ch 1, [sc in anchor base, ch 2, 5 dc into the ch-3 loop created in Round 41, ch 2, sc into same anchor base]; move to next anchor and rep. Work 5 petals around. Fasten off and weave ends. Each petal now has a puff of dc held by sc base stitches.
Round 43 :
Round 4 – Second petal layer (rear petals): Reattach cream to the back of the ring between anchors, ch 2 (counts as hdc), 7 hdc in back loops around the base of each petal anchor to create fuller rear petals; slide to next anchor and repeat. You should still have 5 petal groups; join and fasten off. This creates two layers (rear set and front set) for depth.
Info :
To shape petals, when working the petal dc clusters, slightly block each petal with a dab of water and pin to shape. A tiny amount of stuffing in the petal base gives the lift seen in the photo if desired.
Round 44 :
Round 5 – Petal shaping using BLO: Reattach cream at one petal base, ch 1, work [1 sc, (1 dc BLO, 1 dc in next stitch) x 4, 1 sc] across each petal row to define petal ridges. Repeat for all petals and join. Fasten off and weave ends. (This gives 5 shaped petals with visible ribbing)
Round 45 :
Round 6 – Attachment loop: Using sage, work a small sl st loop on the underside: join sage to the back of the flower center and ch 6 then sl st to the ring back to create a small leaf anchor point for sewing to vine. Fasten off and weave ends. Flower ready to attach.
Info :
For each large flower repeat Rounds 40–45. Make five identical large daisies. Slight variations in petal tension will create natural variation, which is desirable.
— Small Daisy Motif (Make 4) :
Round 46 :
Small Flower Round 1: With golden yellow make magic ring, ch 1, 6 sc in ring, pull tight (6)
Round 47 :
Small Flower Round 2: ch 1, *1 sc in next st, ch 2, sl st back into same st to create tiny petal base; rep around to make 3 tiny petals. Finish and fasten off (3 tiny petals)
Round 48 :
Small Flower Round 3: Attach cream yarn to each tiny petal base: ch 1, 3 dc into petal loop, sl st to next base; rep for 3 petals. Fasten off and weave ends. Make 4 small flowers.
Info :
The small flowers are simplified daisies that sit between large flowers as seen in the photo. Keep them flatter than the large daisies so they recede visually.
— Leaf Motif (Make 18) :
Round 49 :
Leaf Round 1: With sage, ch 8. Row turning foundation: sc in 2nd ch from hook, hdc in next, dc in next 3, hdc in next, sc in last (7 sts across chain). Fasten off. (1 leaf base)
Round 50 :
Leaf Round 2: Reattach at base, work along one edge to shape: ch 1, sc, hdc, 3 dc, hdc, 2 sc around tip (worked into same tip st), then continue down other edge: hdc, sc; sl st to base. Fasten off and weave ends. Make 18 leaves total to attach in pairs at flower bases.
Info :
Sew leaf pairs behind each large flower (3 leaves per large flower pair in layered arrangement) and single leaves near small flowers; adjust leaf counts to suit your visual preference for fuller or sparser foliage.
— Attaching Flowers & Leaves to Vine :
Round 51 :
Info : Pin each large flower to the mesh at desired vine anchor points. Use the long sage tails from vine anchor loops to slip through the small sage loop on the flower back. Secure with mattress or whip stitch using sage yarn so the join is invisible from the front.
Round 52 :
Info : Position small flowers between large flowers; sew their golden centers to the mesh first, then sew petals to secure. Add leaves behind flowers: pair two leaves at each large flower base, overlap slightly and tack with short stitches through leaf bases and mesh vines for a strong attachment.
Round 53 :
Info : When sewing motifs, work from the back of the runner so stitches are hidden in the mesh. Use tidy, small passes and secure ends by weaving back through 4–6 stitches on the back.
— Decorative Inner Row (surrounding flowers) :
Round 54 :
Inner Lace Round 1: With cream, join at top edge of mesh beside the topmost vine anchor. Ch 3 (counts as dc), dc in next 2 dc, *ch 2, sk 2, dc in next 3; rep around the inside of the mesh border to create a small lace frame running parallel to the edge of the runner. This defines where the scalloped border will begin. Turn as necessary to follow the rectangle shape. (stitch count equals mesh width adjusted for corners)
Round 55-58 :
Inner Lace Round 2–5: Continue in cream: repeat pattern of dc groups and ch-2 spaces for 4 more rows to give a slightly raised frame that supports the scalloped edge. Keep corners square by working (dc, ch 2, dc) in corner spaces to form 90-degree turns.
Info :
These inner rows stabilize the mesh near the edges and create a defined zone for adding the scalloped border. Use stitch markers at corner points to maintain square corners while you add rounds.
— Scalloped Sage Border (worked around entire runner) :
Round 59 :
Border Round 1: Attach sage yarn at center of one long edge of the inner lace frame with a sl st. Ch 1, work 1 sc in each dc across the inner frame to create a neat anchor row for the scallop. On corner spaces, work 3 sc evenly to turn the corner. Continue around entire perimeter and join with sl st to first sc. (stitch count equals perimeter dc count)
Round 60 :
Border Round 2: ch 3 (counts as dc), *sk 1 sc, (5 dc) into next sc for scallop shell, sk 1 sc, sl st into next sc; rep across to form scallop clusters. At corners, work (5 dc) in the same turning sc to keep scallops continuous. Join with sl st to top of beginning ch. This forms first scallop layer.
Info :
Count scallop shells across one long edge; the sample uses 11 scallops per long edge and 3 scallops across short ends. Adjust number by spacing shells across the anchor row — keep even spacing for symmetry.
Round 61 :
Border Round 3: ch 3, dc into center of each shell from previous round, 1 dc at each sl st join between shells. On corners, work 2 dc into the same corner space to maintain shape. This raises scallops and gives a fuller edge. Join with sl st.
Round 62 :
Border Round 4: Work picot detail for scallop edging: ch 1, sc in same st, *ch 3, sl st in 3rd ch (picot), sc into center dc of scallop; rep around. Join and fasten off. This is a decorative final scallop ridge that mirrors the lacy look in the photo.
Info :
For a denser scallop like the photo, you can add an extra layer: after Round 61, work a final round of 7 dc shells centered over each scallop and finish with sc in between shells to add more texture and depth.
— Corner & Short End Shaping :
Round 63 :
Corner shaper row (if scallops bunch at short ends): On short ends, work shells slightly closer: (3 dc, ch 1, 3 dc) in the tip sc to create a pointed oval end reminiscent of photographed rounded scalloped ends. Repeat on opposite short end. Join and weave ends.
Info :
Use extra picots at the corners to create a delicate pointed edge like the image. You may also place a small hanging loop of ch 6 at the center of each short end for the decorative tassel/point highlight if desired.
— Final Surface Embroidery & Finishing :
Round 64 :
Finishing Row 1 – Flower centers: With golden yellow yarn, add a small French-knot-like technique by making 6 sc around center ring of large daisies to give the textured eye seen in the photo. Sew through center with three passes to build up thickness.
Round 65 :
Finishing Row 2 – Tidy joins: Weave in all tails by threading yarn needle and repeating through 6–8 mesh stitches on the back. Trim close and, if desired, secure ends with a tiny dot of fabric glue on back for added durability (optional).
Info :
Block the runner gently: wet-block or steam-block with pins at scallop points to open scallops and flatten mesh. Use pins to shape petals and leaves while blocking for the lifted 3D effect shown in the photo. Allow to dry overnight.
Round 66 :
Final inspection: Check for any loose areas, secure with additional small invisible whip stitches on the back, and trim stray threads. Your runner is now complete and ready to style on a bistro or console table.
Completing this Cream And Sage Daisy Lace Table Runner is such a rewarding experience — the balance of airy filet mesh, layered daisies, and a scalloped sage edge makes every stitch feel intentional. Pinning and placing the flowers is a peaceful, creative step that lets you personalize spacing. The finished runner brings a warm, botanical elegance to a small table and makes a charming handmade gift. 🧶🌼 Happy crocheting and enjoy every lacey stitch!