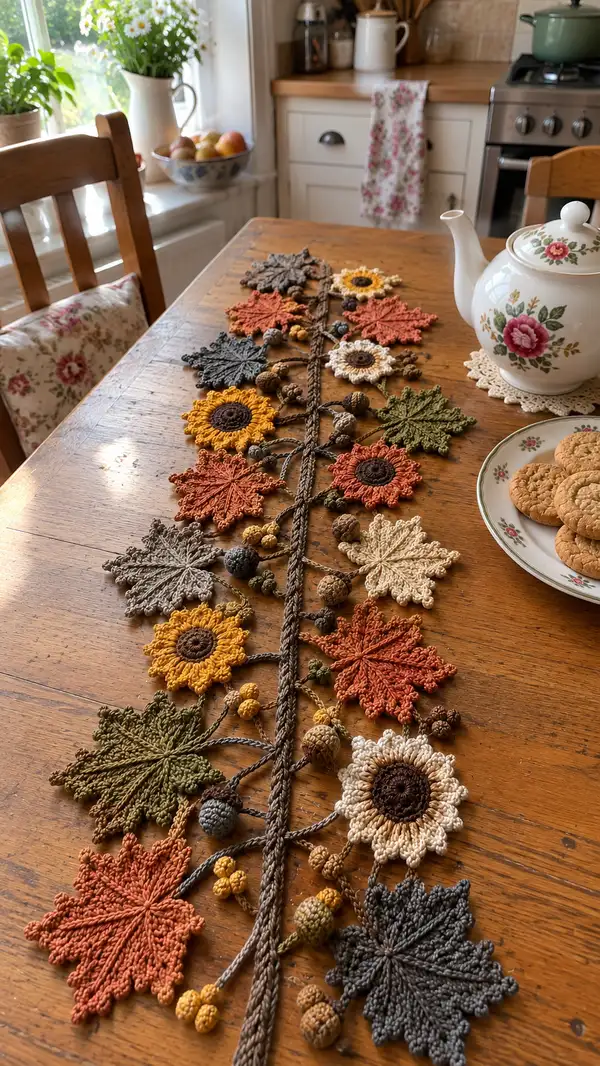
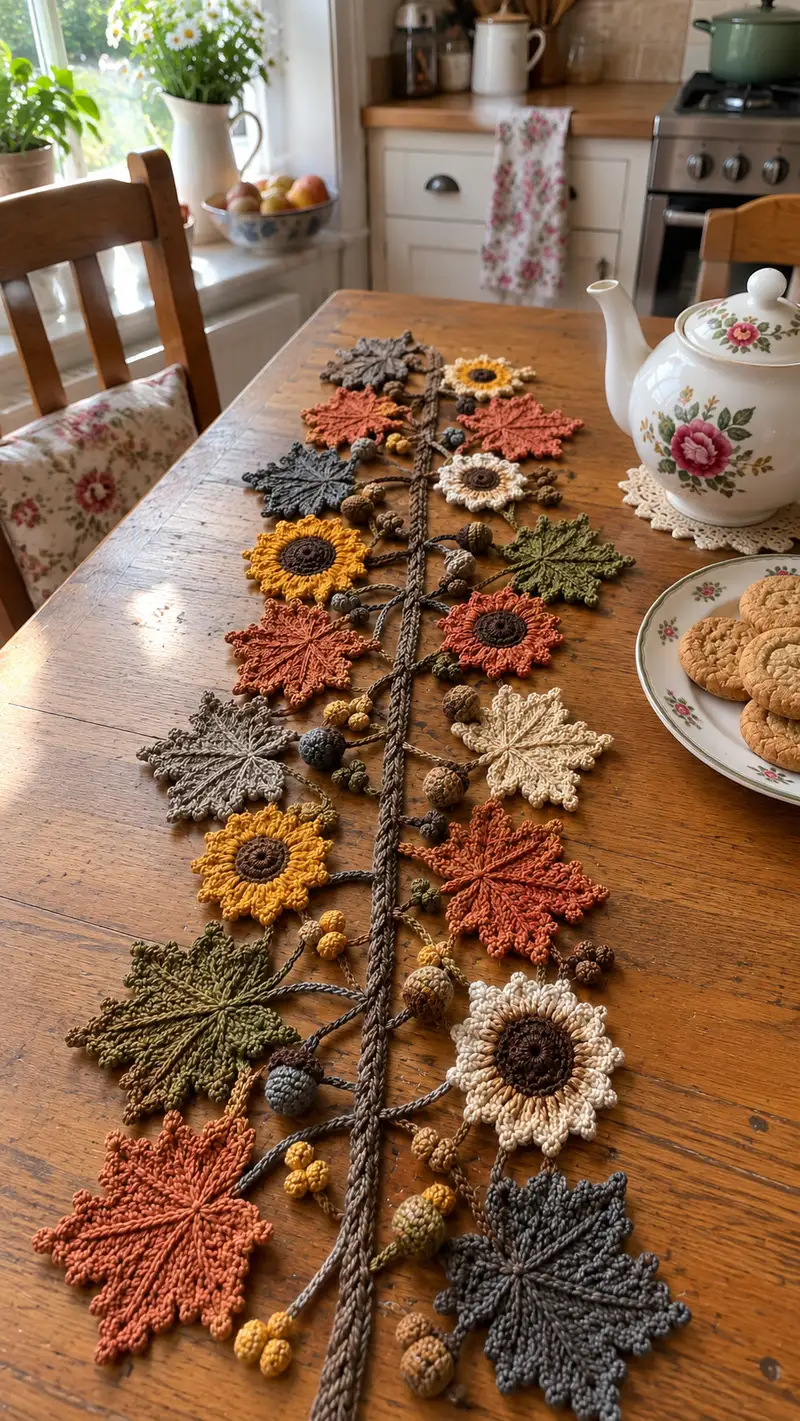
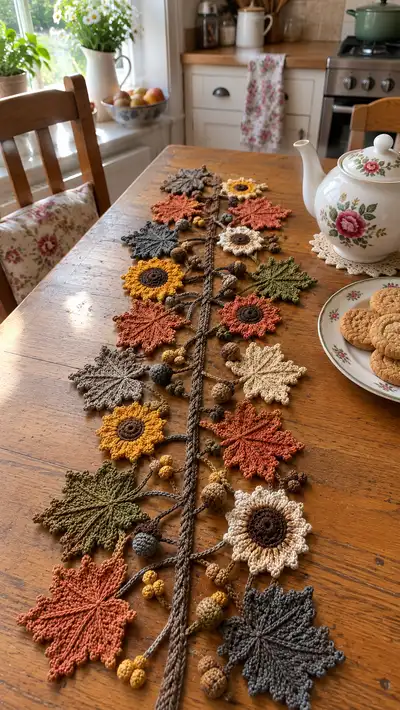
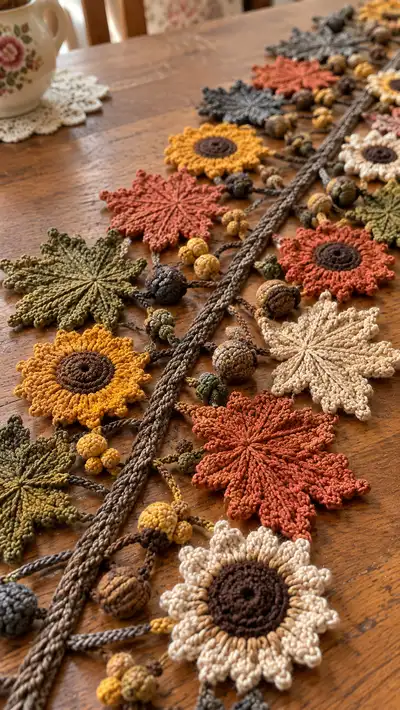
A warm, textured table runner inspired by autumn leaves and sunflowers, hand-crocheted in mercerized cotton. This long runner features layered sunflower motifs, multi-lobed maple-style leaves, braided stems and tiny acorn/berry clusters for natural detail. Perfect to drape down the center of a dining table for cozy seasonal styling.
Progress Tracker
0% Complete
— Materials & Gauge :
Info :
Gauge is not critical for overall runner length but important for motif size match. Using 3.5mm hook with DK cotton each sunflower motif measures approximately 10-12cm across; each maple leaf measures approximately 10cm from tip to base. Adjust hook size to match desired density and motif size.
— Overview :
Info :
This pattern is modular. You will make: Sunflower motifs (make 6-8), Maple-style leaves (make 10-14), Small leaves/leaf buds (several), Crocheted acorns & berry clusters (many), and a central braided cord (one long braid). Motifs are joined with crocheted stems and sewn into position. Read through full pattern before starting.
— Sunflower Motif (Make 8) :
Round 3 :
(1 sc, 1 inc) x 6 (18)
Round 4 :
(2 sc, 1 inc) x 6 (24)
Round 5 :
1 sc in each st (24)
Info :
Change to dark brown for the central disc if you are using contrasting centers. Work rounds 1-5 tightly so the center looks dense; this helps petals sit well without gaps.
Round 6 :
(2 sc, 1 inc) x 6 (30)
Round 7 :
1 sc in each st (30)
Round 8 :
Change to petal color (mustard or cream). For crisp petal placement, place a stitch marker at the first stitch of this round and continue to move it up each round to identify the starting anchor.
Round 9 :
*Sc in next st, ch 3, skip next st, sl st into next st* Repeat around (30) - this creates 15 loop bases. (If you prefer 12 petals, work ch3 loops into every 2nd stitch accordingly)
Info :
These ch-3 loops form the petal anchors. Count loops as you work — you will build petals on top of these loops in subsequent rounds.
Round 10 :
*Into each ch-3 loop: (sl st, ch 1, 5 dc, ch 1, sl st)* working all clusters into the loop. Join with sl st to first st. Center count remains the same (30)
Round 11 :
Turn petal clusters into fuller petals: Into the center of each 5dc cluster work (sc, hdc, 2 dc, hdc, sc) to produce a rounded petal edge. Fasten off petals color leaving tail for weaving. Center remains 30.
Info :
If you want a double row of petals, rejoin petal color at the base of each petal and work an extra round of (3 dc) centered on each petal for more fullness.
Round 12 :
Rejoin brown to the back of the center if you want a narrow rim: *sl st into every other st around the center (15 sl st)* This gives a neat border behind petals.
Round 13 :
Optional decorative round: Using a lighter brown or tan, work (sc, ch2, sc) into every 3rd stitch around the brown disc to get a stitched look (30)
Info :
Block completed motif flat: gently steam or wet-block and pin flat on a towel to make petals crisp and even. Repeat to make required number of sunflower motifs. Weave in ends securely.
— Large Maple-Style Leaf (Make 10) :
Info :
These leaves are worked from tip to base as an elongated fan using a central spine. The leaf has 8 lobes and deep veining created with front post and back post dc to give texture.
Round 1 :
Ch 14. In 2nd ch from hook: sc, hdc, dc, 2 dc in next, dc in next 3 sts, hdc in next, sc in next (this forms one side of the leaf tip). (Count along chain side: 10 sts worked)
Round 2 :
Working along opposite side of chain: sc in next 2 ch, hdc in next, dc in next 3 ch, 2 dc in next, dc in next, hdc in next, sc in last. At base you should have mirror counts making total around 20 sc/hdc/dc combination stitches (not counting turning chains)
Info :
This first round builds the flat leaf. Adjust chain length to change overall leaf length. Keep tension even so the leaf lays flat.
Round 3 :
Turn leaf and work along the edge: Starting at tip, work sc evenly around the whole leaf edge to create a solid border (approx 30 sc). This will be your stitch count reference for subsequent vein rounds (30)
Round 4 :
*On right side only: work fpdc around designated center spine stitch to create raised vein; on left side work bpdc mirroring the vein.* Work 1 fpdc at equal intervals across the right edge and 1 bpdc across left edge to create alternating ridges. Total stitch count remains (30)
Info :
Use a stitch marker at the center base so you can find the base easily for assembly. These front/back post stitches give the leaf a ribbed look similar to real leaf venation.
Round 5 :
On each of the 8 lobes work a picot accent at the tip: *sc, ch 3, sl st into last sc* repeat across lobes (30)
Round 6 :
Optional texture round: In each sc around work (sc, ch 1) to give a lacy edge; this will increase count slightly to approx (45) depending on ch placements. Fasten off and block leaf flat.
Info :
For smaller leaves, use ch 10 base and reduce dc groupings accordingly. Change color between rounds for variegated effect or to create fall shading using a gentle crochet-over technique.
— Small Leaf / Bud (Make 12) :
Round 1 :
Ch 8, sc in 2nd ch from hook, hdc in next, 2 dc in next, hdc in next, sc in next, sl st in last. Turn and sc evenly back along opposite side into chain (approx 12 sc total)
Round 2 :
Working into the same edge, create a raised centre vein with 3 fpdc around a central chain stitch; this keeps the little leaf puckered and realistic. Fasten off. (12)
Info :
Small leaves are used as connectors and to fill spaces between sunflowers and larger leaves. Make them in olive and muted gold for contrast.
— Acorn (Make 10-12) :
Round 3 :
(1 sc, 1 inc) x 6 (18)
Round 4 :
(2 sc, 1 inc) x 6 (24)
Round 5 :
1 sc in each st (24)
Info :
Begin stuffing the sphere lightly at this point. The acorn body should be slightly soft to the touch; do not overstuff. Reserve a small tail of yarn for closing.
Round 6 :
(2 sc, 1 dec) x 6 (18)
Round 7 :
(1 sc, 1 dec) x 6 (12)
Round 8 :
6 dec (6) - close leaving tail. Fasten off and weave tail inside. This completes the acorn nut body.
Round 9 :
Make the textured cap: Using a contrasting brown, make a magic ring of 6 sc (6)
Round 10 :
Inc in each st (12)
Round 11 :
(1 sc, 1 inc) x 6 (18)
Round 12 :
Work a surface bobble/cluster round: *Into next st: (dc, ch1, dc) all in same stitch, sl st into next stitch* repeat to create ridges (18). Fasten off leaving long tail for sewing cap to nut body.
Info :
Sew cap to nut by placing the cap over the closed end of the nut and whipstitching the rim. Add a tiny wooden bead or small dot of brown yarn as the acorn knob if desired.
— Berry Cluster (Make 12 clusters of 3-5 berries) :
Round 1 :
For each berry: mr 6 sc (6)
Round 3 :
1 sc in each st (12) - fasten off leaving tail and very lightly stuff (do not overfill)
Info :
Sew berries into small clusters of 3-5 on short stems (see Stem construction). These clusters act as filler between motifs and give an organic look.
— Braided Central Stem / Spine :
Info :
The central spine is a sturdy 3-strand braid made from three crocheted cords. Each cord is made with a chain foundation worked with tightly spaced sc to maintain thickness. The final braid is flattened and sewn to secure its shape before adding motifs.
Cord A - make 1 :
Ch 220 (or desired length for runner). In 2nd ch from hook: sc in each ch to end (219 sc). This makes a long cord approximately 120cm; adjust chain length to desired runner length.
Info :
Make three cords of equal length in brown tones. Work tightly and use the same hook for consistent thickness. You can make cords shorter for a smaller runner or longer for a table that needs extended length.
Cord B - make 1 :
Repeat ch 220, sc in each ch to end (219)
Cord C - make 1 :
Repeat ch 220, sc in each ch to end (219)
Round 1 :
Place three cords side by side and braid them in a standard 3-strand braid for the length of the cords. Secure ends with a small knot and weave in tails. The braid forms the central trunk of the runner.
Info :
For a flat, decorative braid press it gently with a warm iron over a damp cloth or steam lightly then pin flat while it cools. This will help it sit well on the table.
— Crocheted Connecting Stems (Make many as needed) :
Round 1 :
For each short stem: ch 12, join to braid by sl st into desired braid stitch, then continue working outwards: ch 6, sc into last ch to form a small loop or leave long to attach a motif. (Length and number of stems determined by motif placement)
Info :
Connect stems from the underside of the braid so they appear to grow from the trunk. Use single strands and tiny stitches so stems remain slim and natural-looking.
— Assembly - Positioning Motifs :
Info :
Layout all motifs on a flat surface. Place the braided spine centrally and arrange sunflowers, leaves, small leaves and acorn/berry clusters in an alternating pattern along both sides. The sample uses: sunflower, leaf, sunflower, leaf etc. Maintain symmetry by mirroring placements from the center outwards.
Step 1 :
Pin the braid to the table covering or blocking mat; pin stems in place so spacing between motifs is even (approximately 8-12cm between motif centers depending on motif size)
Step 2 :
Using long tails left on each motif, sew stems securely under the braid, stitching through braid and motif stem at least 8-10 times for each connection to prevent movement. Use mattress or whipstitch to hide joins. Use matching thread color for invisible seams.
Info :
Sew acorn caps and berries at the ends of short stems or in clusters at branch junctions. Use small stitches and weave ends through the braid for extra security.
— Finishing Touches :
Round 1 :
Weave in all loose ends and trim closely. Gently block the whole runner to ensure motifs sit flat and the braid lies straight. Pin edges of leaf lobes for crisp points and steam lightly.
Info :
Optional: Add a few hand-stitched French knots in dark brown to sunflower centers for extra texture. Add a small dab of craft glue under wooden beads if you used beads inside acorn caps to prevent rotation.
— Variation Notes & Customization :
Info :
To create a shorter runner, reduce braid cord length and remove one or two motif repeats. For a table garland, make motifs on a thinner cord and leave braid out. Mix yarn fibers for different drape: linen or cotton-linen blends will soften and drape more, while mercerized cotton keeps motifs crisp.
Round 1 :
Spacing guide example for an 8-sunflower runner: 8 sunflowers and 10 leaves alternated along a 120cm braid; place motifs centered 12cm apart. Adjust proportions based on motif size.
Info :
Photographed runner used roughly 8 sunflowers, 12 large leaves, 14 small leaves, 12 acorns and 14 berry clusters. This produces a balanced composition on a table roughly 160-180cm long when braid tails are included.
— Care Instructions :
Info :
Hand wash gently in cool water and lay flat to dry. If using wooden beads, remove before washing or keep water exposure to minimum. Avoid bleach and tumble drying to prevent distortion.
This Autumn Floral Table Runner is a lovely seasonal centerpiece that brings cozy charm to your home. Each motif is a little work of art — petals, veins and tiny acorns combine for a handcrafted, rustic look. Assemble at your pace and enjoy how individual pieces come together into something beautiful and warm. 🧶🍂✨