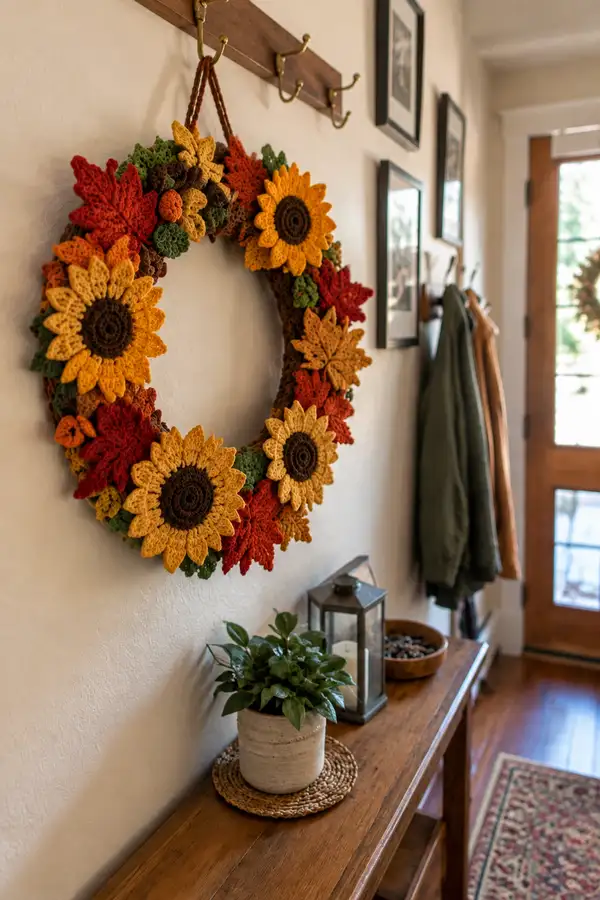
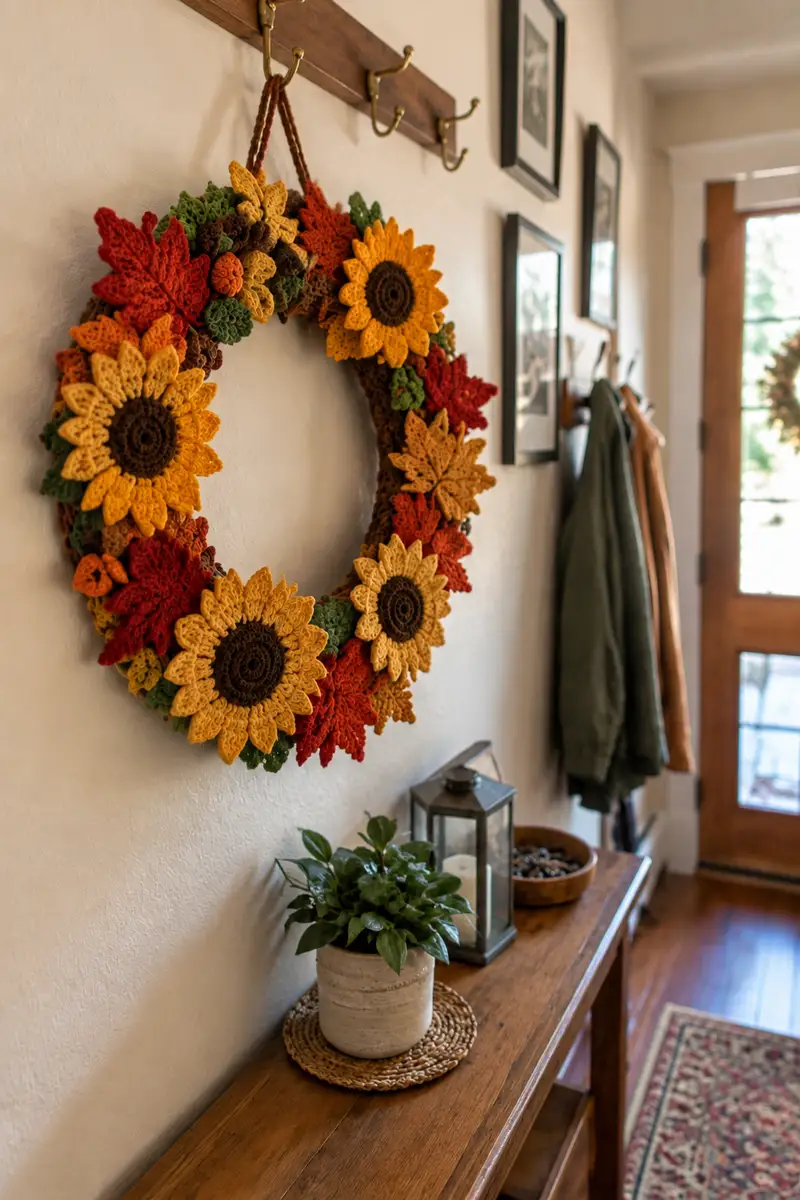
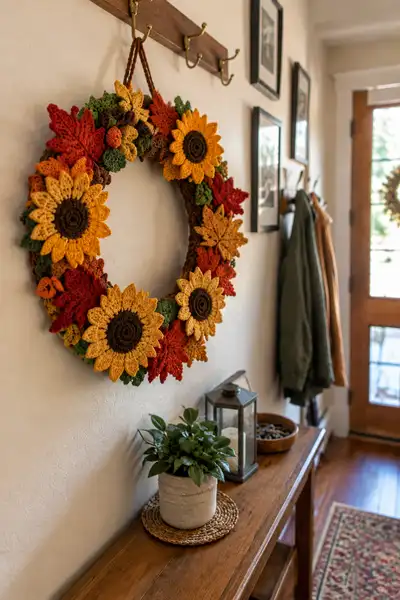
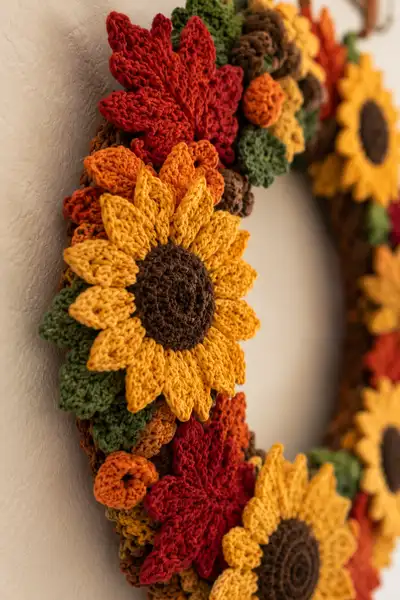
Create a warm, textured autumn wreath bursting with crocheted sunflowers, maple leaves, acorns and leafy clusters. This pattern recreates the layered, 3D look seen in the photo using worsted-weight yarn and simple motif modules. The finished wreath is a gorgeous seasonal accent for your door or entryway, full of rich golds, rusts, greens and browns.
Progress Tracker
0% Complete
— Wreath Base (wrapped foam/wire base) :
Info :
Use a 10-12 inch foam wreath base or a wire ring wrapped with burlap or yarn. This base will be covered with a crocheted tube (a wrapped cozy) to provide a neat layer for attaching motifs. The wrapped tube is made in the round to slip over the wreath. If you prefer, wrap the wreath in burlap and skip to assembly.
Round 1 :
With brown yarn and 4.0 mm hook, ch 40 and join with sl st to form a ring, careful not to twist (40)
Round 2 :
Ch1, 1 sc in each ch around, join with sl st to first sc (40)
Round 3 :
Ch1, 1 sc in each st around in BLO to create a defined rim (40)
Round 4-12 :
Ch1, 1 sc in each st (40) — continue until tube measures long enough to slip over wreath base (measure around foam). If you need more circumference, increase foundation chain by sets of 4 then repeat rounds.
Info :
Try the tube on your wreath base as you go. The goal is a snug sleeve; adjust length so when seamed it overlaps slightly. You can work more rounds for a thicker base.
Round 13 :
Fold tube lengthwise and using sl st or whip stitch through both edges, seam the long side to form a closed tube. Join ends with invisible seam to make a ring that will slip over wreath base.
Round 14 :
Slip the tube over the foam/wire base; if using wire, add a few hot glue dots inside to secure temporarily
Info :
Optionally add a second wrapped tube to build thickness for very full wreaths. The wrapped base hides the foam and creates a dense surface to sew motifs onto.
— Sunflower Center (make 4) :
Round 1 :
With dark brown and 3.5 mm hook, mr, 6 sc in mr (6)
Round 3 :
(1 sc, inc) x6 (18)
Round 4 :
(2 sc, inc) x6 (24)
Round 5 :
(3 sc, inc) x6 (30)
Round 6 :
1 sc in each st (30)
Info :
For a slightly domed center, work Round 6 in BLO to create a visible ridge. Fasten off leaving a long tail for sewing. Make 4 centers total for the wreath.
— Sunflower Petal Module (make 12 petals per sunflower, repeat for 4 sunflowers so 48 petals total) :
Info :
Petals are worked from the base up and are made individually then sewn around the center. Use golden yellow. Each petal is a small fan shape created with trebles and dc clusters for a ruffled look.
Round 1 :
With golden yellow and 4.0 mm hook, ch 7 (foundation for a petal)
Round 2 :
Sc in 2nd ch from hook, sc in next, hdc in next, dc in next, tr in next, dc in last (6) — creates tapered petal
Round 3 :
Turn, ch1, sc across working around the tip: sc in tr, sc in dc, sc in hdc, sc in sc, sc in sc; sl st to first sc to finish (5)
Round 4 :
Ch1, working at base of petal, attach by sc to a small loop base: ch2, sl st in same base to form a small knub (used to sew into center later)
Info :
Make 12 petals per sunflower. Keep tension consistent so petals are uniform. When you sew petals to the center, place them edge-to-edge slightly overlapping for a full sunflower look.
— Petal Decorative Layer (create outer petal layer for depth) :
Round 1 :
Using golden yellow, ch 9, join into a loop with sl st. Ch1, work 16 sc evenly around the loop (16)
Round 2 :
(1 sc, 1 hdc, 1 dc, 1 hdc, 1 sc) in each st around to create 16 small petals (80)
Info :
This decorative ring is optional but when layered under the main petals it gives the sunflower extra fullness like the ones in the photo. Block lightly to shape.
— Sunflower Assembly (per flower) :
Info :
Sew the 12 main petals around the sunflower center, spacing evenly. Sew the decorative layer under these petals for fullness. Use the long tail from center to stitch petals securely. Arrange with a slight forward curve so petals sit outward.
Round 1 :
Place sunflower center flat. With golden yellow, use a running stitch to sew each petal base to the outer edge of the center, spacing every 3 stitches on the center to make 12 petals.
Info :
Stitch through both loops of the center for extra hold. After sewing the first round of petals, stack a second row offset between petals for a double-layered look as shown in the photo.
— Maple Leaf (make 10-12 leaves in varying colors) :
Info :
Maple leaf pattern uses a small center spine and worked lobes on either side. Use rust, red and ochre yarns for variety. Leaves are worked flat and blocked/starched slightly to hold shape.
Round 1 :
With rust yarn and 3.5 mm hook, ch 15 (base chain for leaf)
Round 2 :
Sc in 2nd ch from hook and next 4 ch (5 sc), hdc in next (1), dc in next (1), tr in next (1), dc in next (1), hdc in next (1), sc in last (1) — now rotate to work along opposite side of base chain
Round 3 :
On opposite side of chain, sc in next, hdc in next, dc in next, tr in next, dc in next, hdc in next, sc in last 5 — join with sl st at base (total lobes mirrored)
Round 4 :
Ch1, create serrated edge: *(sc2tog across next 2 sts, ch2, sl st in ch2), rep across whole edge to give pointed leaf tips*
Round 5 :
Fasten off leaving long tail for sewing and block leaf with pins to define lobes and points.
Info :
For larger leaves, increase foundation chain by 4-6 and work the same shaping pattern. For smaller filler leaves, use ch 9 and follow pattern scaled down.
— Small Leaf Cluster (make many small filler leaves and clusters) :
Round 1 :
With moss green and 3.5 mm hook, ch 7, sl st to join into ring (7)
Round 2 :
Ch1, 7 sc around (7)
Round 3 :
Ch1, *(sc, ch2, sl st) in same st to make a small loop leaf, sl st into next st, rep around for 7 small loop leaves
Info :
Make dozens of these little clusters in several shades of green to fill gaps between larger motifs. They are small and quick and add a luscious textured background like in the photo.
— Acorn / Pinecone Spiral (make 6-8) :
Round 1 :
With tan yarn and 3.5 mm hook, mr, 6 sc in mr (6)
Round 3 :
(1 sc, inc) x6 (18)
Round 4 :
1 sc in each st (18)
Round 5 :
Switch to brown for cap: ch1, sl st in next st, *ch2, 3 dc in same st, sl st in next st* around to create textured cap bumps (9 bumps)
Round 6 :
Return to tan for body, sc in each st around to form a short stubby body (18)
Info :
Stuff slightly if you want a plump acorn. Sew the cap over the top, tacking in place. These give rustic accents in the wreath photo.
— Small Rolled Rose / Rosette (make 8-12) :
Round 1 :
With orange and 3.5 mm hook, ch 30
Round 2 :
Sc in 2nd ch from hook and across to end (29)
Round 3 :
Ch1, turn, sc across (29) — make the strip about 29 stitches long and 1-2 rows tall
Round 4 :
Fasten off leaving long tail. Starting at one short end, roll the strip tightly, sewing through layers as you roll to form a rosette. Secure base with several stitches.
Info :
Alternate widths and lengths to create small and larger roses. These are great space-fillers between leaves and sunflowers.
— Ruffle Filler (make several for volume) :
Round 1 :
With mustard or mixed ochres and 4.0 mm hook, ch 40
Round 2 :
In 2nd ch from hook, sc, *hdc, dc, tr, dc, hdc, sc* across to create ruffled scallop bands; fasten off and form into small rosettes or scrunched clusters and hand sew onto wreath base
Info :
These ruffled strips are great for adding dense texture around sunflowers, and are quick to make. Make 8-12 of varying lengths and colors.
— Hanging Loop and Decorative Braided Cord :
Round 1 :
With brown yarn, ch 60, fold in half and braid loosely into a 3-strand cord, then sew ends to top of wreath forming a hanging loop. Trim tails and tuck ends under motifs.
Info :
For a more finished look, make two braided cords and twist them together. Reinforce attachment by sewing through the wrapped base several times.
— Assembly and Placement (dense floral collage) :
Info :
Lay the wrapped wreath base flat on a table. Plan motif placement before sewing: sunflowers spaced roughly at 12 o'clock, 4 o'clock, 7 o'clock and 9 o'clock positions as in the photo, with one lower sunflower near 6 o'clock to create a lopsided, natural look.
Step 1 :
Pin the sunflowers first with their centers facing outward. Space them around the wreath and adjust until balanced.
Step 2 :
Sew sunflower centers and petals to the base through the wrapped tube with long tail using sturdy whip stitch. Use at least 8-10 passes through the base per sunflower to keep them secure.
Step 3 :
Place maple leaves next, tucking them under petal edges and sewing only the leaf base to the wrapped tube so tips lift slightly for dimension.
Step 4 :
Add small leaf clusters, acorns and rosettes in gaps to create a dense border. Sew or hot glue for temporary hold then reinforce with stitching.
Info :
Alternate colors and stagger sizes to avoid symmetry; this produces the natural, layered effect seen in the photos. Continue filling until the wreath looks full and lush with only small pockets of the base visible.
Finishing :
Weave in all loose tails through several stitches and trim. Steam-block leaves and petals as needed to encourage them to hold a curved, natural shape. Hang and adjust petals/leaves so the wreath looks balanced from all angles.
Info :
If you want extra durability for outdoor display, secure motifs with fabric glue in addition to sewing, and consider spraying with a fabric sealant tested for your yarn type.
This autumn wreath pattern brings the colors of the season into your home with beautiful, hand-crafted detail. Each sunflower and maple leaf you crochet adds a layer of texture and warmth that really elevates your entryway. I hope you enjoy the meditative repetition of making motifs and the creative joy of arranging them into a cozy composition. 🧶🍁 Display it proudly or gift it to someone who loves handmade seasonal decor! 🎃