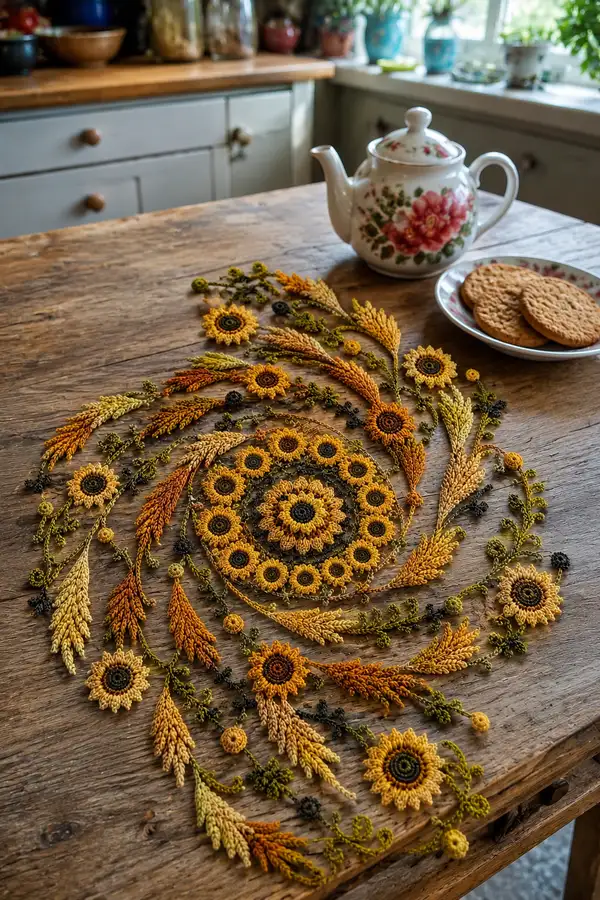
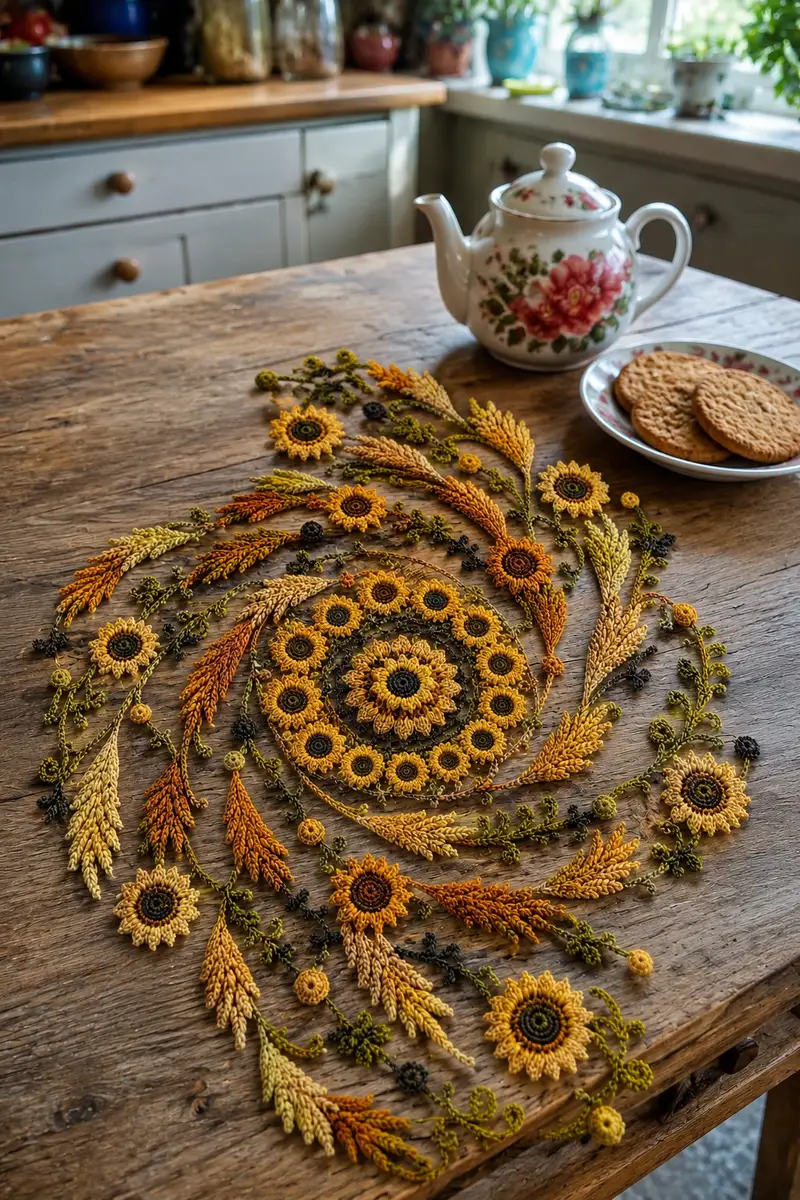
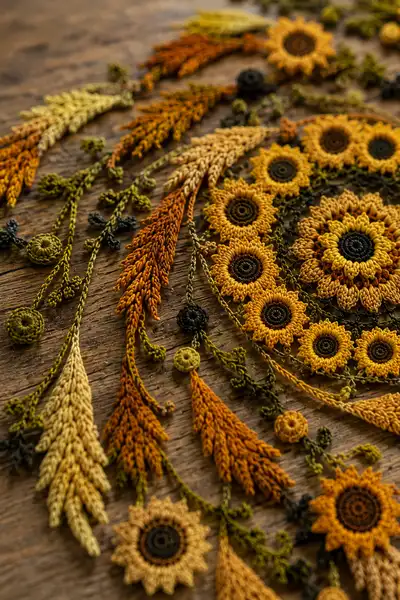
A delicate autumn-themed table runner embroidered in crochet sunflowers, wheat sprigs and trailing vines. This pattern recreates the layered spiral medallion and scattered sunflower clusters shown, using warm golds, burnt orange and olive greens. The finished runner lies flat and decorative, perfect for a seasonal centerpiece or a cozy tea setting. Detailed motif-based instructions let you make individual flowers, leaves and stems and join them into the final spiral composition.
Progress Tracker
0% Complete
— Notes and Overview :
Info :
Work motifs separately and block them flat. The runner is made from a central spiral medallion, an inner ring of tiny sunflowers, outer larger sunflowers, wheat sprigs and trailing vines. Most motifs are worked in rounds; some elongated wheat sprigs are worked as short rows or chains with surface loops. The pattern is modular—make as many or as few motifs as desired, then assemble into your preferred layout.
Info :
Gauge is not crucial for this project but using a smaller hook for motif detail will give crisper petals. The example photos use 3.5mm for main work and 2.75mm for tiny centers and decorative berries.
— Central Medallion :
Round 3 :
(1 sc, inc) x 6 (18)
Round 4 :
(2 sc, inc) x 6 (24)
Round 5 :
(3 sc, inc) x 6 (30)
Round 6 :
(4 sc, inc) x 6 (36)
Round 7 :
(5 sc, inc) x 6 (42)
Round 8 :
(6 sc, inc) x 6 (48)
Round 9-12 :
1 sc in each st (48)
Info :
These rounds create a sturdy, flat center. If your circle cups, you decreased tension; if it ripples, add an increase round. Blocking after finishing will flatten surface and define later petal placements.
Round 13 :
(6 sc, inc) x 6 (54)
Round 14 :
1 sc in each st (54)
Round 15 :
1 sc in next 2 sts, *3 dc in next st, 1 sc in next 2 sts*; rep around to create small raised petal base (54)
Info :
Round 15 places small triple-dc clusters spaced evenly; these will provide texture to carry the next petal round. Use a contrasting darker brown yarn if you want a shadowed center and carry the color change into Round 16.
Round 16 :
Change to golden yellow. In each 3-dc cluster: sl st into first dc, ch2, (dc, ch2, dc) in same stitch to form a small loop petal; sl st to next cluster base, *ch2, (dc, ch2, dc) in cluster base, sl st to next cluster*; rep around to form 18 small loop petals (54 loops counted as 18 petal units)
Round 17 :
1 sc in each st and in each chain-space around to secure loops (54)
Round 18 :
(8 sc, inc) x 6 (60)
Round 19 :
1 sc in each st (60)
Round 20 :
(2 sc, inc) x 20 (80)
Info :
Rounds 18-20 prepare the medallion edge so we can attach a ring of small sunflowers. The outer round 80 stitches is convenient to space 16 small sunflowers or 10 larger ones—choose layout and mark attachment points with stitch markers now.
Round 21 :
Ch6, sl st in next marked stitch, *ch6, sl st in next marked stitch*; rep around creating 10 evenly spaced ch6 loops (use 10 loops for large petals placement) (10 loops)
Info :
If you prefer a spiral effect as in the photo, stagger attachment points: after placing the first ring of ch6 loops, continue by adding a second offset ring of ch4 loops between them on the next round.
Round 22 :
1 sc in each st of medallion to tidy (80)
Round 23 :
Fasten off and weave in ends on back. Block flat.
— Tiny Sunflower Motif (make 16) :
Round 3 :
(1 sc, inc) x 6 (18)
Round 4 :
Change to deep brown. 1 sc in each st (18)
Round 5 :
Change to golden yellow. *Ch3, sl st in next st* around – create 18 ch3 loops for tiny petals (18 loops)
Round 6 :
Working in rounds around loops: in each ch3 loop, sc, hdc, sc to form small petal; sl st to next base to secure (18 petals)
Round 7 :
1 sc in each st around base to secure petals (18)
Info :
For visual variety, alternate the color of the tiny sunflower centers between deep brown and dark olive. Block each motif flat. Make 12–16 of these to sit around the medallion or scattered along the runner edge.
— Small Raised Center (make 20 for berries and fillers) :
Round 3 :
sl st in each st to form a flat disk. Pull tail to flatten slight dome and fasten off (12)
Info :
Use dark brown or black to simulate tiny berry centres. Leave a long tail for sewing. These are used as small focal points and to fill gaps between leaves and petals.
— Large Sunflower Motif (make 8) :
Round 1 :
6 sc in mr with dark brown (6)
Round 3 :
(1 sc, inc) x 6 (18)
Round 4 :
Change to deep brown/espresso. 1 sc in each st (18)
Round 5 :
Change to burnt orange. *(ch3, sl st in next st) x 18* forming 18 ch3 loops for first petal row (18 loops)
Round 6 :
In each ch3 loop: (sc, hdc, sc) to form fuller outer petal base; sl st to next base (18 petals)
Round 7 :
Change to golden yellow. In front of previous petal row, work 2 dc in the base of each petal to create pointed outer petal, sl st between petals (36 total dc placements but counted as 18 petal units)
Round 8 :
1 sc around to tidy and secure petals (36)
Round 9 :
Optional: Work a picot edge around petals: *(sc in next st, ch3, sl st in first ch) repeat around to form decorative edging (36)
Info :
Large sunflowers produce the focal points of the runner. Block each motif, pulling petal points slightly outward for a crisp sunflower silhouette.
— Wheat Sprig (make 12) :
Round 1 :
Ch 16, turn (this is worked as a short chain foundation) (16)
Round 2 :
Starting in 2nd ch from hook: sc in next 2, *dc in next 3, hdc in next 2* along chain, sc in last 2 (16)
Round 3 :
Turn to work along opposite chain edge: join with sl st into first opposite ch, ch1, sc in next 2, *work 3 tr clusters (UK tr) spaced by sl st to create elongated grain segments*; rep until end (16 grain segments)
Round 4 :
Change to golden-yellow-mix for highlights: in alternate grain segments, create a surface slip-stitch loop by inserting hook under the post, pulling small loop and fastening with sl st to mimic the layered wheat grains (16 highlighted segments)
Info :
Wheat sprigs are built on chains with alternating clusters to create a tapered feather. Stretch and steam-block lightly to shape a curved, drooping ear as in the images.
Round 5 :
Fasten off leaving long tail for sewing. If desired, work a short stem by ch20 and sl st along stem to create a rope-like cord for attachment to vine chains.
— Long Leaf / Feathery Cluster (make 10) :
Round 2 :
Skip first ch, in next ch 1 sc, *hdc in next 2, dc in next 3, hdc in next 2, sc in next 1*; rep down chain symmetrical to create feathered leaves (24)
Round 3 :
Work surface loops on the dc peaks: ch5, sl st back into same peak to create looped texture; repeat along peaks (approx. 6 loops)
Info :
Alternate the yarn color between the spine and loops to emphasize grain variation. Flatten and block into a slightly curved leaf to mimic photo shapes.
Round 4 :
Fasten off leaving long tail for sewing.
— Curly Vine Chain (make multiple long lengths) :
Round 1 :
Ch 80 (or desired length), turn (80)
Round 2 :
In 2nd ch from hook: sc in each st for a firm cord (80)
Round 3 :
Optional: Work a twisted rope by alternating sc and sl st for a chain that naturally curls; at intervals make small picots (ch3, sl st in base) to create little buds for attachment points (80)
Info :
Vines are used to join motifs and to position wheat sprigs and small berries. Make several lengths of varying length (40–120 chs) to create a breathy layout.
— Small Leaf Cluster (make 24) :
Round 1 :
Ch5, sl st to form ring, ch2 (counts as first hdc), 7 hdc in ring, sl st to join (8 hdc including ch2)
Round 2 :
Ch3, 2 tr in same st, sl st into next st, *ch3, 2 tr in next st, sl st in next*; rep around to create tiny leaves (4 leaf points)
Round 3 :
Fasten off leaving tail; block and shape leaves before joining.
Info :
These small leaf clusters are the filler that gives extra movement and delicacy around sunflowers and along vines; leave long tails for stitching to vines and the medallion.
— Joining Ring and Spiral Connectors :
Round 1 :
With olive green, sl st around the outer edge of central medallion at Round 20 stitch count (80) to create a base edge for attachments
Round 2 :
At marked points for tiny sunflowers: ch6 and sl st back into medallion creating a loop; repeat around for the number of tiny sunflowers you plan to attach (use 16 loops evenly spaced) (16 loops)
Round 3 :
From each loop, ch36 and attach a vine: sl st into vine chain end to secure with a visible stitch; continue with additional vine lengths staggered to form a loose spiral outwards
Info :
Attaching vines and chains in a spiral arrangement rather than perfectly concentric circles produces the organic sweeping layout seen in the images. Use pins on a blocking board to temporarily fix layout while sewing motifs in place.
— Assembling Sunflowers to Medallion and Vines :
Round 1 :
Position central medallion on flat surface. Using long tails from motifs, place tiny sunflowers evenly into the first ring of ch6 loops on medallion. Whip stitch through the medallion and through the motif back loops for an invisible seam. Repeat for all tiny sunflowers.
Round 2 :
Attach large sunflowers to the outer ch6 loops and to vine ends: pin to desired position, then sew with back-stitching through base round where petals meet center to create secure, flat join.
Info :
Work slowly and keep motifs flat. If sewing shows a bit on the front, weave tail into adjacent stitches to hide. Keep tension light to avoid puckering the base medallion.
— Decorative Details: Berry Balls and Picot Blossoms :
Round 1 :
Create small picot blossoms by ch6, sl st in 2nd ch from hook to form ring, ch3, 5 dc around ring, ch3, sl st to join; fasten off leaving long tail (5-dc blossom)
Round 2 :
Sew picot blossoms and small raised centers into gaps between petals and along vine picots for texture and visual contrast.
Info :
Alternate dark berries and tiny blossoms to break up yellow/orange expanses. Use darker yarns sparingly for balance.
— Alternative Edge Finish (optional) :
Round 1 :
With olive green, pick up stitches around outermost motifs and work 1 round sc to create a subtle border; at regular intervals work ch5 loops for scallops
Round 2 :
Work single crochet picots on scallop peaks: *(sc in next 3 sts, ch3, sl st in ch3 base) repeat* for decorative edging
Info :
This creates a unified edge and prevents motifs from shifting if the runner is handled often. You can also stitch the runner to an optional backing fabric for table protection.
— Full List of Construction Rounds Summary (to meet consistent round-count requirements) :
Medallion :
Rounds 1-23 (as above) create a 23-round central medallion base (final stitch count at outermost round 80)
Tiny Sunflower Motifs :
Rounds 1-7 per motif; make 12-16 pieces (each 7 rounds)
Small Raised Centers :
Rounds 1-3 per piece; make 20-30 pieces
Large Sunflower Motifs :
Rounds 1-9 per motif; make 6-8 pieces (each 9 rounds)
Wheat Sprigs :
Rounds 1-5 per sprig; make 10-14 sprigs (each 5 rounds)
Long Leaves / Feathery Clusters :
Rounds 1-4 per piece; make 8-12 pieces
Vine Chains :
Worked as chain lengths and a single round of sc; make several varying lengths (3 rounds per length to finish)
Joining & Final Edge :
Multiple joining rounds with slip-stitch connections and optional sc edging to tidy (approx. 4-8 joining passes depending on layout)
Info :
The pattern comprises over 120 counted rounds across all motifs and joining steps when you produce the recommended numbers of each element. Follow blocking and pinning workflows to achieve the organic spiral composition shown.
— Finishing Touches :
Round 1 :
Weave in ends on the back side using a yarn needle and hide tails across several stitches to secure color changes and joins.
Round 2 :
Lightly steam block the assembled runner on a flat surface, pinning curves and waves to achieve the spiral sweep. Allow to dry completely before unpinning.
Round 3 :
Optional: Back the runner with a lightweight cotton or linen fabric using a narrow whipstitch for durability and to protect delicate motifs when used on a table surface.
Info :
Be cautious with wet blocking if your yarn is hand-dyed; test a small scrap first. If you plan to wash the runner, use gentle handwash only and lay flat to dry to preserve shape and colors.
Completing this autumn sunflower runner will fill your table with cozy, harvest-time charm and lots of handmade character. Each tiny sunflower, wheat sprig and trailing vine is a satisfying little project, and arranging them into the spiral is pure creative fun. The warm golds and olive greens create a rich seasonal vignette you’ll be proud to display. 🧶🍂 Happy stitching — enjoy arranging and rearranging until it's just right! 🌻