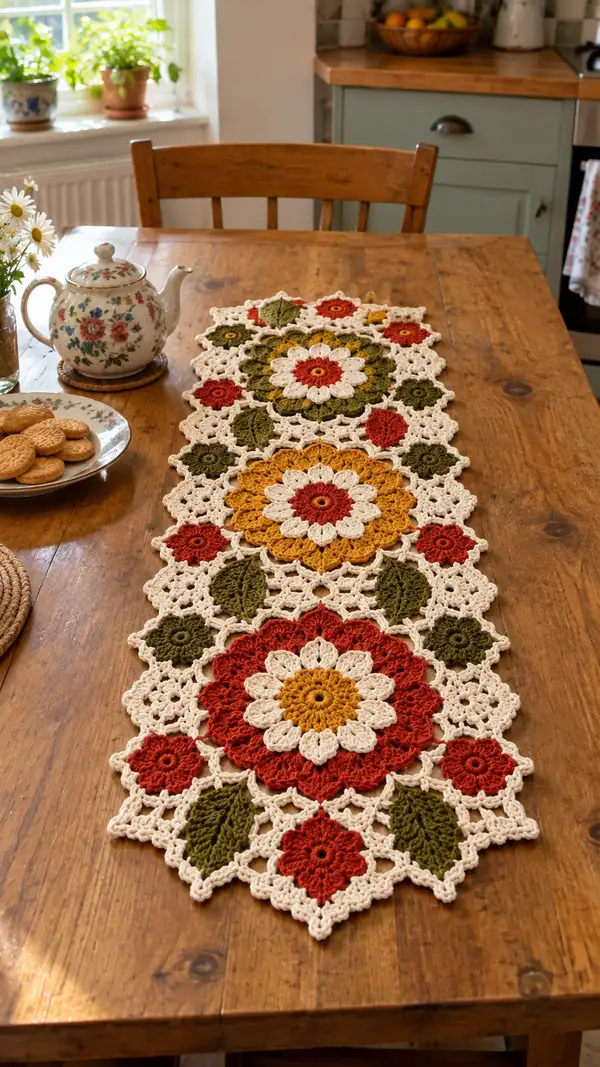
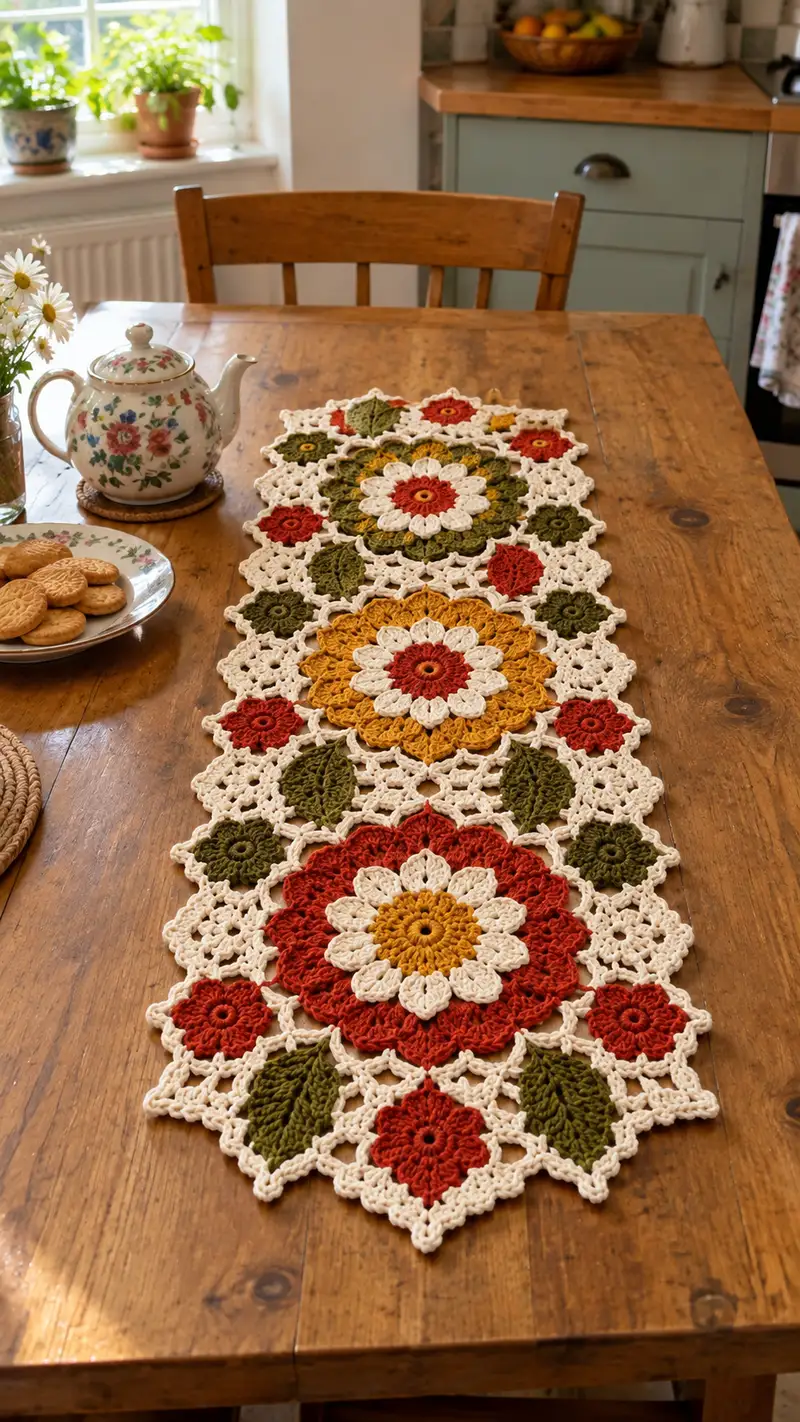
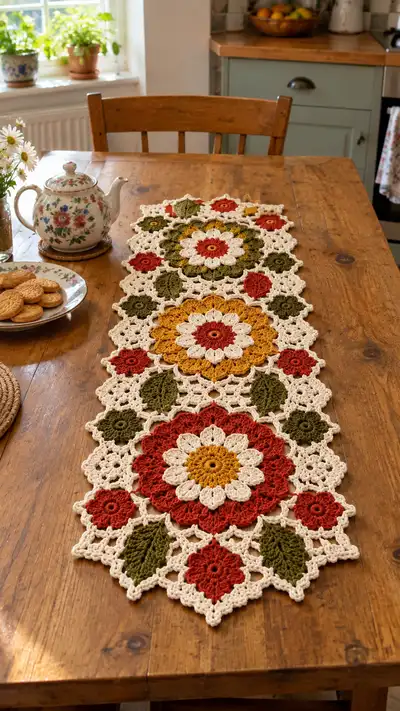
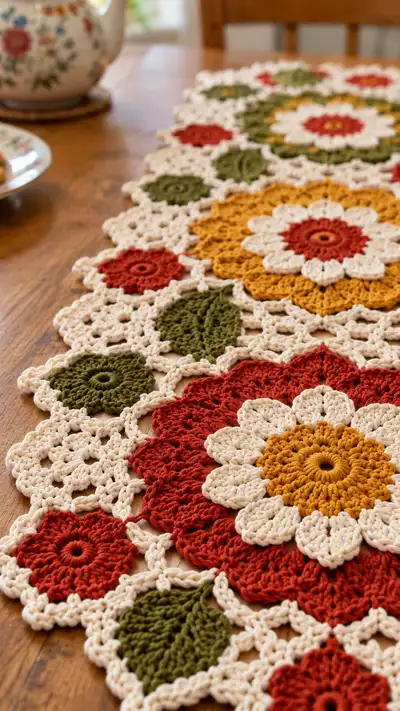
This warm, vintage-inspired table runner features layered floral medallions, leafy connectors and a delicate lace-like cream border. The runner uses autumn tones—rust, mustard, olive and cream—and a join-as-you-go technique to create a long, scalloped centerpiece for your table. Detailed rounds and info sections guide you through motif making, leaf shaping, lace connectors and final edging for a beautiful heirloom finish. Suitable for crocheters who enjoy motif work and color changes.
Progress Tracker
0% Complete
— Notes :
Info :
This pattern is worked in separate motifs that are joined-as-you-go with cream lace rounds. Work motifs flat in the round and use stitch markers to mark round starts. All rounds are joined with sl st unless otherwise stated. Where a color change is requested, finish the last yarn over with the new color to make a neat change.
Info :
Gauge is not critical for this decorative runner but consistent tension is important to make motifs sit flat and join neatly. For a runner approximately 12-14 inches wide and 40-48 inches long, use worsted cotton and a 4.0mm hook as suggested.
— Large Flower Motif (Make 3, main medallions) :
Round 1 :
12 sc in magic ring (12)
Round 3 :
(1 sc, 1 inc) x 12 (36)
Round 4 :
(2 sc, 1 inc) x 12 (48)
Info :
Change to mustard (or chosen center color) now. Keep long tail for joining center round if you wish to embroider later. The first four rounds make a solid center to support petal rounds.
Round 5 :
1 sc in each st (48)
Round 6 :
(3 sc, 1 inc) x 12 (60)
Round 7 :
1 sc in each st (60)
Info :
Change to rust (petal color) for the first petal layer. Ensure your hook glides smoothly in cotton; keep loops pulled to consistent height for puff clusters to look even.
Round 8 :
*Ch 2, skip 2 sts, (5 dc cluster in next st, ch 2, sl st in next st) to create a raised petal base; repeat from * around to make 12 petal bases (12 ch-2 spaces)
Round 9 :
In each ch-2 petal base: sl st, ch 2 (counts as hdc), (puff stitch x 7) in same ch-2 base, sl st to secure - repeat to create 12 puff petals (12 puff petals)
Info :
Puff stitch: yarn over, insert hook into stitch, yarn over and pull up loop (repeat 3-4 times depending on puff volume), yarn over and pull through all loops, ch 1 to close puff. Work uniformly across petals.
Round 10 :
1 sc between each puff petal around (60)
Round 11 :
(4 sc, 1 inc) x 12 (72)
Info :
This round expands the motif to accept a second petal layer. Change to cream for highlight petals if following photo colors; contrast will give a layered daisy effect.
Round 12 :
1 sc in each st (72)
Round 13 :
*Ch 3, skip 3 sts, (7 dc cluster in next st, ch 3, sl st in next st) repeat from * to create 12 large petal bases (12 ch-3 spaces)
Round 14 :
In each ch-3 petal base: sl st, ch 3 (counts as dc), (puff stitch x 9) in same base, sl st to secure - repeat around to form 12 large puff petals
Round 15 :
1 sc between each large petal around (72)
Round 16 :
(5 sc, 1 inc) x 12 (84)
Info :
At this point you have a layered flower: small center, inner petals and larger outer petals. Keep petals slightly lifted while working next rounds so they remain defined when flattened.
Round 17 :
1 sc in each st (84)
Round 18 :
Change to cream for the lace-join foundation; ch 4, *skip 2 sc, sc in next st, ch 3, sc in next st, ch 4, sl st in top of next sc; repeat from * around to create 21 chain-loop scallops (approx 21 loops)
Round 19 :
Working in each ch-4 scallop: (sc, ch2, 5 dc cluster, ch2, sc) anchor into loop; sl st to next anchor and continue around to form decorative scalloped outer petals (21 scallops)
Info :
Fasten off leaving long tail if you plan to embroider motifs later. Block motif to a flat circular shape before joining to ensure even joins. Make 3 identical large motifs.
— Medium Flower Motif (Make 4) :
Round 1 :
10 sc in magic ring (10)
Round 3 :
(1 sc, 1 inc) x 10 (30)
Round 4 :
(2 sc, 1 inc) x 10 (40)
Round 5 :
1 sc in each st (40)
Info :
Switch to rust or mustard depending on desired look for the mid-layer. This motif is slightly smaller and will sit between large motifs in the runner sequence.
Round 6 :
*Ch 2, (3 dc cluster in next st), ch 2, sl st in next st; repeat from * around to create 10 petal bases (10 ch-2 spaces)
Round 7 :
In each ch-2 base: sl st, ch 2, (puff x5) in base, sl st to secure - repeat to make 10 puff petals
Round 8 :
1 sc between petals around (40)
Round 9 :
(3 sc, 1 inc) x 10 (50)
Round 10 :
1 sc in each st (50)
Round 11 :
Change to cream and work a lacy ring: *ch4, sl st in next 2 sts, ch2, sl st in next st; repeat from * around creating 10 lace loops
Round 12 :
In each ch-4 loop: (sc, ch2, 5 dc cluster, ch2, sc) - anchor with sl st between loops. Fasten off and block flat.
Info :
Make four medium motifs; these are used alternately with small flowers and leaves to build the runner centre line and sides.
— Small Rosette Motif (Make 8-10) :
Round 1 :
8 sc in magic ring (8)
Round 3 :
(1 sc, 1 inc) x 8 (24)
Round 4 :
*Ch3, sl st in next st, repeat around to create 8 small loop petals (24 loops)
Round 5 :
In each small loop: sl st, ch2, 3 dc cluster, sl st to secure - repeat around. Fasten off and weave ends.
Info :
Small rosettes fill gaps around large and medium motifs. Make 8-10 depending on how dense you want the runner edges to appear.
— Leaf Motif (Make 10-12) :
Round 1 :
Ch 10, sl st to form small loop (or work a 10-ch foundation)
Round 2 :
Working along one side of chain: (sc, hdc, 3 dc, hdc, sc) then along opposite side mirror (sc, hdc, 3 dc, hdc, sc) — finish at base (20 sts approximate)
Round 3 :
Turn leaf; along center ridge: sl st down center with BLO stitches to create rib: *ch1, sl st in next st* repeat until tip. Fasten off leaving long tail to sew
Info :
Leaves are worked in olive green and shaped by blocking and pinning to create a 3D curved leaf. Make 10-12 leaves to tuck between medallions as shown.
— Small Solid Circle (Make 6-8) :
Round 1 :
6 sc in magic ring (6)
Round 3 :
1 sc in each st (12)
Info :
These small circles form centers for secondary flowers or fill triangular gaps between petals. Work in olive or rust for contrast.
— Lace Connector/Join-as-you-go Rounds (Use cream for all connectors) :
Info :
Join motifs with a join-as-you-go method: when working the outer cream lace round of a motif, instead of completing loops independently, sl st into the corresponding loop on an adjacent, already-blocked motif to connect them. Work connectors so that motifs sit in rows (large, medium, large) with small florals and leaves filling side gaps as pictured.
Round 1 :
With cream yarn join at any outer sc anchor: ch 1, sc in same st, *ch 5, sk 3, sc in next ornament anchor, rep around to form openwork chain loops sized to match adjoining motif anchors (adjust loop length to line up with adjacent motif anchors)
Round 2 :
In each ch-5 loop: (sc, ch3, 3 dc cluster, ch3, sc) anchor to adjacent motif if present with sl st; otherwise work cluster free. Repeat around. Fasten off when motif is attached on all intended sides.
Info :
When connecting, lay motifs flat on a blocking board in the final layout. Work one motif’s lace round at a time, joining to adjacent motifs as you encounter their outer loops. Use stitch markers to indicate the positions where joins will occur so you can match up petals and leaf points precisely.
Round 3 :
To create the lattice between motifs: ch 3 between established anchors and sl st into the corresponding loop of the neighbor motif, creating a network of ch-bridges. This reinforces the runner and produces the airy lace background visible around flowers.
Info :
Make sure joins are not twisted; flatten loops and pin before fastening the sl st to make flat, consistent connections. Work slowly on join rows to maintain symmetry and pattern repeat.
— Outer Border and Final Edging (Cream) :
Round 1 :
With cream, pick up along outer edge of assembled motifs: sc evenly around entire runner, placing 3 sc into tight corners or points to maintain flatness. Count total stitches and note starting point. (Even stitch count depends on assembled size; aim for even coverage)
Round 2 :
(3 sc, ch4, sl st in next st) repeat to create open scallop edging around whole runner; increase in convex corners by adding extra scs to avoid puckering
Round 3 :
In each ch-4 scallop: (sc, ch3, 5 dc cluster, ch3, sc) anchoring to scallop base. This creates a delicate pointed lace edge similar to photograph scallops.
Round 4 :
Picot round: sl st to center top of each large scallop, ch3, sl st in 3rd ch to make a small picot, sl st to next scallop. Fasten off and weave in ends carefully following seam lines.
Info :
Block the entire runner flat, pinning each scallop and leaf in position. Light steam or spray-block for cotton yarn, then allow to dry. Blocking brings out the lace and joins and makes edges crisp.
— Alternative Stitch and Texture Notes :
Info :
To make petals more pronounced, substitute taller stitches for puff clusters: use 3-triple cluster or elongated trebles worked into same base. For a softer runner, swap cotton for a blended DK yarn and use a 3.5mm hook. If you want a stiffer look, use a slightly larger hook and heavier cotton.
Info :
Keep a note of the order you work motifs so joins match: for this runner layout work motifs left-to-right in rows, finishing each motif's outer lace round only when its joining neighbors have been placed to make accurate join-as-you-go connections.
— Finishing Touches :
Info :
Weave all loose ends to the back of the runner and trim close. If desired, lightly starch the runner for added body, or leave soft and drapey. Add stitched embroidery in centers for extra detail if desired.
Info :
Store flat to avoid curling. Spot clean gently; cotton withstands gentle hand wash if necessary. Re-block if needed after washing to restore shape.
This floral table runner pattern celebrates autumn colors with layered petals, delicate lace connectors and sculpted leaves for a timeless handmade centerpiece. Each motif is an opportunity to relax, experiment with texture and create a piece you’ll be proud to display. Pin, stitch and savor the process — the runner makes a stunning gift or seasonal upgrade for your own table. 🧶🍁✨