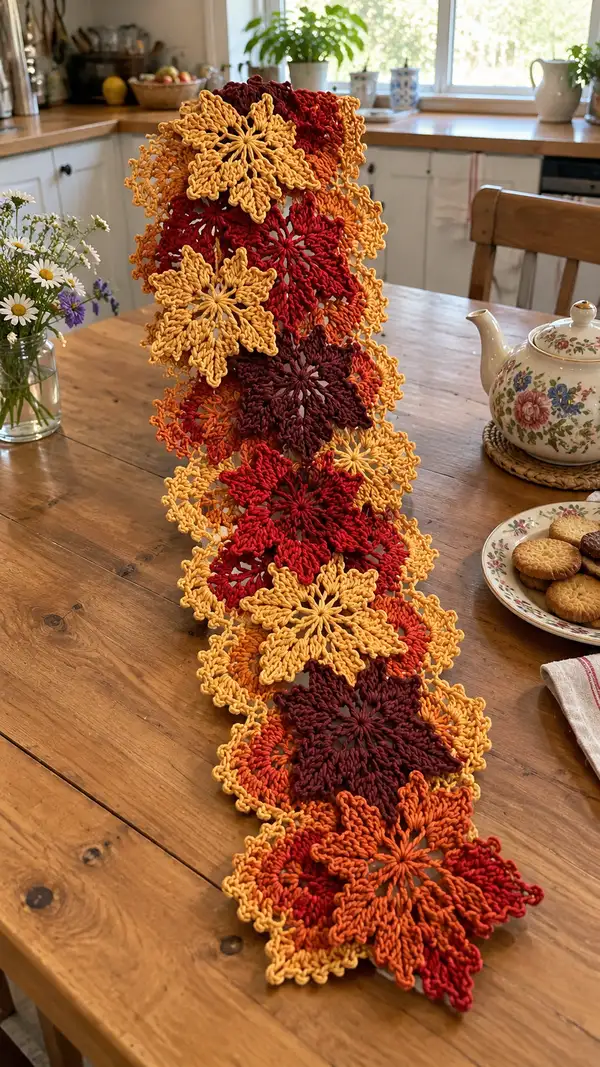
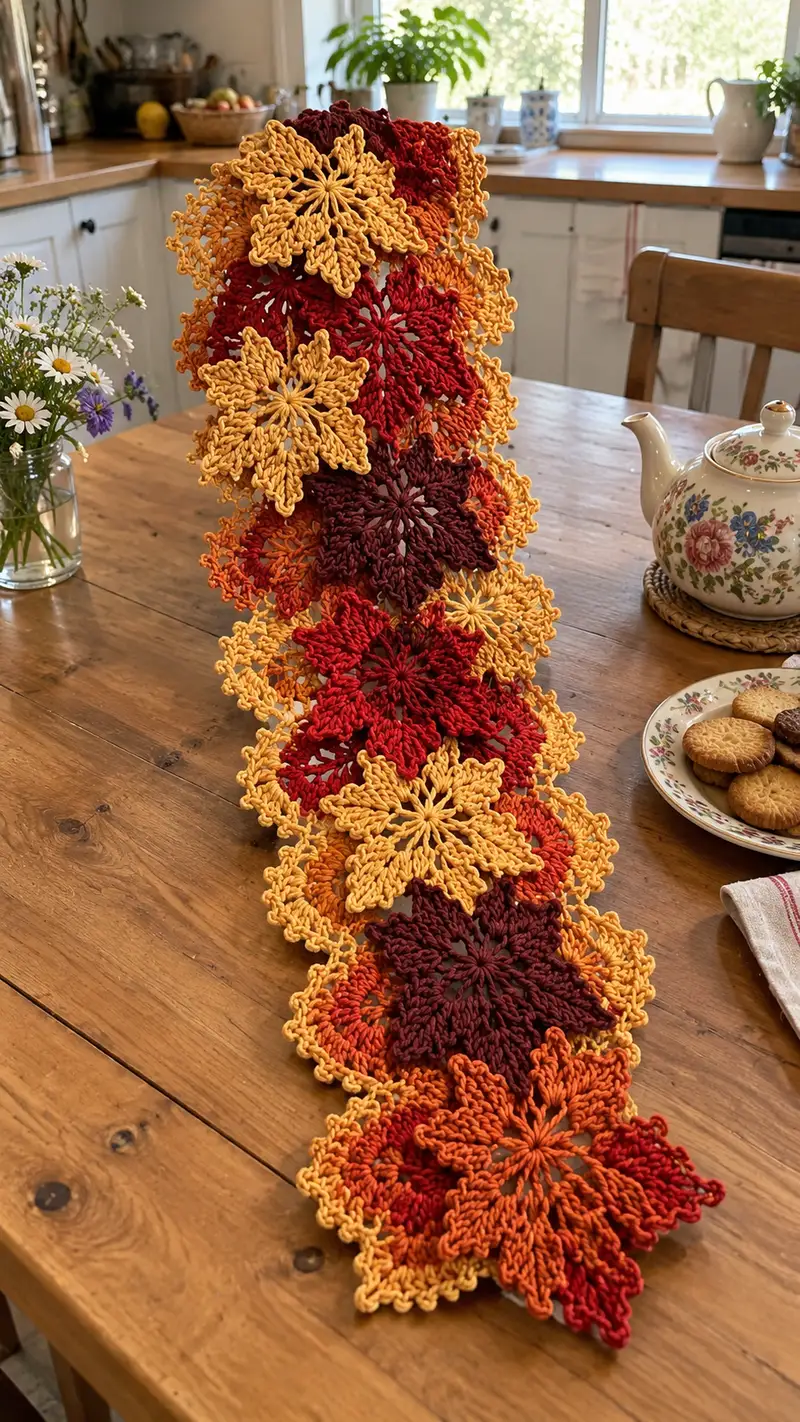
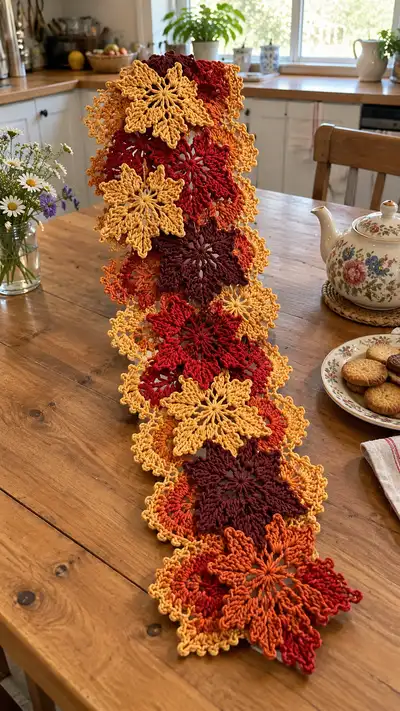
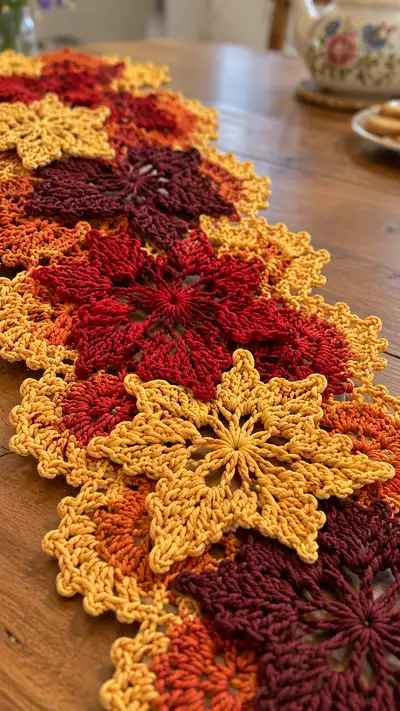
A warm, lacy table runner made from layered floral motifs in rich autumn shades. This design features large 8-point flower motifs worked in textured puff and cluster stitches, joined with a delicate lace border to create a flowing runner perfect for seasonal decor. The pattern shows color changes in warm gold, pumpkin, red and deep burgundy to mimic fall leaves. Make a short runner or continue motifs to customize length.
Progress Tracker
0% Complete
— Overview :
Info :
This table runner is made of identical large 8-point floral motifs (Large Flower) and a small connector motif used optionally to fill gaps. Work motifs flat, block each motif, then join-as-you-go on the final round of motifs or sew them together. The pattern below gives a step-by-step construction of the Large Flower, a Small Connector Motif, the join-as-you-go method, and the finishing edging. Abbreviations follow standard US terms. Read all notes before starting.
Info :
Use a 4.0mm hook and worsted weight cotton for the same drape; swap to 3.5mm for a firmer border. The motif described is an 8-point flower approximately 6.5-8 inches (16-20 cm) across when blocked, depending on yarn and tension.
— Stitch Techniques & Tips :
Info :
Puff stitch: Yarn over, insert hook, yarn over, pull up loop (repeat 3-4 times to gather 6-8 loops on hook), yarn over and draw through all loops, ch1 to close if noted. For consistent puff size keep same number of yarnovers per puff throughout the motif.
Info :
Cluster stitch: Worked by partially completing multiple dc/tr in the same st leaving last loop of each on hook, then yarn over and pull through all loops to close. These create raised petal texture.
— Large Floral Motif (Make as many as needed) :
Round 1 :
mr, ch1, 8 sc in magic ring, pull ring closed and sl st to first sc to join (8)
Round 2 :
Ch6, sl st in next sc, ch6, sl st in next sc—(ch6, sl st in next sc) x8 to make 8 tall chain loops around center (8 loops)
Round 3 :
Work petal in each ch6 loop: sl st into loop, sc, hdc, 3 dc, hdc, sc, sl st to base; repeat in each loop (petal) x8 (8 petals)
Info :
Keep petals slightly raised by working into the chain loop rather than the base sc. Use stitch marker at the start of the first petal if you need a reference.
Round 4 :
Ch3 (counts as dc), *ch3, dc between petals at base (in the sc that separates previous petals)*; repeat * around for 8 dc and 8 ch-3 loops creating a star outline (16 dc/spaces total)
Round 5 :
Into each ch3 space: (sc, ch4, puff into the top of the petal (see technique), ch4, sc) x8 creating small lacy arches and a puff anchored at petal tips (8 puff clusters)
Round 6 :
Ch5 (counts as tr), *in top of each puff make (2 tr, ch2, 2 tr), ch2, sl st into next space between petals*; repeat around to create tall pointed secondary petals (8 clusters)
Info :
Change to a contrasting color now if you want multi-tone petals. Fasten off original color leaving a 6-inch tail for weaving if switching—carry neatly if stripes are desired.
Round 7 :
Working in new color: Sl st to center of one secondary cluster, ch2, (hdc, dc, tr) into top of cluster, *ch3, slip into center arch between clusters, ch3, (tr, dc, hdc) into next cluster top*; repeat around to make decorative arches (8 arches)
Round 8 :
Ch1, *5 sc around base of each secondary petal (work evenly across the chain spaces and previous stitches), sl st in next st to move to next petal*; repeat around producing a stable round of sc that evens out shape (40 sc total approx)
Info :
Count your sc after this round: there should be 5 sc per secondary petal x8 = 40 sc. Adjust by adding or removing a sc in a petal if you find your motif is not lying flat.
Round 9 :
Ch4 (counts as tr), *in next sc make (tr, ch2, tr) to form small shell between petals, ch2, sl st into center stitch of next petal base*; repeat around (8 shells)
Round 10 :
Into each shell: (sc, ch5, sc) to create large chain loops between petals; repeat around to make 8 decorative loops (8 loops)
Info :
These ch5 loops will be used to anchor the next layer of petals; keep loop tension consistent so the motif remains circular rather than scalloped too soon.
Round 11 :
Work larger petals into each ch5 loop: sl st into loop, sc, hdc, 5 dc, hdc, sc, sl st back to base (large petal) x8 (8 large petals)
Round 12 :
Ch3, *in between large petal tips work (2 dc, ch3, 2 dc), sl st in next base*; repeat to create triangular arches between large petals (8 arches)
Round 13 :
Ch1, 1 sc in same st, *ch3, skip 2 sts, sc in next 6 sts across petal body, ch3, sc in next base*; repeat around to secure petals and add airy spaces (work evenly to maintain shape)
Info :
From rounds 9-13 the motif becomes layered; if the motif curls at this stage lightly steam-block it or pin to shape while damp to guide the final form.
Round 14 :
Change color if desired. Ch2, *hdc in each st across petal body until center of next arch, (ch3, picot, ch3) in arch center, continue hdc across next petal*, repeat around. This round adds picot decorations in arch centers (8 picots)
Round 15 :
Ch4, *in the picot space work (3 tr, ch4, 3 tr) to create tall decorative points around each petal top, sl st to next joining point*; repeat around (8 tall points)
Round 16 :
Ch1, sc in same st, *sc in next 6 sts, (sc, ch2, sc) in the center of tall point as a small arc*, repeat around to create a stable base for outer lace (approx 64 sc total)
Info :
Check counts: if you used 8 petals and average 8 sc between points, approx 64 sc should be present. Adjust one or two stitches across petals to reach evenness before continuing.
Round 17 :
Ch5, *skip 2 sts, sl st in next st, ch5*; repeat around to make 16 ch-5 loops that will become outer lace picots (16 loops)
Round 18 :
Into each ch5 loop work: (sc, hdc, 5 dc, hdc, sc) to form a lacy scallop x16 (16 scallops)
Round 19 :
Ch3, *2 dc in top of scallop, ch3, 2 dc in same point, sl st to base between scallops*; repeat around to create a beaded ridge (32 dc clusters)
Info :
At this point the motif is quite wide; measure across petals and compare to desired finished motif size. If you want a smaller motif, omit one outer round; if larger, add additional chain-loop rounds.
Round 20 :
Change color for outer edge if desired. Ch2, 1 hdc in each st around working evenly to create a firm edge; sl st to join (hdc per st around)
Round 21 :
Ch1, *sc in next 3 sts, picot (ch3, sl st into picot base) in next st*; repeat around for a picot dotted edge that forms a crisp scallop (count will be multiple of 8 depending on previous round)
Round 22 :
Ch4, sl st into picot top, *ch4, sl st into next picot top* to create loops for joining; repeat around aligning loops with each petal point (8 loops)
Round 23 :
Ch1, work sc and small decorative picots across remaining tiny gaps as needed to make the outer border even. This is a shaping and tidying round rather than a set repeat—work evenly until motif feels balanced.
Info :
Fasten off leaving a 6-8 inch tail for weaving. Block motif flat, pinning petal tips gently outward to open the lace. Repeat for all motifs and block before joining for best results.
Round 24-30 :
Optional decorative rounds: You may add up to 7 additional rounds of airy chain and picot lace for a larger motif. Example repeat: Round 24: Ch5, *sl st in next picot top, ch5* around (increase outer loops); Round 25: In each ch5 loop work (sc, ch7, sc); Round 26: Add (3 dc, ch3, 3 dc) in arch centers; Round 27: Sc round; Round 28: Picot dotted round; Round 29: Edge chain round; Round 30: Final sc tidy round. Use these to scale motif size if desired by one to three inches.
Info :
If adding these optional rounds, maintain balance by counting repeats: all repeats should be multiples of 8 loops or shells to align with petals. Stop when size matches your runner plan.
— Small Connector Motif (Optional, Make as many as needed to fill gaps) :
Round 1 :
mr, ch1, 6 sc in mr, sl st to join (6)
Round 2 :
Ch4, *sl st in next sc, ch4* around to form 6 ch4 loops (6)
Round 3 :
In each ch4 loop: (sc, 3 dc, sc) to create small petal x6 (6 petals)
Round 4 :
Ch2, sc around petals working 2 sc in each sc of the petal bases to widen motif (approx 18 sc)
Round 5 :
Ch5, *sl st into next petal top, ch5* continue around to create 6 outer loops for joining points(6)
Round 6 :
Work a tidy round of sc in new color if desired, adding small picots (ch3, sl st) at alternating loops for texture. Fasten off leaving tail for joining.
Info :
Small connector motifs are intended to sit between large flowers to even spacing and give a delicate honeycomb look. Make a sample to check scale relative to large motifs before making multiples.
— Join-As-You-Go Method (Preferred for a seamless runner) :
Info :
Layout plan: Arrange motifs in a single-file column for a runner; motifs should overlap slightly so petal tips of one sit over the body of the next. Mark positions before joining. The method below attaches a new motif to previously blocked motifs on its final outer round.
Round 1 :
Work new Large Flower through Round 22 as above up to final border before final picot loop round (stop where you have even outer loops to join).
Round 2 :
When you reach the first outer loop that coincides with a neighbor motif edge, work this sequence: ch4 (loop), sl st into corresponding loop of the neighbor motif, ch4, sl st back into your motif loop to secure the join. Continue working around and join at each coinciding loop (make 3-5 joins per adjoining petal depending on how the layout sits).
Info :
Join at 3-5 points per overlapping petal gives a stable but flexible seam. Use a stitch marker on the neighbor motif to mark join loop positions if needed. Keep joins tidy and consistent in tension to avoid puckering.
Round 3 :
Where motifs do not align perfectly, add the Small Connector Motif in the gap and join it with two sl sts to each adjacent large motif using the same join method on its outer loops.
Round 4 :
After joining each new motif around 3-4 points, work the remaining outer border stitches of your motif as usual (sc/picot rounds) to finish. Fasten off and weave in ends from the joined area securely through the join to lock.
Info :
Work joins with slightly looser tension than finished edge rounds so motifs lie flat. If a join looks too loose, slip a few invisible stitches with yarn needle through the back of motifs to stabilize.
— Runner Layout Suggestions :
Info :
For the photographed runner the maker used a single-file connected column of alternating colors and occasionally nested a Small Connector Motif to stagger petals for an organic look. Typical motif count for a standard dining table runner is 6-10 motifs depending on motif size.
Info :
To make a wider runner, create two parallel columns joined with connector motifs in between. Keep the same join-as-you-go principle but plan join points carefully so that petals nest without crowding.
— Edging & Finishing Rounds :
Round 1 :
Once all motifs are joined and blocked, work an outer unifying edging around the entire runner: With a contrasting color and a 3.5mm hook, sc evenly around the perimeter of the assembled motifs, placing 3 sc in each outer scallop and 1 sc in tighter curves. Work slow and adjust to keep the edge even.
Round 2 :
Ch5 between outer sc groups to create a small decorative loop and sl st into base every 3-4 sc to keep the edge stable. This forms a gentle scalloped look.
Round 3 :
In each ch5 loop work (sc, picot, sc) or (sc, ch3, sc) depending on how pronounced you want picots to be. Keep picots small (ch3) to avoid a spiky border—photograph shows small, rounded picots.
Round 4 :
Finish with one final sc round to tidy: sc evenly around, using 1 sc per picot top and 2-3 sc per scallop; this compresses the edge slightly and secures the decoration. Fasten off and weave in ends.
Info :
Edge counts are dependent on layout and number of motif joins; always work to visual balance rather than strict total stitch count. Use blocking at the end after the edge to even everything out.
— Blocking & Final Shape :
Info :
Wet block each motif individually: dampen motif, pin to blocking mat and gently shape petals and outer scallops to be even. Allow to dry completely. After joining and edging, re-block the entire runner by pinning it into final shape; use rust-proof pins and blocks for consistent spacing.
Round 1 :
Press lightly with a steam iron at low setting if additional shaping is required; do not press too hot on cotton-blend yarns. Use a pressing cloth to protect texture.
Info :
Blocking is crucial for this pattern to open the lace and make petal edges lie flat. Take time here for professional finish.
— Variations & Scaling :
Info :
For a smaller motif: omit outer rounds 17-22 and scale down to the small connector for a denser runner. For a larger dramatic runner: add optional rounds 24-30 and switch to a bulky cotton yarn and larger hook—recalculate motif count for desired runner length.
Info :
Experiment with monochrome, ombre, or repeating color sequences. The photographed sample alternates gold, orange, red and burgundy to emulate autumn leaves.
Info :
Keep detailed notes and mark your motif placement on a layout board if assembling a large runner so you maintain color balance and the organic cascading look.
Completing this autumn floral runner feels like arranging a bouquet of crocheted flowers across your table — warm, layered, and full of texture. Each motif comes together to form a cozy, handmade centerpiece that welcomes guests and adds personality to your home. I hope your hands enjoy the rhythm of petals and picots as much as mine did making it. 🧶🍂 Share your finished runner and savor the glow of a project beautifully done! ✨