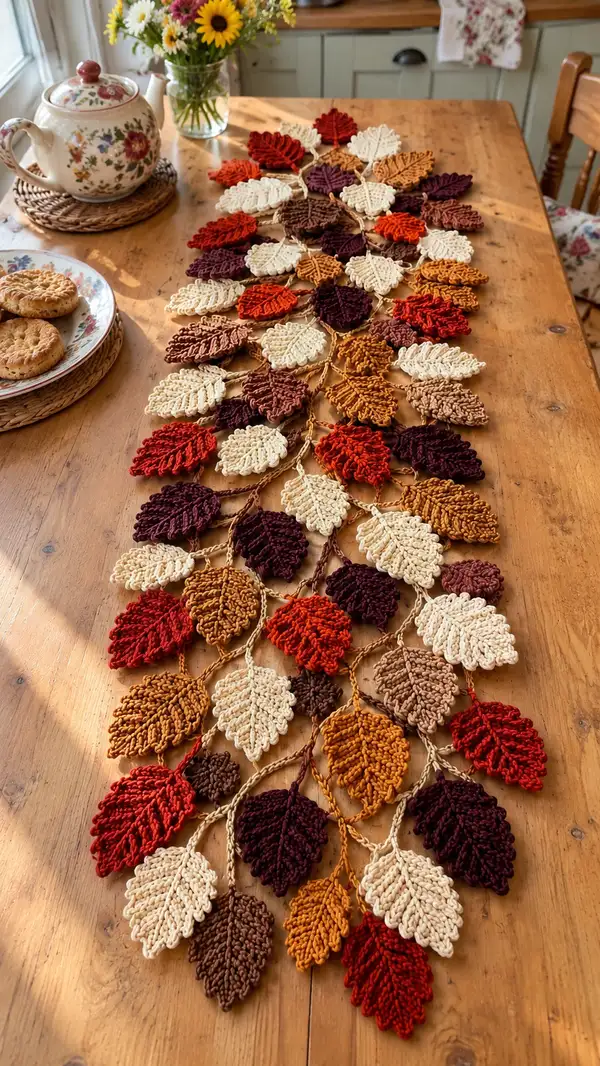
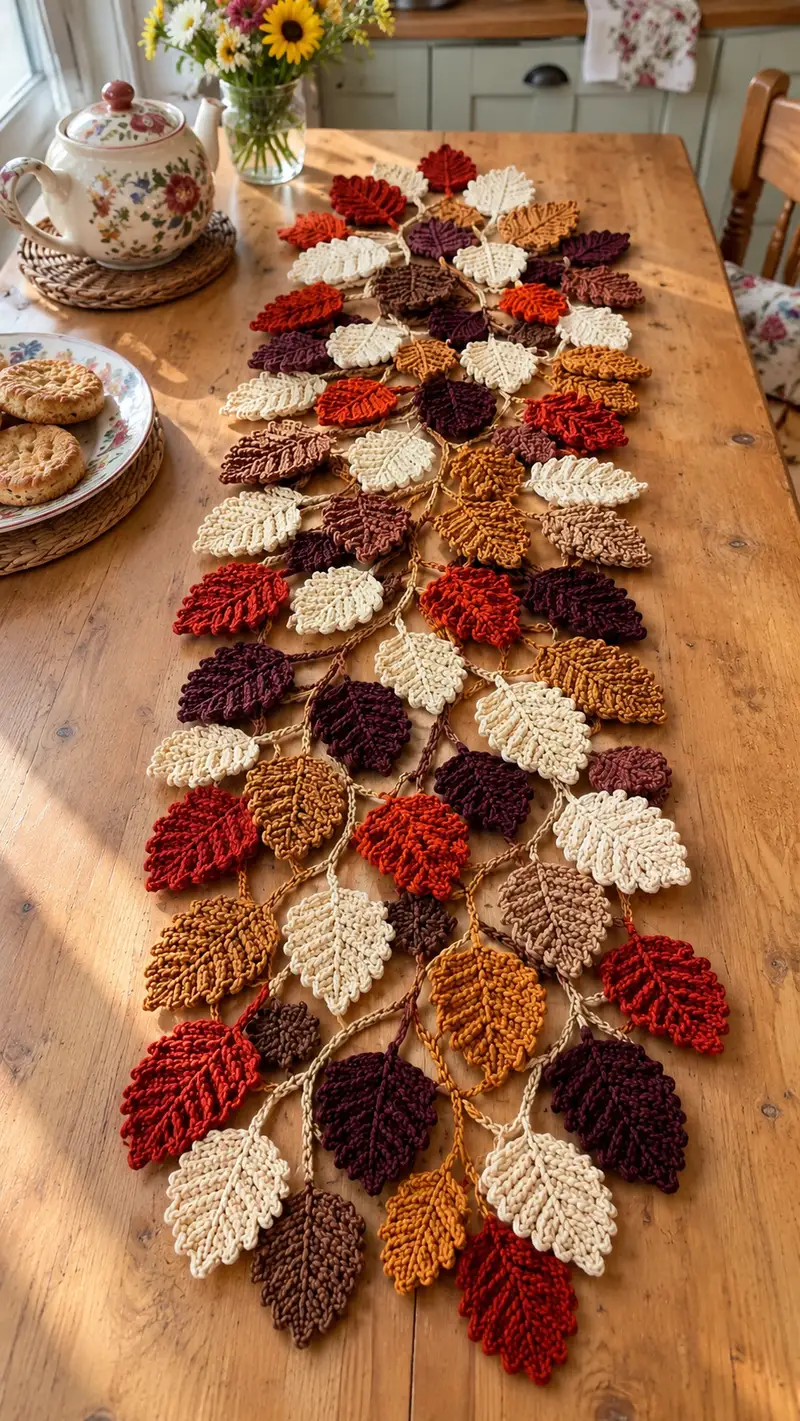
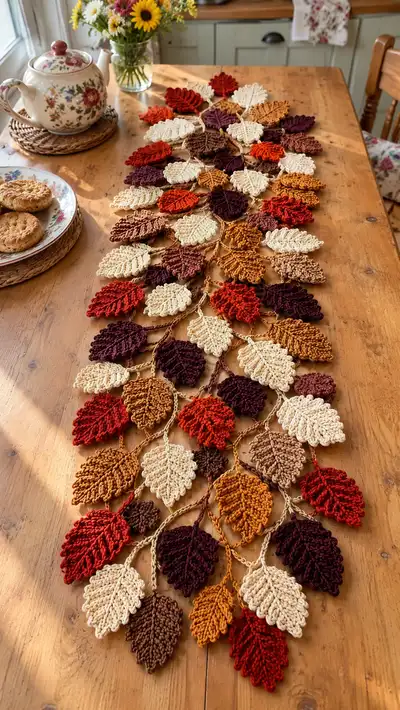
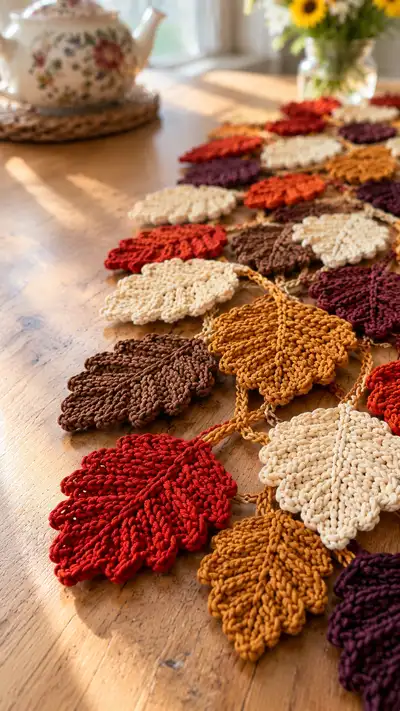
Bring the warm colors of fall to your table with this crocheted autumn leaves runner. A cascade of individually crocheted leaves in rich reds, golds, browns and cream are joined by delicate chain vines to create a textured, organic runner. The lightweight, flat leaves lie beautifully on a wooden surface and create a cozy seasonal centerpiece. Suitable for makers who enjoy modular crochet and joining techniques.
Progress Tracker
0% Complete
— Pattern Overview :
Info :
This pattern is modular: make multiple leaves in three sizes then join them with chain vines. Leaves are worked flat in continuous rounds/rows to create a central spine and mirrored sides. Surface slip stitch ribs are added for vein texture. Finish by blocking leaves flat and joining into a runner of the desired length.
Info :
Finished size for the sample runner (as photographed): approx 36-40 inches long and about 10-12 inches wide at its widest point, using worsted cotton and a 3.5mm hook. Size will vary by yarn and hook choice.
— Gauge & Tips :
Info :
Gauge is not critical but for consistent leaf size test a large leaf. With worsted cotton and 3.5mm hook a large leaf measures approx 3.5-4 inches tall and 3-3.5 inches wide (measured tip to base and across the widest broadest point).
Info :
Work tightly enough that stitch definition is clear for surface slip-stitch ribs but not so tight that the fabric is stiff. Keep tension consistent for all leaves for the most even runner.
— Leaf (Large) :
Info :
Make 24 large leaves in the main palette (deep burgundy, rust, mustard, brown, cream as desired). Each large leaf is worked in 34 rounds (rows) including surface ribbing and finishes approximately 3.5-4 in tall. Use 3.5mm hook.
Round 1 :
Make a magic ring, ch1, work 6 sc into ring. Pull tight. (6)
Round 2 :
Inc in each st around (work 2 sc in each st). (12)
Round 3 :
(1 sc, inc) x6 around. (18)
Round 4 :
(2 sc, inc) x6 around. (24)
Round 5 :
(3 sc, inc) x6 around. (30)
Info :
These increases establish the rounded base of the leaf. From here we build height and then shape a pointed tip by concentrated decreases at one side in later rounds.
Round 6 :
(4 sc, inc) x6 around. (36)
Round 7 :
1 sc in each st around. (36)
Round 8 :
1 sc in each st around. (36)
Round 9 :
1 sc in each st around. (36)
Round 10 :
1 sc in each st around. (36)
Info :
At the end of Round 10, place a stitch marker in the stitch that will become the tip-side. You will reference this stitch when concentrating decreases to form a point.
Round 11 :
(5 sc, inc) x6 around. (42)
Round 12 :
1 sc in each st around. (42)
Round 13 :
1 sc in each st around. (42)
Round 14 :
1 sc in each st around. (42)
Info :
Rounds 11–14 create the broad midsection of the leaf where most of the vein texture will appear. Keep tension even. If you prefer a narrower leaf, skip Round 11 (reducing max width).
Round 15 :
Work 1 sc in first 6 sts, dec (sc2tog), 1 sc in next 12 sts, dec, 1 sc in next 12 sts, dec, 1 sc in remaining sts to end. (39)
Round 16 :
1 sc in each st around. (39)
Round 17 :
Work 1 sc in first 5 sts, dec, 1 sc in next 10 sts, dec, 1 sc in next 10 sts, dec, 1 sc in remaining sts. (36)
Info :
Begin shaping the tip by placing decreases slightly off-center towards the stitch-marker side. This sequence narrows one end without pulling in the entire leaf.
Round 18 :
1 sc in each st around. (36)
Round 19 :
Work 1 sc in first 4 sts, dec, 1 sc in next 8 sts, dec, 1 sc in next 8 sts, dec, 1 sc in remaining sts. (33)
Round 20 :
1 sc in each st around. (33)
Round 21 :
Work 1 sc in first 3 sts, dec, 1 sc in next 6 sts, dec, 1 sc in next 6 sts, dec, 1 sc in remaining sts. (30)
Info :
Continue concentrating decreases on the tip-side. Check your leaf shape frequently: you want a rounded base and a gentle taper to a point.
Round 22 :
1 sc in each st around. (30)
Round 23 :
Work 1 sc in first 2 sts, dec, 1 sc in next 4 sts, dec, 1 sc in next 4 sts, dec, 1 sc in remaining sts. (27)
Round 24 :
1 sc in each st around. (27)
Round 25 :
Work 1 sc in first 1 st, dec, 1 sc in next 2 sts, dec, 1 sc in next 2 sts, dec, 1 sc in remaining sts. (24)
Round 26 :
1 sc in each st around. (24)
Round 27 :
(1 sc, dec) x6 around. (18)
Info :
At this point the leaf should have a clear tapered tip. Fasten off leaving a 12-14 inch tail for sewing and weaving. You will add surface ribs next.
Round 28 :
With RS facing, join yarn at base center (opposite tip). Ch1, work a round of sc evenly around the leaf edge to define a neat border. (18)
Round 29 :
1 sc in each st around working in BLO to produce a slight ridge on the outside edge. (18)
Round 30 :
Fasten off. Weave in the short tail at the tip and the long tail at the base; leave long tail at base for attaching to vine if desired.
Round 31 :
Info on surface ribs: Using a contrasting or matching color, work surface slip-stitch veins from the base toward the tip in 5–7 evenly spaced lines. To work a surface slip-stitch, insert hook into surface of leaf, pull up loop, yo and pull through loop on hook—repeat for a line.
Round 32 :
Surface rib technique example: From the base center, chain 1 to secure, then surface sl st 10–14 times to create a raised vein reaching near the tip. Repeat symmetrically on both sides of the center vein. (Counts will vary by leaf size)
Round 33 :
Optional: Add a slip-stitched scalloped edge by working *sc, ch1, sk1, sc* around the outer edge if you want a decorative border. Fasten off and weave in ends.
Round 34 :
Blocking: dampen lightly and pin flat on blocking board following natural shape; allow to dry completely to set shape.
— Leaf (Small) :
Info :
Make 18 small leaves. Each small leaf is worked similarly to large leaf but with fewer increases and rounds for a more compact shape. Use same hook and yarn or a slightly smaller hook for a tighter fabric.
Round 1 :
Magic ring, ch1, 6 sc in ring. (6)
Round 2 :
Inc in each st around. (12)
Round 3 :
(1 sc, inc) x6 around. (18)
Round 4 :
(2 sc, inc) x6 around. (24)
Round 5 :
1 sc in each st around. (24)
Info :
Small leaves are compact: reduce width by skipping Round 5 increases if you want an even smaller leaf.
Round 6 :
(3 sc, inc) x6 around. (30)
Round 7 :
1 sc in each st around. (30)
Round 8 :
Work decreases concentrated toward tip: 1 sc in first 6 sts, dec, 1 sc next 8 sts, dec, 1 sc remaining sts. (28)
Round 9 :
1 sc in each st around. (28)
Round 10 :
Continue decreases: (2 sc, dec) x6. (22)
Round 11 :
1 sc in each st around. (22)
Round 12 :
(1 sc, dec) x6. (12)
Round 13 :
1 sc in each st around. (12)
Round 14 :
Fasten off leaving long tail for attaching to vine. Add surface ribs using surface slip-stitch as desired and block flat.
— Leaf (Mini) :
Info :
Make 12 mini leaves to fill gaps and create texture. These are quick to work and are best made with the same yarn and a slightly smaller hook if you want a crisp small leaf.
Round 1 :
Ch6. 1 sc in 2nd ch from hook, hdc in next ch, dc in next 2 ch, 3 sc in last ch (turn and work opposite side), dc in next 2 ch, hdc in next ch, sc in final ch. Join with sl st to first sc. (12)
Round 2 :
Ch1, 1 sc in each st around to tidy edge. (12)
Round 3 :
Work 1 sc in first 3 sts, dec, 1 sc in next 3 sts, dec, 1 sc in remaining sts. (10)
Round 4 :
1 sc in each st around. (10)
Round 5 :
Work 2 dec evenly spaced (sc2tog twice). (6)
Round 6 :
Fasten off, leave long tail for joining. Add one centre surface vein with a surface sl st from base to tip. Block lightly.
— Surface Veins & Ribbing :
Info :
Surface ribs are what make these leaves look like real leaves. Use the same or slightly darker color. Work surface slip stitches from the base outwards in evenly spaced lines. For large leaves do 5–7 ribs, for small leaves 3–5, for mini leaves 1–2. Keep tension relaxed.
Round 1 :
Join color at base center (opposite tip), ch1, work a line of surface sl st across the center to tip (approx 10–14 sl sts for large leaf). Fasten off leaving a weaving tail. (variable)
Round 2 :
Work additional ribs: space them equally left and right of the center vein. Each rib is a surface sl st line of similar length. (variable)
Info :
To make ribs more pronounced, you can chain a short cord and whipstitch it along the surface before securing ends underneath the leaf.
— Vine Connector (Make many) :
Info :
Vines are long chains of consistent length that join leaves into a runner. For the photographed runner each vine segment between leaves is ch12–ch16 depending on spacing preference. Make a mix of single and double-strand vines to add depth.
Round 1 :
With yarn color chosen for vine, ch16 (or preferred length). (16)
Round 2 :
Turn and in second ch from hook work 1 sc, 1 sc in each ch across. (15)
Round 3 :
Fasten off leaving long tail for joining. For a chained rope-like vine, use a thicker cord: ch40 and join ends with sl st to make a loose cord, or use two strands held together for a chunky vine.
Round 4 :
Info on vine variation: For a twisted vine, chain 30 then with both ends twist and sl st through spirals to hold twist. Alternatively, braid 3 sewn chains for extra body.
Round 5 :
To connect leaves directly without a long chain, use short 6–12 ch connectors and sew leaf base tails to connectors at 4–8 stitch intervals to create staggered attachment points.
— Assembly & Joining Pattern (Runner Construction) :
Info :
Plan your layout before joining. The photographed runner alternates large, small and mini leaves in staggered columns—two offset columns mirrored along a central vine. Lay out leaves on the table first to experiment with color placement and spacing.
Round 1 :
Start with a central vine of ch80–ch100 laid lengthwise. Use long chain or connected chain segments joined with sl st to form a central backbone. (variable)
Round 2 :
Attach leaves by sewing the base tail into the chain at desired intervals using a yarn needle. Insert base tail into chain, whipstitch 6–8 stitches around the chain to secure then weave tail through leaf back for invisibility.
Round 3 :
Alternate sides and stagger the leaves so they overlap slightly and create a dense foliage look. For a wide runner add secondary side vines (short chain segments) sewn between main vine stitches and attach additional leaves to those connectors.
Info :
To achieve the photographed organic look, avoid perfectly symmetrical placement; slightly vary chain lengths and use small leaves to fill gaps near joins.
Round 4 :
Where two leaves overlap, use a few invisible mattress stitches through both leaf backs to hold them in place so they do not flip upward. Do not stitch through the surface ribs to keep texture intact.
Round 5 :
When you reach the runner length you desire, finish the last vine ends with tidy knots and weave tails into neighboring leaves to hide them. Trim and tuck any remaining ends under the leaves.
— Decorative Options & Edging :
Info :
Add small crocheted acorns, berries or tiny pom-poms between leaves for extra seasonal flair. A decorative border of slip-stitch loops worked along the outermost leaves makes a finished framed edge.
Round 1 :
To make an acorn: With brown, work magic ring 6 sc, inc in each (12), (1 sc, inc) x6 (18), switch to lighter tan for cap: 1 sc in each around 18, then sl st to form dome, fasten off leaving tail and sew to runner. (small - variable)
Round 2 :
To make small berries: ch6, sl st into a ring, pull tight, fasten off, attach as small dots between leaves.
Info :
For a more permanent table runner, you can lightly stiffen leaves with diluted fabric stiffener after assembly. Test on a scrap leaf to avoid discoloration or stiffness that looks plastic.
— Finishing :
Round 1 :
Once all leaves are joined, block the entire runner gently to make leaves lie flat and settle joins. Pin edges and allow to dry thoroughly if wet-blocked.
Round 2 :
Weave in all ends: every leaf has at least one long tail used for joining—secure these by weaving through multiple stitches at the back of the leaf and then trimming close.
Round 3 :
Final inspection: check for loose stitches at joins and reinforce them with a few extra whipstitches where necessary, especially where the runner will receive handling.
Info :
Label or photograph your layout before disassembling if you plan to reproduce the same arrangement later. This helps when re-stitching leaves after blocking.
This cozy autumn leaves runner brings handmade warmth to any table with layered texture and rich fall colors. Each leaf is a little piece of crochet joy, and stitching them together creates a relaxing rhythm and a beautiful final result. Whether you keep it for seasonal decor or give it as a thoughtful gift, this runner celebrates craft and color. 🍂🧶✨