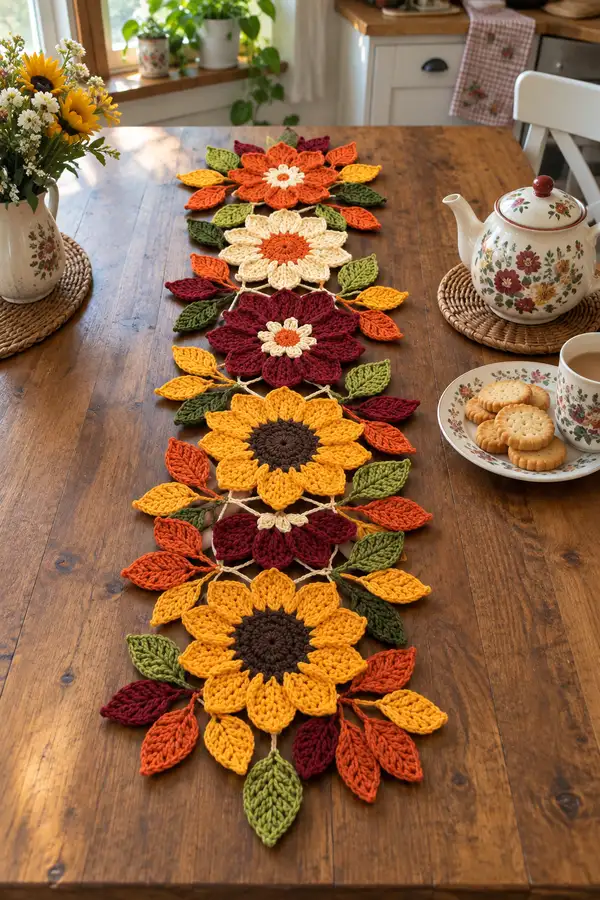
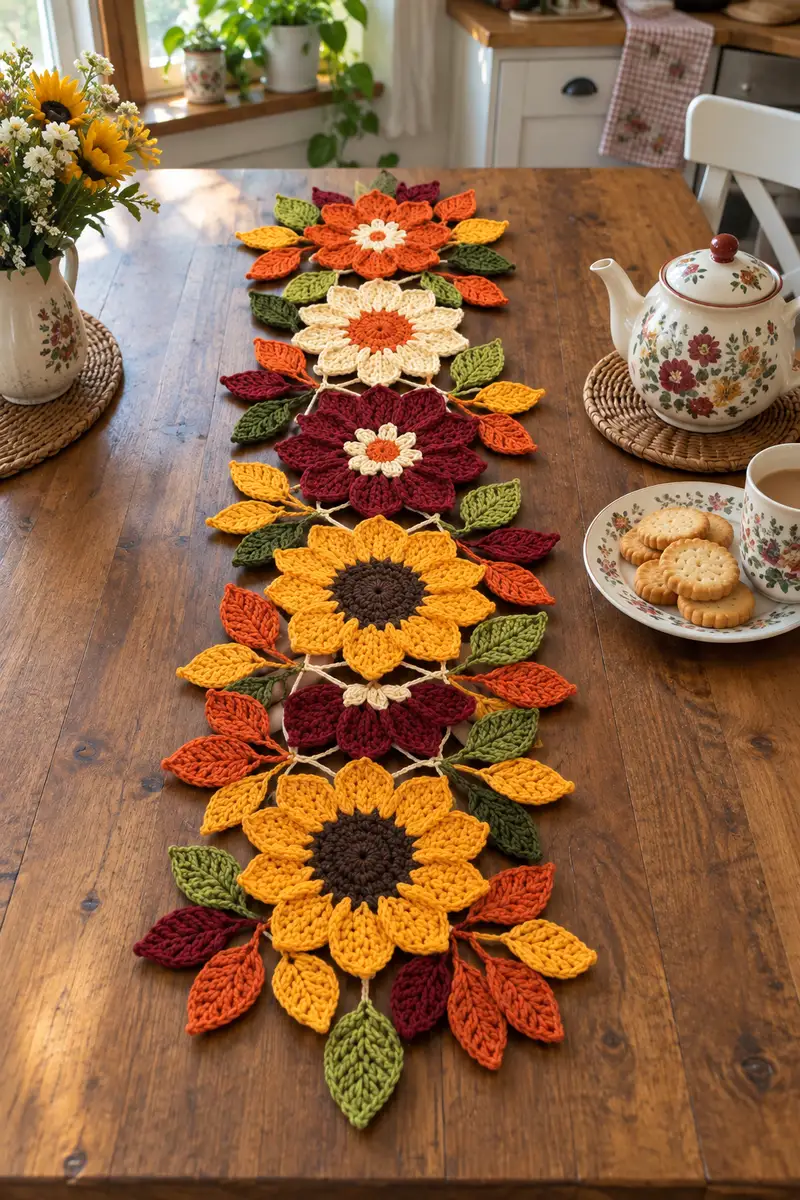
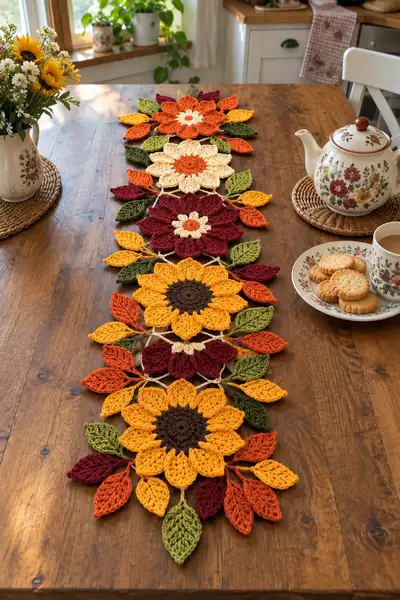
Create a warm autumn table runner made from interconnected crochet flower motifs and sculpted leaves. This pattern uses bold fall colors — sunflower gold, rust orange, deep burgundy, cream and leafy greens — to form large floral medallions linked by braided chains and decorative leaves. Each motif is worked flat with textured petals and raised leaf veins for a 3D look. The finished runner is a striking seasonal centerpiece for dining or side tables.
Progress Tracker
0% Complete
— Sunflower Motif (Make 2 gold sunflowers) :
Round 1 :
Using dark brown, 6 sc in mr (6)
Round 3 :
(1 sc, inc) x 6 (18)
Round 4 :
(2 sc, inc) x 6 (24)
Round 5 :
(3 sc, inc) x 6 (30)
Round 6 :
(4 sc, inc) x 6 (36)
Info :
Change to golden yellow now. Fasten off brown or carry it to the back and join yellow with a sl st to any stitch. The brown center should be flat and neat; weave in tail securely.
Round 7 :
Join golden yellow, ch1, 1 sc in same st, 1 sc in each st around (36)
Round 8 :
1 sc in each st (36)
Info :
These two even rounds provide a base for petals. Keep tension slightly firm so petals will stand proud.
Round 9 :
*1 sc in next st, ch3, skip 1 st, sc in next st; rep from * around to form ch-loops for petals (36 sc, 36 ch3 loops)
Round 10 :
Working into ch3 loops: *(1 sc, 1 hdc, 3 dc, 1 hdc, 1 sc) in each ch-3 loop* around (12 petal clusters across 36 loops) (petal clusters = 12)
Info :
Each group of three loops forms a petal anchor. If you prefer fuller petals, replace the 3 dc with 5 dc for a wider petal; adjust counts accordingly. Stitch counts indicated refer to anchors, petals are counted as 12 clusters.
Round 11 :
Ch1, 1 sc around the base of each petal cluster (36 sc)
Round 12 :
1 sc BLO in each st around to create a slight ridge at the petal base (36)
Round 13 :
Attach yarn at petal tip behind a cluster, work reverse around petal: sc, hdc, (2 dc, tr, 2 dc) across petal center, hdc, sc; fasten off and weave tail - repeat for each of 12 petals (worked individually)
Info :
Round 13 builds the raised petal height. Work each petal the same to maintain symmetry. If you wish for more definition, use front post dc around the petal base on previous round to lift petals.
Round 14 :
With golden yellow, pick up yarn behind each petal and sl st across outer edge to tidy joins. This is more of a finishing pass than a round of countable stitches.
Round 15 :
Optional edging: *ch1, sc evenly around the outside edge including petal tips and spaces between petals to create a tidy border* (approx. 72 sc total, variable)
Info :
Block each sunflower flat, shaping petals slightly outward. Pin the center flat and steam or wet-block gently to open petal shapes. Blocking will make joining motifs easier and neater.
— Layered Flower Motif (Make 2 deep burgundy flowers) :
Round 1 :
Using cream for inner eye: 6 sc in mr (6)
Round 3 :
(1 sc, inc) x 6 (18)
Round 4 :
Change to rust orange; (2 sc, inc) x 6 (24)
Round 5 :
1 sc in each st (24)
Info :
We are building a layered small center to sit beneath a larger burgundy petal ring. The cream center contrasts for depth.
Round 6 :
Switch to deep burgundy. Ch2, *(3 dc cluster in next st, ch1, sl st in same st), skip next st* around to create petal posts (12 cluster anchors)
Round 7 :
Working into cluster anchors: *sc, hdc, 3 dc, hdc, sc* in each anchor (12 petals)
Round 8 :
Ch1, sc around base of petals in each space to tidy (24 sc)
Info :
For a ruffled look, work petals in back loops on Round 7 to allow front loops to remain for later decorative stitches.
Round 9 :
Use BLO 1 sc in each st to make a ridge between center and petals (24)
Round 10 :
Optional second petal layer: *skip 1 st, (2 dc, tr, 2 dc) in next st, skip 1 st, sl st in next st* x 6 to create larger outer petals (12 larger petals)
Round 11 :
Sc around to tidy edges, approx. 48 sc (variable)
Info :
If you want a flatter motif for linking, omit Round 10 and simply sc around. Block and shape petals before joining.
— Cream & Orange Layered Motif (Make 2 medium cream flowers) :
Round 1 :
Using rust orange, 6 sc in mr (6)
Round 3 :
(1 sc, inc) x 6 (18)
Round 4 :
Switch to cream, (2 sc, inc) x 6 (24)
Round 5 :
1 sc in each st (24)
Round 6 :
*Ch3, sl st into next st* repeat around to create ch loops for petals (24 loops)
Info :
Create 12 petal anchors by pairing loops where required; count carefully to ensure petals align with center geometry.
Round 7 :
Into each petal anchor: sc, hdc, 3 dc, hdc, sc to form 12 petals (worked into ch loops) (petal count = 12)
Round 8 :
Sl st around to tidy outer edges, approx. 48 sl st (variable)
Round 9 :
Optional small picot edging: *sc, ch3, sl st in 3rd ch* around petal tips to create delicate scallop
Info :
This medium motif fills space between larger sunflowers and layered burgundy flowers when joined. Use block to flatten petals to desired look.
— Leaf (Make many – various sizes) :
Round 1 :
Using forest green, ch10 (or ch12 for larger leaves), sc in 2nd ch from hook, hdc next, dc next, tr next, dtr next (center peak), continue dec: tr, dc, hdc, sc to last ch; sl st to final ch to form one side (worked flat)
Round 2 :
Turn and work along opposite side: sc, hdc, dc, tr, dtr at peak, tr, dc, hdc, sc back to starting point; sl st to join (leaf is symmetrical)
Info :
Adjust chain length for different leaf sizes. For textured vein, use FPdc (front post double crochet) down center on Round 3.
Round 3 :
Optional vein: With contrasting moss green, work a line of FPdc down center running from base to tip and back to create a raised vein; secure and weave ends.
Round 4 :
Edge: Sc evenly around leaf in BLO to create a ridged outline (approx. 22-28 sc depending on leaf size)
Info :
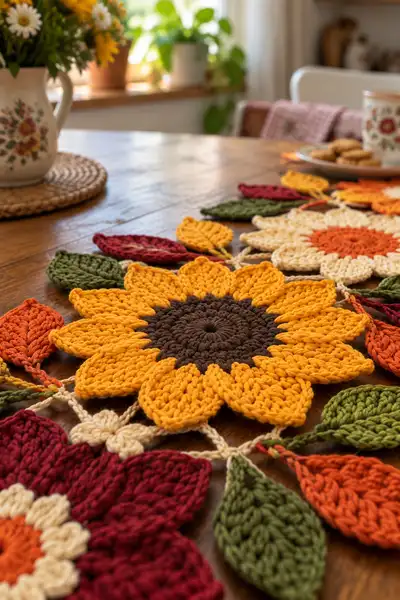
Leaves in the photo show a clearly defined vein; FPdc or FPtr works well. Make a mix of small (ch8), medium (ch10), and large (ch12) leaves to replicate the composition.
— Small Petal Clusters / Floral Connectors (Make multiple) :
Round 1 :
Using cream, 6 sc in mr (6)
Round 3 :
Change to cream or contrast color, ch5, sl st back into ring to form a loop petal; repeat 6 times around to create a small rosette or connector (6 loop petals)
Info :
These small clusters appear between motifs as decorative links and fill negative space. Make 6-12 depending on runner length.
— Motif Connector Chains & Mesh (Make sections to join motifs) :
Round 1 :
Using cream, ch16, sl st into the back loop of an anchor point on motif A to create a strap, ch16 back, sl st into motif B anchor point. Repeat for each pair of motifs to create chain links (adjust ch length to taste)
Round 2 :
Reinforce connector: working into chain, *sc evenly across chain, sl st into anchor point; rep for each connector* to make braided-looking link (approx. 32 sc per link, variable)
Info :
The image shows a trio of linked motifs connected by small four-strand braided looking chains; keep connectors consistent in length so motifs lay flat. Block connectors lightly after assembly.
Round 3 :
Optional decorative mesh: Between connectors, make a short net of ch5, sl st into motif, ch5 returning; repeat to form slight lattice (no strict stitch count)
— Assembly and Joining Motifs :
Info :
Pin motifs in desired order on a blocking mat. Typical layout alternates sunflower, cream, burgundy, sunflower, etc. Space motifs evenly so leaves fill in edges.
Round 1 :
With cream, use sl st to anchor one connector chain point to the back of first motif at a petal junction, ch16, sl st to corresponding point on second motif. Repeat to join motifs on both sides for secure attachment.
Round 2 :
Reinforce with sc: working through chain and motif edge, sc through both layers to secure join (approx. 10-16 sc for each join depending on connector width)
Info :
Try to sew the joins invisibly where petals overlap or at lower layers to hide connector stitches. Use small whip stitches with matching yarn to strengthen joins after initial crochet linking if needed.
Round 3 :
Attach leaves: Pin leaves so veins are oriented toward the runner edge; use yarn needle and matching green yarn to sew leaf bases to motif underside where connectors meet, using ladder stitch for neat seam. Make 2-4 leaves per motif as pictured.
Info :
Leaves should be sewn under petals so they appear to sprout naturally. Use the leaf base as the attachment point; stitch through both leaf and the motif fabric at the connector junction for stability.
— Border and Finishing Rounds :
Round 1 :
With cream, sc evenly around entire runner outer edge to tidy joins and create a cohesive border. Work 2 sc in corners where shapes meet to prevent curling. Stitch count variable (approx. 200-300 sc depending on runner length)
Round 2 :
1 sc BLO around entire border to create a raised ridge (same stitch count as previous)
Round 3 :
Optional decorative scallop: *(sc, ch3, sl st into 3rd ch)* across border at even intervals to create small scallops at petal tips
Info :
Finally, block runner flat and secure with pins. Spray lightly with water and shape petals and leaves. Allow to dry completely before removing pins. Weave in any remaining tails on the back using a tapestry needle.
— Tips, Variations and Troubleshooting :
Info :
Adjust motif count to fit your table length. For longer tables, repeat motif sequence; for shorter, omit a motif and add extra leaf clusters. Changing yarn weight and hook size will alter finished size—wider yarn will create a chunkier, faster-to-make runner.
Info :
If you prefer less three-dimensional petals, flatten layers by working petals in half height (hdc instead of dc/tr). For stronger joins use a matching thread sewn invisibly through both motif layers after crocheted connectors are complete.
Info :
Keep notes of your stitch counts for the first motif; subsequent motifs should match those counts exactly for neat joins. If a motif feels slightly smaller, block it more aggressively or add one extra round of sc before petals to equalize size.
This autumn floral runner brings a touch of handmade warmth to every meal time. Each motif is a little celebration of texture and color, and I love how the raised petals catch light on the table. With simple repeats and clear joins, you can make a runner to match any table size or color palette. 🧶🍂 Enjoy creating and changing it to suit your home — and display it proudly on special occasions! 🎃