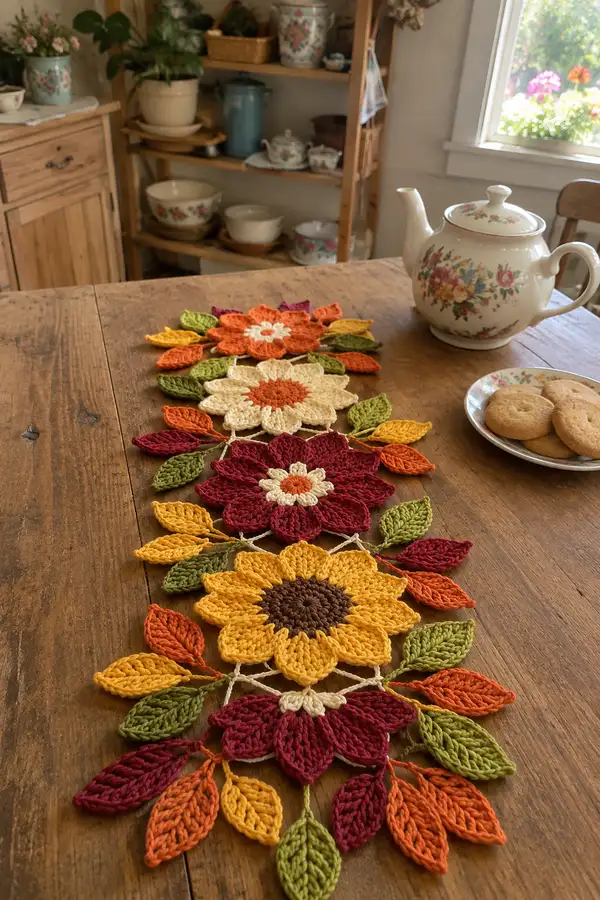
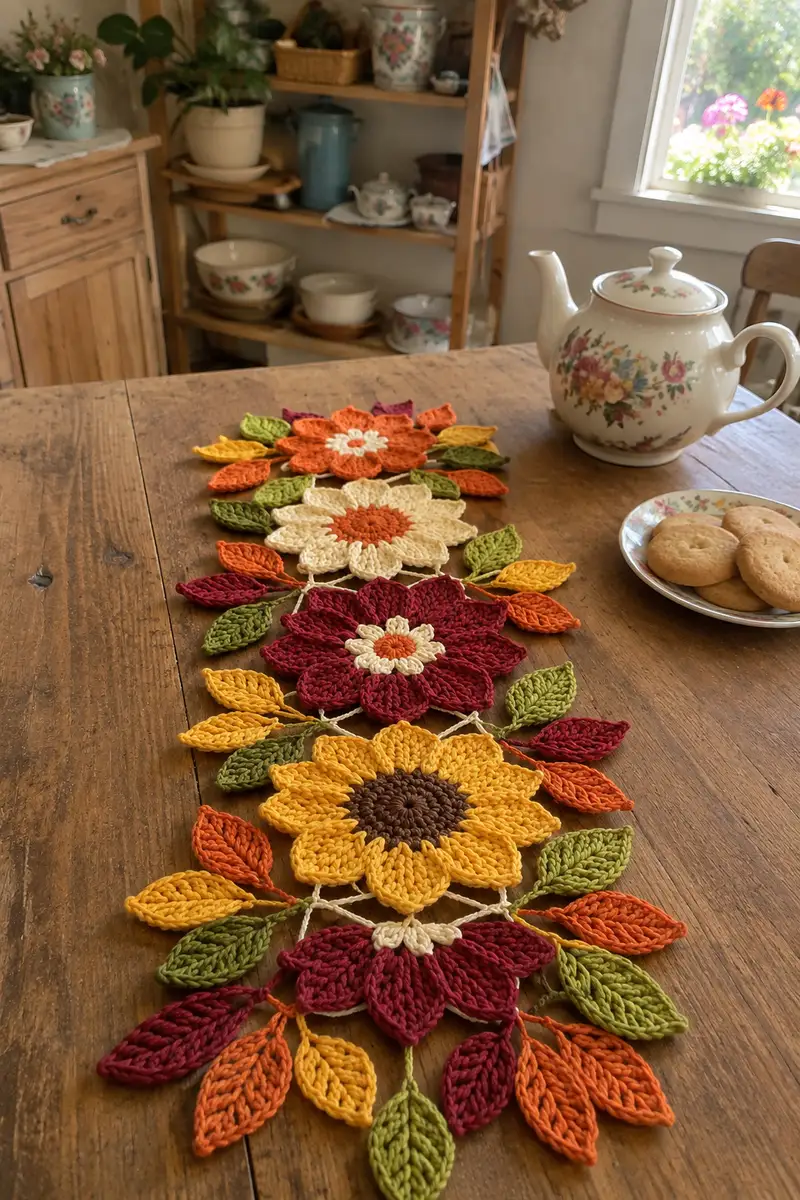
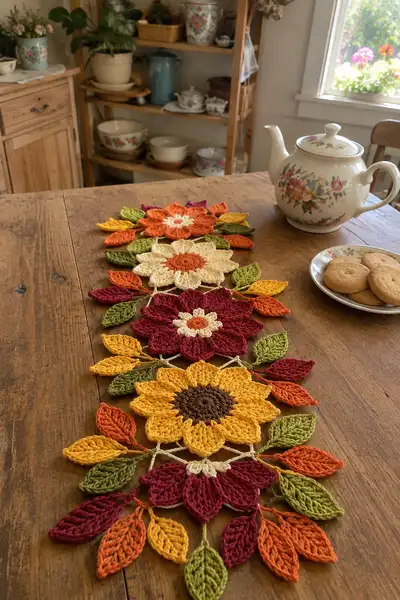
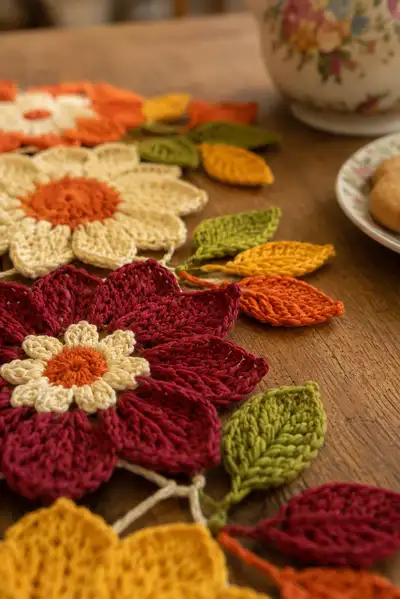
Create a warm, autumn-inspired table runner composed of linked sunflower-style motifs and delicate sculpted leaves. This pattern uses worsted weight cotton for crisp petals and defined leaf texture, finished with small connecting chains that form a pretty openwork runner. Perfect for seasonal décor, it lays flat and photographs beautifully for fall tablescapes.
Progress Tracker
0% Complete
— Materials & Gauge :
Info :
Gauge is not critical for this decorative runner but for consistent motif size work 10 rounds of sc in the center yarn to measure approximately 4" across. Use 3.5mm hook and worsted cotton to achieve similar sizing as the sample photo.
— Sunflower Motif (Make 4 total; color variations noted) :
Round 1 :
6 sc in magic ring (6)
Round 3 :
(1 sc, 1 inc) x 6 (18)
Round 4 :
(2 sc, 1 inc) x 6 (24)
Round 5 :
(3 sc, 1 inc) x 6 (30)
Round 6 :
(4 sc, 1 inc) x 6 (36)
Info :
Change color now if you want a contrasting center (eg. chocolate brown for sunflower centers). Fasten off previous color leaving tail to weave in later.
Round 7 :
1 sc in each st around (36)
Round 8 :
1 sc in each st around (36)
Round 9 :
(4 sc, 1 inc) x 6 (42)
Round 10 :
1 sc in each st around (42)
Info :
We are establishing a flat circular base; keep stitches even and do not increase too fast to avoid ruffling. Use stitch marker to mark the first stitch of each round.
Round 11 :
(2 sc, ch 4, sk 2) x 14 (42; 14 ch-4 spaces)
Info :
Round 11 creates 14 evenly spaced ch-4 loops that will serve as anchors for the first petal layer. Count loops to ensure correct petal number.
Round 12 :
Join new petal color in first ch-4 sp. *ch2 (counts as partial), (3 dc, tr) in same ch-4 sp, (3 dc) in same ch-4 sp, sl st in next ch-4 sp* repeat around to form 14 petal bases (14 petals; ~14 x 7 sts = 98 total stitches when counted individually)
Round 13 :
Working behind previous petals, ch1, sc in same sp, *ch3, sc between petal bases (between petal clusters)* repeat around to create small connecting loops (14 connecting loops)
Info :
These ch-3 loops will be used to attach a second petal layer and to create the little decorative webbing between petals. Keep tension loose enough to allow petals to sit naturally.
Round 14 :
For each petal: work into the front of the petal base as follows: join yarn at base, (hdc, dc, 2tr, dc, hdc) all worked into the same petal base. Sl st to top of petal to finish. Repeat for all 14 petals (14 petals; each petal counts 6 stitches in this formation)
Round 15 :
Ch1, sc in each stitch around petal bases and into connecting loops; work 2 sc in the ch space behind each petal tip to stabilize (total stitch count varies by petal fullness, expect ~84-100 sts)
Info :
Use BLO on this round to create a slight rim behind the petals if you prefer a raised petal look. A shallow BLO will leave the petal fronts crisp.
Round 16 :
Switch to a second petal color if making a layered flower (eg. cream or pale). Work *ch 5, sl st into base between petals* around to create 14 ch-5 loops (14 loops)
Round 17 :
Into each ch-5 loop: (ch2, 6 dc, ch2), sl st at base to create ruffled outer petal (each petal ~8 sts; 14 petals total ≈112 sts)
Round 18 :
Ch1, sc in each st around outer petal edges, working 2 sc in each ch-2 corner to flatten petals slightly (approx total stitches ~140 due to outer petal density)
Info :
At this point your motif should be approximately 5-6 inches across depending on tension and yarn. If you want a slightly larger motif work an extra round of petals using longer clusters (dtr) now.
Round 19 :
For sculpted petal ridges: *fpdc around the body of each outer petal (work 6 fpdc per petal), sl st between petals* Repeat for all petals (14 petals; fpdc count = ~84)
Round 20 :
Ch1, sc in each st around; when you reach the gap between motifs (if working the runner modularly) leave a long tail for joining or work a short ch-6 loop to be used for later connecting
Round 21 :
Optional decorative picot round: *sc 2, ch3, sl st in top of last sc (picot made), sc 2, sl st into next petal gap* Repeat around to add a delicate edge (counts variable)
Info :
Weave in the tails from color changes but leave the ones intended for joining so you can easily sew or use crochet join techniques. Block each motif lightly to ensure petals lay flat before assembly.
Round 22 :
Fasten off leaving 8" tail for sewing if not joining by crochet. Repeat motif construction for remaining motifs, varying the petal colors as desired (examples used in photos: mustard/gold with chocolate center; deep burgundy with cream center; cream with burnt orange center; burnt orange with cream center)
Info :
Make 4 motifs total. You may alter petal count to 12 or 16 by adjusting Round 11 anchors (eg. ch-5 or ch-3 instead of ch-4) but keep symmetry consistent across motifs used in the same runner.
— Leaf Motif (Make 22–28 leaves total for a 4-motif runner) :
Round 1 :
Make a slip knot, ch6 (counts as base). In 2nd ch from hook: sc, hdc, dc, (3 dc) in next st to form the tip, dc, hdc, sc in the next sts working down the chain to create a symmetrical leaf; sl st to starting chain (7 sts along leaf body and tip cluster)
Round 2 :
Working on opposite side of the foundation chain mirror: sc, hdc, dc, (3 dc), dc, hdc, sc; sl st to first sc to close leaf (total stitches ~14 including tip cluster)
Round 3 :
BLO around entire leaf: ch1, *sc in next st, hdc in next, dc in next two, sl st at tip*, repeat to the other side to create a subtle ridge (approx 16 sts)
Info :
For a plump leaf, use a slightly larger hook or add a tiny filler cord inside before closing. For a realistic midrib, use a contrasting yarn and embroider a line of sl st down the center later.
Round 4 :
Edge stitch: ch1, sc evenly around leaf working 2 sc in tip cluster to round it out. Fasten off leaving a 12" tail for joining (counts variable)
Info :
Make a mixture of small (approx 2.0" long) and medium (approx 2.75" long) leaves in olive, mustard and burnt orange for a layered, natural look.
Round 5 :
Optional: embroider central vein: with contrasting yarn, run simple sl st or backstitch from base to tip; weave tail through leaf edge to secure
Round 6 :
Make leaves until you have 5–8 leaves to attach to each motif depending on desired fullness (for 4 motifs plan 22–28 leaves total)
— Leaf Join Stem & Decorative Connecting Chains :
Round 1 :
Using cream/ivory or neutral thread, ch10 for a short connector, sl st into the inside edge of a petal between two petals; this forms a decorative lace-like connector between motifs (counts variable)
Info :
Chains connecting motifs should be slightly loose to allow motifs to lay flat. Do not pull tight or motifs will pucker.
Round 2 :
From the sl st join, ch6 and sl st into the corresponding petal gap of the next motif; fasten off and weave tails. Repeat for all motif-to-motif connections - use 2–3 chains per motif pair for a decorative lattice (counts variable)
Round 3 :
Attach leaves by sewing leaf tails to the back loop of the outer petal seam or tie with a small ch-6 loop then sew down for security. Space leaves evenly around motif edge: aim for 5 leaf attachment points per motif.
Info :
Alternate small and medium leaves around each motif to mimic the sample: a cluster of two small leaves + one medium leaf at each side of the motif creates a balanced look.
— Decorative Edge & Stabilizing Round :
Round 1 :
With neutral yarn, attach to any petal back and work *ch3, sc in top of next petal, ch3, sl st into connecting chain* around to give an airy scalloped border; repeat to surround entire assembled runner (counts variable)
Info :
This round stabilizes the runner and hides joining tails. If you prefer a solid border work sc evenly in each stitch instead of ch loops for a more defined edge.
Round 2 :
Optional reinforcing round: sc in each sc and sl st in each ch loop; work 2 sc in petal seam points to flatten and secure motifs (counts variable)
Info :
Check that the runner lies flat; if any motifs curl block them again slightly damp and pin edges flat until dry.
— Alternate Petal Variation (for two different looks used in photo) :
Round 1 :
Make center as for Sunflower Motif Rounds 1–10. For alternate petal styling, after establishing ch-anchors, work cluster petals made of (dtr, dtr, tr, dtr, dtr) for a fuller, ruffled petal. Work 12–14 such petal clusters.
Round 2 :
Work *ch2, sl st* between clusters to create airy gaps; sc around to stabilize. This variation produces the deep burgundy flower seen in the photo.
Info :
When you use longer clusters the motif becomes larger; allow an extra connecting chain length between motifs to compensate so the runner remains even.
— Small Central Flower (Optional accent used between large motifs) :
Round 1 :
6 sc in magic ring (6)
Round 3 :
(1 sc, 1 inc) x 6 (18)
Round 4 :
*ch4, sl st into every 3rd st* around to make 6 loops (6 loops)
Round 5 :
In each ch4 loop: (dc3, sl st) to form 6 small petals; sl st to base and fasten off. Use as a small filler motif between larger motifs if desired.
Info :
Small central flowers are decorative and can be used to fill gaps or to decorate an end of the runner for symmetry.
— Assembly & Joining Notes (Detailed technique rounds) :
Round 1 :
Lay motifs flat in your planned order. Mark three to four joining points along the perimeters of adjacent motifs (use the ch-loops previously left for joining if you made them in Round 20 of motifs).
Round 2 :
For crochet join: with neutral yarn and 3.5mm hook, insert hook into petal gap of motif A, pull up a loop, ch6, insert hook into corresponding gap of motif B and sl st to join. Make 2–3 joins per motif pair at evenly spaced positions.
Info :
When joining by crochet the runner retains flexibility. If you prefer a fixed look sew the chains with yarn and invisible whip stitch for less stretch.
Round 3 :
Sew leaves: position leaves around connected points and stitch down with the long tail left when fastening off in leaf construction. Use small mattress or whip stitches through the leaf base and the petal backloop for secure attachment.
Round 4 :
Once all motifs and leaves are joined, work the Decorative Edge & Stabilizing Round as described above around the entire outer perimeter to integrate joins and tidy tails.
Info :
Trim and weave in remaining ends behind the motifs; a small dab of fabric glue can be used on the final knot for extra security if the runner will be washed frequently.
— Finishing & Blocking :
Round 1 :
Lightly block motifs flat by pinning to a mat in the desired shape and misting with water or using steam from a distance. Allow to dry fully before removing pins. Press petals lightly to open them evenly.
Info :
If you plan to launder the runner, hand wash gently in cool water with mild soap and reshape while damp. Cotton will soften with wash so block again if needed.
Round 2 :
Final inspection: ensure all joins are secure, weave in any short tails, and trim stray fibers for a polished presentation.
Info :
For display, place a thin non-slip runner pad under your crochet runner to protect table surfaces and keep the runner in place.
Completing this autumn sunflower table runner brings seasonal charm to any table — each layered petal and sculpted leaf adds handcrafted warmth. The modular construction makes it easy to customize length and color for different gatherings. I hope this pattern inspires cozy afternoons of crocheting and a beautiful centerpiece that will brighten your home all season long. 🍁🧶