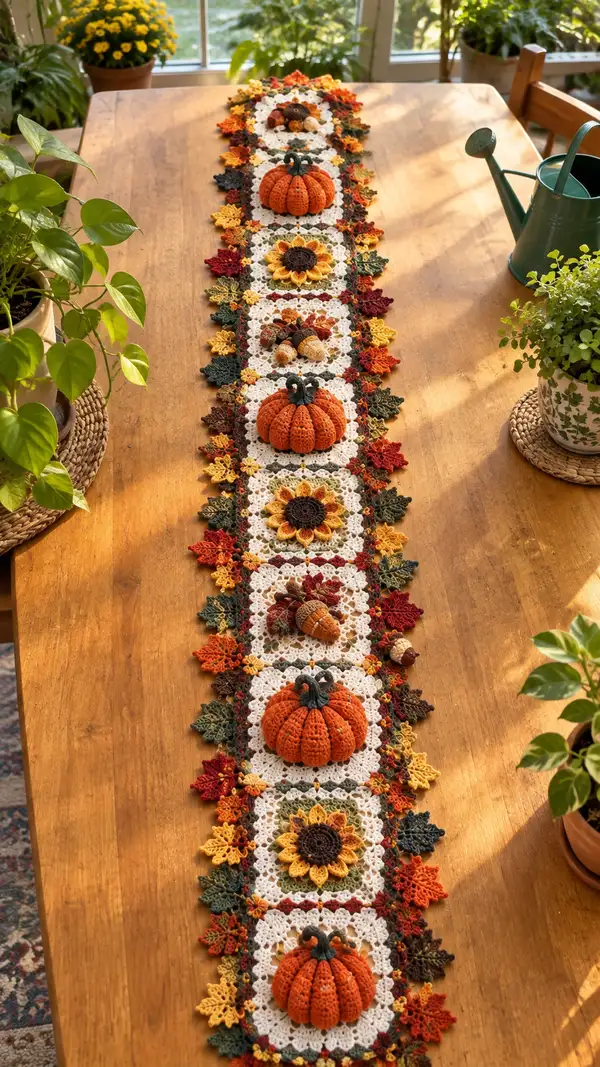
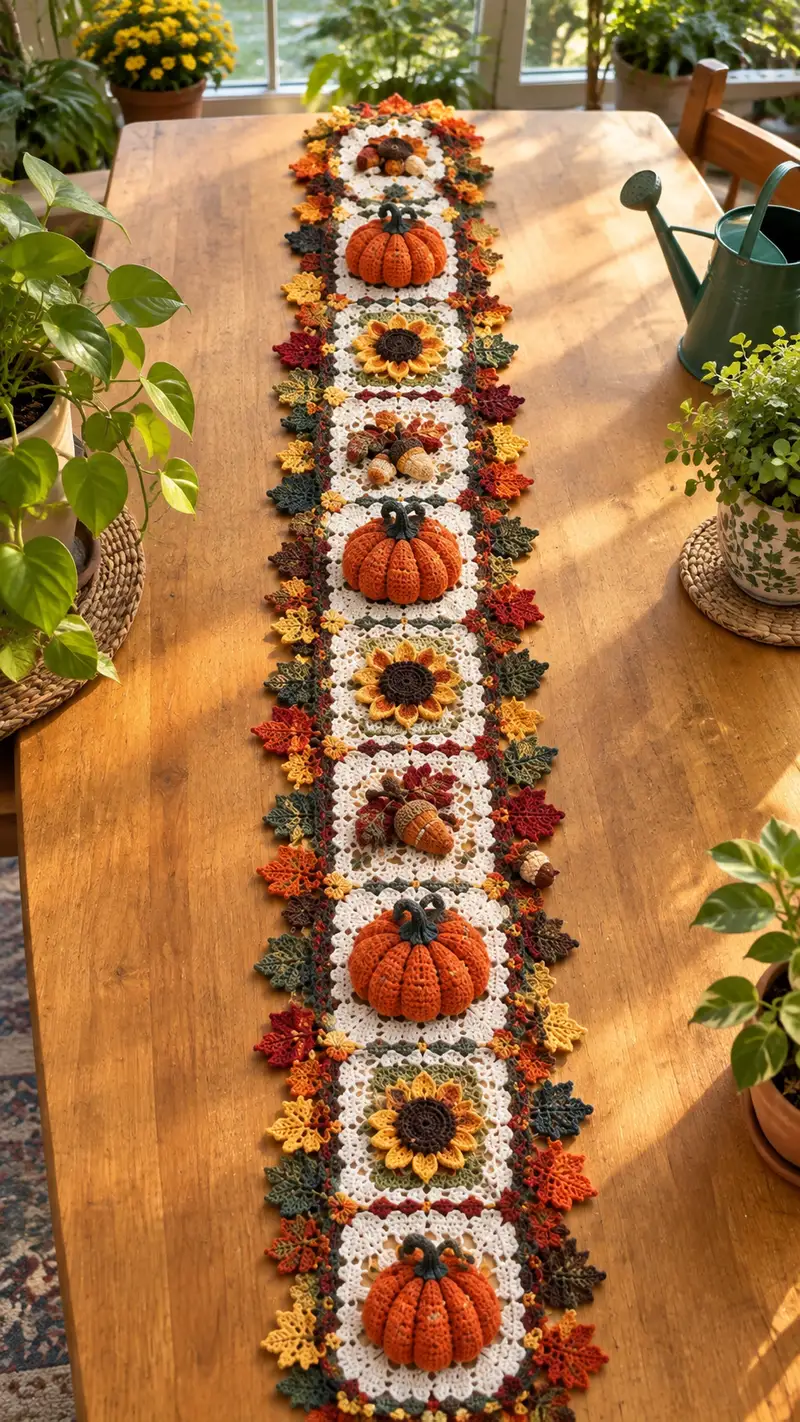
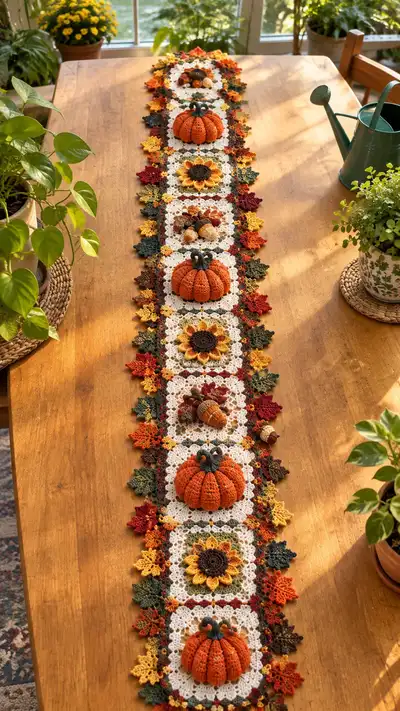
A long, elegant autumn table runner featuring white lacy granny squares framed with colorful fall leaves, layered sunflowers, tiny acorns, and 3D pumpkins. Warm autumn palette of pumpkin orange, mustard yellow, deep green and burgundy adds cozy seasonal charm. Each square is a delicate lace medallion that becomes a stage for dimensional appliques and leaf edgings. Perfect for a festive centerpiece or seasonal decor on dining and console tables.
Progress Tracker
0% Complete
— Materials & Gauge :
Info :
Gauge is flexible for this decorative runner. Using worsted weight yarn and a 4.0mm hook, a finished 10-round white square measures approximately 5.5" / 14cm. Adjust hook size if necessary to match proportions. Work tightly for 3D motifs, moderately for squares and lace.
— Granny Square Base (Make 8 identical squares; adjust count for length) :
Round 1 :
In white, 8 dc in mr, sl st to first dc to join (8)
Round 2 :
Ch 3 (counts as dc), 1 dc in same st, ch1, 2 dc in next st, ch1, rep around making 8 clusters separated by ch1, sl st to top of starting ch3 (16 dc total, 8 ch-1 sps)
Round 3 :
Ch3 (counts dc), 2 dc in each ch-1 sp, ch1 between clusters, continue around, sl st to top ch3 (24 dc in clusters, 8 ch-1 sps)
Round 4 :
Ch 2, *2 dc, ch2, 2 dc into next ch-1 sp (corner made), dc in each stitch along side to next corner*, rep 3 more times to form square corners, sl st into ch2 of starting corner (this round forms 4 corners with ch-2 corners)
Round 5 :
Ch3 (counts dc), (2 dc, ch2, 2 dc) in each corner ch-2 sp, 1 dc in each dc across sides; sl st to join. Keep square flat; total stitches vary based on row counts (approx 48-56 dc)
Info :
At this point block the square flat to get accurate measurements and to flatten the center for applique placement. Use pins and steam or wet-block as appropriate for fiber content.
Round 6 :
Ch1, sc evenly around entire square working 3 sc into each corner ch-2 sp to keep edges flat; sl st to join (approx 4 sc per side per 2-3" depending on square)
Round 7 :
Ch4 (counts as tr), *skip next st, (3 tr, ch2, 3 tr) in corner ch2, skip next st, tr across side into spaces to create lacy shell pattern*, rep around, sl st to top ch4
Round 8 :
Ch1, sc in each st and ch sp around; work 3 sc in each corner ch2 to reinforce (the square now has a lacy center and neat edge)
Round 9 :
Ch3, 1 dc in same st, sk1, (2 dc, ch1, 2 dc) in each corner ch2, dc in each dc and ch1 across sides; sl st to join. (This creates a slightly larger square ready to take a centered motif)
Round 10 :
Ch1, sc around to create a firm rim for sewing appliques; sl st to join. Fasten off leaving long tail for pinning motif to square.
Info :
Make a total of 8 base squares (or the desired number). Block each square after completing Round 10 so edges are consistent and squares line up when joined. Arrange the white squares in the desired order before adding appliques.
— 3D Pumpkin Applique (Make 4 - Medium 3D Pumpkin, repeated for each center square) :
Round 1 :
With pumpkin orange and 3.5mm hook, mr, 6 sc in mr (6)
Round 2 :
Inc in each st around (12)
Round 3 :
(1 sc, inc) x6 (18)
Round 4 :
(2 sc, inc) x6 (24)
Round 5 :
(3 sc, inc) x6 (30)
Round 6 :
(4 sc, inc) x6 (36)
Info :
These increases shape the pumpkin bulb. Keep tension even and join the yarn end if you will work vertical ribs with surface slip stitch later. We will create ribs by working back loop rounds and then using strong yarn for sewing ribs if desired.
Round 7 :
1 sc in each st around (36)
Round 8 :
1 sc in each st around BLO (36) - this creates a subtle ridge for the ribbed effect
Round 9 :
1 sc in each st around (36)
Round 10 :
(4 sc, dec) x6 (30)
Round 11 :
(3 sc, dec) x6 (24)
Info :
Begin stuffing pumpkin firmly but not to a rock-hard state. Add small amounts at a time and reshape round after each stuffing addition. Leave a small opening to crochet neck and add stem later.
Round 12 :
(2 sc, dec) x6 (18)
Round 13 :
(1 sc, dec) x6 (12)
Round 14 :
6 dec (6) - stuff firmly then close with needle and yarn tail using whip stitch; fasten off leaving long tail for sewing onto square
Info :
To create pumpkin ribs: using a length of embroidery-weight slightly darker orange yarn and a yarn needle, run gathered stitches from base to top across the surface dividing into 8 to 12 segments. Pull gently to form vertical grooves then anchor stem.
Round 15 (Stem) :
With forest green, ch6, sl st into 2nd ch from hook, sc 4 across, fold and sc around to create a short tube (4 sts). Fasten off leaving tail; roll and sew to top center of pumpkin. Optionally insert a small wire inside stem for curlable shape.
Info :
Sew each pumpkin onto the center of a blocked white square. Pin in position then attach by invisible whip stitch around the base so pumpkin sits firmly but slightly raised for dimensional effect.
— Sunflower Motif (Make 2 layered sunflowers) :
Round 1 :
With dark brown, mr, 8 sc in mr, sl st to join (8)
Round 2 :
Inc in each st around (16)
Round 3 :
1 sc in next st, (inc) x8, 1 sc in each remaining st to total 24 sts (this evens center; adjust to make flat disk)
Info :
Fasten off brown. The brown disk should be slightly domed to simulate the seed head. We will add a petal ring worked in yellow then a secondary petal round in orange for depth.
Round 4 (Petal base) :
Join mustard yellow to any st on outer edge, ch3 (counts as dc), 2 dc in same st, sl st in next st, *ch3, 3 dc in next st, sl st in next st* repeat around to create 8 petals; fasten off (8 petals)
Round 5 (Second Petal Layer) :
Join orange to back of first petal base, ch4, (tr, ch1, tr) into space behind each petal to create taller petals that peak between first petals; rep around for 8 larger petals; sl st and fasten off
Round 6 :
Whip stitch brown disk to center of layered petals; ensure petals are spread evenly and slightly flared. Fasten off and weave ends.
Info :
Optional: use a tiny amount of polyfill under seed head before sewing down for a plump center. Sew the sunflower onto the white square with the center slightly raised.
— Acorn Trio (Make 6 small acorns and 3 small clusters) :
Acorn Cap Round 1 :
With dark brown, mr, 6 sc in mr (6)
Round 2 :
Inc in each st (12)
Round 3 :
1 sc in next st, (inc) x6 (18)
Round 4 :
1 sc in each st for 1-2 rounds to form a shallow cap (18)
Info :
Fasten off leaving long tail for sewing. The cap should be small and slightly bowl-shaped to cup the acorn body.
Acorn Body Round 1 :
With tan/light brown, mr, 6 sc in mr (6)
Round 2 :
Inc in each st around (12)
Round 3 :
(1 sc, inc) x6 (18)
Round 4 :
1 sc in each st around (18)
Round 5 :
(2 sc, dec) x6 (12)
Round 6 :
(1 sc, dec) x4 then sc in remaining (8) - stuff lightly; close with dec to 6 and fasten off leaving tail for sewing
Info :
Sew acorn cap to body using long tail; sew cap on top with a few secure stitches and leave a small bit of tail as a tiny stem or attach a short green stem if desired. Make 6 acorns for scatter decorations placed in alternate squares.
— Maple-Style Leaf (Large) - Make 24 for edging :
Round 1 :
With burgundy, ch8, sl st into 2nd ch from hook, sc, hdc, dc, tr into next ch, tr into next ch, dc into next ch, hdc into next, sc into last ch; rotate to work on the other side of ch foundation mirroring stitches back to starting sl st; sl st to join. (This creates a single leaf shape)
Round 2 :
Ch1, sc around including into all stitch tops, add extra 2 sc into central lobe to make it pronounced; sl st and fasten off. Block leaf flat.
Info :
Make leaves in a palette of greens, oranges, mustard and burgundy for a variegated border. Use different hook sizes or tension to make some leaves slightly smaller or larger for visual interest.
— Simple Small Leaf (Make 36-40) :
Round 1 :
With mustard, ch6, sc in 2nd ch from hook, hdc, dc, hdc, sc; turn and sl st back along the opposite chain to create a mirrored leaf, sl st to join, fasten off (creates small 6-7 stitch leaf)
Info :
These small leaves are used to fill gaps between large maple leaves and to soften the edge. Make leaves in contrasting accent colors and lightly block to add definition.
— Joining Squares & Adding Motifs :
Info :
Arrange squares in your chosen order. In the sample photo squares are arranged alternating pumpkin, sunflower, acorn cluster, pumpkin, sunflower, acorn cluster, pumpkin, sunflower. Use pins and measure spacing visually before joining.
Round 1 (Joining - first pass) :
With white join-as-you-go or slip stitch join: place two squares with right sides together if using slip join method or right sides up if using join-as-you-go. Working through both loops along one side, sl st in each st across to join squares edge-to-edge. Repeat to join all squares in a single long strip. Alternatively use whip stitch with matching yarn for less visible seam.
Round 2 (Secure Join Row) :
Once all squares are joined into a strip, with contrasting green (olive) work a round of sc along the long edges to create a base for leaf attachment: sc evenly along the seam edge, placing 3 sc in each corner or junction to keep fabric flat. This will be approx 120-160 sc depending on runner length.
Info :
When sewing pumpkins/sunflowers, pin each motif centered on the square then use invisible ladder or whip stitch sewing from underside into the firm rim created at Round 10 of the square. Sew pumpkin base first then add stems and leaf cluster accents around it.
Round 3 (Leaf Anchor Row) :
In burgundy, ch1 and sc into the green securing row every 4-6 sts to create anchor points for leaves. You'll make approx 30-40 anchor points down each long side depending on spacing.
Info :
Use these anchor points to sew or slip-stitch leaves onto runner as you progress. Mix large and small leaves so they overlap for a natural edge. Pin before sewing.
— Decorative Scattered Fillers (Acorn Clusters & Tiny Flowers) :
Round 1 :
Make small clusters by combining three small acorns or tiny bobble flowers. For tiny bobble flowers: ch4, sl st into center to form a ring, 5 sc into ring, join, then 1 round of sc and 3-bobble petals around to create small 6-petal filler. Attach to squares in gaps between leaves.
Info :
Scatter 2-3 small filler clusters per square to mimic the photo's gathered acorn clusters. Secure each with matching thread and a few stitches through the foundation so they don't rotate.
— Outer Scalloped Border & Picot Edge :
Round 1 :
With deep rust, join at end of runner, ch3 (counts dc), dc across entire long sides into the green anchor row, work 3 dc in each corner to keep shape, continue to the next long side, join with sl st. Aim to have an even multiple of stitches for repeat pattern - approx 280-320 dc around full runner depending on width.
Round 2 :
Ch1, sc in each dc around; sc3 in each corner; sl st to join (creates firm base for scallops)
Round 3 (Scallop Round) :
*Skip 2 sc, 5 dc in next sc, skip 2 sc, sl st in next sc* - repeat along sides to create scallops. Work 7-12 scallops per long side depending on spacing. Sl st and fasten off rust color.
Round 4 (Picot Edge) :
With mustard, join at a scallop center, *sc into first dc of scallop, ch3, sl st into 3rd chain to make a picot, sc into next dc across scallop*, rep across each scallop for delicate picot points. Fasten off and weave in ends.
Info :
Work picot edge carefully; blocked squares will display scallops evenly. If picots feel too fragile, work a smaller ch2 picot instead of ch3.
— Final Attachment of Leaves & Decorative Stitching :
Round 1 :
Using anchor points created earlier, pin large maple leaves first at even intervals along each side (approx 3 leaves per square side), then tuck small leaves and filler flowers between them. Sew each leaf by stitching along its base into the anchor row and a few stitches into the scallop round for stability.
Round 2 :
Use green yarn to stitch vines and connect acorn clusters with a surface slip-stitch chain; this unifies the motifs and creates a naturalistic flow along the runner.
Info :
Trim any long tails and weave them through motifs to the underside. Secure any loose decorative pieces with an extra small dab of fabric glue on the underside for long-term durability if desired.
— Optional Extra Rounds for Longer Runner or Extra Texture :
Round 1 :
To lengthen runner by one square, make an additional granny square base and repeat sequence of motifs and joining steps. For denser edging, add another round of scallops or a double picot row for a frilled finish.
Info :
Keep notes of stitch counts as you add extra squares so border repeats (scallops and picots) remain mathematically consistent across the entire runner.
— Finishing Touches :
Info :
Give the entire runner a final blocking and gentle steam to shape scallops and leaves; ensure all motifs are sewn flat and secure. Spot-clean or hand wash gently if needed due to mixed yarn colors. Press using low heat from the wrong side if fiber content allows.
Round 1 :
Weave in all remaining ends through several stitches and trim close to fabric. Inspect runner for any loose leaves or motifs and secure them with extra stitches as needed.
Info :
For storage, fold with acid-free tissue between layers or roll carefully to protect raised pumpkins and sunflowers; avoid stacking heavy items on top of the runner to preserve 3D shapes.
Completing this Autumn Harvest Table Runner is a rewarding seasonal project that turns your table into a warm, hand-crafted display. The combination of lacy squares, dimensional pumpkins, sunflowers and scattered leaves creates a layered, textured centerpiece full of autumnal charm. Take your time pinning and blocking — the finishing touches really make this a treasured piece. 🧶🍁 Your family and guests will love the cozy seasonal feel it adds to any meal or gathering. 🎃